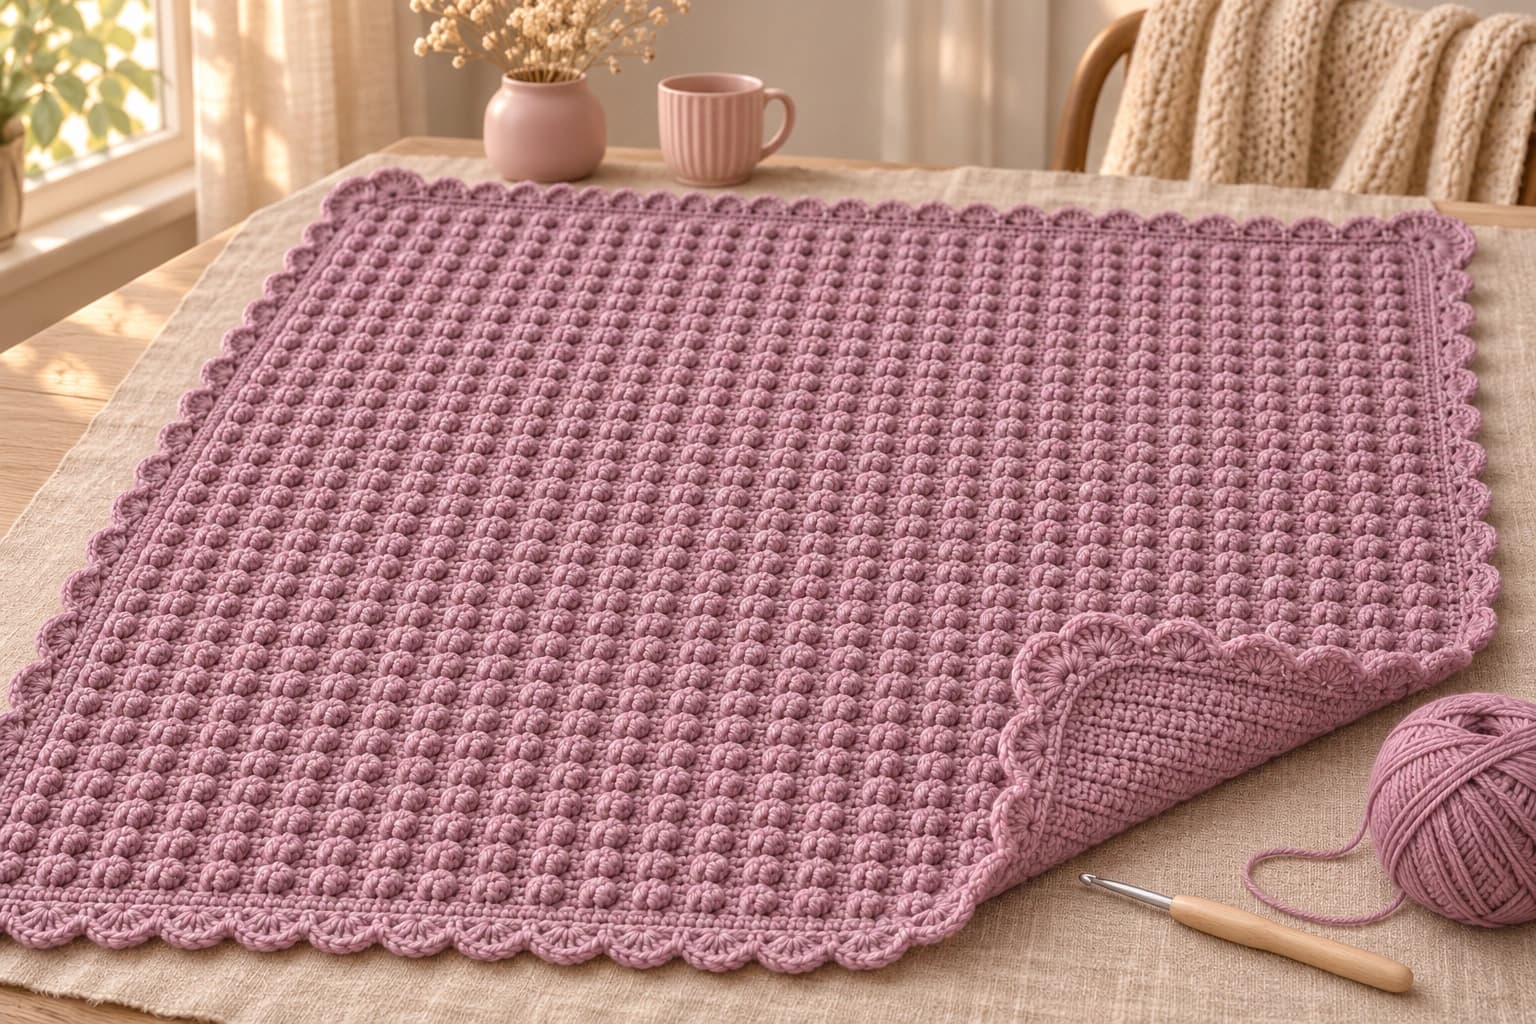
Easy Crochet Baby Blanket

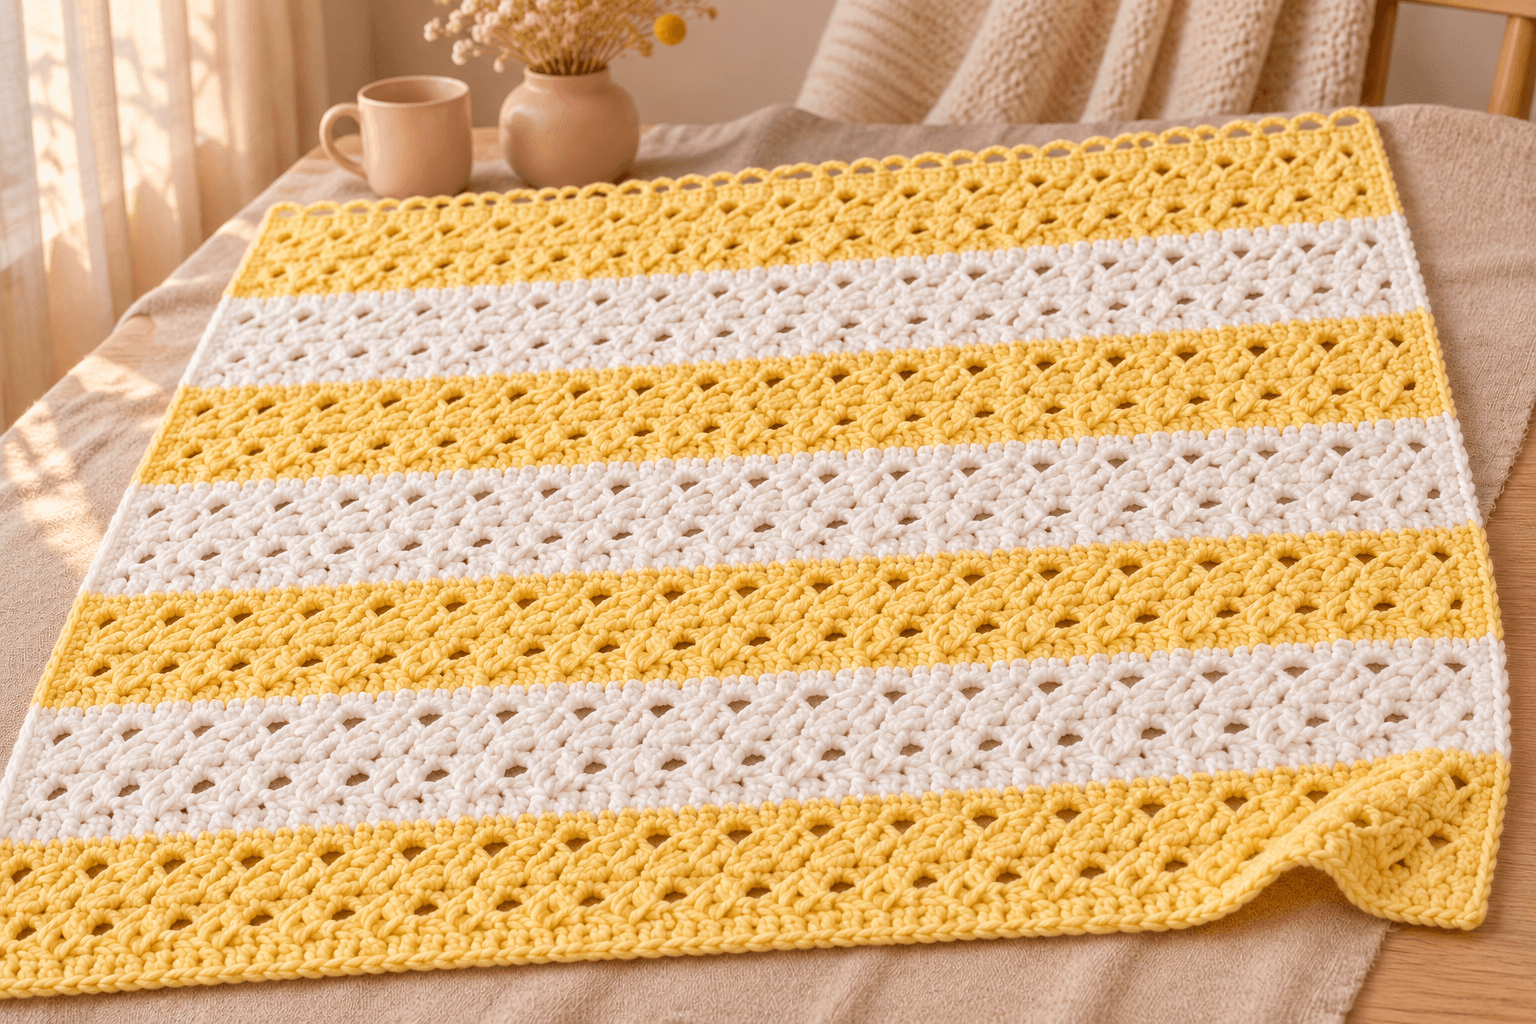
I like yellow beside white on a cloudy afternoon. The white gives the little ridges room to show, and the yellow makes the whole blanket feel sunny. This easy crochet baby blanket is a striped rectangle with a target size of about 32 × 47 in (81 × 119 cm), worked back and forth with a repeating group of single crochet, chains and double crochet.
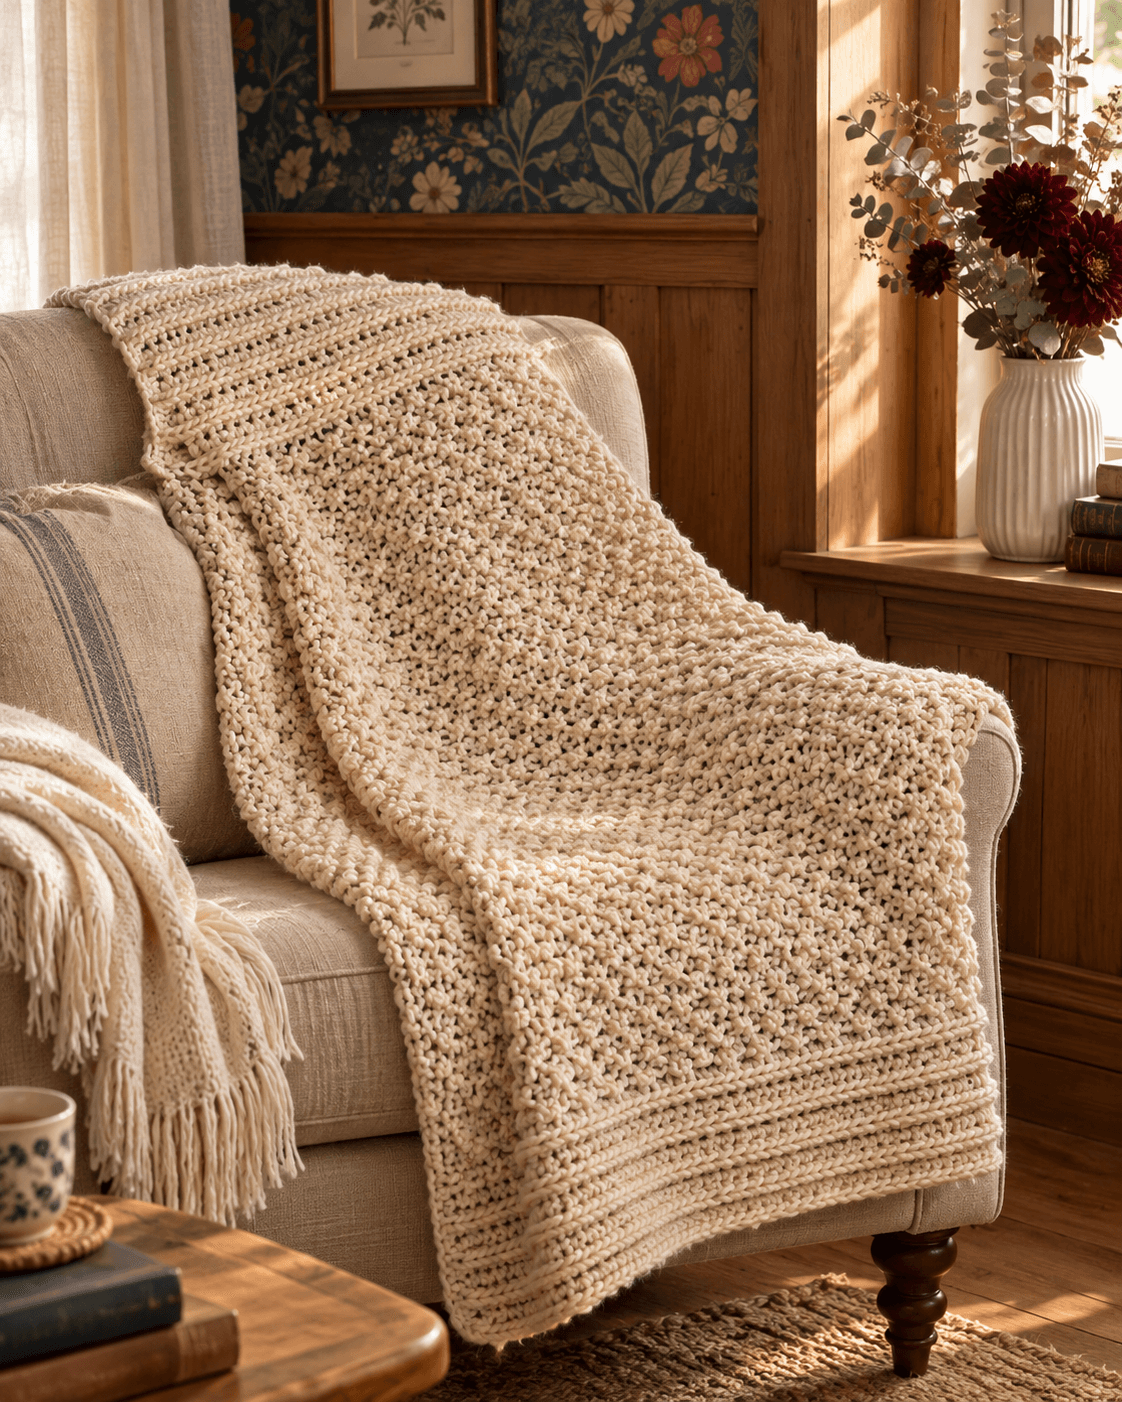
Once the first row is in place, the hook goes into the open chain spaces. That makes the repeat easy to find when you put the blanket down and come back to it later. I keep the stripes broad and finish the top with a lighter row of chain arches.
This tutorial follows the stitch construction demonstrated in Leelee Knits’ baby blanket tutorial. The matching written pattern is the source for the starting chain, hook and original supply allowance. The stripe plan below is flexible.
| At a glance | |
|---|---|
| Finished size | Target about 32 × 47 in (81 × 119 cm); measure the washed stitch swatch first |
| Yarn | Worsted #4 acrylic in soft yellow and white |
| Hook | 5 mm (H/8) |
| Pieces | 1 panel |
| Time | Several relaxed crochet sessions |
| Skill | Easy: ch, sc, dc, turning and changing colors |
Yarn, hook and sizing for the striped baby blanket
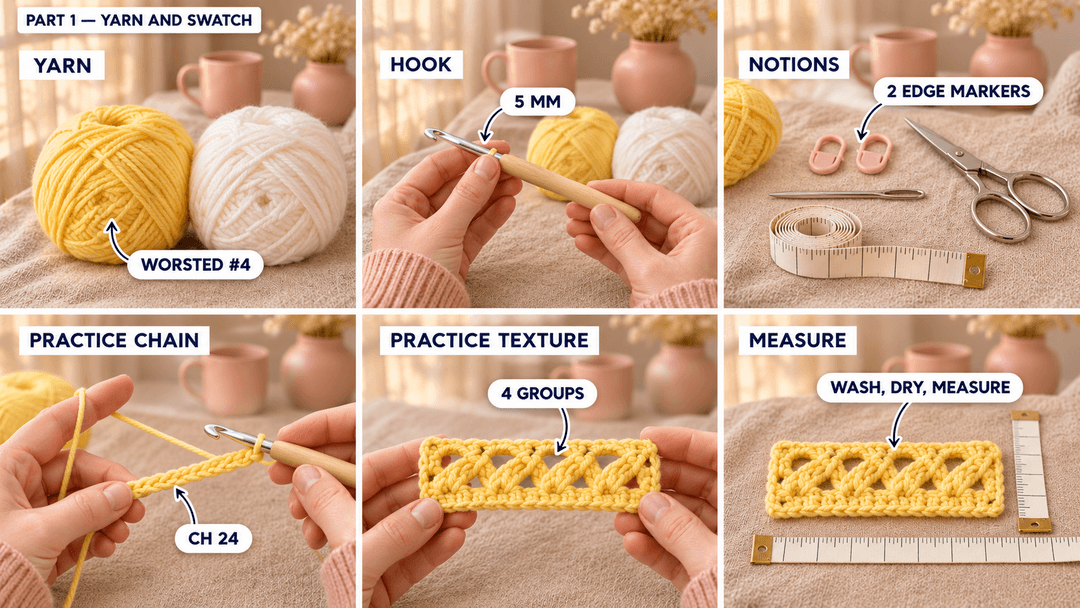
I like a smooth yarn here: the slanting groups catch the light. The source uses Hobbii Amigo XL, a worsted #4 yarn with 100% acrylic fiber and about 109 yd (100 m) per 50 g ball. Its supply list allows 8 yellow balls and 5 white balls, approximately 872 yd yellow and 545 yd white. Treat that as the source allowance, rather than a measured requirement for every stripe arrangement.
Gather a 5 mm (H/8) hook, scissors, a yarn needle, two removable stitch markers and a measuring tape. A different worsted yarn can change both the drape and the amount needed, even when the ball label recommends the same hook.
Measure the texture before choosing the width
For a practice swatch, chain 24 and follow the two construction rows below with 4 complete groups instead of 28. Work enough rows to measure away from the edges. Wash and dry the swatch as you will the blanket, then measure its width and height without stretching it.
The 120-chain version has 28 complete groups between its edge stitches. Add or remove 4 starting chains to add or remove one group. Use your washed swatch to choose the starting chain; a chain by itself can look wider than the fabric above it.
Abbreviations, US terms: ch = chain; sc = single crochet; dc = double crochet; st = stitch. A ch-3 space is the opening beneath a group of three chains. Put the hook under the whole arch when working into that space.
Counting: the beginning ch 3 counts as one edge dc. The three chains inside each texture group form a space and are counted separately from the solid stitches. Turn after each body row. The counts below include the beginning edge chain as one stitch.
The pattern — starting the textured blanket stitch
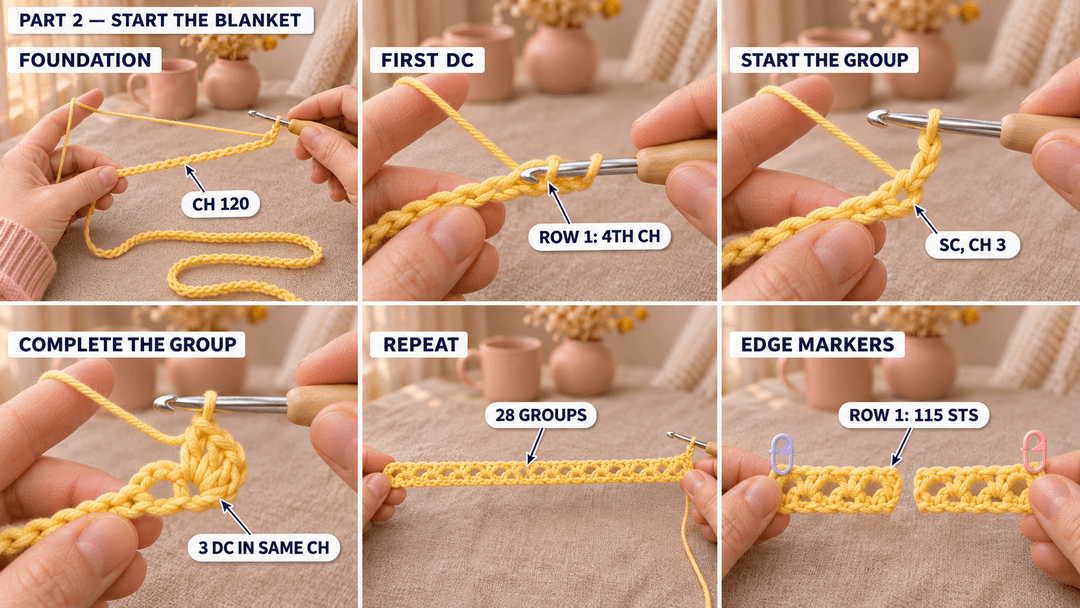
Blanket panel — yellow, 5 mm hook, Make 1. Leave an 8 in (20 cm) starting tail and ch 120. The starting chain becomes the bottom edge.
- Row 1: dc in the 4th ch from the hook; (skip 3 ch, work sc, ch 3 and 3 dc in the next ch) × 28; skip the last 3 intervening ch and sc in the final ch. 28 ch-3 spaces. (115)
The three skipped chains beside the first dc form the starting edge. Clip a marker into the top of that little chain column. Clip the other marker into the final sc. These are the two places where it is easiest to lose the edge on the next row.
To make sc, ch 3 and 3 dc in one place, work the sc first. Make three chains, then return to the same starting chain for all three dc. The group leans to one side, like a tiny fan.
Tip. Keep the starting chain relaxed. If it pulls the bottom edge into a shallow bowl, remake the chain with a slightly larger hook, then return to 5 mm for the fabric.
Building the blanket with one repeating row
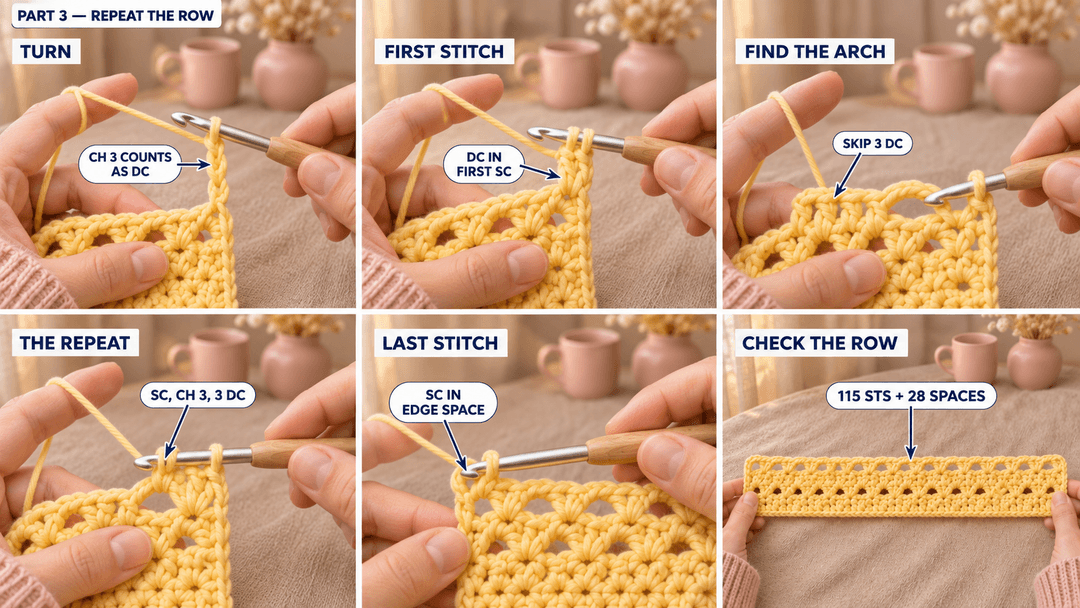
- Rows 2–98: ch 3, turn, dc in the first sc; skip the next 3 dc; (work sc, ch 3 and 3 dc into the next ch-3 space) × 28, leaving the stitches between spaces unworked; skip the last sc and the edge dc, then sc into the beginning ch-3 space of the previous row. 28 ch-3 spaces. (115)
Slide the hook under the next open arch for each repeat. At the far end, the final sc goes into the edge turning-chain space. Move the edge markers after each row: one to the new beginning chain and one to the final sc.
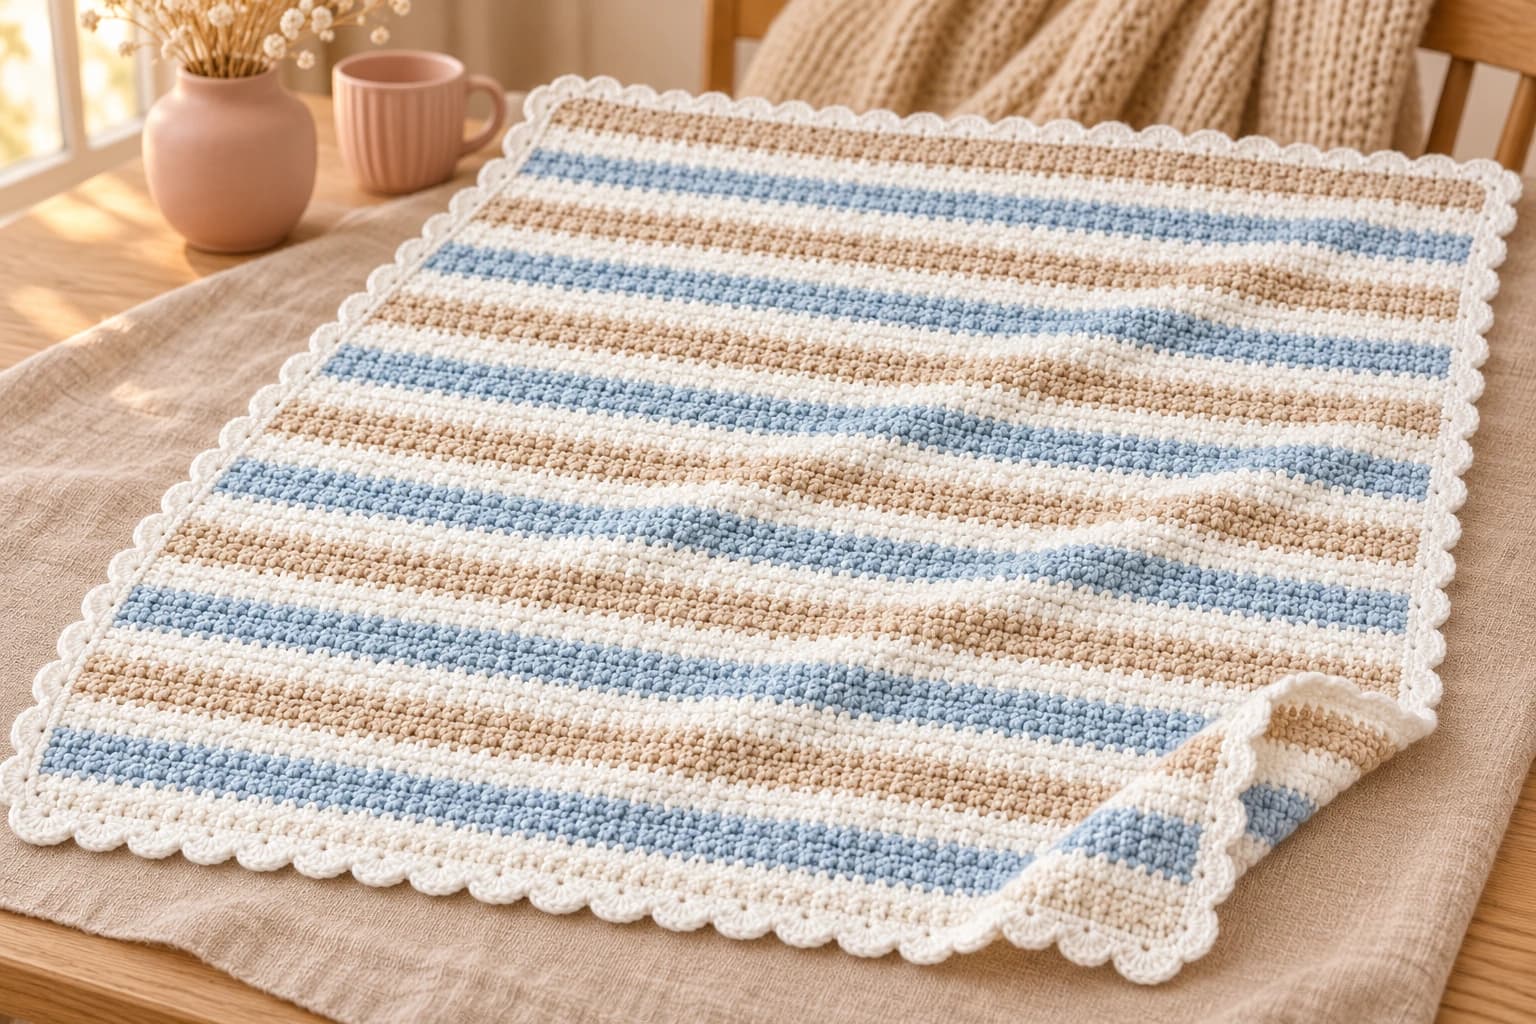
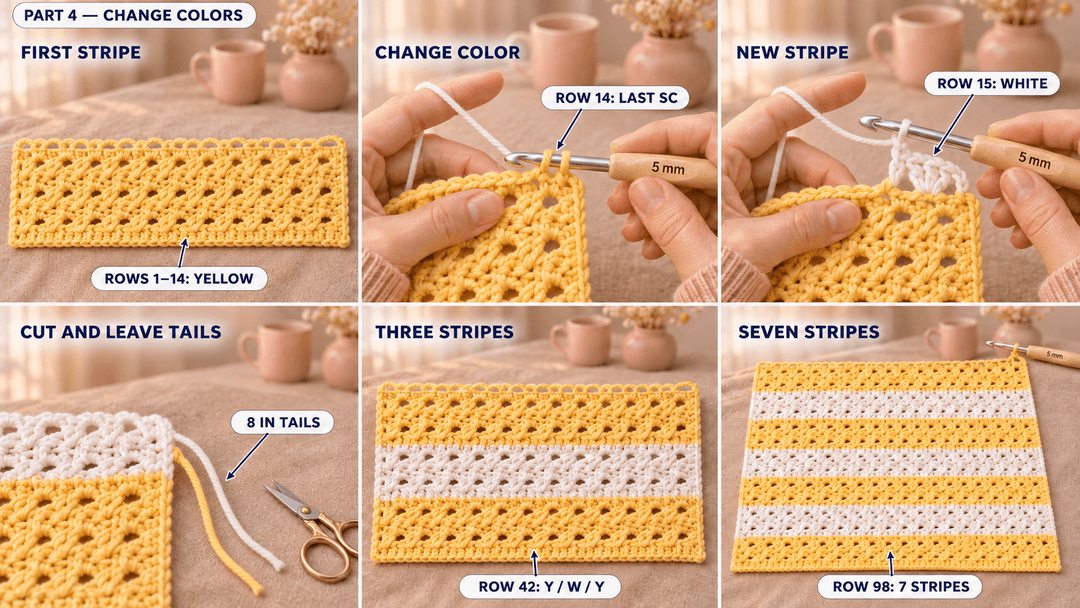
The 98 body rows give seven stripes of 14 rows. Measure as you work. These row numbers define the stripe arrangement, rather than guaranteeing a particular length: row height depends on the washed texture swatch. For a different length, finish after any complete body row and work the finishing row next.
Tip. Count the arches before starting another stripe. There should still be 28. A missing arch usually means that the final group or the turning-chain space was missed.
Changing between yellow and white stripes
I like to start and finish in yellow, with white bands between. This seven-stripe arrangement is an option for this tutorial; the folded reference photograph does not establish the complete original sequence.
| Body rows | Color |
|---|---|
| 1–14 | Yellow |
| 15–28 | White |
| 29–42 | Yellow |
| 43–56 | White |
| 57–70 | Yellow |
| 71–84 | White |
| 85–98 | Yellow |
Change color in the final sc of Rows 14, 28, 42, 56, 70 and 84. Insert the hook into the edge space and pull up a loop with the old color. With two loops on the hook, draw the new color through both. Make the next row’s beginning ch 3 with the new color.
Cut the old strand, leaving an 8 in (20 cm) tail, and leave the same length on the new strand. Keep both tails loose until you weave them in. Cut at each change rather than carrying a long unused strand up the side.
Finishing the blanket with a straight top edge
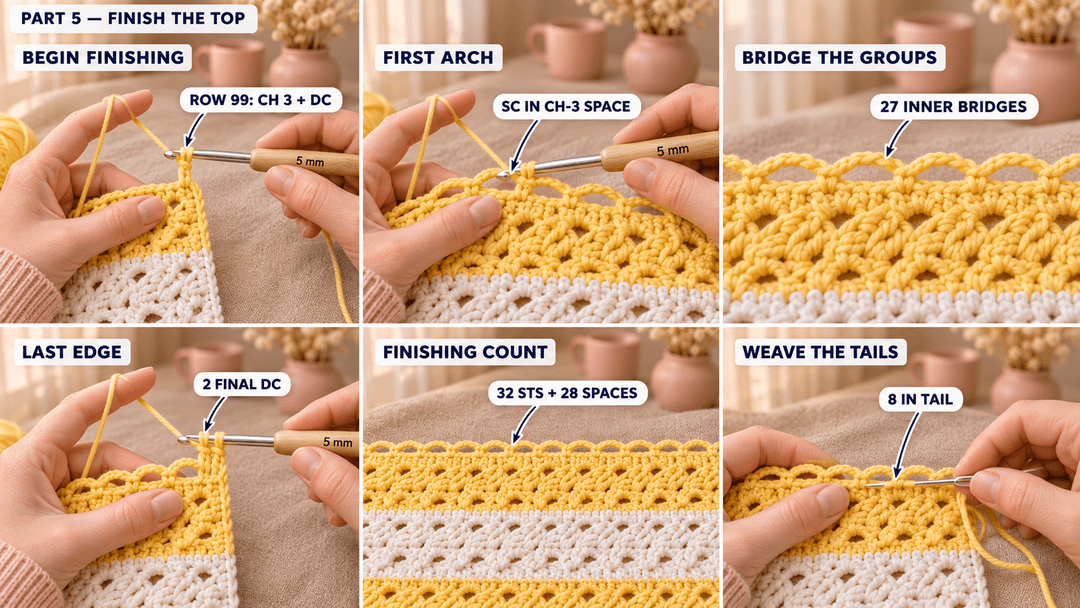
After the final body row, keep the active color. This finishing variation replaces the full fans with chain bridges, while retaining paired dc at both edges.
- Row 99: ch 3, turn, dc in the first sc; skip 3 dc and sc in the first ch-3 space; (ch 3, skip the next sc and 3 dc, sc in the next ch-3 space) × 27; ch 3, skip the sc at the base of the last worked space, dc in the remaining edge dc and dc into the edge turning-chain space. 28 ch-3 spaces. (32)
Work gently across the arches so the top lies flat. The last two dc go into the lone dc beside the old turning chain and then into the turning-chain space itself. After the final dc, cut the yarn with an 8 in (20 cm) tail and pull it through the live loop.
Thread each tail onto the yarn needle. Weave through the backs of several matching-color stitches, turn and come back through a nearby path. Spread the fabric flat before trimming, so the woven strand has enough slack when the blanket moves.
Washing and blocking the textured blanket
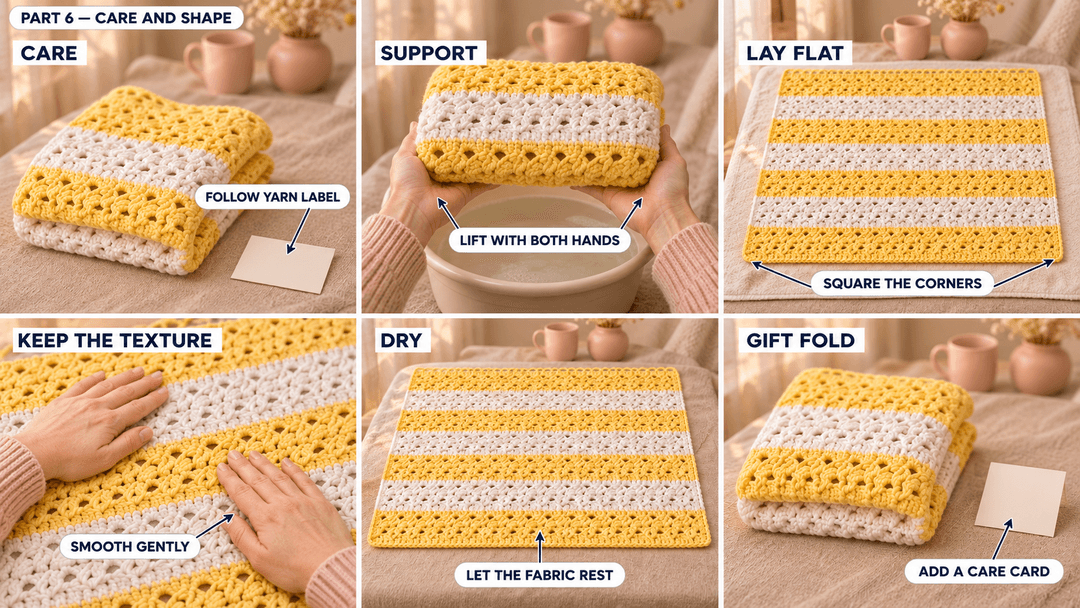
Follow the care label on the yarn you used. Amigo XL’s manufacturer specifies a 30°C (86°F) wash and allows low-temperature tumble drying. For shaping, I prefer to spread the damp blanket flat, square the corners gently and leave the texture relaxed.
Slide both hands under the wet blanket before lifting it. Smooth the stripes with your palms, without pulling the chain spaces wider. Keep a hot iron off acrylic; pressure and heat can flatten the ridges.
For a gift, fold the blanket with one yellow band showing and tuck a small care card under a ribbon. Take the ribbon off before the blanket is used.
UK terms: US sc = UK dc; US dc = UK tr; ch is the same.
Made a striped blanket? Tag #wavodecrochet on Pinterest so I can see your colors.