Mesh Crochet Headband with Adjustable Ties

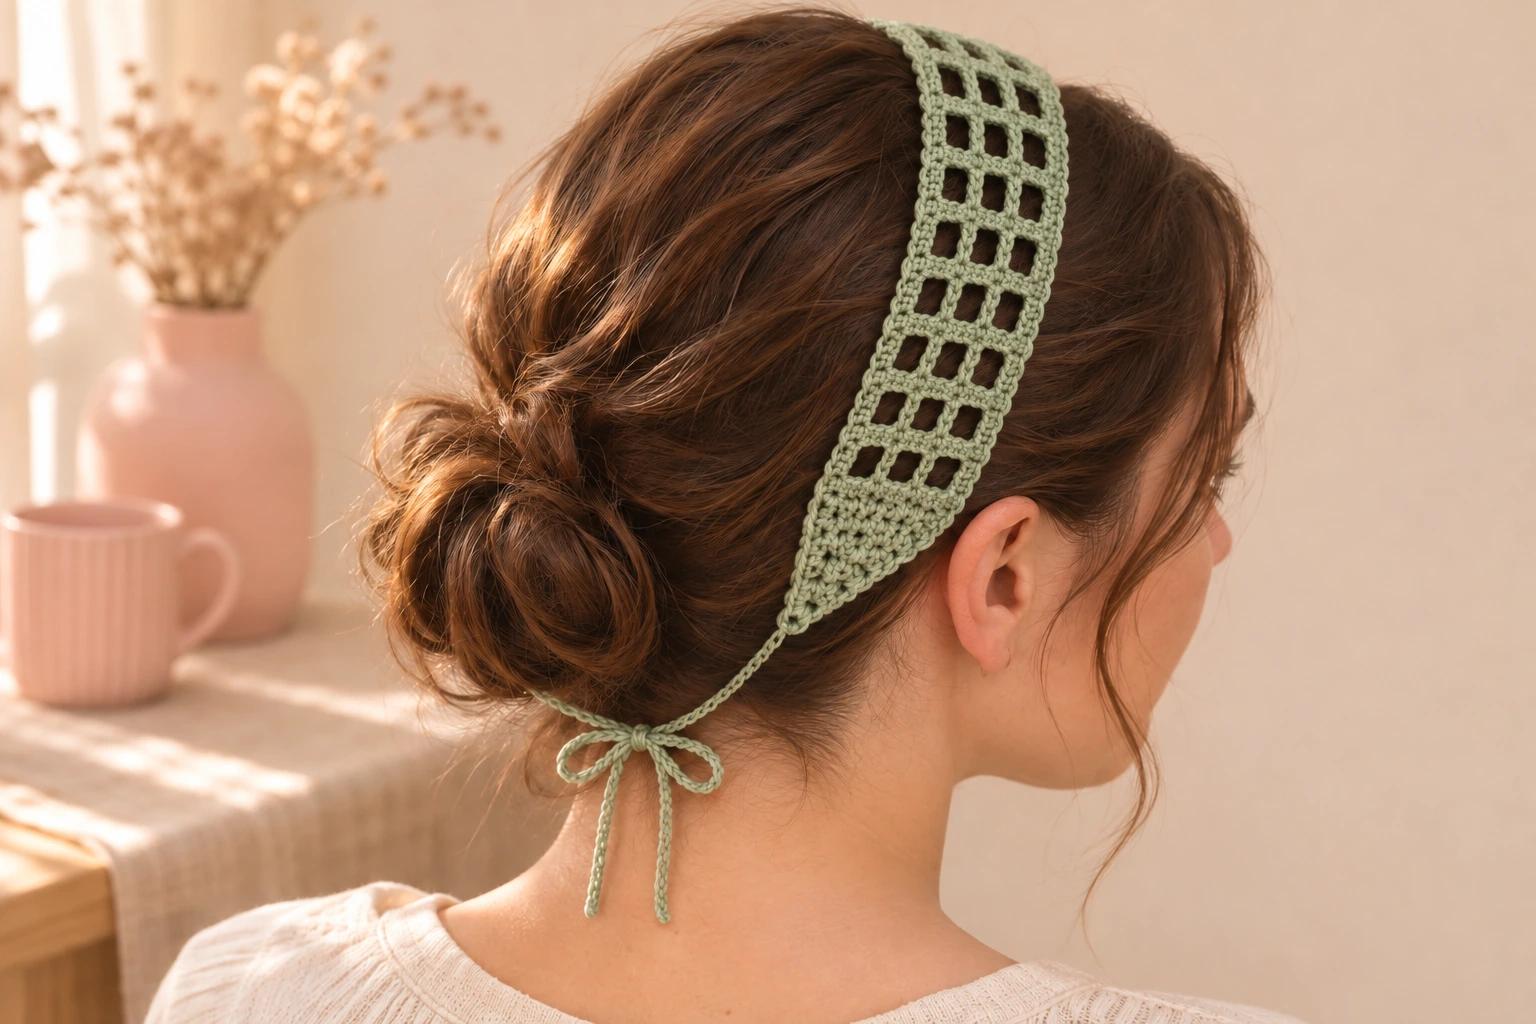
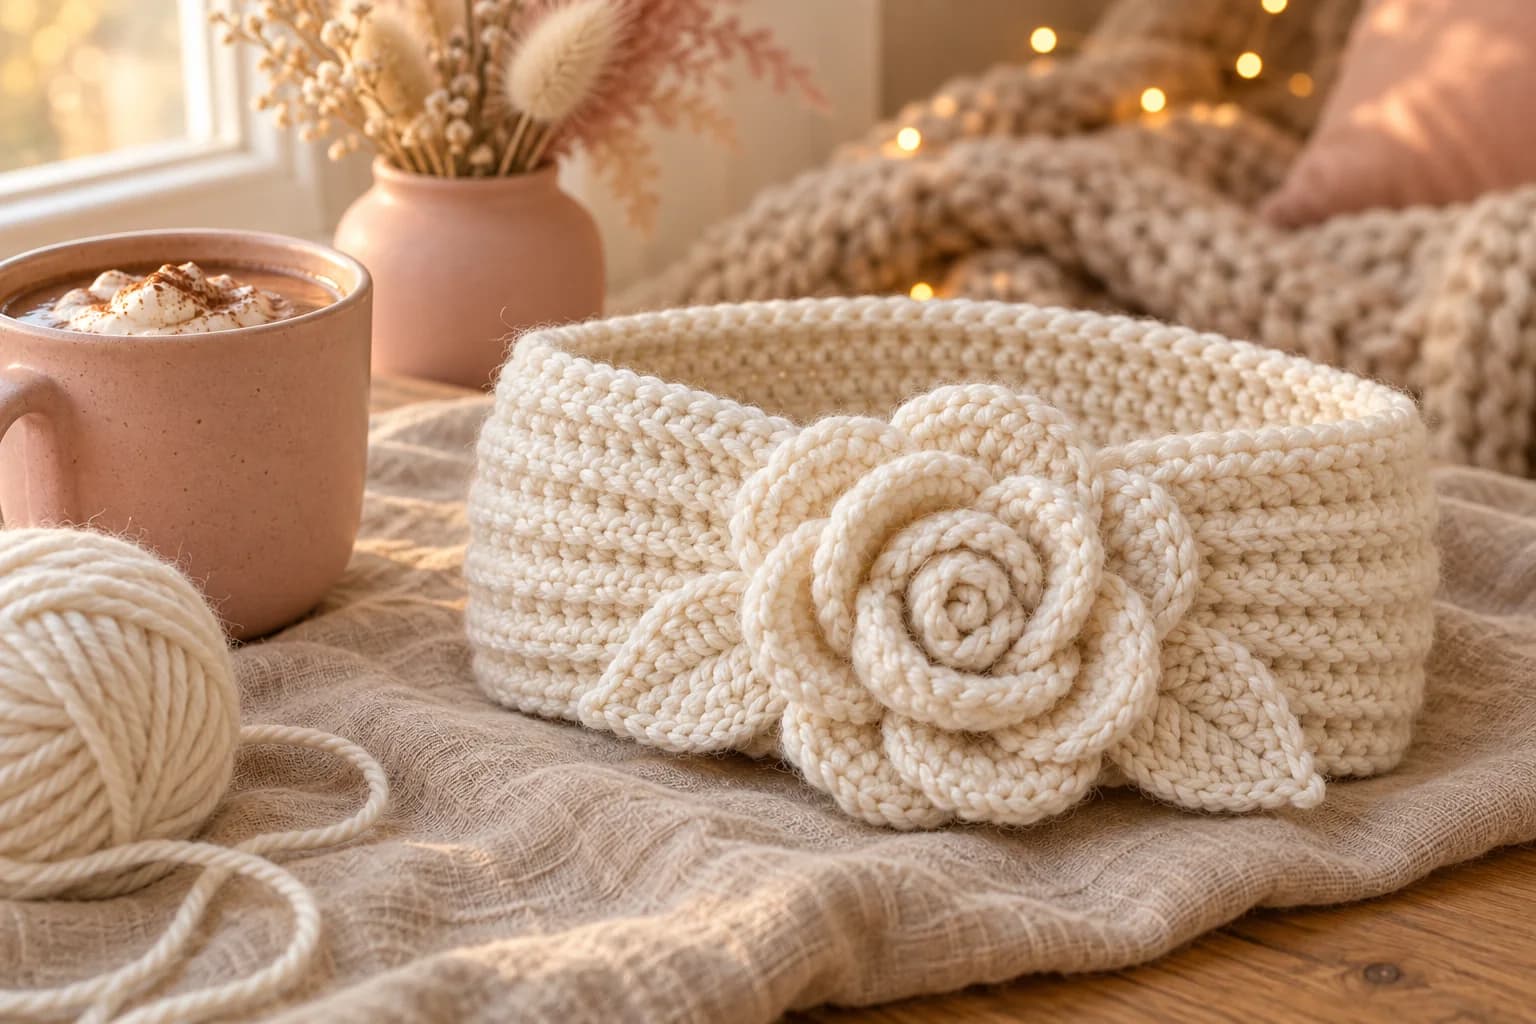
On warm days I like a headband that keeps the wisps off my face and lets a breeze through. This mesh crochet headband is about 2 in (5 cm) wide, with three columns of open mesh and thin ties that knot at the nape.
I like the way the solid ends narrow into the ties. The mesh lies across the top of the head, and only the slim chains sit under the hair.
| At a glance | |
|---|---|
| Width | about 2 in (5 cm) at the mesh |
| Body length | about 11 in (28 cm), including the tapered ends |
| Ties | about 9 in (23 cm) each |
| Yarn | worsted #4 acrylic, about 20 yd |
| Hook | 5.5 mm |
| Pieces | 1 |
| Time | varies with the number of mesh rows |
| Skill | easy: chains, single and double crochet, increases and decreases |
Yarn and hook for a light mesh headband
- Yarn — About 20 yd of worsted #4 acrylic. I like a soft sage for this one. Red Heart Super Saver solids, 100% acrylic, 364 yd (333 m) per 198 g, are one example.
- Hook and tools — A 5.5 mm hook, a tapestry needle and scissors.
Tension. Use about 3½ sc per inch as a flat-fabric reference. The measurements above are estimates. Lay the band flat to measure it and check the fit as you go.
Stitches (US terms). Ch = chain, sc = single crochet, dc = double crochet, st = stitch, inc = 2 sc in one st, sc2tog = single crochet two together, sc3tog = single crochet three together. A ch-1 space is the gap under a chain between two dc. Turn at the end of each row as directed. Turning chains give the row height. The mesh counts include the three ch-1 spaces.
Making the first tie and starting the mesh
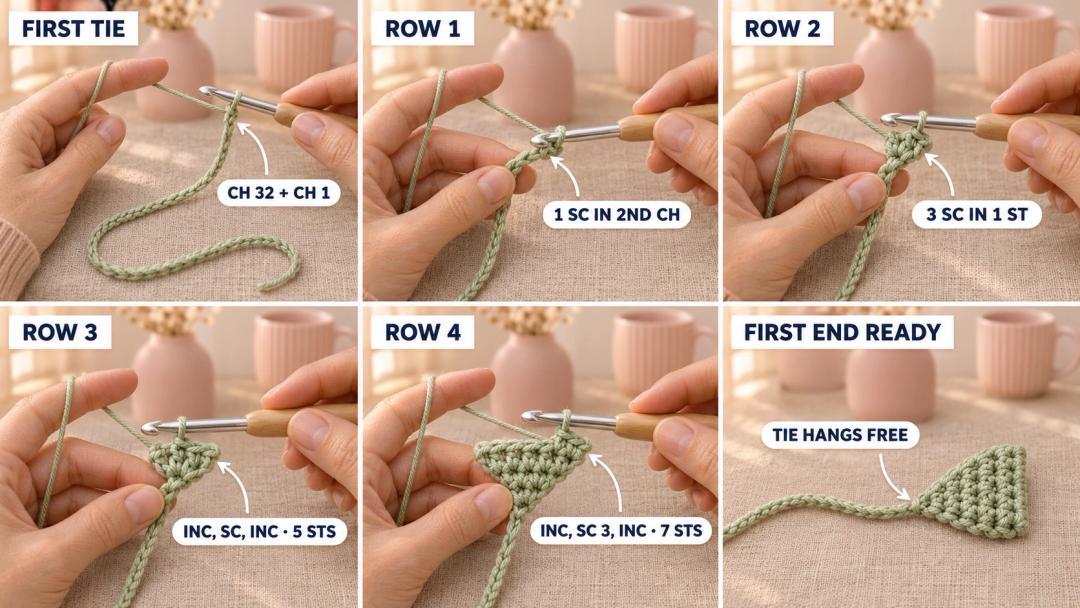
Headband (sage, 5.5 mm hook, Make 1). Leave a starting tail long enough to weave in. Ch 32 for the first tie, then ch 1 for turning.
- Row 1: Sc in the 2nd ch from the hook. (1)
- Row 2: Ch 1, turn, 3 sc in the same st. (3)
- Row 3: Ch 1, turn, inc, sc, inc. (5)
- Row 4: Ch 1, turn, inc, sc 3, inc. (7)
Let the long chain dangle below the little wedge as you turn. The next row opens the wedge into the mesh.
Working the mesh from ear to ear
- Row 5: Ch 2, turn, dc in the first sc, (ch 1, skip 1 sc, dc in the next sc) × 3. (7)
- Rows 6–19: Ch 2, turn, dc in the first dc, (ch 1, dc in the next dc) × 3. (7) 14 rows.
Each mesh row has four dc and three ch-1 spaces. Put the last dc into the top of the last dc from the previous row. The turning ch 2 sits beside it at the edge.
Tip. If an edge starts to flare, pinch the top of the last dc before you work into it. The ch 2 beside it can look like one more stitch.
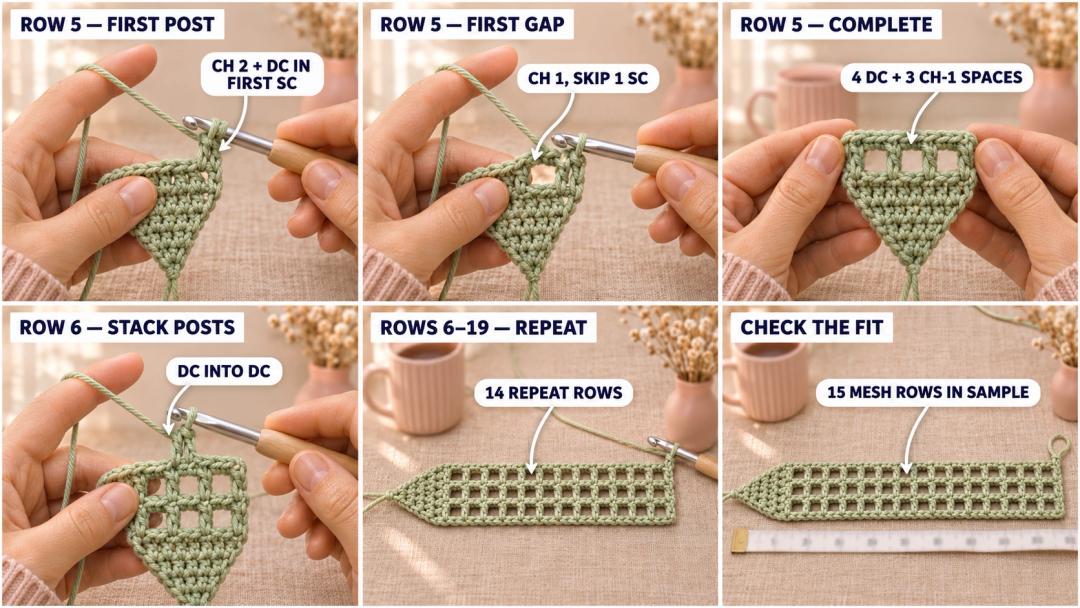
For the standard length, count 15 mesh rows before you start the final taper.
Tapering the mesh and finishing the second tie
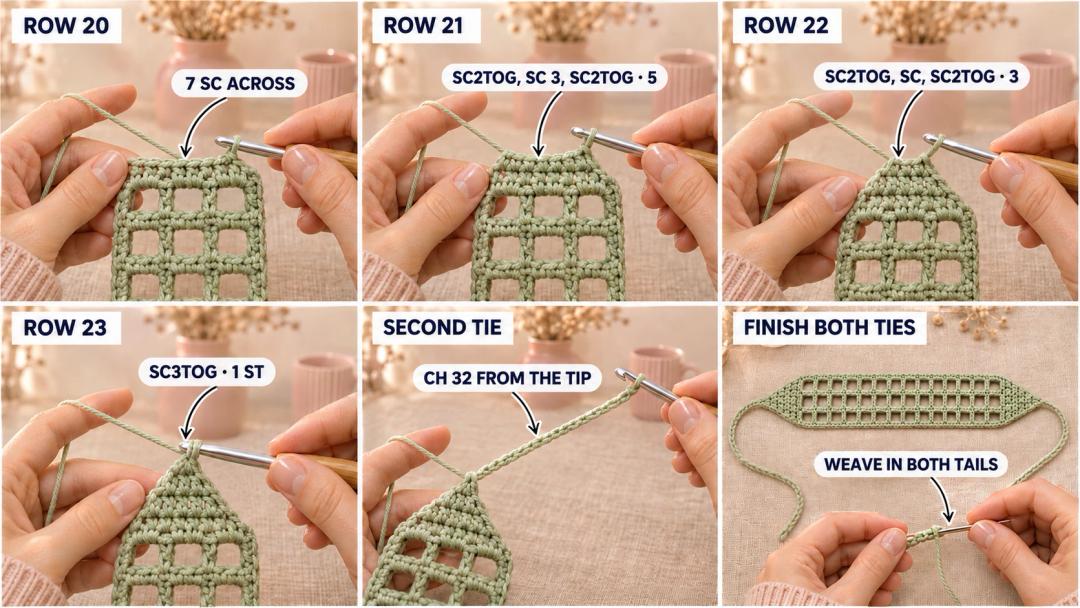
- Row 20: Ch 1, turn, sc in each dc and each ch-1 space across. (7)
- Row 21: Ch 1, turn, sc2tog, sc 3, sc2tog. (5)
- Row 22: Ch 1, turn, sc2tog, sc, sc2tog. (3)
- Row 23: Ch 1, turn, sc3tog. (1)
For a decrease, insert the hook and pull up a loop in each of the next two or three stitches. Yarn over and draw through all the loops on the hook.
Ch 32 straight from the last stitch to make the second tie. Fasten off at the tip, then use a tapestry needle to weave each tail back through several chain bumps on its own tie. Trim the ends.
Adjusting the headband for your fit
Measure over the top of your head between the two spots where you want the ties to start. Try the strip against that span before working Row 20. Leave room for the four finishing rows, about 1 in (2.5 cm) at the reference tension. Add or remove repeats of the mesh row as needed, then work the same taper.
For longer ties, add the same number of chains at both ends. At the first end, keep the extra turning chain separate from your tie count. I like tying the chains into a small bow at the nape so I can loosen the band without pulling it over my hair.
UK terms — US sc = UK dc, US dc = UK tr.
Made a mesh headband? Tag #wavodecrochet on Pinterest so I can see your color.