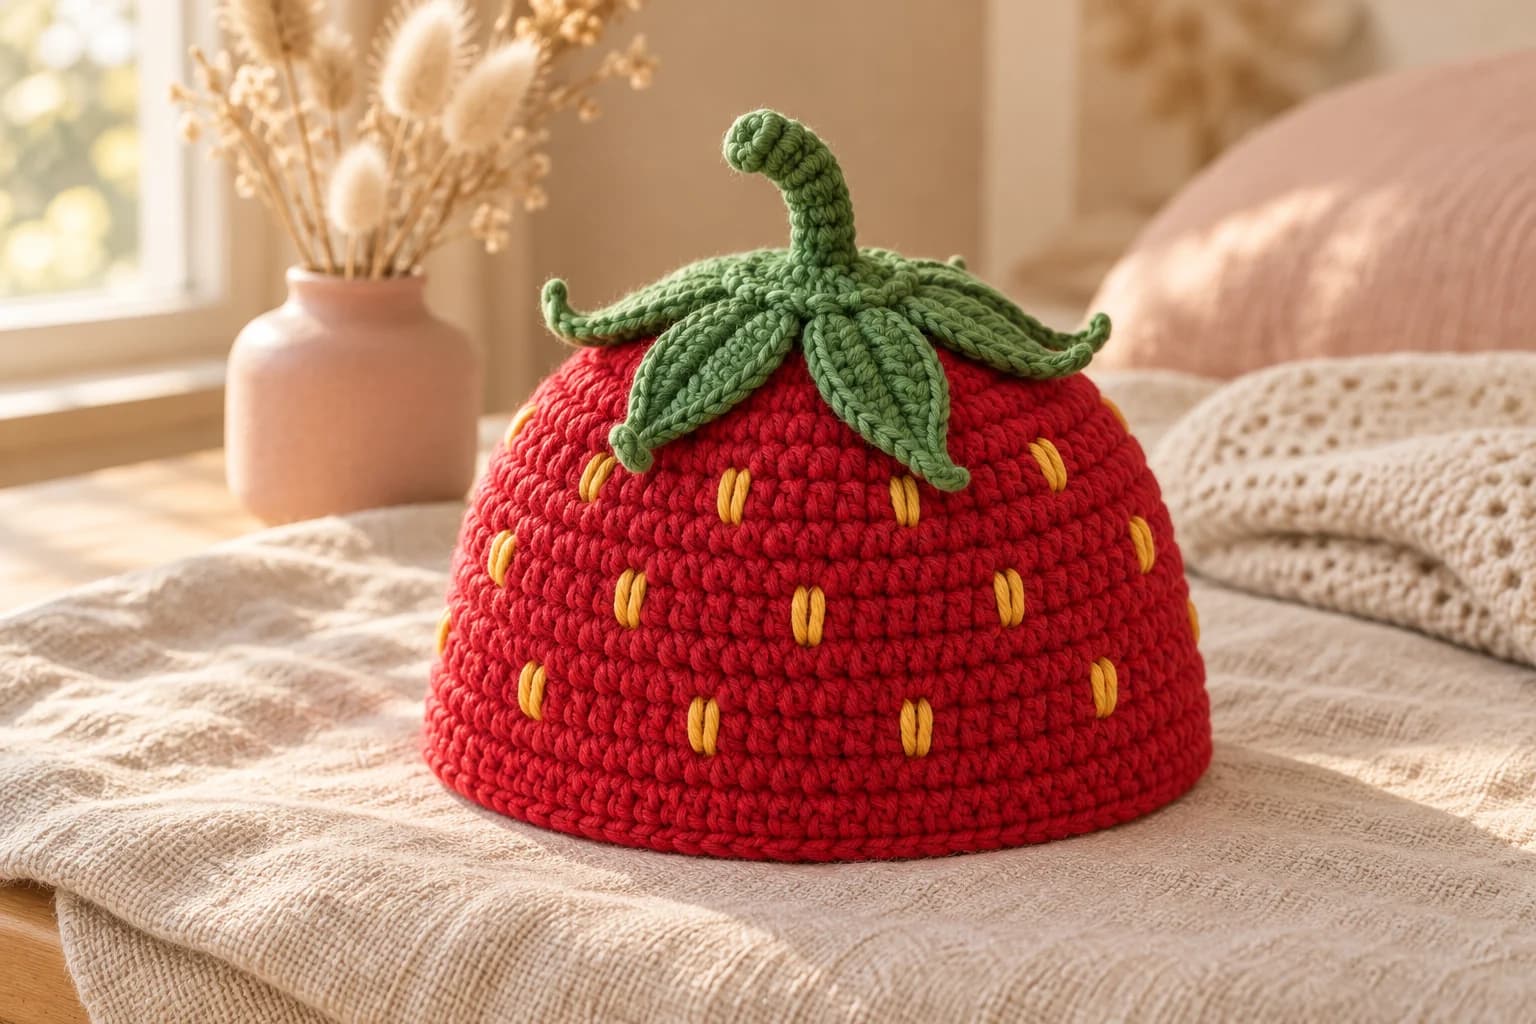
Yellow Baby Sandals Crochet Pattern with Double Soles

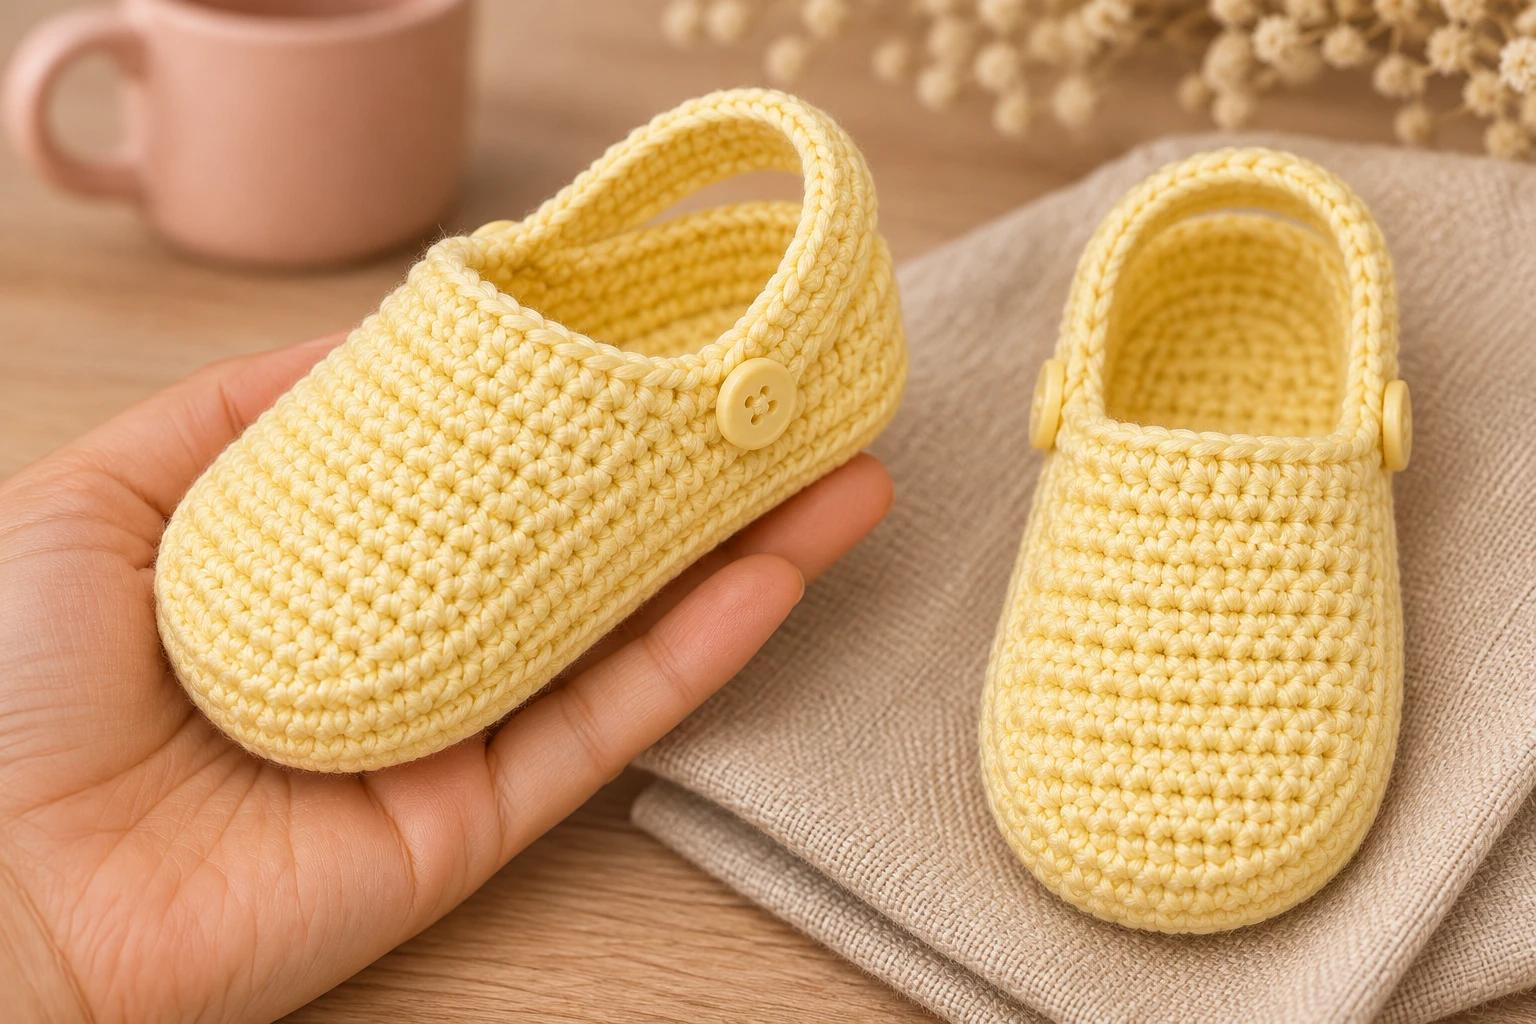
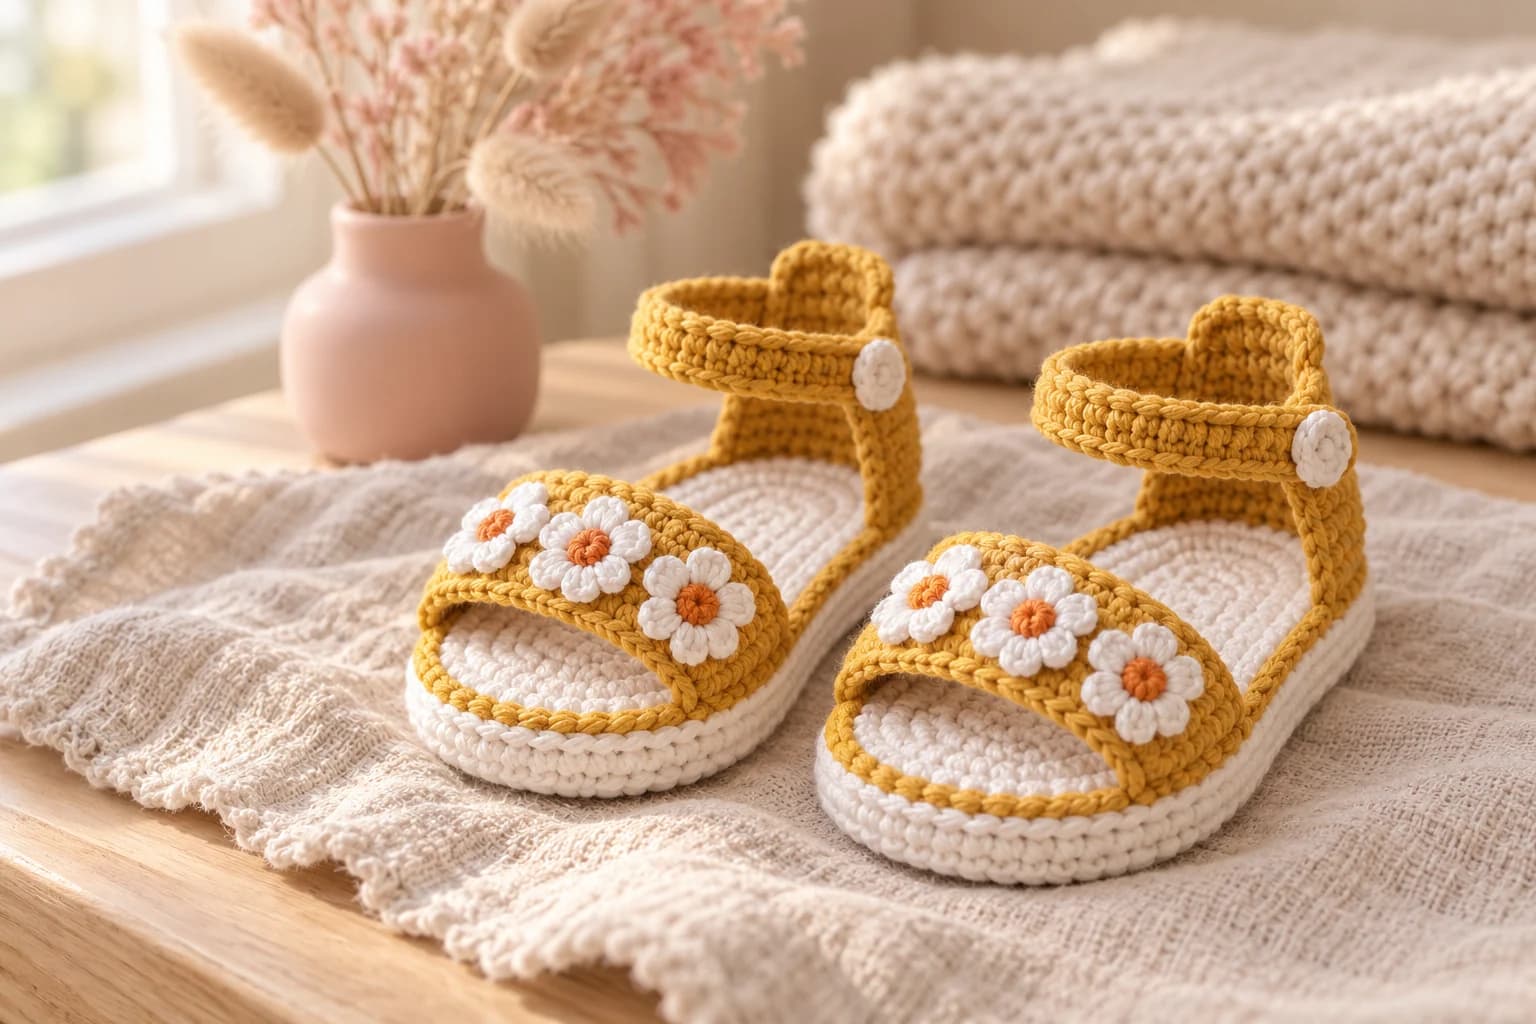
Shown with the buttoned display straps. Use the sewn strap finish for the infant pair.
I like how a solid color shows the little ridge around a crochet sole. These yellow crochet baby sandals use a 0–6 month starting size, with two layers under each foot and a rounded toe that grows straight from the sidewall.
The toe is the part I slow down for. Short rows go back and forth across the front, picking up a little more of the sidewall at each turn. The heel stays open for the strap.
| At a glance | |
|---|---|
| Makes | One pair, with four sole layers and two heel straps |
| Size | 0–6 months as a starting size. Check the first sole against the foot. |
| Yarn | Yellow YeYe Balls 3/16 Nm acrylic, held double. Start with a 40 g ball. |
| Hook | 2.5 mm throughout |
| Skill | Intermediate. Joined ovals, short rows and working into an existing edge. |
Choosing the Fit for 0–6 Months
Measure the foot from the back of the heel to the longest toe, then across the widest part. Use those two measurements to check the first sole before making the other three. Lay the sole flat and measure it without stretching, with the widest end at the toes.
I check the first sole on the table. It should lie flat, then bend a little when you press a thumb under the toe. Check it again if you switch yarns, even if you keep the same hook.
Pattern test. This pattern has been crocheted and tested. Use the first sole to check the fit before making the other layers.
Gauge. 25 sc per 10 cm (about 6.35 sc per inch) with two strands of YeYe Balls held together and a 2.5 mm hook.
Yarn, Hook and Stitches for the Yellow Baby Sandals
- Yarn. Yellow YeYe Balls 3/16 Nm, a three-ply 100% acrylic, held double. Start with a 40 g ball and keep both strands together for every piece.
- Hook and tools. A 2.5 mm hook, removable stitch markers, a tapestry needle, scissors and a tape measure.
- Closure. For an infant pair, sew the strap ends to the sides after checking the heel opening. For display only, the adjustable version uses two ½ in (1.3 cm) buttons per sandal.
US terms. ch = chain, sl st = slip stitch, sc = single crochet, hdc = half double crochet, dc = double crochet, FLO = front loop only, st = stitch, sts = stitches, R = round. A standing sc starts with a slip knot on the hook and is worked straight into the marked stitch. The starting chains of joined rounds give the hook height and stay outside the stitch count.
Making the Double Soles
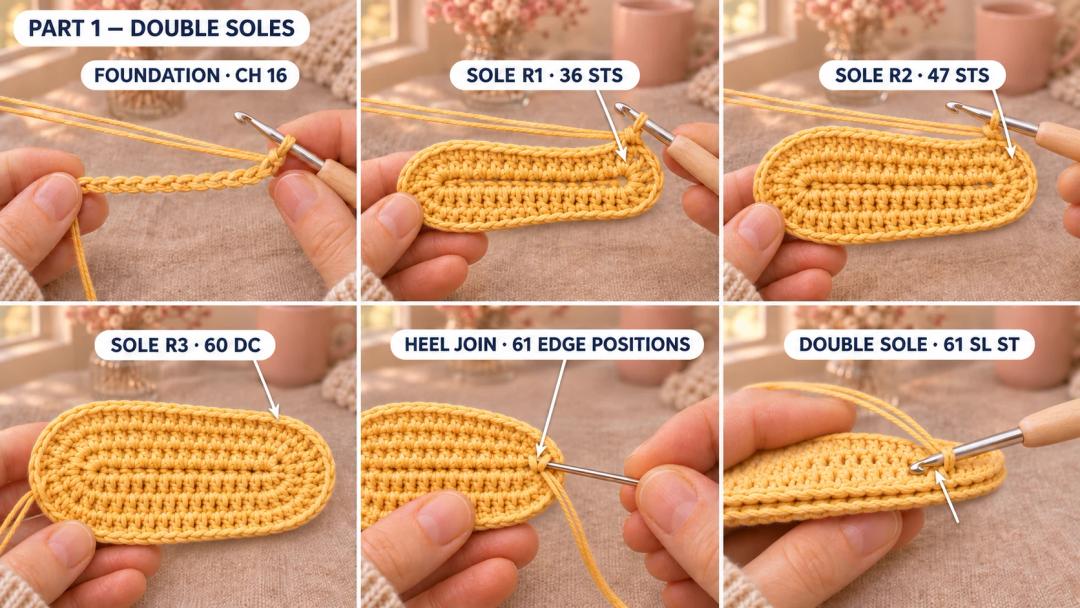
Sole layers (yellow, 2.5 mm, Make 4). Ch 16. Work down one side of the chain, around the wide toe and back along the other side. The joins sit near the heel. Mark the first worked stitch of each round.
- R1: Starting in the 2nd ch from the hook, sc 9, hdc 2, dc 3, 6 dc in the last ch. Turn the chain sideways and work into its underside, dc 3, hdc 2, sc 8, 3 sc in the ch where the first sc was made. (36) Join with a sl st in the first sc.
- R2: Ch 1, (2 hdc in next st) × 2, hdc 9, dc 3, (2 dc in next st) × 6, dc 3, hdc 10, (2 hdc in next st) × 3. (47) Work the first increase in the stitch where R1 joined. Join with a sl st in the first hdc.
- R3: Ch 2, (dc, 2 dc in next st) × 2 starting in the same st as the join, dc 12, (2 dc in next st, dc) × 6, 2 dc in next st, dc 12, (2 dc in next st, dc) × 3, dc in the joining sl st of R2. (60)
Finish the heel join. Cut the yarn with a tail long enough to thread the needle. Skip the ch 2, pass the needle under both loops of the first dc and back down through the top of the final dc. Ease the thread into a small V. Count this V as the 61st edge stitch for the next step. Secure and weave in the tail on the wrong side. Mark the middle of the broad toe on each sole.
Join two layers for each sandal. Set the soles with their right sides facing out, wide toes lined up and narrow heels lined up. Start near the center heel. Pick up the corresponding stitch on each layer and sl st through them together. Continue one pair at a time around the oval, including the V at the invisible join, for 61 sl sts. Finish with an invisible join over the first sl st, using its place in the edge as part of the existing count. Weave the tail between the layers.
Tip. Give each joining stitch a little slack. You’ll want room for the hook when you work the first round of the sidewall. If the sole starts to cup, ease up on the yarn as you join.
Building the Sidewall in Front Loops
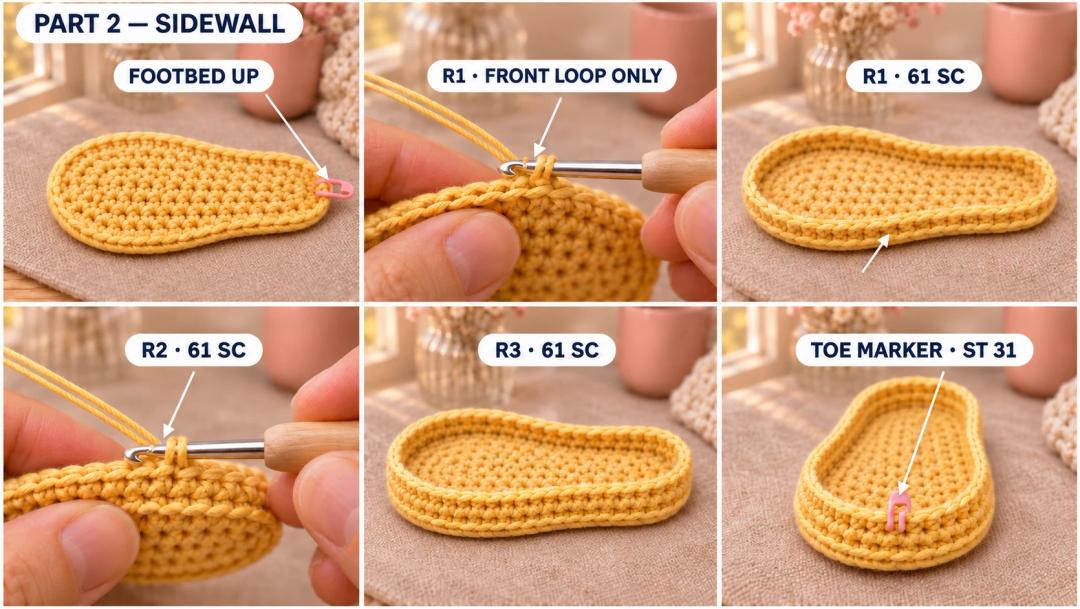
Find the center of the heel. Hold the doubled sole flat with the footbed facing up. The first round uses the front loop of each joining sl st, the strand nearer you as you look at the stitch. Mark the first sc.
- R1: Standing sc in the front loop of the marked heel sl st, sc in the front loop of each remaining joining sl st. (61) Join with a sl st in the first sc.
- R2–R3: Ch 1, sc around. (61) Work two rounds, starting in the first sc and working under both loops. Join R2 with a sl st in the first sc. After R3, use the needle to make an invisible join over the first sc without adding an edge stitch.
Weave the yarn into the inside of the sidewall. Count from the first sc of R3, including that stitch as 1, and mark st 31 at the toe. Set the sole down with the toe facing you to use the right and left directions in the next step.
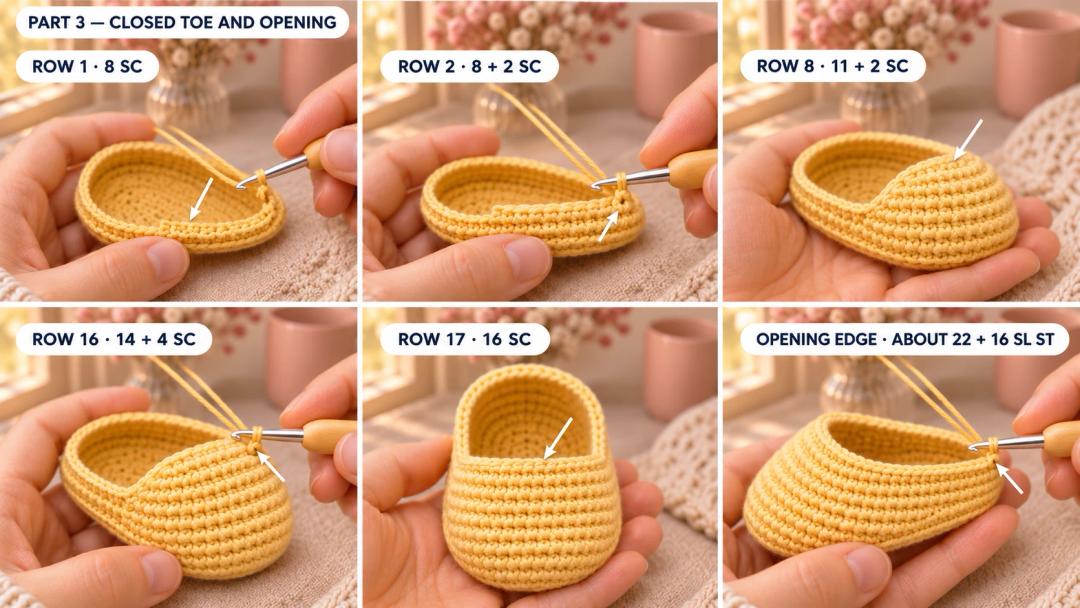
Shaping the Closed Toe in 17 Rows
With the toe facing you, mark the second stitch to the right of the toe marker and the fourth stitch to the left. Work the first row from the right marker to the left marker. Count the marked stitches at both ends. There are seven sidewall stitches in that span.
How the rows attach. Turn without a turning chain. Work the main sc across the toe panel. At the far edge of the row, work the indicated side sc into the next unused stitches of sidewall R3, one sc per stitch. That brings the edge up to the sidewall. On the next pass, start by skipping the stated number of stitches at the turning edge. Mark the first main sc if it tends to disappear under your thumb.
- Row 1: Standing sc in the right-hand marked stitch, sc 2, 2 sc in next st, sc 3 to the left-hand marker. (8)
- Row 2: Turn, sc 8 across the panel, then 2 side sc. (10)
- Rows 3–4: Turn, skip 2 sts, sc 8 across the panel, then 2 side sc. (10) Work two rows.
- Row 5: Turn, skip 1 st, sc 9 across the panel, then 2 side sc. (11)
- Row 6: Turn, skip 2 sts, sc 9 across the panel, then 2 side sc. (11)
- Row 7: Turn, skip 1 st, sc 10 across the panel, then 2 side sc. (12)
- Row 8: Turn, skip 1 st, sc 11 across the panel, then 2 side sc. (13)
- Rows 9–11: Turn, skip 2 sts, sc 11 across the panel, then 2 side sc. (13) Work three rows.
- Row 12: Turn, skip 1 st, sc 12 across the panel, then 2 side sc. (14)
- Rows 13–14: Turn, skip 2 sts, sc 12 across the panel, then 2 side sc. (14) Work two rows.
- Row 15: Turn, skip 1 st, sc 13 across the panel, then 2 side sc. (15)
- Row 16: Turn, skip 1 st, sc 14 across the panel, then 4 side sc. (18)
- Row 17: Turn, skip 2 sts, sc 16 across the panel. (16)
Edge the opening. Keep the heel opening facing you. From the end of Row 17, sl st into each unused sidewall stitch around the open heel to the opposite edge of the panel. Expect about 22 sl sts along this section. Continue with one sl st in each of the 16 sc across the top of Row 17. Cut the yarn, make an invisible join and weave in the tail on the inside.
Crocheting the Adjustable Heel Straps
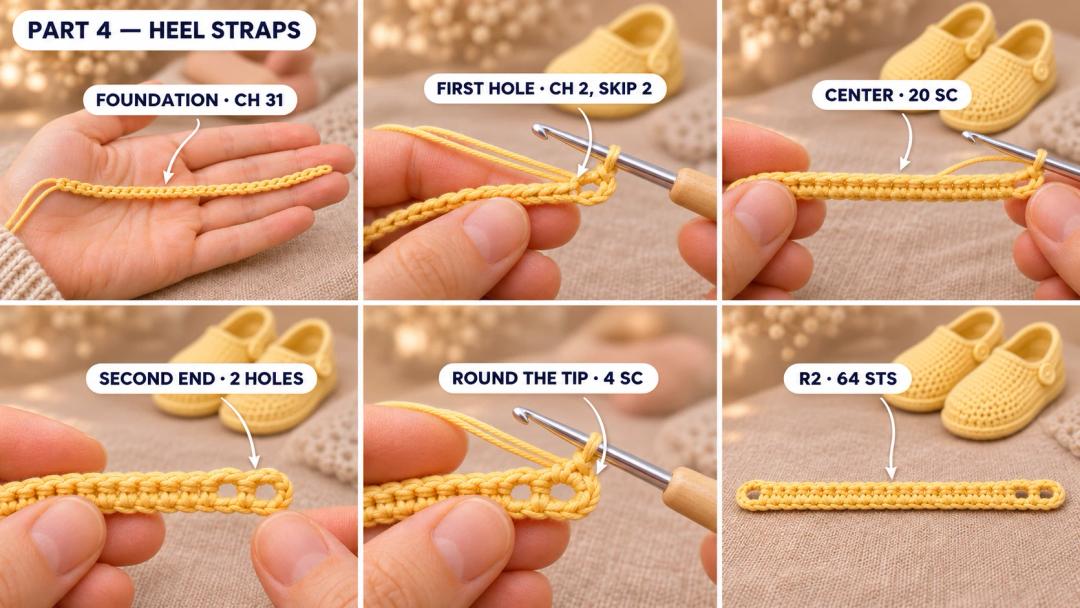
Heel straps (yellow, 2.5 mm, Make 2). Ch 31. The first pass forms three buttonhole spaces. Work back along the other side of the same chain to give the strap its width. The working ch 2 spaces count as two chains each in R1.
- R1: Sc in the 2nd ch from the hook, ch 2 and skip 2 ch, sc 20, ch 2 and skip 2 ch, sc 2, ch 2 and skip 2 ch, 4 sc in the last ch. On the return side, work 2 sc at each skipped two-chain section and 1 sc behind each of the intervening straight stitches. Work 3 sc in the ch at the starting end to round it. (64) This includes 58 sc and the six chains across the three spaces.
- R2: Sl st in each sc around, working 2 sc into each ch-2 space along the buttonhole edge. (64) Keep the three buttonhole openings clear.
Fasten off and weave in the ends. Wrap each strap around the outside of the heel to check which end lands on each side. Keep the double-hole end on the opposite side for the second sandal so the pair mirrors.
Attaching the Straps and Finishing the Pair
Safety. Save the version with small buttons for display. For a baby, use a sewn strap with both ends anchored to the sandal.
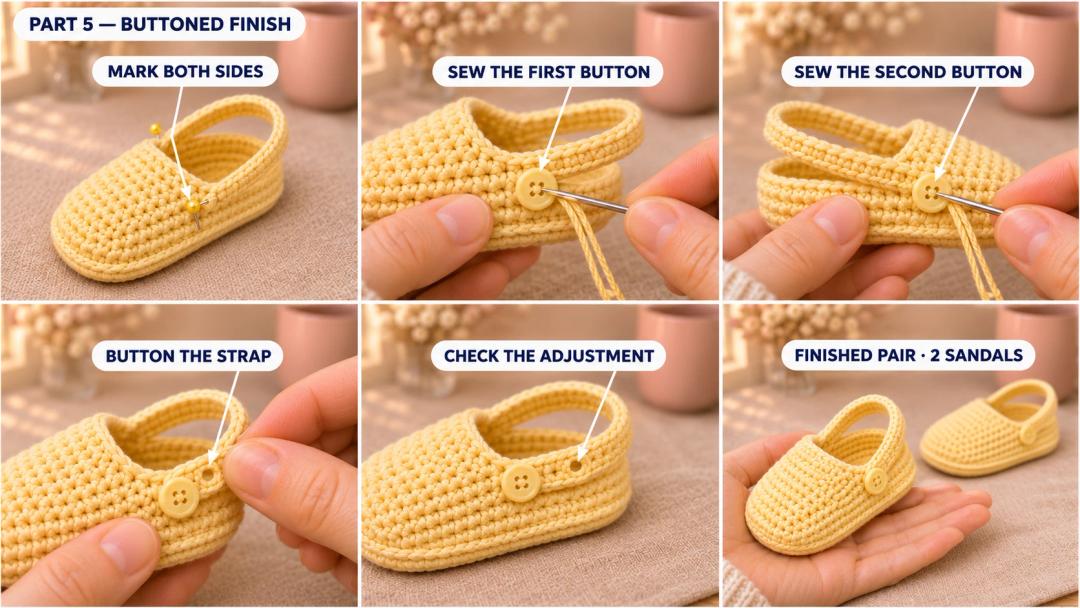
Sewn heel straps. Lay the strap around the heel and use removable markers to hold its ends at the height of the opening edge, just behind the toe panel. Check the opening against the foot measurements. Sew through each strap end and the sidewall with matching yarn, stitching along both edges of the overlap. Give each end a gentle tug. It should lie flat and stay put. Hide the yarn tails between the stitches.
Adjustable display straps. Set the button positions using the strap itself. Pin the single-hole end on one side, curve the strap around the heel and pin through one of the two holes at the other end. Sew a ½ in button at each pinned point. Button through the inner hole for a shorter strap or the outer hole for a longer one.
UK terms. US sc is UK dc, US hdc is UK htr, and US dc is UK tr.
I like to set the two sandals heel to heel to see the curves match. If you make a yellow pair, share it with #wavodecrochet.