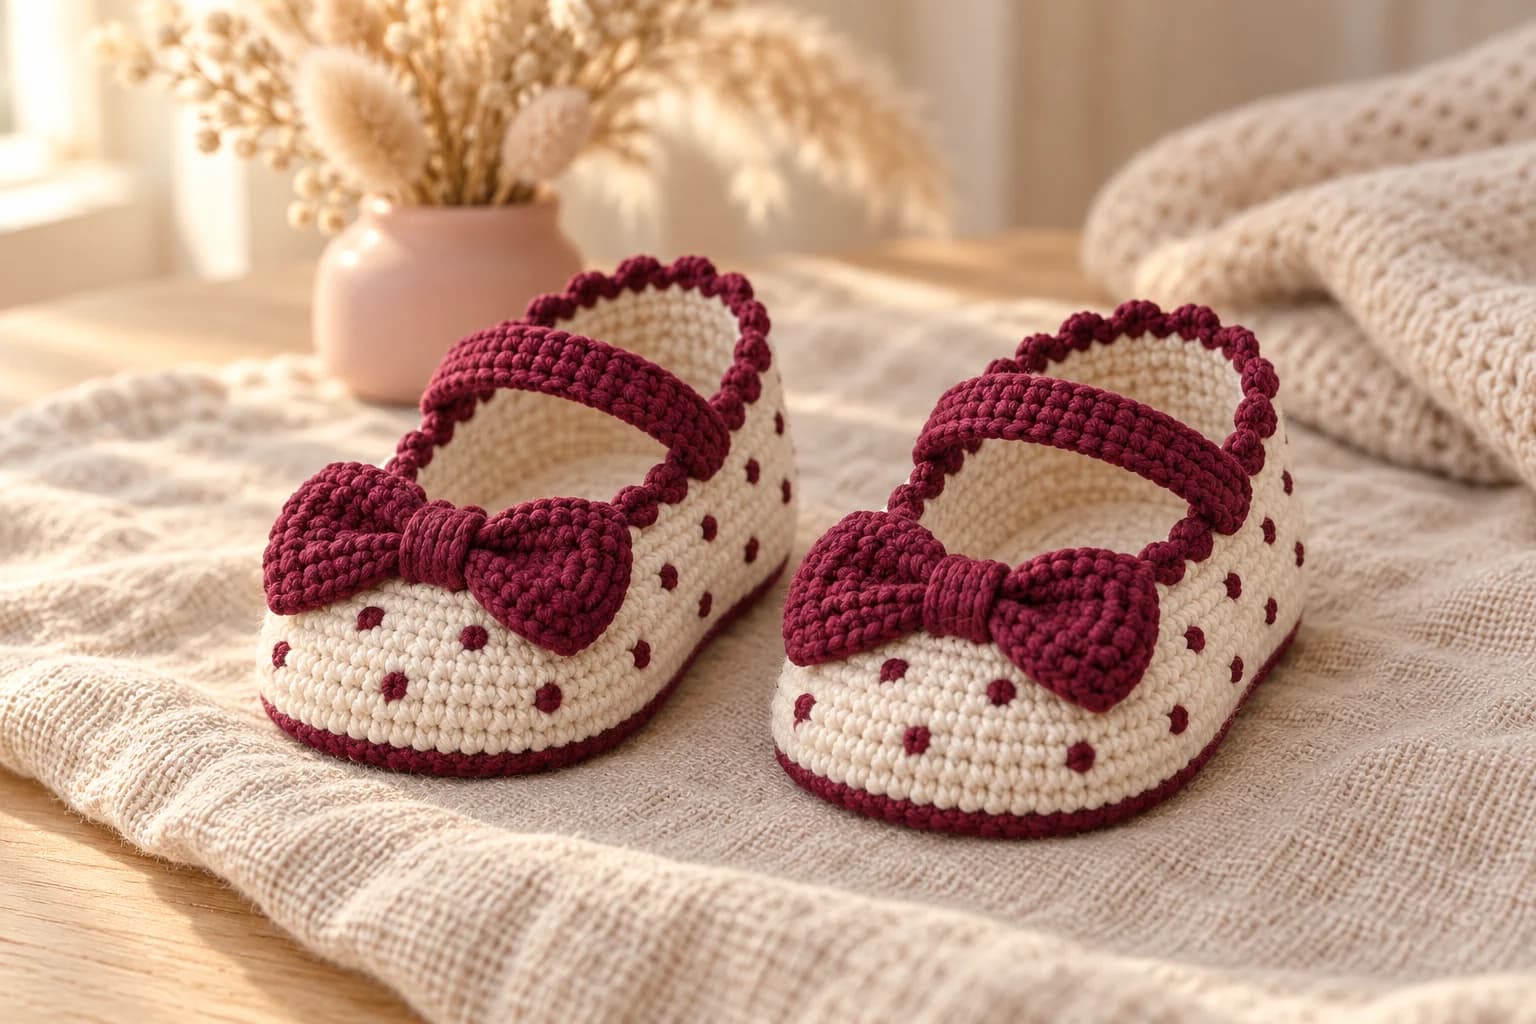
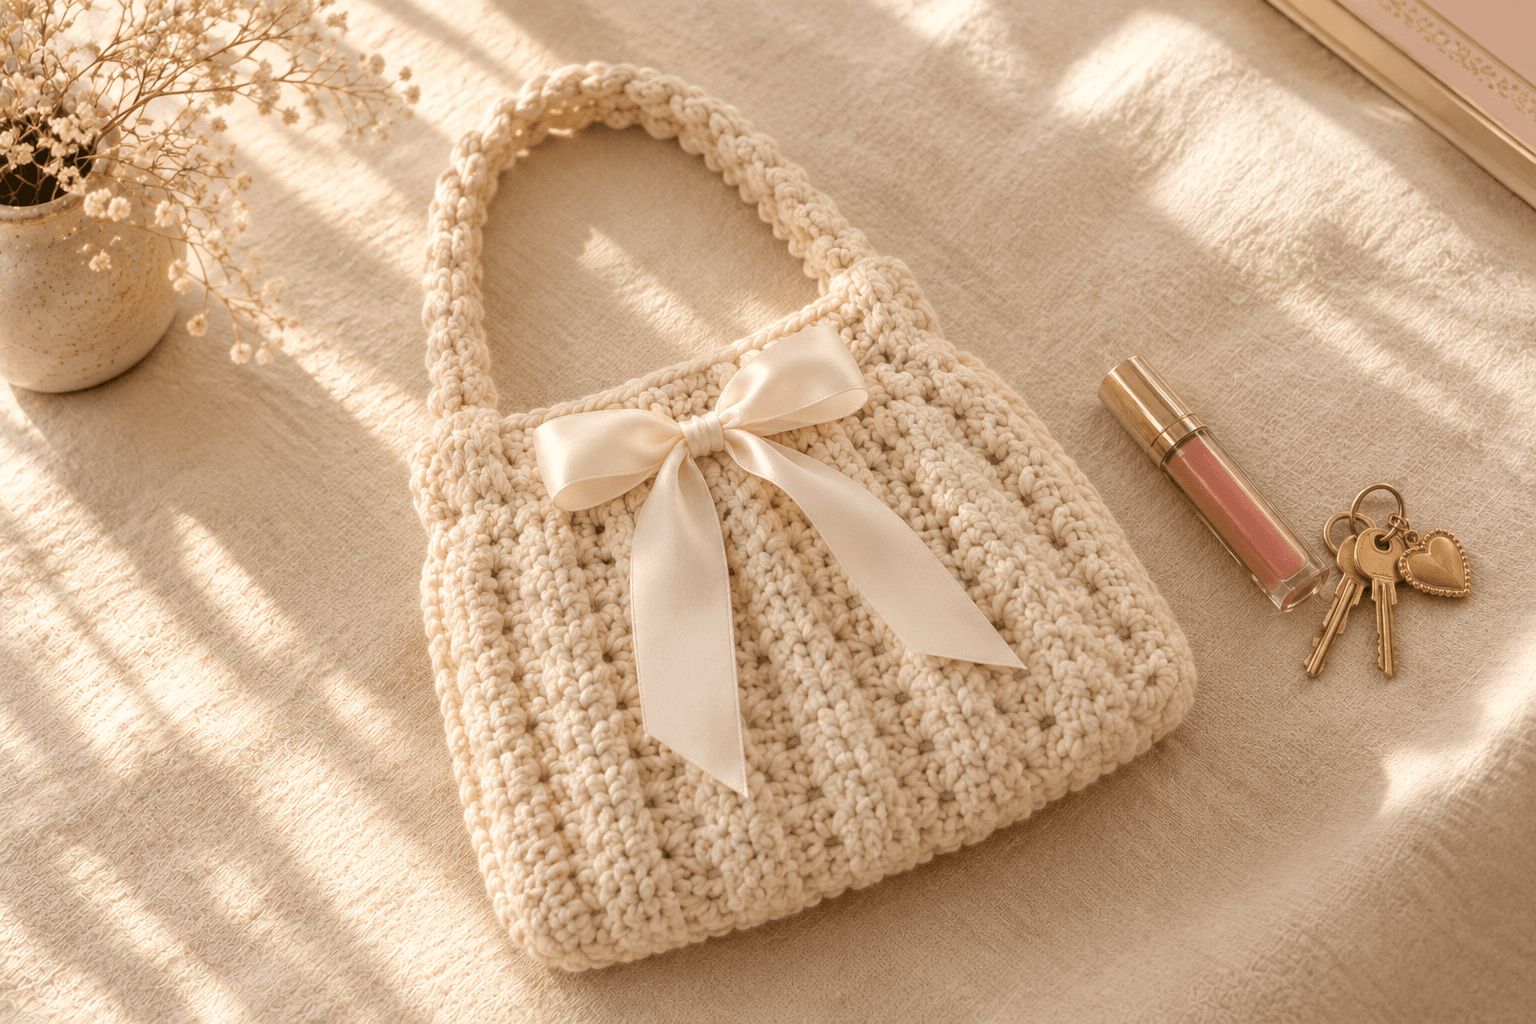
Cute Coquette Crochet Coaster

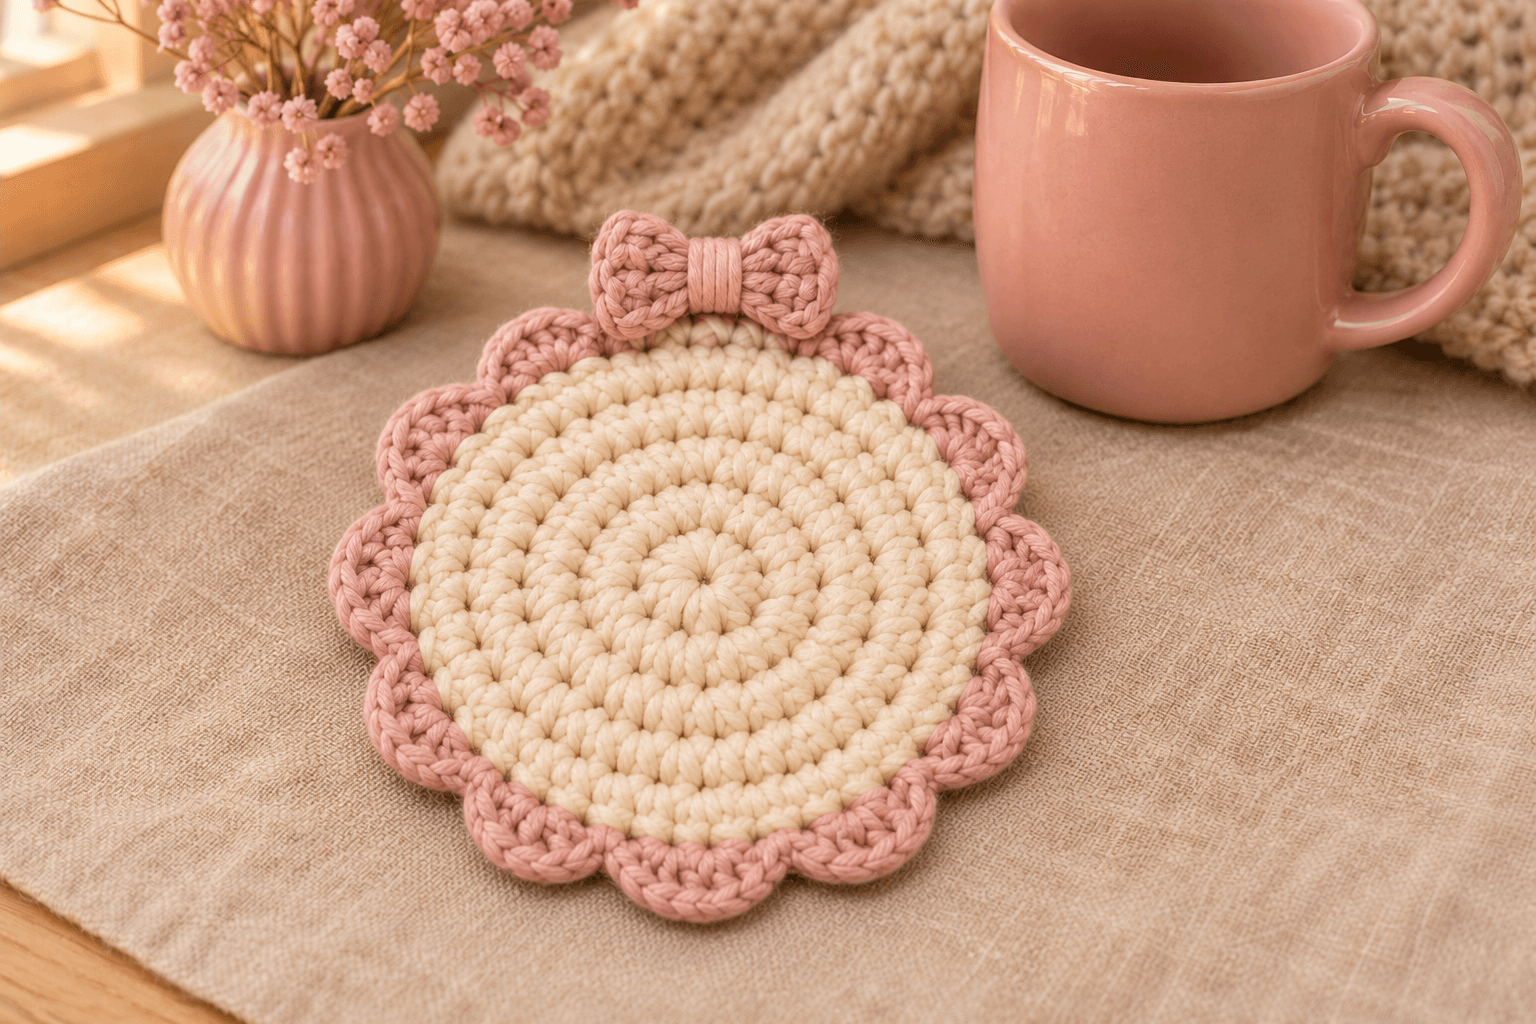
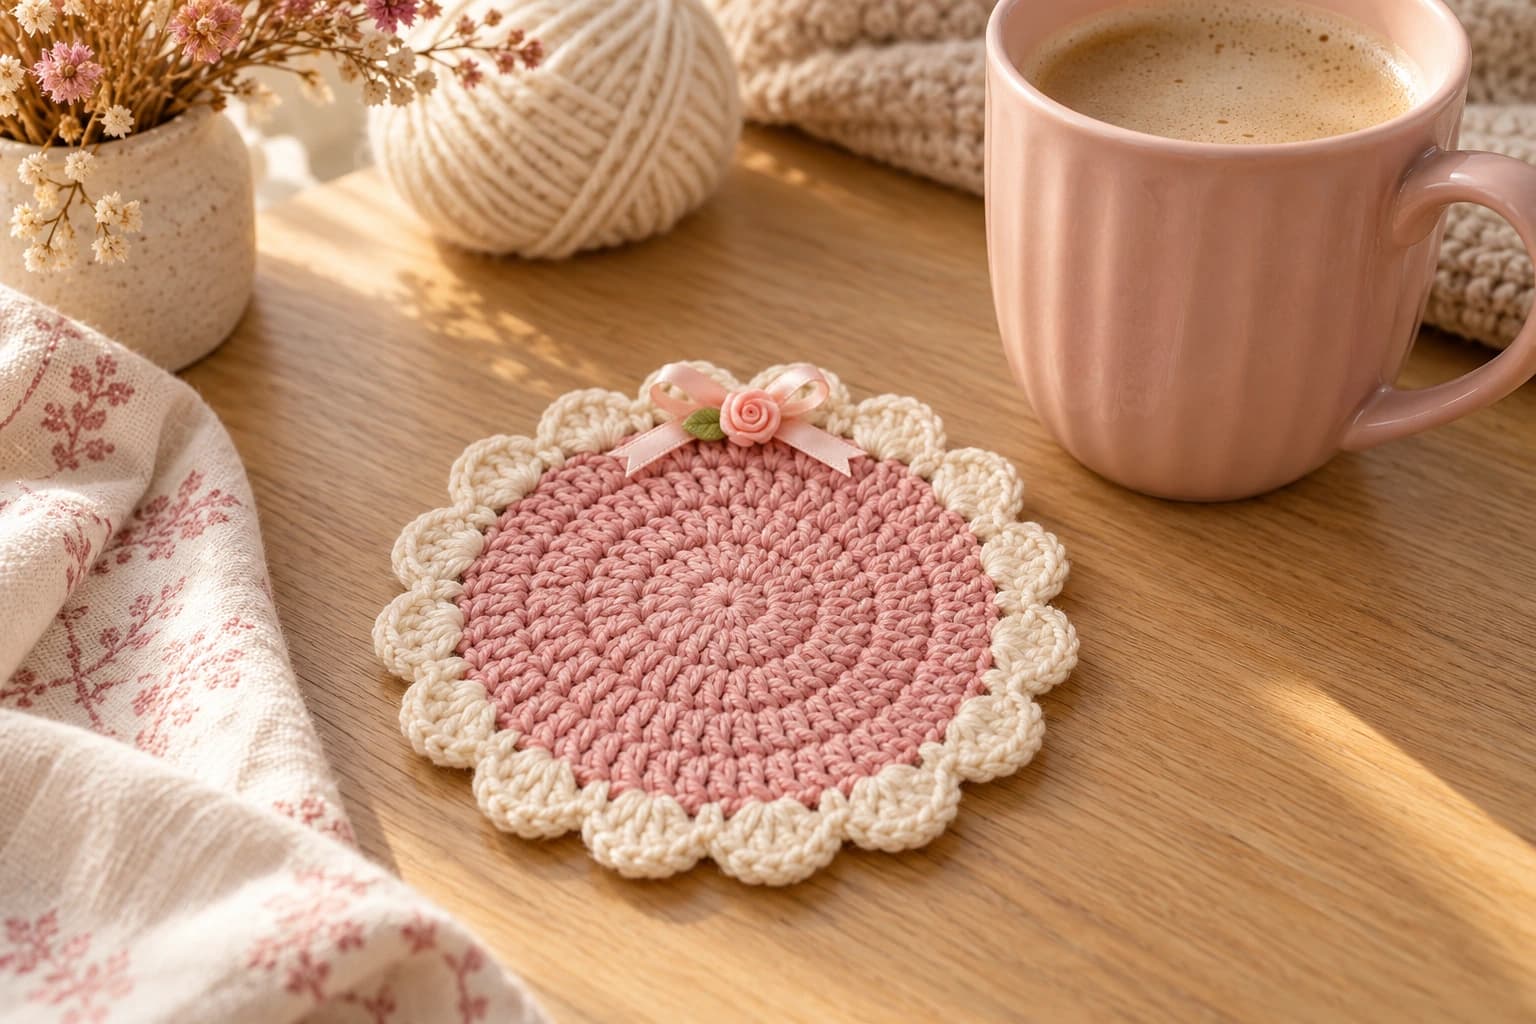
I like a little bow on a tea tray, but I still want my cup to sit level. This cute coquette crochet coaster has a flat cream center, twelve small pink scallops and a little crocheted bow at the rim. It measures about 4½–5 in (11.5–13 cm) across the scallops, with the bow peeking out at one side.
The cream circle is plain single crochet. One little pink repeat goes around the edge. The bow starts as a tiny rectangle that you pinch and wrap in the middle. I keep the decoration at the outside so the cup has a smooth place to rest.
| At a glance | |
|---|---|
| Finished size | about 4½–5 in (11.5–13 cm) across the scallops, excluding the bow |
| Cream center | about 3¾–4 in (9.5–10 cm) across |
| Yarn | worsted #4 cotton; about 14 yd cream and 8 yd dusty pink |
| Hook | 5 mm (H/8) |
| Pieces | 2: coaster with its edging, and the bow |
| Time | about 1–1½ hours, plus drying time |
| Skill | easy: sc, increases, slip stitches, skipped stitches and simple sewing |
Cotton and colors for the coquette coaster
Cream and dusty pink give this coaster its soft look. I would use both colors from the same cotton range so the edging feels like part of the circle. A smooth yarn makes the little scallops easier to see while you count them.
- Yarn: worsted #4, 100% cotton, such as Lily Sugar’n Cream Original, about 120 yd (109 m) per 2.5 oz (71 g) in the solid colors. Allow 14 yd cream and 8 yd pink, including the bow and sewing ends.
- Hook: 5 mm (H/8) for both pieces, as a starting point.
- Small things: a tapestry needle, scissors, two stitch markers, a measuring tape, a towel and a few rustproof blocking pins.
Tension. Use about 3 sc per inch (12 sc per 4 in / 10 cm) as the stitch-gauge reference. Check a small flat sc swatch after washing and drying it. At that stitch gauge the cream center is about 3¾–4 in (9.5–10 cm) across. The scallops bring the expected width to about 4½–5 in (11.5–13 cm). These are estimates; measure your coaster after it dries.
Stitches, in US terms: MR = magic ring; ch = chain; sl st = slip stitch; sc = single crochet; inc = 2 sc in the same stitch; st = stitch. R means round. Work through both loops unless a step says otherwise.
The circle has joined rounds: do not turn. Begin R2–R6 with ch 1 and finish each round by joining to the first sc. The beginning chain and joining slip stitch do not count. Move a marker into the first sc of every round.
The pattern — a flat cream coaster
Coaster: cream cotton, then pink for the attached edging; 5 mm hook. Make 1. The magic ring is the center underneath the cup. Leave a 6 in (15 cm) starting tail.
- R1: MR, 6 sc in the ring. Sl st to the first sc. (6)
- R2: ch 1, inc × 6. Sl st to the first sc. (12)
- R3: ch 1, (sc, inc) × 6. Sl st to the first sc. (18)
- R4: ch 1, sc, inc, (2 sc, inc) × 5, sc. Sl st to the first sc. (24)
- R5: ch 1, (3 sc, inc) × 6. Sl st to the first sc. (30)
- R6: ch 1, 2 sc, inc, (4 sc, inc) × 5, 2 sc. Sl st to the first sc. (36)
After R1, draw the magic ring closed slowly, holding the stitch bases with your fingers. The increases move slightly on R4 and R6 to soften the outline into a circle.
After R6, fasten off with a 6 in (15 cm) tail. Weave both cream ends into the back of the stitches, reverse direction and trim. Lay the circle on the table before adding pink: the middle should rest flat.
Tip. Make the first sc in the same stitch you joined into. The little joining slip stitch sits beside it; leave that slip stitch alone. Adding a stitch into it every round makes the edge grow unevenly.
If the circle cups, loosen the increases and check that every round has six of them. If the edge waves, recount the stitches before trying to block it flat. A counting mistake is easier to fix while the cream yarn is still close by.
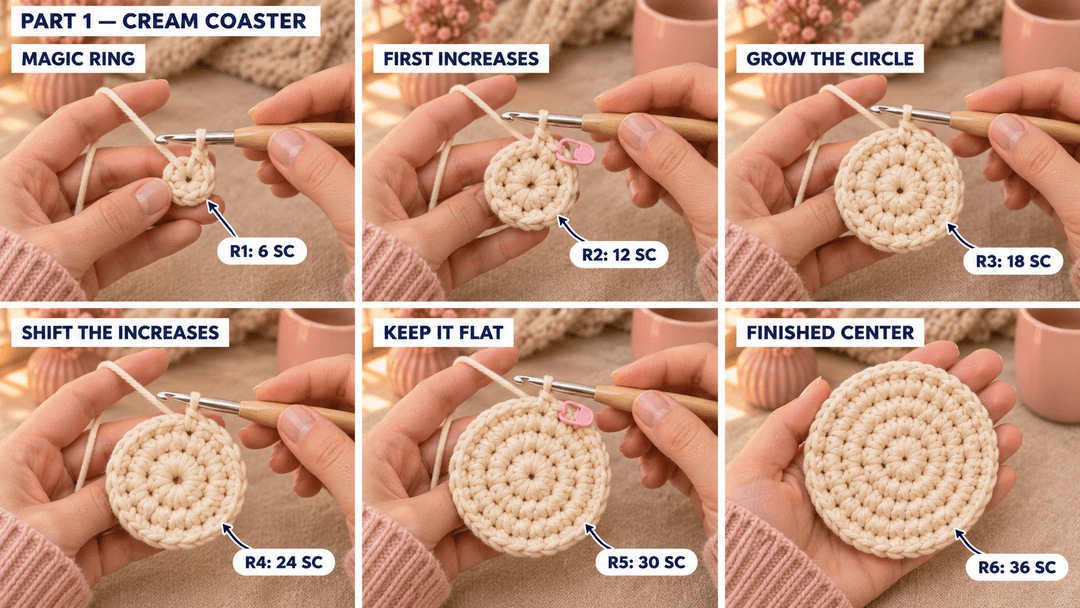
The collages illustrate the main stages; follow the written instructions for stitch counts.
Adding the pink scalloped edge
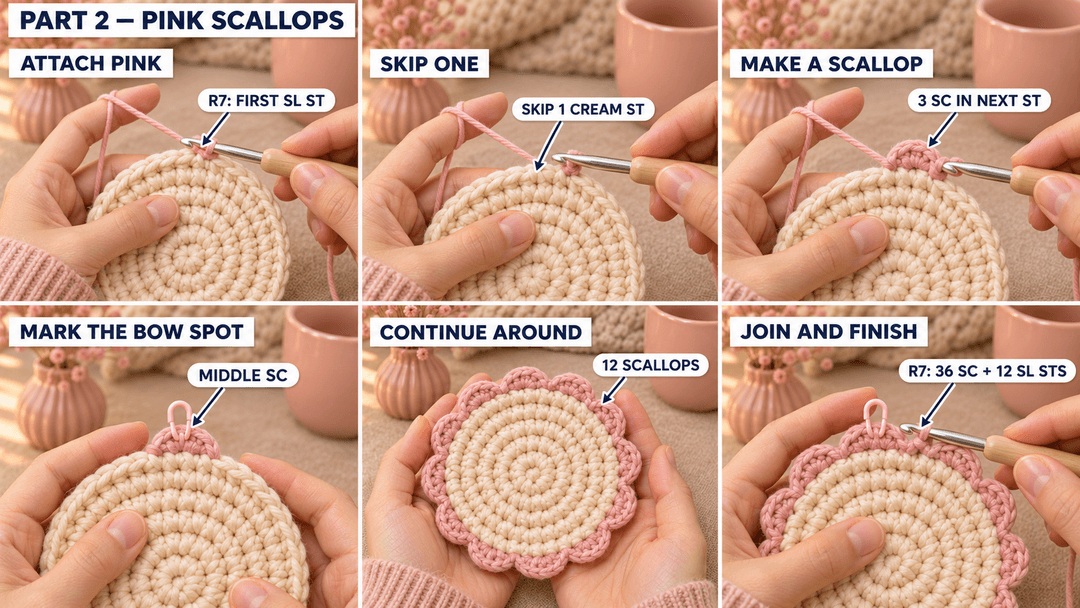
The border makes twelve small, rounded scallops. Work straight into the 36 sc of R6. Put a pink slip knot on your hook, ready to work into the first cream sc. The first slip stitch of the repeat attaches pink; work it once.
- R7: (sl st in the next st, skip the next st, 3 sc in the next st) × 12. Sl st to the first border sl st to join. (48 sts)
Those 48 border stitches are 36 sc and 12 sl sts. The final joining slip stitch is excluded. Each three-sc group is one scallop.
Here is the first repeat slowly:
- Sl st into the first cream stitch to attach pink.
- Leave the next cream stitch unworked.
- Work 3 sc into the third cream stitch. Put your second marker into the middle sc of this first pink group; this is the bow position.
- Sl st into the next cream stitch to begin the next repeat, skip one, then work 3 sc into the following stitch. Continue around the circle.
Keep the pink slip stitches relaxed. They hold the dips between the scallops; a tight slip stitch can make the rim pull inward. Finish with a 6 in (15 cm) tail and weave the pink ends into the backs of nearby pink stitches. Keep the bow-position marker in place.
Making and attaching the little pink bow
A tiny rectangle for the bow
Bow: pink cotton, 5 mm hook. Make 1. Leave a 6 in (15 cm) starting tail.
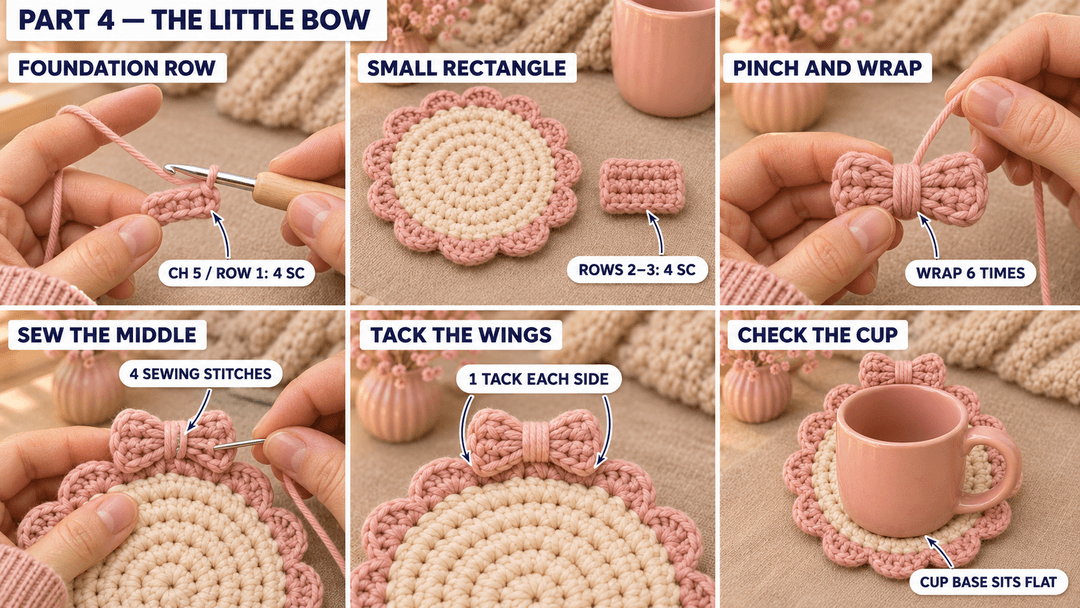
- Row 1: ch 5, sc in the 2nd ch from the hook and in each ch across. (4)
- Rows 2–3: ch 1, turn, 4 sc. (4) 2 rows.
Fasten off with an 18 in (45 cm) tail at the end of Row 3. Weave the starting tail into the back of the rectangle. Keep the long finishing tail free.
Hold the rectangle with its four-stitch edge running left to right. Pinch its middle from top to bottom and wrap the long tail six times around the pinch. Tie the wrapping securely at the back and keep the remaining tail for sewing. Ease the two wings outward with your fingertips. The bow is about 1⅓ in (3.4 cm) wide before sewing.
Sew the bow on the outer rim
Block the coaster and let it dry completely using the directions below. Then lay it face up with the marked scallop at the top. Set the bow across that scallop, its wings pointing left and right and its wrapped middle over the marked pink stitch. Let the upper part of the bow project beyond the rim.
- With the remaining pink tail, take four small sewing stitches through the back of the wrapped middle and the marked middle sc of the first scallop. Keep the coaster flat while tightening.
- Take one small tack through the lower back edge of each bow wing into the first and third sc of that same scallop. Let the wings sit on the pink rim, with the cream middle clear.
- Before securing the tail, set your usual empty cup on the cream circle. Its whole base should touch the flat cotton. If it catches a wing, move the bow a little farther outward and adjust the two tacks.
- Weave the remaining tail into the backs of pink stitches, reverse direction and trim. Remove the markers and any pins.
Tip. The middle wrap needs to be firm, but the two wing tacks can stay light. They guide the bow away from the cup without flattening its little folds.
Blocking and washing your coquette coaster
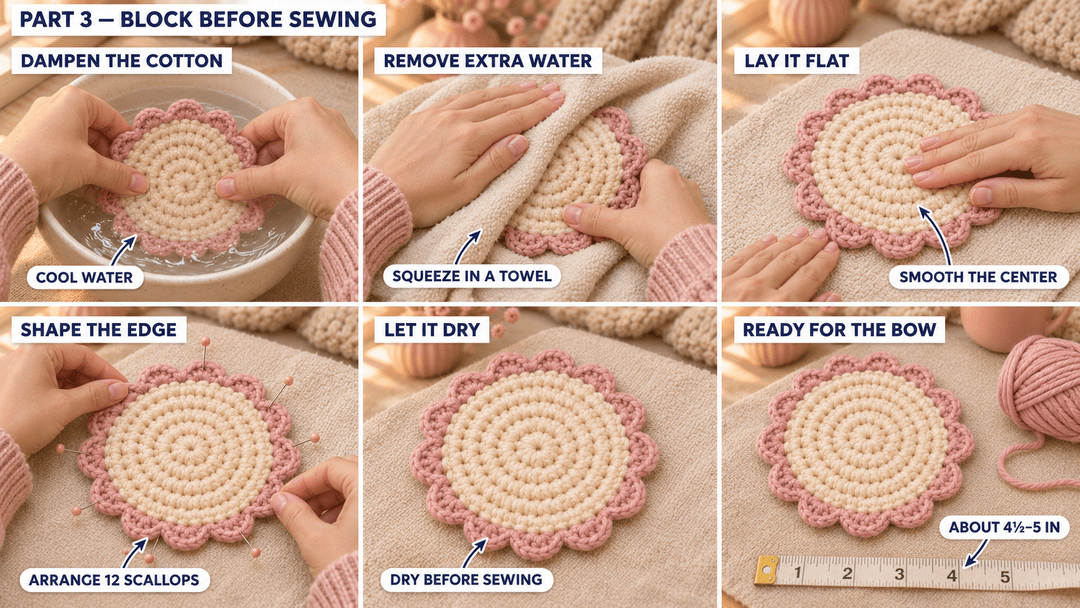
Block before sewing on the bow. Dampen the coaster in cool water, squeeze it gently in a towel and lay it face up. Smooth the cream center, then arrange the twelve pink scallops with your fingers. Pin lightly if needed and let it dry completely.
Follow the relaxed fabric rather than stretching it to a fixed measurement. The middle should lie flat, with a gently rounded pink edge. Leave the completed bow dry beside the coaster, ready to sew on once the cotton has dried.
Once the bow is attached, wash according to the cotton label and reshape it gently. For the first wash, wash the coaster separately to check whether the pink dye runs into the cream. Let it dry flat, with the little bow facing up.
I would make a pair for a tea tray and wrap them in a paper band with the bows peeking above it. If you prefer a pink middle, my coquette coaster with a cream scalloped edge uses that color combination.
UK terms: US sc = UK dc; US sl st = UK slip stitch.
Made a little bow coaster? Tag #wavodecrochet on Pinterest so I can see your tea-tray colors.
Pattern by Clara Hartwell for Wavode. Questions? Email me at support@wavode.com.