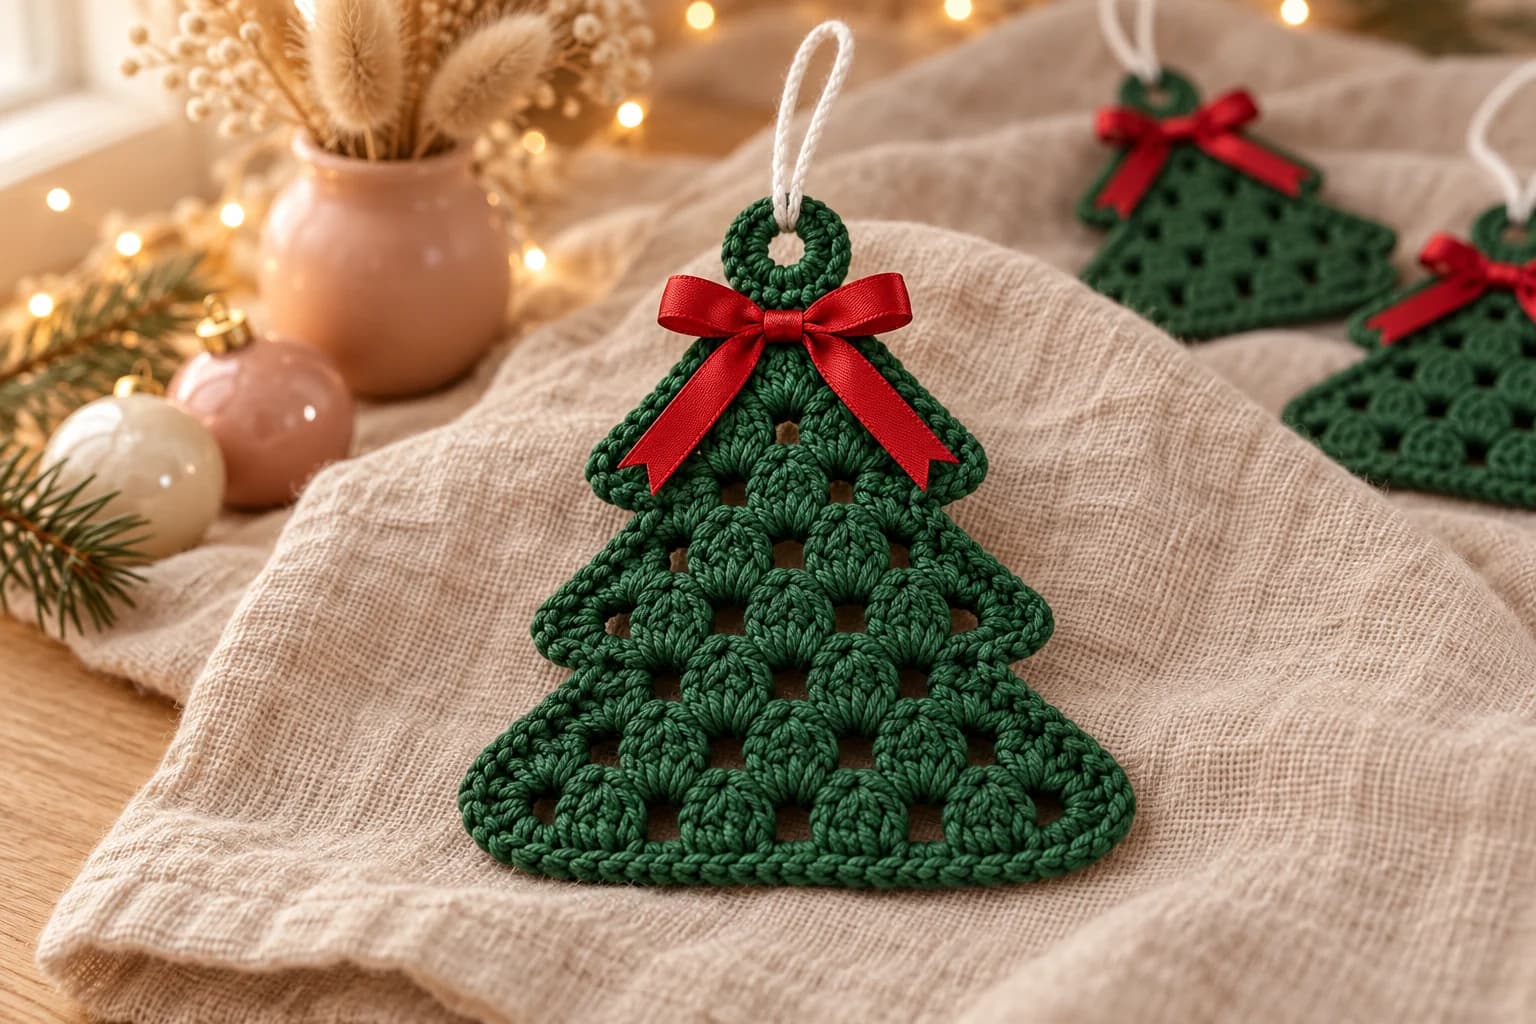
Christmas Granny Crochet Square

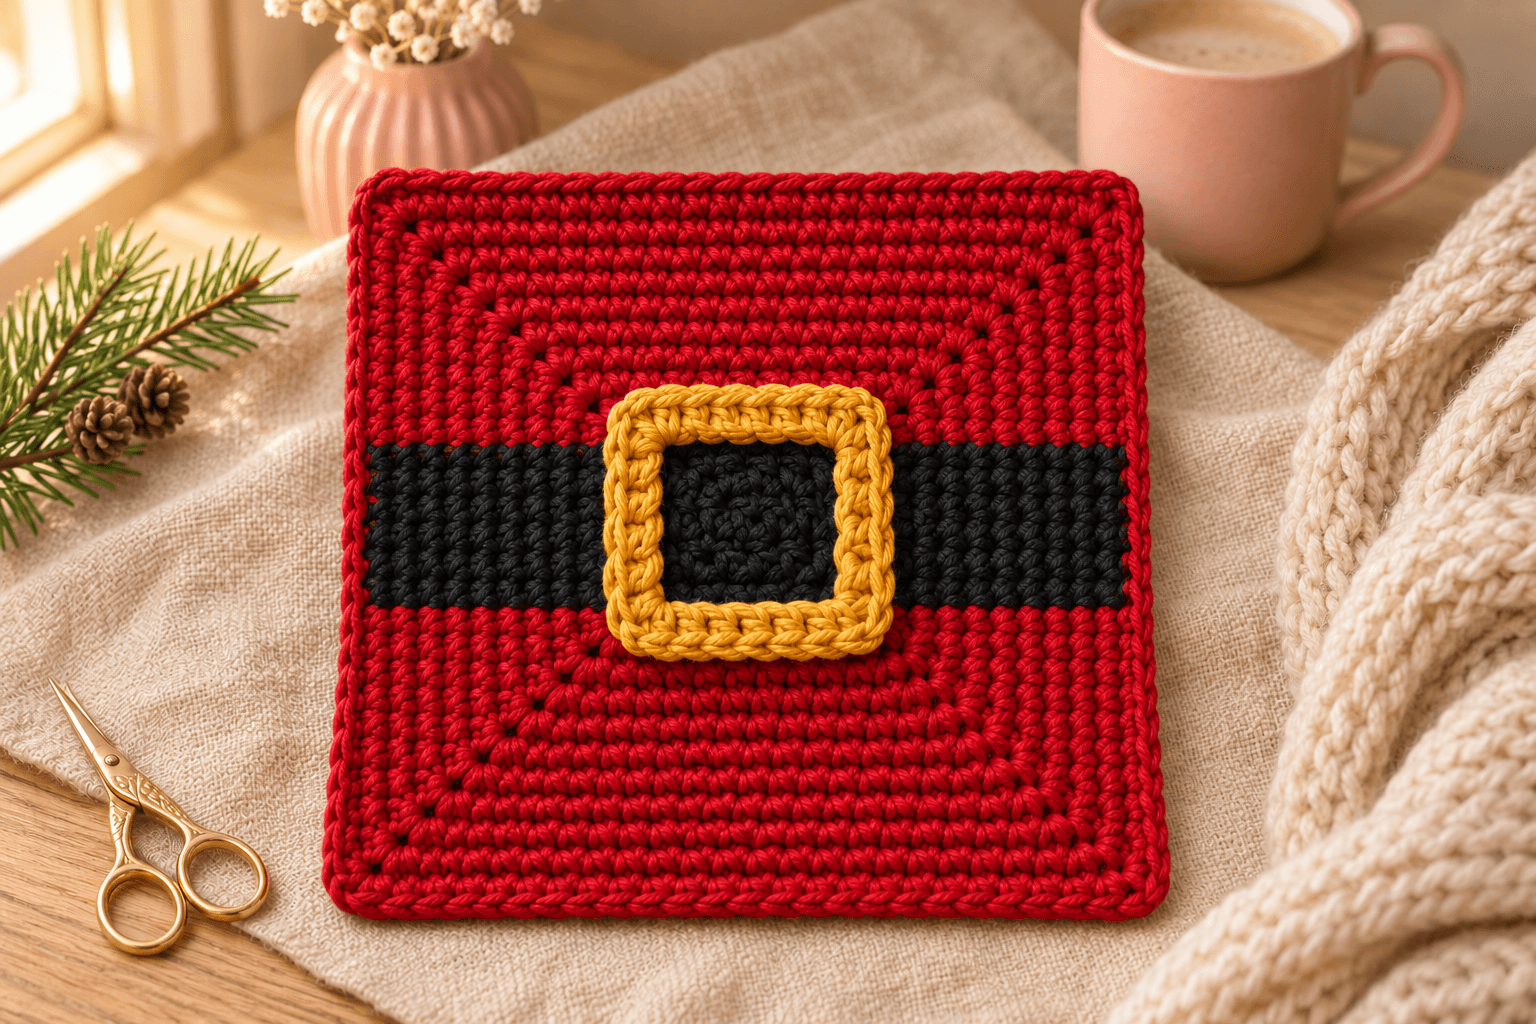
I like Christmas decorations you can recognize from across the room. A strip of black and a little gold frame do most of the work here. This Christmas granny crochet square makes a Santa belt motif about 6 in (15 cm) across, with a red background and a gold buckle that sits just above the stitches.
The square grows from the center in single crochet. The stitches sit close together, and the little black sections keep the belt going across the middle. I keep the buckle separate so its edges stand up clearly against the black. It is a good project for practicing color changes at a comfortable pace.
| At a glance | |
|---|---|
| Finished size | about 6 in (15 cm) square; buckle about 2 in (5 cm) across |
| Yarn | worsted #4 cotton in red, black and gold; about 47 yd altogether |
| Hook | 5 mm (H/8) |
| Pieces | 2: the square and its buckle |
| Time | about 2–3 hours |
| Skill | intermediate: joined square rounds, short color changes and a sewn appliqué |
Cotton and colors for the Santa belt square
I prefer smooth cotton for this square: the black belt has a clean edge, and the gold stitches keep their little frame shape. Choose all three colors from the same yarn range so the buckle and the square have a similar thickness.
- Yarn: worsted #4, 100% cotton, such as Lily Sugar’n Cream Original. The solid colors are about 120 yd (109 m) per 2.5 oz (71 g) ball. Allow about 30 yd red, 12 yd black and 5 yd gold. The black allowance includes the tails from its short sections.
- Hook: 5 mm (H/8) for both pieces, as a starting point.
- Small things: a tapestry needle, scissors, five stitch markers, a measuring tape, rustproof pins and a blocking mat or towel.
Tension. Use 3 sc per inch (12 sc per 4 in / 10 cm) as the stitch-gauge reference. Make a small flat sc swatch first, wet it and let it dry flat before measuring. The square's approximate size is 6 in (15 cm); measure the finished motif before matching it to other squares. Row height and the corner chains affect its final width too.
Stitches, in US terms: MR = magic ring; ch = chain; sc = single crochet; sl st = slip stitch; st = stitch; sp = space. R means round. A color named before a group applies to every stitch in that group.
This is a solid, single-crochet granny-style square, worked in joined rounds with the same face toward you. The beginning ch 1 and joining slip stitch do not count. The four corner ch-1 spaces are listed separately from the sc count. Mark the first sc and move that marker up each round.
The pattern — a red Christmas square with a black belt
Square: black and red cotton, 5 mm hook. Make 1. The magic ring is the center of the buckle opening. Work into both loops throughout.
The black center
- R1: In black, MR, (sc, ch 1) × 4 in the ring. Sl st to the first sc. (4 sc)
Pull the ring closed gently. There are four sc and four corner spaces. Put a marker in each corner space and call them A, B, C and D, starting with the first space after your beginning stitch and following the working direction. Keep those corner letters as the square grows.
Before R2, sl st into corner A. Ch 1; it does not count.
- R2: (Sc, ch 1, sc) in corner A, sc in the next st; (sc, ch 1, sc) in corner B, sc in the next st; (sc, ch 1, sc) in corner C, sc in the next st; (sc, ch 1, sc) in corner D, sc in the last st. Sl st to the first sc. (12 sc)
Move the corner markers into the new ch-1 spaces. Fasten off black with a 6 in (15 cm) tail. Weave both black ends into the back of the center, changing direction once.
Getting ready for the red and black rounds
The edge from A to B and the opposite edge from C to D will stay red. The black belt extends through the middle of edges B to C and D to A. All four corner groups are red.
For each of R3–R8, prepare two black lengths of 24 in (60 cm). Each length makes one three-stitch black section. Leave a 6 in tail when you introduce it, then cut it after its third sc with another 6 in tail for weaving in.
Changing color: finish the sc just before a black section by drawing black through its last two loops. Work the three black sc, finishing the third with red. Keep red attached and lay it along the tops of those three base stitches; crochet over it with black. Let that carried red strand sit loosely inside the stitches.
Tip. Spread the three black stitches gently before you pick up red again. If the carried strand pulls the belt into a little pinch, give it more slack before continuing.
Join red in corner A after R2. Ch 1. In each line below, A corner means (sc, ch 1, sc) into corner A. Follow the stitches from A toward B, C, D and back to A, then join to the first sc. Before the following round, sl st into corner A and ch 1. Move the four corner markers up as you go.
The word corner on its own means (sc, ch 1, sc) in the next marked corner space, always in red. Ordinary sc go into the next stitches, one per stitch. Work the opening A corner once on every round. It is included in each stated count.
- R3: A corner, red 3 sc, corner; black 3 sc, corner; red 3 sc, corner; black 3 sc. Join in red. (20 sc)
- R4: A corner, red 5 sc, corner; red sc, black 3 sc, red sc, corner; red 5 sc, corner; red sc, black 3 sc, red sc. Join. (28 sc)
- R5: A corner, red 7 sc, corner; red 2 sc, black 3 sc, red 2 sc, corner; red 7 sc, corner; red 2 sc, black 3 sc, red 2 sc. Join. (36 sc)
- R6: A corner, red 9 sc, corner; red 3 sc, black 3 sc, red 3 sc, corner; red 9 sc, corner; red 3 sc, black 3 sc, red 3 sc. Join. (44 sc)
- R7: A corner, red 11 sc, corner; red 4 sc, black 3 sc, red 4 sc, corner; red 11 sc, corner; red 4 sc, black 3 sc, red 4 sc. Join. (52 sc)
- R8: A corner, red 13 sc, corner; red 5 sc, black 3 sc, red 5 sc, corner; red 13 sc, corner; red 5 sc, black 3 sc, red 5 sc. Join. (60 sc)
At the end of R3, the final black stitch sits just before the first red sc of the round. Finish that black stitch with red, cut black, then join with red. On R4–R8, finish each three-stitch black section with red and continue the remaining red sc along that side.
Weave each black tail into the backs of its own black stitches, passing back through a different strand to secure it. Keep the red strand inside the stitches while you weave. Look across the middle: the black stitches should make one straight belt.
The narrow red border
Continue with red. Sl st into corner A and ch 1.
- R9: A corner, red 15 sc, corner; red 15 sc, corner; red 15 sc, corner; red 15 sc. Join. (68 sc)
There are 17 sc between each pair of corner spaces, with four ch-1 corner spaces. Fasten off with a 6 in (15 cm) tail and weave it into the back. Remove the markers; you can reuse four of them for the buckle. Turn the square so the black stripe runs horizontally, with a broad red section above and below it.
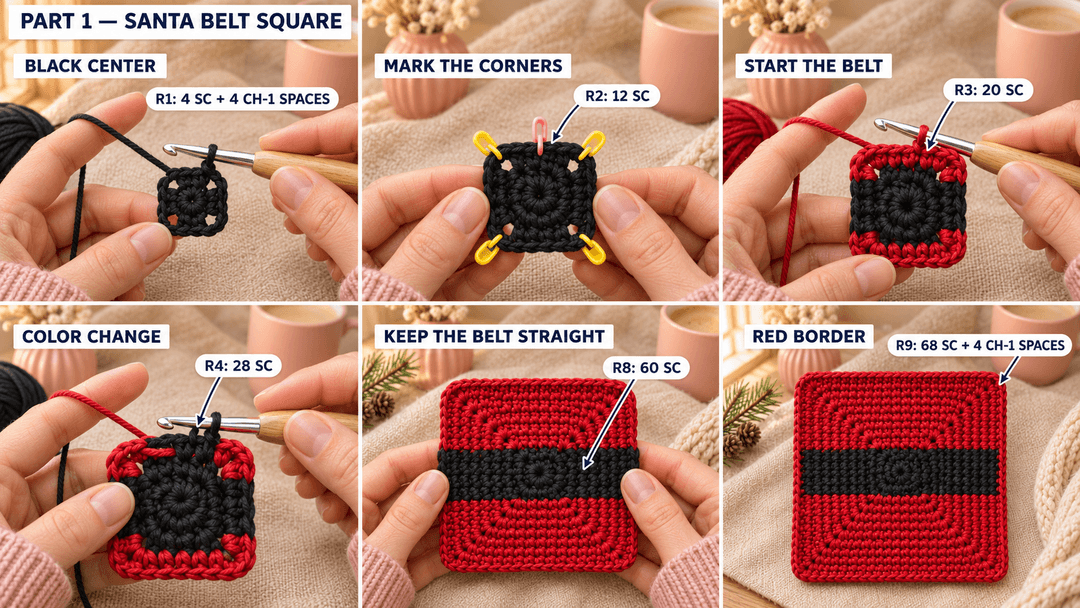
The collages illustrate the main stages; follow the written instructions for stitch counts.
Crocheting the raised gold belt buckle
Buckle: gold cotton, 5 mm hook. Make 1. This is a small open frame, worked around a chain ring.
Ch 16 loosely. Check that the chain is straight, then sl st into the first chain to form a ring. Ch 1; it does not count. For the next round, start in that same first chain and work through one loop of each chain.
- R1: (Sc in each of the next 3 ch, 3 sc in the next ch) × 4. Sl st to the first sc. (24 sc)
The middle sc of each three-sc group is a corner. Mark those four stitches, then gently ease the ring into a square with your fingers. The corners fall at stitches 5, 11, 17 and 23, counting from the first sc.
Fasten off with an 18 in (45 cm) sewing tail at the outer edge. Weave the short starting tail into the back of the frame. The buckle should be about 2 in (5 cm) across at the stated stitch gauge, with an open middle.
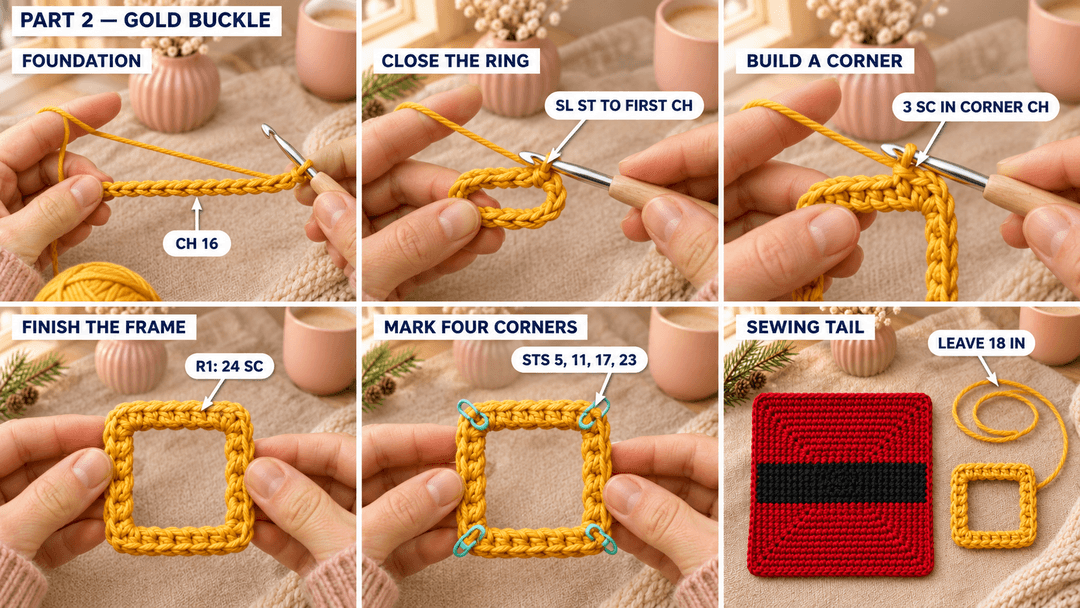
Centering the buckle on Santa’s belt
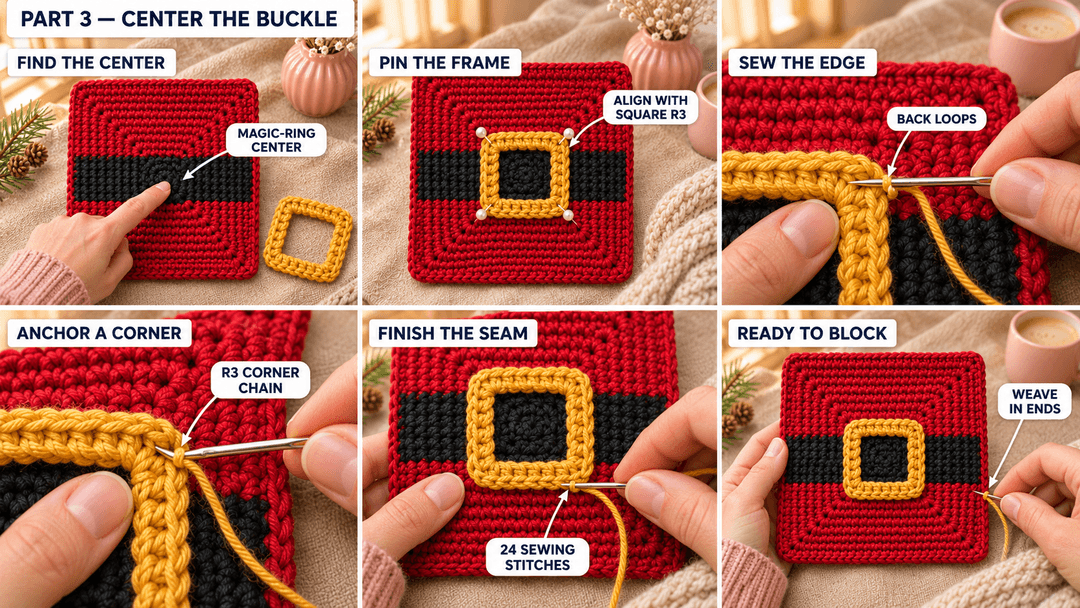
Lay the square face up with the belt horizontal. Set the buckle over the magic-ring center, with its edges parallel to the square's edges. The black center should show through the opening like the middle of a real belt buckle.
- Pin the corners. Place the four marked buckle corners over the four R3 corner chains of the square. Keep the buckle flat and the black opening centered.
- Sew around the frame. With the gold tail, catch the back loop of each buckle sc and a small strand from the corresponding stitch beneath it on the square's R3. Between each pair of marked corners, sew through the five intervening buckle stitches and the five sc along that R3 edge. At each corner, anchor the marked buckle sc into the yarn of the corner chain. Work 24 small sewing stitches around the frame.
- Finish on the back. Take the tail through the back of nearby stitches, reverse direction and weave it in. Remove the pins and markers.
Tip. Sew with the square resting flat on the table. Pull just until the thread disappears behind the buckle. If the red square gathers around it, loosen the last few sewing stitches.
I leave the gold front loops free so the buckle keeps its little raised edge. Give the square a light stretch across the belt to settle the carried red strands before blocking.
Blocking the Christmas square and keeping its corners straight
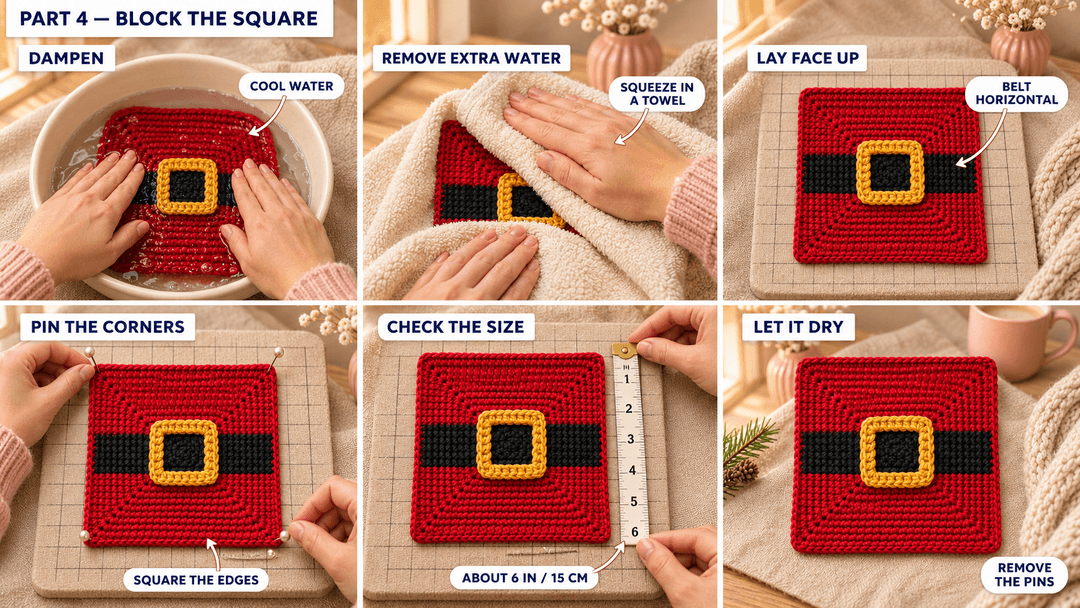
Dampen the cotton in cool water, gently squeeze it in a towel and lay it face up on a blocking mat. Smooth the four edges with your fingers, then pin the corners into a square. Keep the gold frame on top, where it can dry without being flattened.
The expected size is about 6 in (15 cm), but follow the relaxed fabric: blocking should straighten the edges rather than force them wider. Let it dry completely before taking out the pins. If you are making several squares, block them to the same comfortable size before joining.
Wash finished pieces according to the yarn label. For the first wash, wash the square separately so you can check whether the red dye runs into the gold.
A Santa square for your Christmas projects
I would put this one where the buckle can stay on show: on the front of a Christmas cushion or in the middle of a patchwork wall hanging. Keep the belts facing the same way when you lay out several squares. A row of little Santa jackets is especially cheerful along the bottom of a blanket.
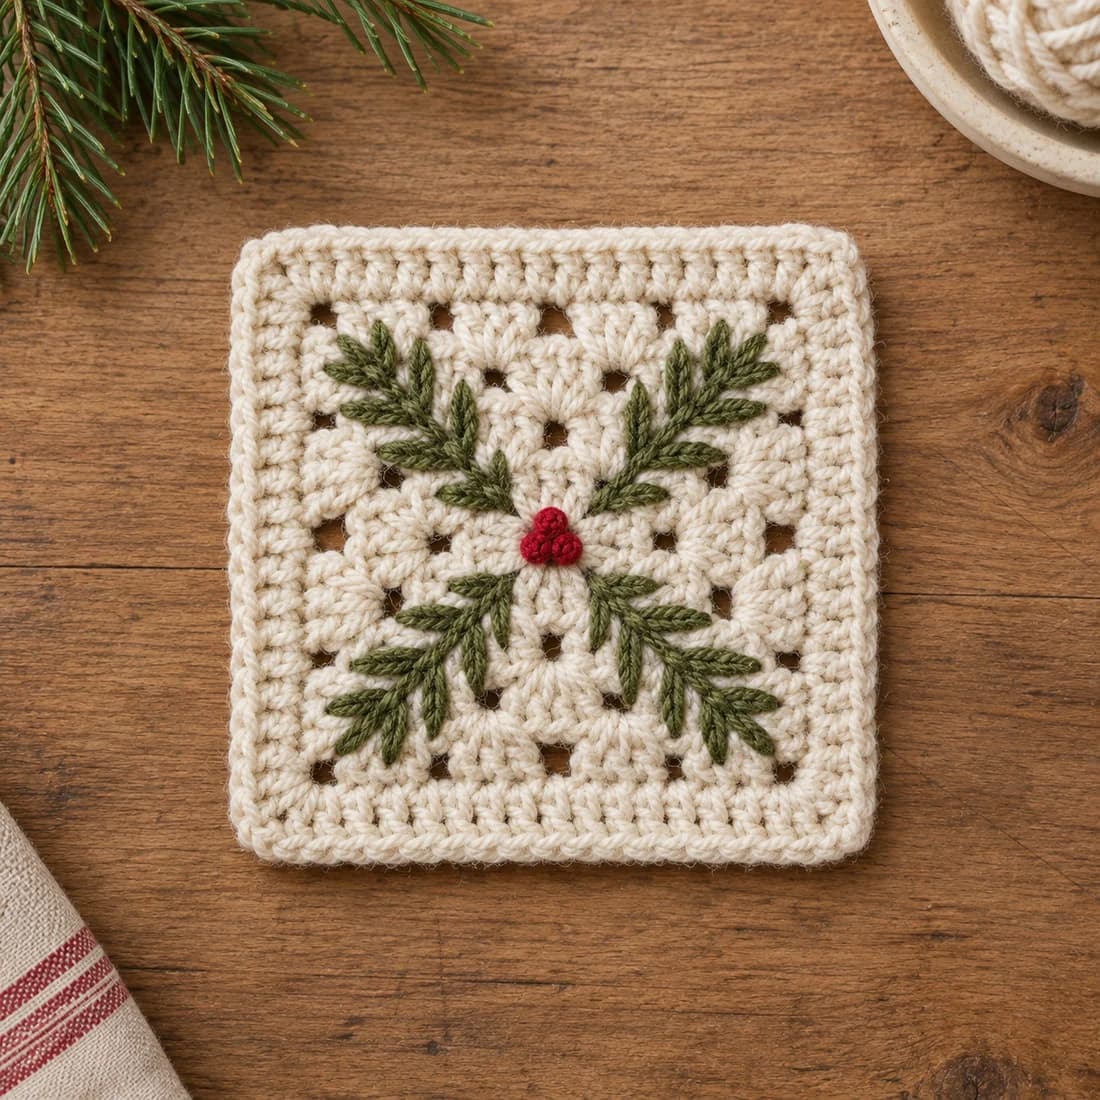
For a quieter square beside it, my Christmas square with embroidered pine sprigs brings in cream and green. Make one of each first and compare their blocked sizes before planning the joins.
UK terms: US sc = UK dc; US sl st = UK slip stitch.
Made a Santa belt square? Tag #wavodecrochet on Pinterest so I can see your Christmas colors.
Pattern by Clara Hartwell for Wavode. Questions? Email me at support@wavode.com.