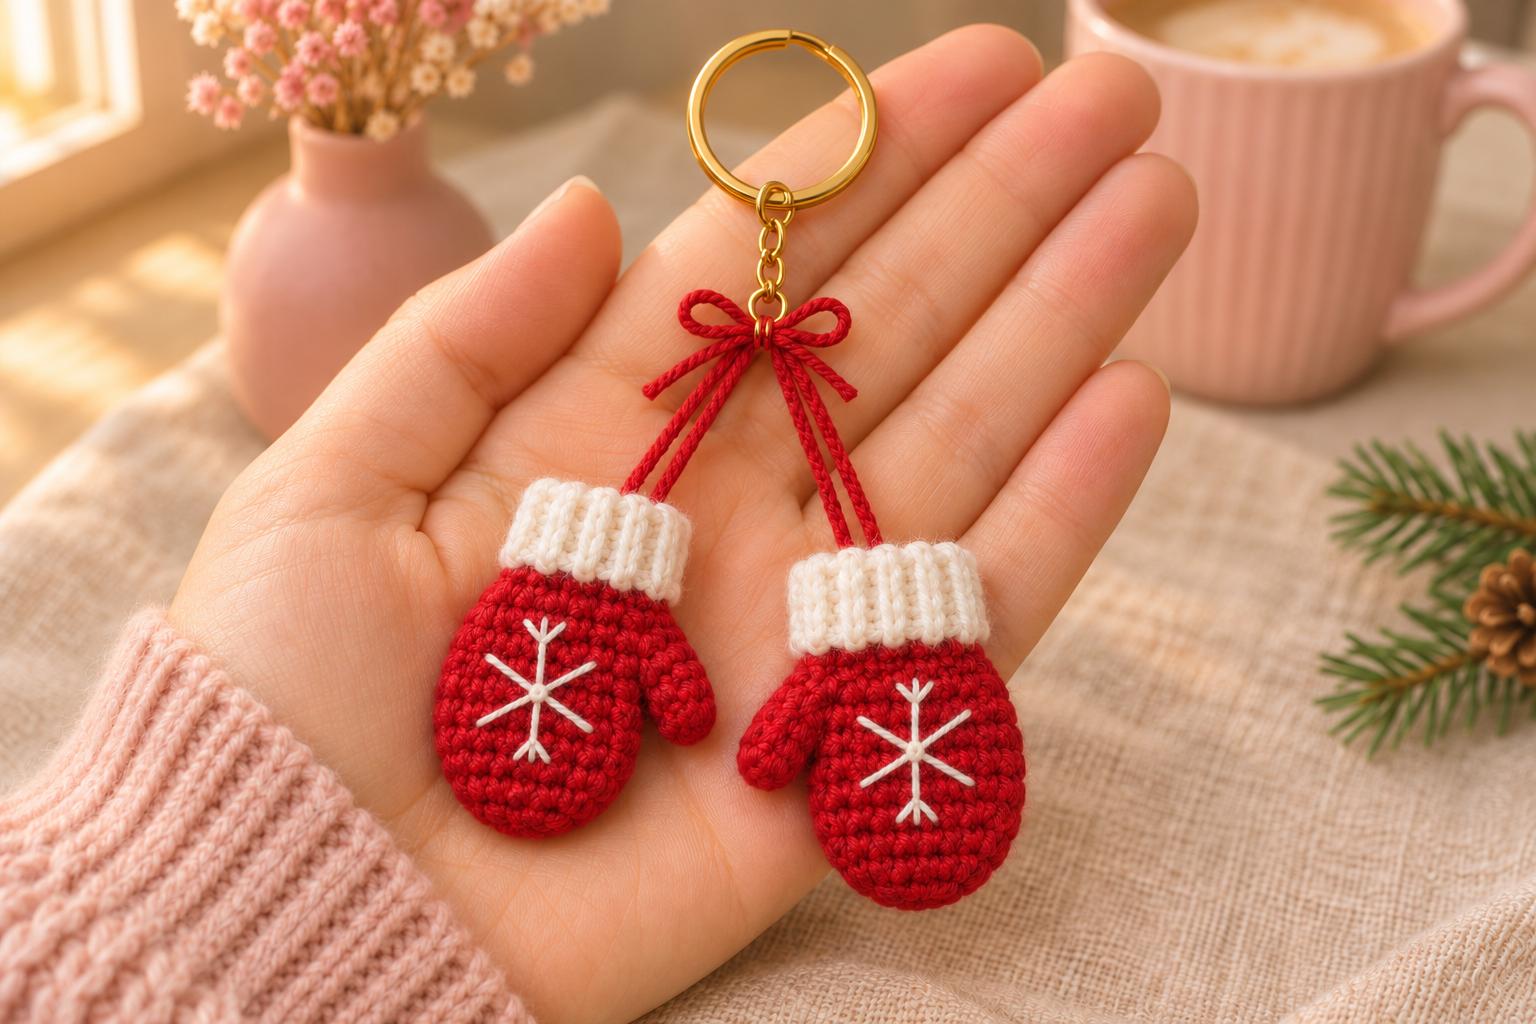
Mini Crochet Roll Cake

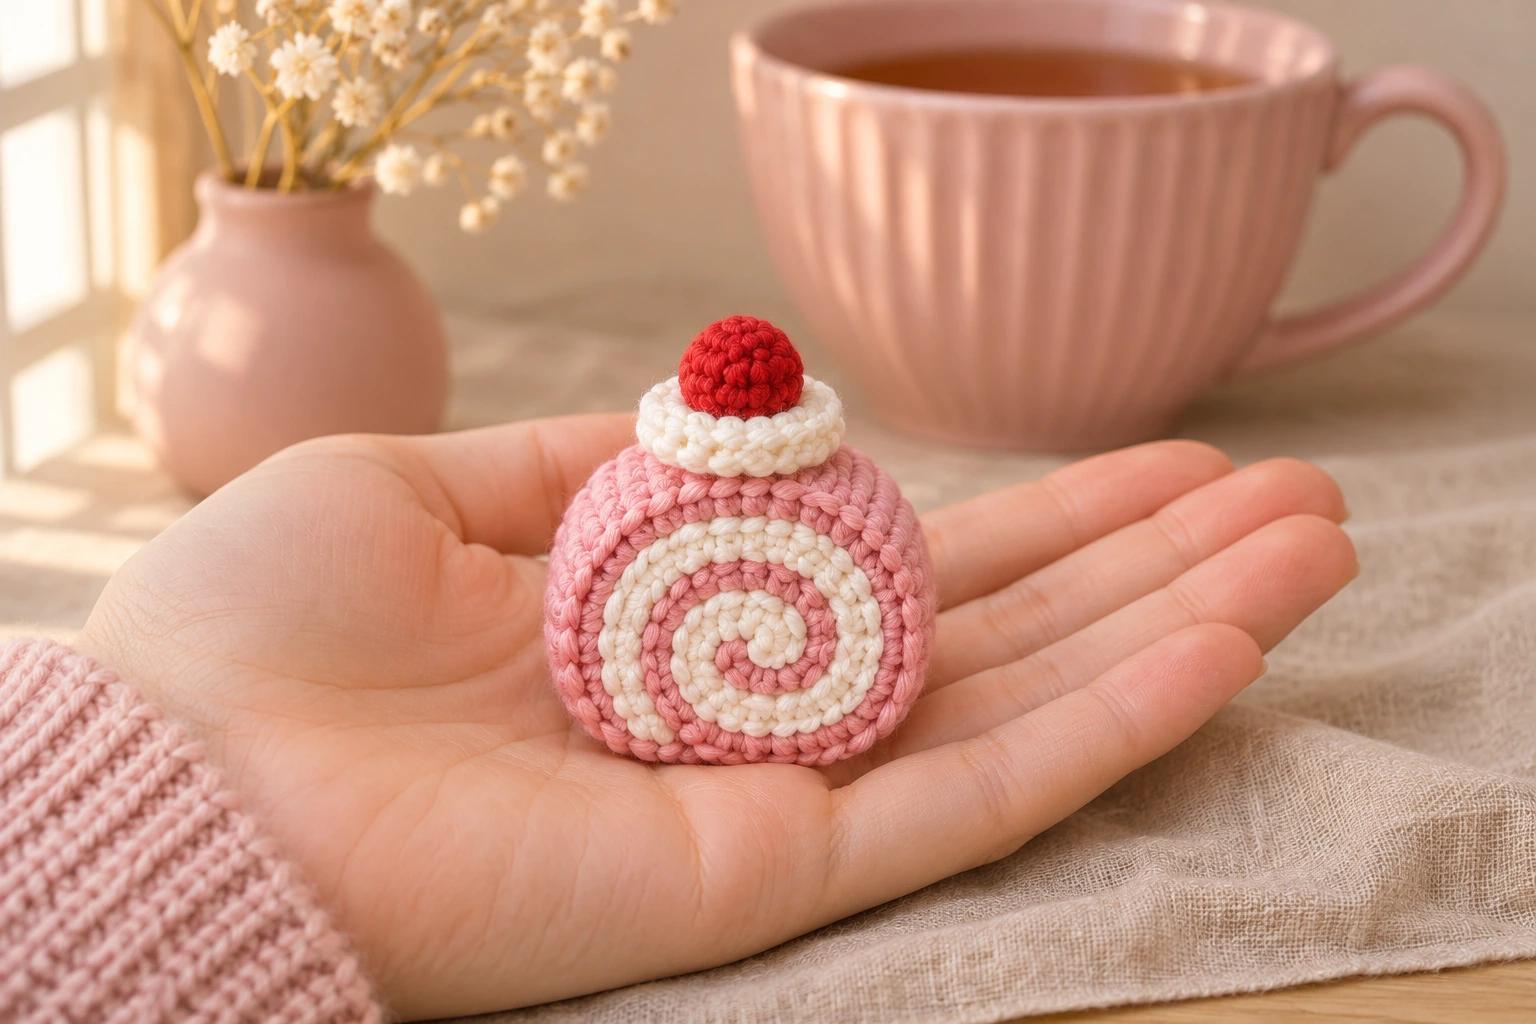
I always reach for the slice with the best swirl. This mini crochet roll cake is about 1½ in (3.8 cm) across the spiral, with pink cake around a ribbon of white filling and a red cherry on top.
I leave a little pink showing at both ends of the filling. The first bare end tucks into the middle, and the other wraps around the outside like the edge of a cake slice.
| At a glance | |
|---|---|
| Finished size | about 1½ in (3.8 cm) across the spiral, estimated |
| Yarn | Sport #2 cotton-acrylic in pink, white and red |
| Hook | 3 mm throughout |
| Pieces | 4 for one cake |
| Time | varies with rolling and sewing |
| Skill | easy: flat rows, a magic ring, a small bobble and hand sewing |
Yarn and tools for the mini roll cake
- Yarn — Lilthings Milk Cotton, Sport #2, 60% cotton and 40% acrylic, 106 m (116 yd) per 50 g. Set aside about 6 yd of pink (shade 10), 5 yd of white and 1 yd of red.
- Hook and tools — 3 mm crochet hook, a removable marker, a tapestry needle, sewing pins and scissors.
Tension. I use about 6 sc per inch as a reference for this sport yarn and hook. Roll the strips snugly, with the white edge still easy to see. The width will vary with how tightly you roll them.
Stitches (US terms). MR = magic ring, ch = chain, dc = double crochet, hdc = half double crochet, sl st = slip stitch. Sc means single crochet in the tension reference. Work the strips back and forth. The ch 2 at the start of Row 2 is for height. The cream is one joined round, and its starting chain is for height. The numbers in parentheses give the stitch or motif count.
The pattern — two strips for the cake swirl
Pink cake strip
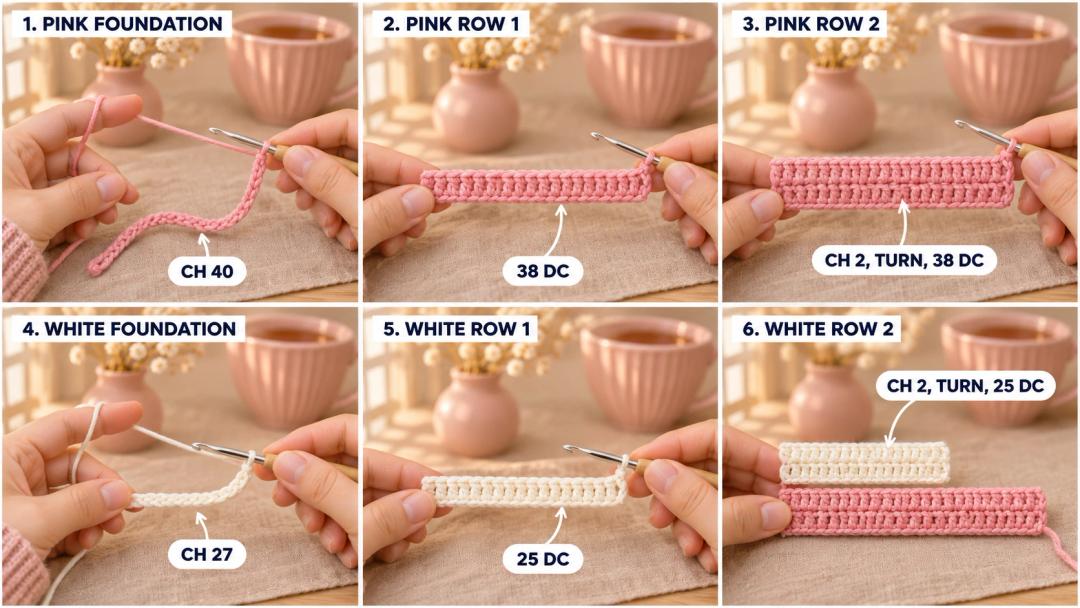
Cake strip (pink, 3 mm hook, Make 1). Mark the first dc of Row 1, so it is easy to find at the far end when you turn.
- Row 1: Ch 40, dc in the 3rd ch from the hook and in each ch across. (38)
- Row 2: Ch 2, turn, dc across. (38)
Start in the first dc after turning and finish in the marked dc. Ch 1 and fasten off with an 8 in (20 cm) working tail at the end of Row 2. Weave in the starting end. The long tail stays at the end that will wrap around the outside.
White filling strip
Filling strip (white, 3 mm hook, Make 1). Mark the first dc of Row 1 as before.
- Row 1: Ch 27, dc in the 3rd ch from the hook and in each ch across. (25)
- Row 2: Ch 2, turn, dc across. (25)
Start and end Row 2 as you did for the pink strip. Ch 1 and fasten off. Weave both ends into the back of the strip. The top loops of Row 2 will show as the white line on the front of the cake.
Making the cream dollop and cherry
White cream dollop
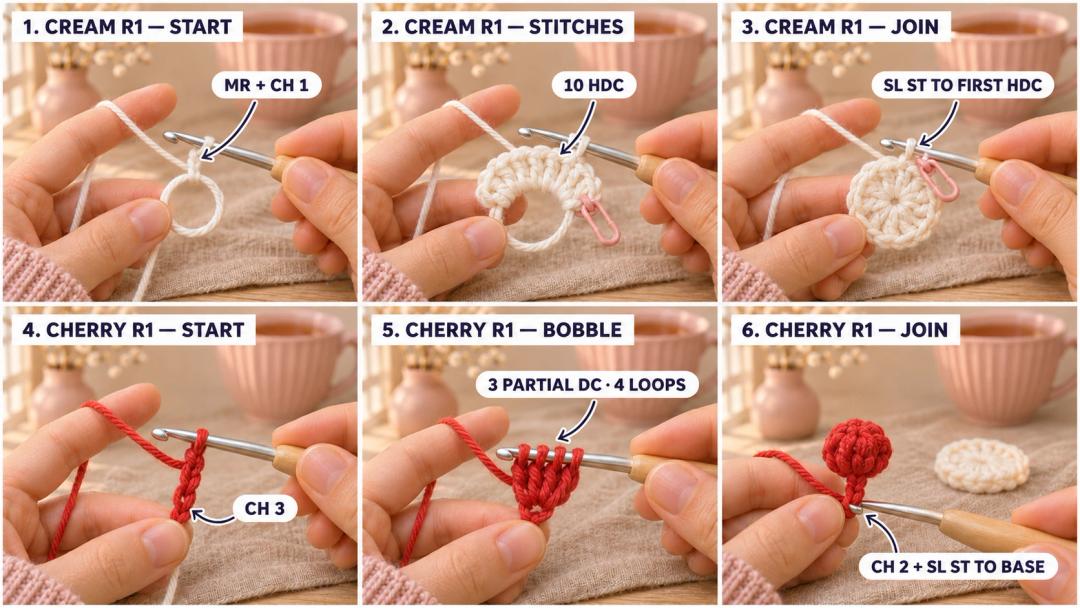
Cream (white, 3 mm hook, Make 1). The magic ring sits in the center of the dollop.
- R1: MR, ch 1, 10 hdc in the ring. (10)
Mark the first hdc as you make it. Pull the starting tail to close the ring, then sl st into the marked hdc. Ch 1 and fasten off with a 6 in (15 cm) working tail at the rim. Weave in the starting tail on the underside.
Red cherry bobble
Cherry (red, 3 mm hook, Make 1). Work into the first chain you make, at the bottom of the starting chain.
- R1: Ch 3, work a 3-dc bobble in the first ch, ch 2, sl st into that same ch. (1 bobble)
For the bobble, yarn over, insert the hook into the base chain and pull up a loop. Yarn over and pull through two loops. Do that three times in the same chain, keeping the remaining loops on the hook. Yarn over and pull through all four loops. The slip stitch brings the two sides of the cherry together at the base.
Ch 1 and fasten off with a 6 in (15 cm) working tail at that base. Weave in the starting tail underneath.
Rolling and sewing the cake together
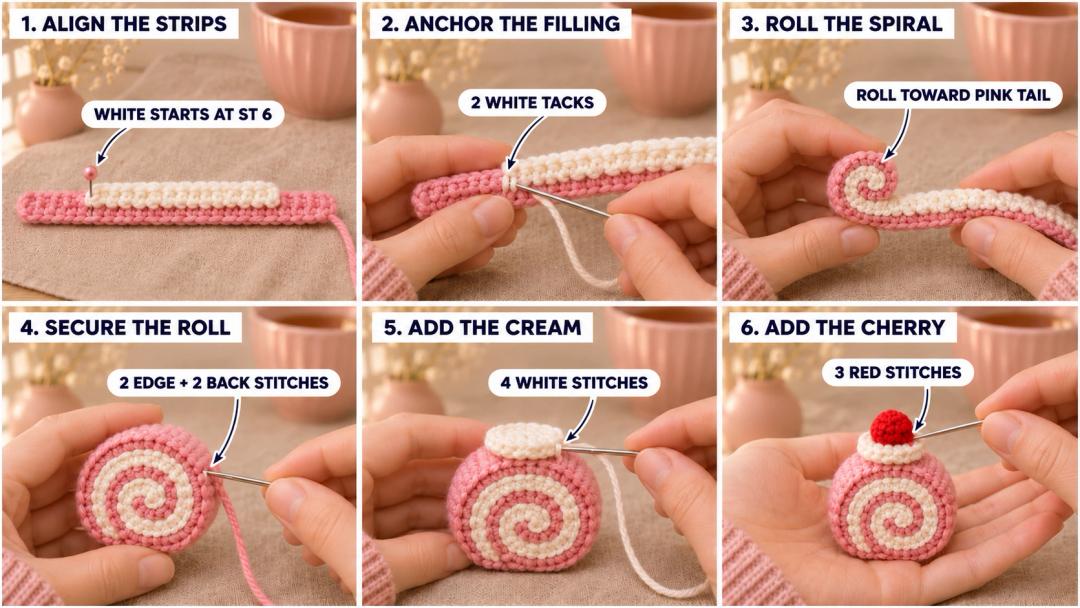
- Line up the swirl. Put the pink strip flat with its long tail to your right. The top edges of Row 2 will face the front of the slice, so line them up with each other. Lay the white strip over the pink, starting at stitch 6 from the left end of the pink Row 2. Pin the first white stitch there. Sew the left end of the white strip to the pink with two small white tacks through the layers near the back edge.
- Roll toward the long tail. Curl the five bare pink stitches at the left inward to start the center. Roll the two strips together toward the right, white on the inside. Keep the front edges even as the white ribbon curls around the center. Pin the loose pink end against the outside.
- Secure the roll. With the long pink tail, sew the pink end to the layer underneath with one small stitch through each of its two row ends. At the back, take two more stitches through neighboring turns of the spiral to hold them together. Hide the tail between the layers.
- Add the toppings. Face the spiral toward you and turn the roll until the pink seam is at the bottom. Sit the cream on top, right between the front swirl and the back edge. With its white tail, take four small stitches evenly around the rim into the pink cake. Place the cherry base over the cream's magic ring and sew it down with three small red stitches. Hide both tails inside the roll.
Tip. If the white edge disappears as you roll, loosen the last turn and nudge it forward with your thumb before pinning the pink end.
UK terms — US dc = UK tr, US hdc = UK htr.
I like setting the little slice beside a teacup, spiral facing out and the cherry right on top. Made a mini roll cake? Tag #wavodecrochet on Pinterest so I can see your swirl.