Crochet Bookmark Pattern PDF

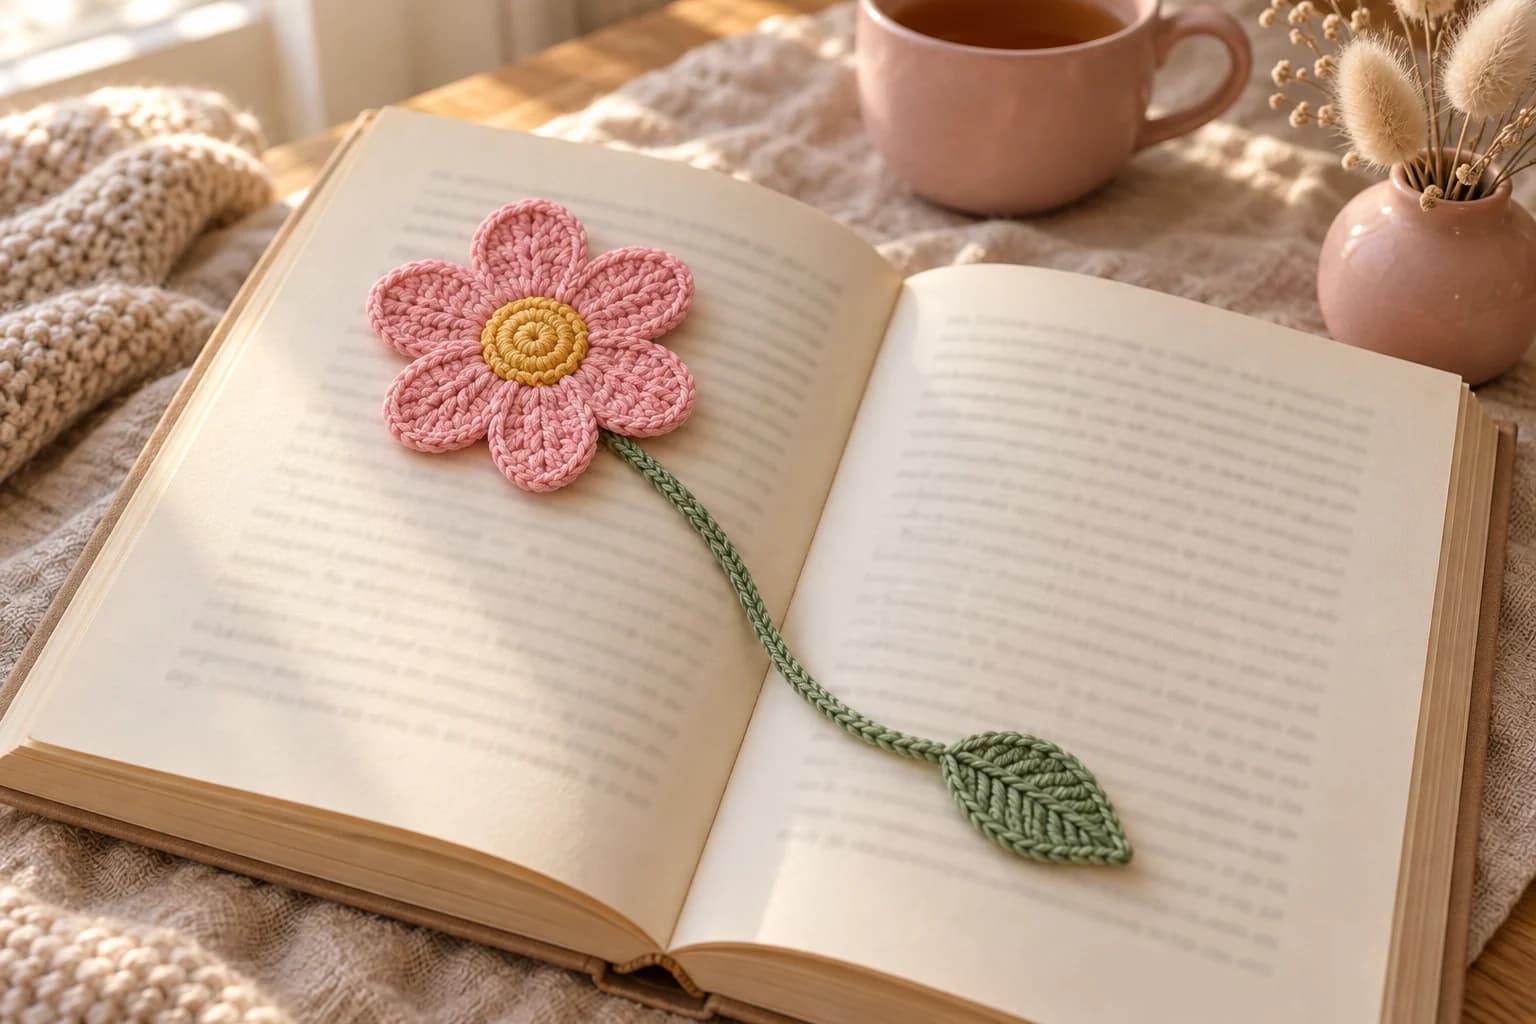
This crochet bookmark is a flat pink flower with a yellow center, a long green stem and a little leaf, and the whole pattern comes as a free printable PDF. The flower peeks over the top of your book while the stem and leaf hold your page. It takes about 18 yards of DK cotton in three colors (perfect for scraps), a 3 mm hook and under an hour.
Key Takeaways
- Two pieces, one seam: the flower, then the leaf and stem worked as one piece that ends with both tails right where they're sewn on.
- The stem doesn't stretch. It's single crochet worked into the back bumps of a chain, so it stays the same length after months in a book.
- Size it to your book: about 6 stitches per inch, so add or remove chains for a paperback or a big hardcover.
- Free printable PDF of the full pattern at the end of the materials list.
Why I love this flower bookmark
A bookmark is the one handmade gift that gets used every single day. It's small enough to finish during an evening of TV, it uses up the bits of cotton left over from bigger projects, and it slips into a card envelope. I tuck one into every book I give away now.
What makes this one work as a real bookmark, not just a cute flower on a string, is the stem. It's a firm little cord that lies flat between the pages and doesn't stretch out of shape. The flower is flat too, with six rounded petals and a neat outline round, so it doesn't make a lump when the book is closed on the stem.
Skill level. Easy. You need a magic ring, chains, single crochet, half double, double and treble crochet, and joining rounds with a slip stitch. The only new trick for some readers is working into the back bump of a chain, and I explain it in Part 2.
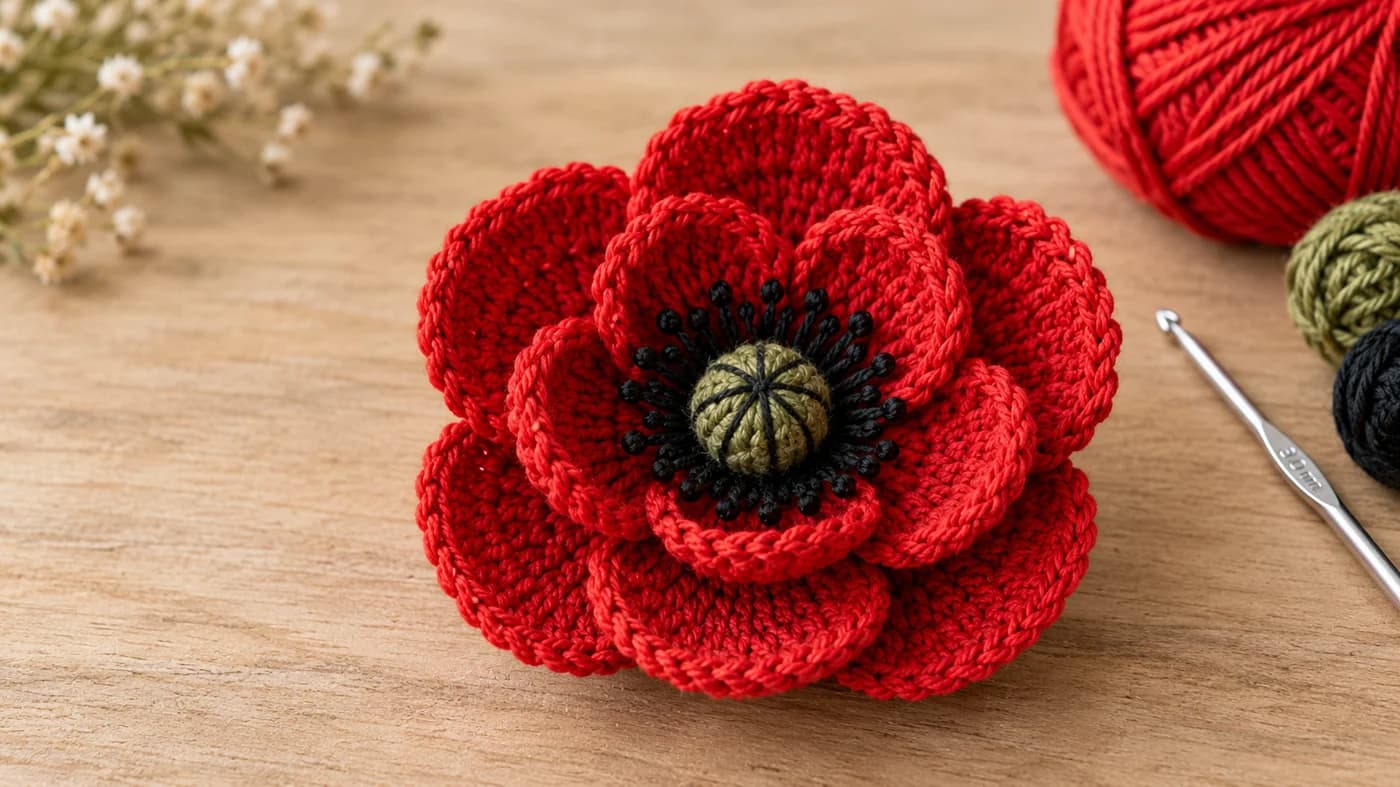
If you love little flowers, my crochet poppy flower uses the same kind of layered petals in bright red.
What you'll need
Yarn (DK #3 cotton, such as Paintbox Yarns Cotton DK or any smooth DK cotton)
| Color | Used for | Amount |
|---|---|---|
| Yellow | Flower center | about 2 yd |
| Pink | Petals and outline | about 10 yd |
| Green | Leaf and stem | about 6 yd |
I worked these amounts out from the stitch count, with a margin for tails. They're estimates, so a few long scraps of each color are enough. Cotton is the best choice here: it's smooth, it holds a crisp outline, and it doesn't shed onto the pages like acrylic fuzz can.
Hook and notions
- 3 mm hook (between US C/2 and D/3; a 3.25 mm D/3 works too). It's a little smaller than the ball band suggests, so the stitches are tight and the flower stays flat.
- A tapestry needle, scissors and a stitch marker.
- Optional: spray starch, if you want the petals extra crisp. Skip it if you don't have any.
Get the free printable PDF. The whole pattern, with the step photos and a stem-length chart for your book size, is on a few clean printable pages: download the crochet flower bookmark PDF. Print it, tick the rounds off as you go and keep it in your project bag.
Gauge and finished size
Gauge isn't critical, but tension is: keep it firm so the flower lies flat. With DK cotton and a 3 mm hook, the yellow center is about ¾ in (2 cm) across, and the finished flower is about 2¼ in (5.5 cm) across. The stem makes about 6 stitches per inch, so the 40-stitch stem is about 6¾ in (17 cm) long, and the leaf adds about 1½ in (4 cm). These are estimates: measure your first one against your book.
Abbreviations (US crochet terms)
- MR: magic ring
- ch: chain
- sl st: slip stitch
- sc: single crochet
- hdc: half double crochet
- dc: double crochet
- tr: treble crochet
- inc: 2 sc in the same st
- sk: skip
- sp: space
- st(s): stitch(es)
- R: round
All the flower rounds are joined rounds: close each one with a sl st in the first stitch. When a round starts with ch 1, that ch 1 doesn't count as a stitch.
The pattern, step by step
Part 1: The flower (yellow and pink)
The magic ring is the center of the flower. The side facing you as you work is the front.
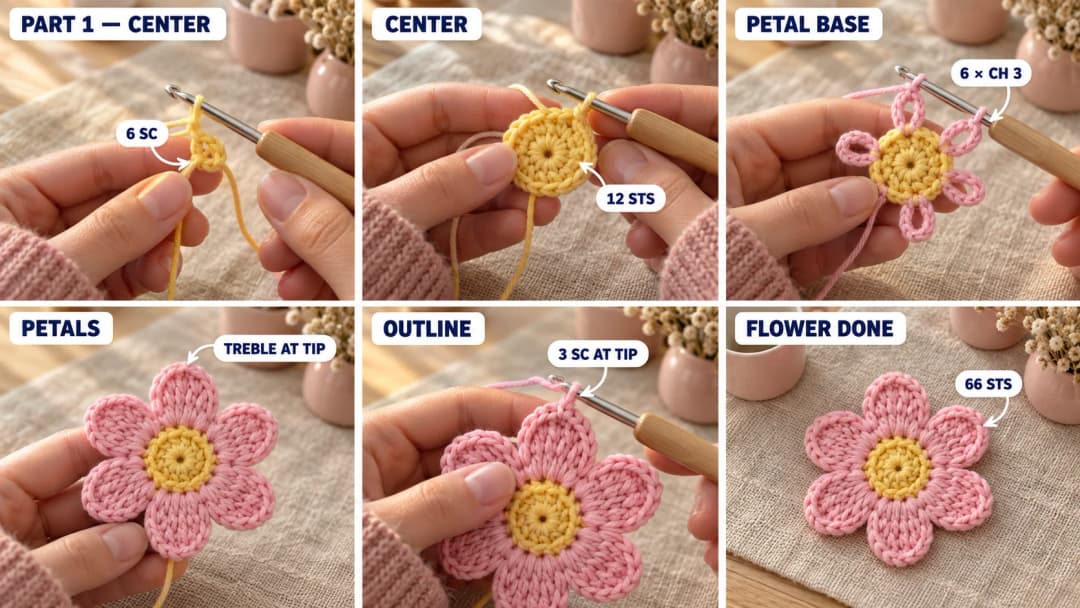
Center (yellow).
- R1: 6 sc in a MR. Pull the ring closed and sl st in the first sc. (6)
- R2: ch 1, inc in each st around. Sl st in the first sc. (12)
Fasten off yellow and pull the starting tail tight so the ring has no hole. Leave both yellow tails on the back for now.
Petal base (pink). Join pink with a sl st in any st of R2.
- R3: ch 1. Starting in the same st as the join, (sc in the next st, ch 3, sk the next st) 6 times in total. Sl st in the first sc. (6 sc and 6 ch-3 sps)
Each ch-3 space is the base of one petal, and the 6 sc are the anchors between the petals.
Petals (pink).
- R4: sl st in the first ch-3 sp. In that sp, work (sc, hdc, 2 dc, tr, 2 dc, hdc, sc). Repeat the same group in each ch-3 sp, 6 times in total. Sl st in the first sc. (6 petals of 9 sts, 54 sts)
The treble at the middle of each group makes the petal long and rounded, not a short shell. The last sc of one petal and the first sc of the next sit side by side, right over the anchor sc of R3.
Outline (pink). This round gives each petal its neat raised edge and deepens the dip between petals.
- R5: don't ch 1. Working into the sts of R4 and starting in the sc you joined into, (sl st in the sc, sc in the hdc, sc in each of the next 2 dc, 3 sc in the tr, sc in each of the next 2 dc, sc in the hdc, sl st in the last sc of the petal). Work this 6 times in total, once around each petal. Sl st in the first sl st. (66 sts: 11 per petal)
Fasten off. Weave the pink and yellow tails into the back of the flower, going through the backs of the stitches only, so nothing shows on the front. Press the flower flat with your fingers, petal by petal. If the petals curl, see the troubleshooting section.
Part 2: The leaf and stem (green, one piece)
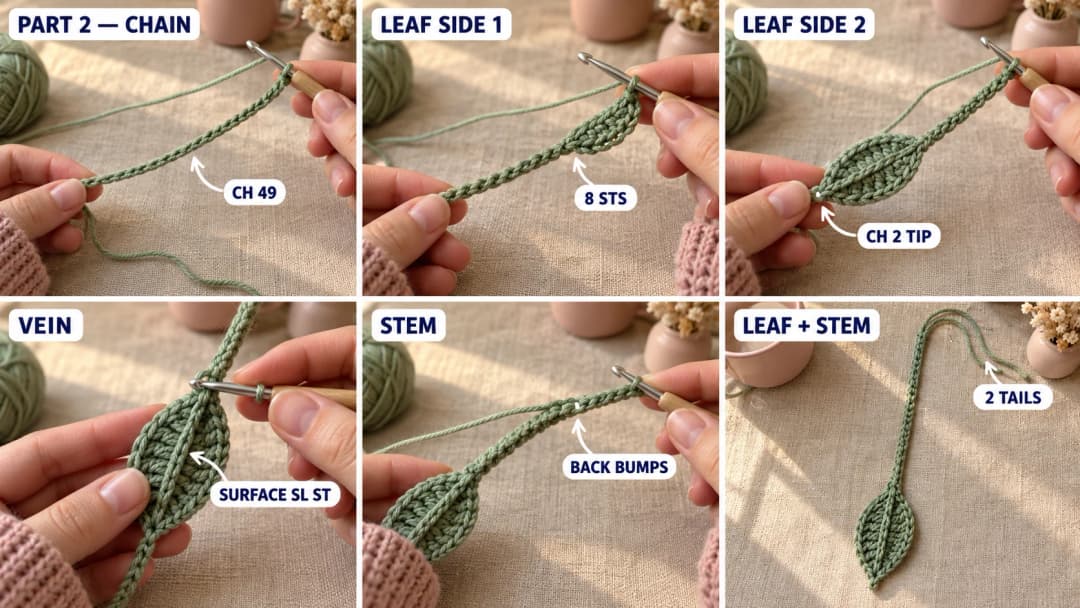
The leaf and stem are one piece. You start at the top of the stem, chain down to the leaf, make the leaf, then work back up the stem. Both tails end up at the top of the stem, which is the end you sew to the flower.
Foundation. Leave an 8-in (20 cm) starting tail. Ch 49. The first 40 chains are the stem; the last 9 are for the leaf. (To change the stem length, see the chart below. Only the 40 changes: the leaf always uses the last 9 chains.)
Leaf, side 1. Starting in the 2nd ch from the hook (this end is the tip of the leaf) and working toward the stem:
- sc in the next ch, hdc in the next ch, dc in each of the next 3 chs, hdc in the next ch, sc in each of the last 2 leaf chs. (8 sts)
The last sc sits in the 41st chain, right next to the stem: that's the base of the leaf.
Leaf, side 2. Turn the leaf so the free loops of the chain are on top, and work back toward the tip, in the free loop of the same chs:
- sc in each of the first 2 chs, hdc in the next ch, dc in each of the next 3 chs, hdc in the next ch, sc in the next ch. (8 sts)
Tip. ch 2, sl st in the first sc of side 1. This makes a little point.
Vein. Now travel back to the base along the middle of the leaf with surface slip stitches. Hold the leaf right side up with the yarn underneath it. Insert the hook down through the leaf on the center line (the gap between the two sides, right along the foundation chain), yarn over underneath and pull a loop up through the leaf and through the loop on the hook. Work about 8 of these sl sts, evenly spaced, until you reach the base. They make a raised vein down the middle, like the one on a real leaf.
Stem. Without fastening off, work back up the stem:
- sc in the back bump of each of the 40 stem chs, back to the starting tail. (40 sc)
The back bump is the little ridge on the back of each chain. Working into it leaves the neat "V" of the chain on the outside, so the stem looks the same on both sides and doesn't stretch.
Fasten off, leaving an 8-in (20 cm) tail. You now have two green tails at the top of the stem, ready for sewing.
Stem length for your book. Measured from the edge of the flower to the tip of the leaf, the bookmark should be about 1 in (2.5 cm) shorter than the page, so the leaf stays inside the book and the flower sits just above the top edge. The 40-stitch stem fits a book about 8½ in tall.
| Book | Page height | Stem chains (the first number) | Total ch |
|---|---|---|---|
| Mass-market paperback | about 6¾ in (17 cm) | 30 | 39 |
| Trade paperback | about 8 in (20 cm) | 38 | 47 |
| Large paperback or small hardcover | about 8½ in (21.5 cm) | 40 | 49 |
| Standard hardcover | about 9½ in (24 cm) | 46 | 55 |
Every 6 chains add or remove about 1 in. If you change the count, the stem round has the same number of sc as the stem chains.
Part 3: Joining the flower and stem
- Place the stem. Lay the flower face down. Lay the top of the stem on the back of the flower so its end sits at the center, on the yellow, and the stem runs straight down between the two bottom petals. About ¾ in (2 cm) of stem lies on the flower.
- Sew it on. Thread one green tail on the needle. Whipstitch both edges of the stem to the back of the flower, from the center out to the edge of R3, catching only the backs of the stitches so nothing shows on the front. Make at least 10 stitches, going back over the seam a second time.
- Lock it. Thread the second tail and sew a few stitches across the end of the stem, through the yellow center. Tie the two tails together in a double knot on the back, then weave each one through the back of the flower in a different direction and trim.
This seam carries all the pulling when you take the bookmark out of the book, so make it firm. Give the flower a good tug when you're done: the stem shouldn't move.
Optional: block it. Pin the flower flat on an ironing board or a folded towel, mist it with water (or spray starch for crisper petals) and let it dry. It stays flat between the pages for much longer.
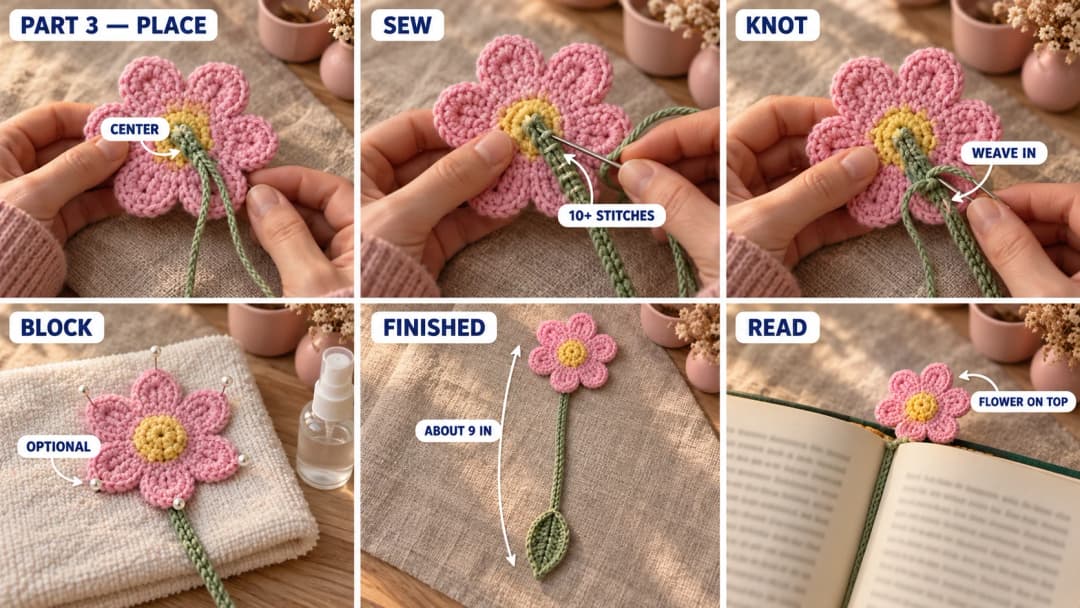
How to use it. Slide the stem and leaf between the pages, with the flower sitting above the top edge of the book. Don't close a heavy book with the flower itself inside: it's flat, but squashing it for weeks can bend the petals.
Make it yours — quick variations
| Variation | Change from the base pattern |
|---|---|
| Daisy | White petals and a yellow center. |
| Sunflower | Yellow petals and a brown center. |
| Lavender and sage | Lilac petals, a cream center and a soft sage stem. |
| Two leaves | Make a second leaf on its own: leave a 6-in starting tail, ch 9, then work the two leaf sides, the tip and the vein as above. Both tails end at the base: use them to sew it to the stem about 2 in above the first leaf. |
| Mini bookmark | Sport-weight cotton and a 2.5 mm hook, same counts. Measure the stem: it'll be shorter, so add chains. |
| Gift tag | Make a shorter stem (ch 20 + 9) and tie it around a jar or a gift with ribbon. |
Troubleshooting the three things that go wrong
The petals curl up like a cup
Your tension is a little tight on R4 compared to R5, or the hook is too small for your yarn. Press each petal flat and block the flower (see Part 3). If it still cups, go up to a 3.25 mm hook for R4 and R5 only.
The flower ruffles
There are too many stitches in the outline. Check that R4 has exactly 9 sts per petal, and that you work only 3 sc in each treble on R5, not more. If your yarn is thick for a DK, use 2 sc in the treble instead.
The stem twists into a spiral
A chain with sc in its back bumps sometimes twists a little, especially if the chains were tight. Make the foundation chain looser than your usual chain (or with a hook one size up), and steam or block the stem straight. A slight curve looks lovely in a book anyway.
Frequently asked questions
Is there a printable PDF of this crochet bookmark pattern? Yes. The whole pattern, the step photos and the stem-length chart are in a free printable PDF: download it here. No sign-up needed.
How long does it take? About 45 minutes to an hour: about 25 minutes for the flower, 15 minutes for the leaf and stem, and 10 minutes for sewing and weaving in the ends.
Can I use acrylic yarn? You can, but cotton is better for a bookmark. Acrylic is springier, so the flower is less flat, and some acrylics leave fuzz on the pages. If you use acrylic, choose a smooth, tightly twisted one.
Will it damage my books? No. The bookmark is flat and soft, with no metal parts. Keep the flower outside the book, so the pages close on the thin stem only.
Can I sell bookmarks made from this pattern? Yes, you're welcome to sell finished bookmarks made from this free pattern at markets, on Etsy or at a book fair. Please credit "Pattern by Wavode" in your listing and link back to this page. What you can't do is share or sell the PDF itself, or republish my photos as your own pattern.
Related patterns on Wavode
- Crochet poppy flower: a bright red poppy with a dark center.
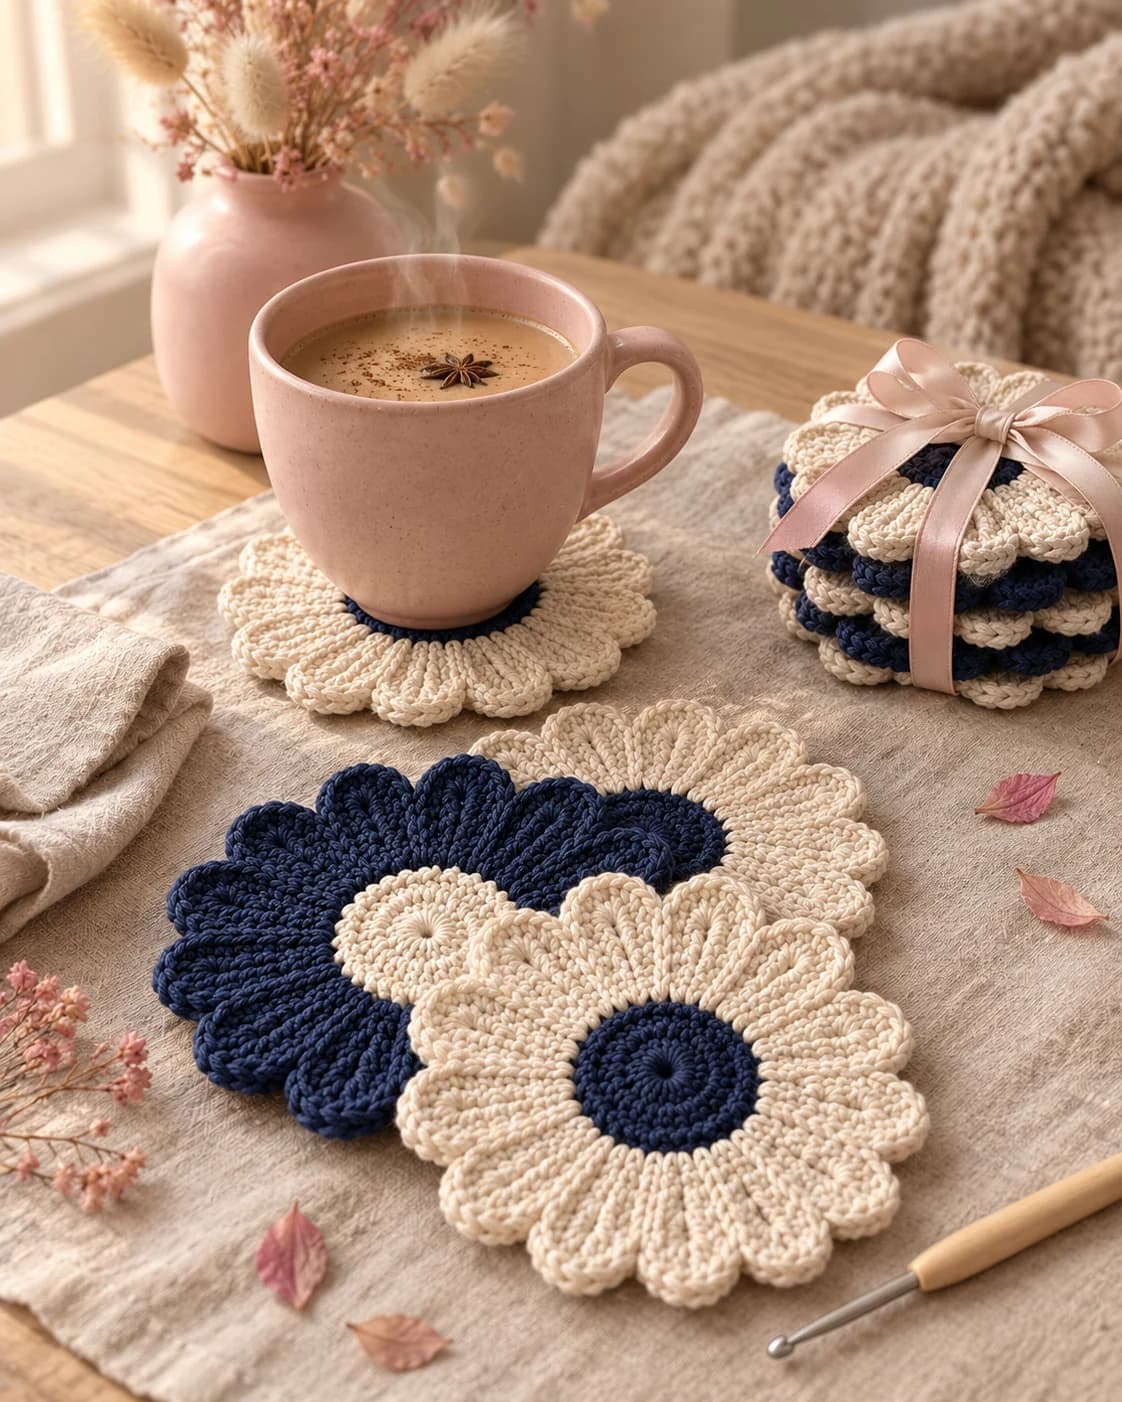
- Crochet daisy coaster: a flat daisy for your coffee mug, next to your book.
- Crochet flower bouquet bag charm: tiny flowers bundled on a key ring.
- Lily of the valley crochet bracelet: another quick little flower make.
Made a flower bookmark? Tag #wavodecrochet on Pinterest. I re-pin every finished make and credit the maker.
Pattern by Clara Hartwell for Wavode. Questions? Email me at support@wavode.com.