Crochet Marigold Flower Pot

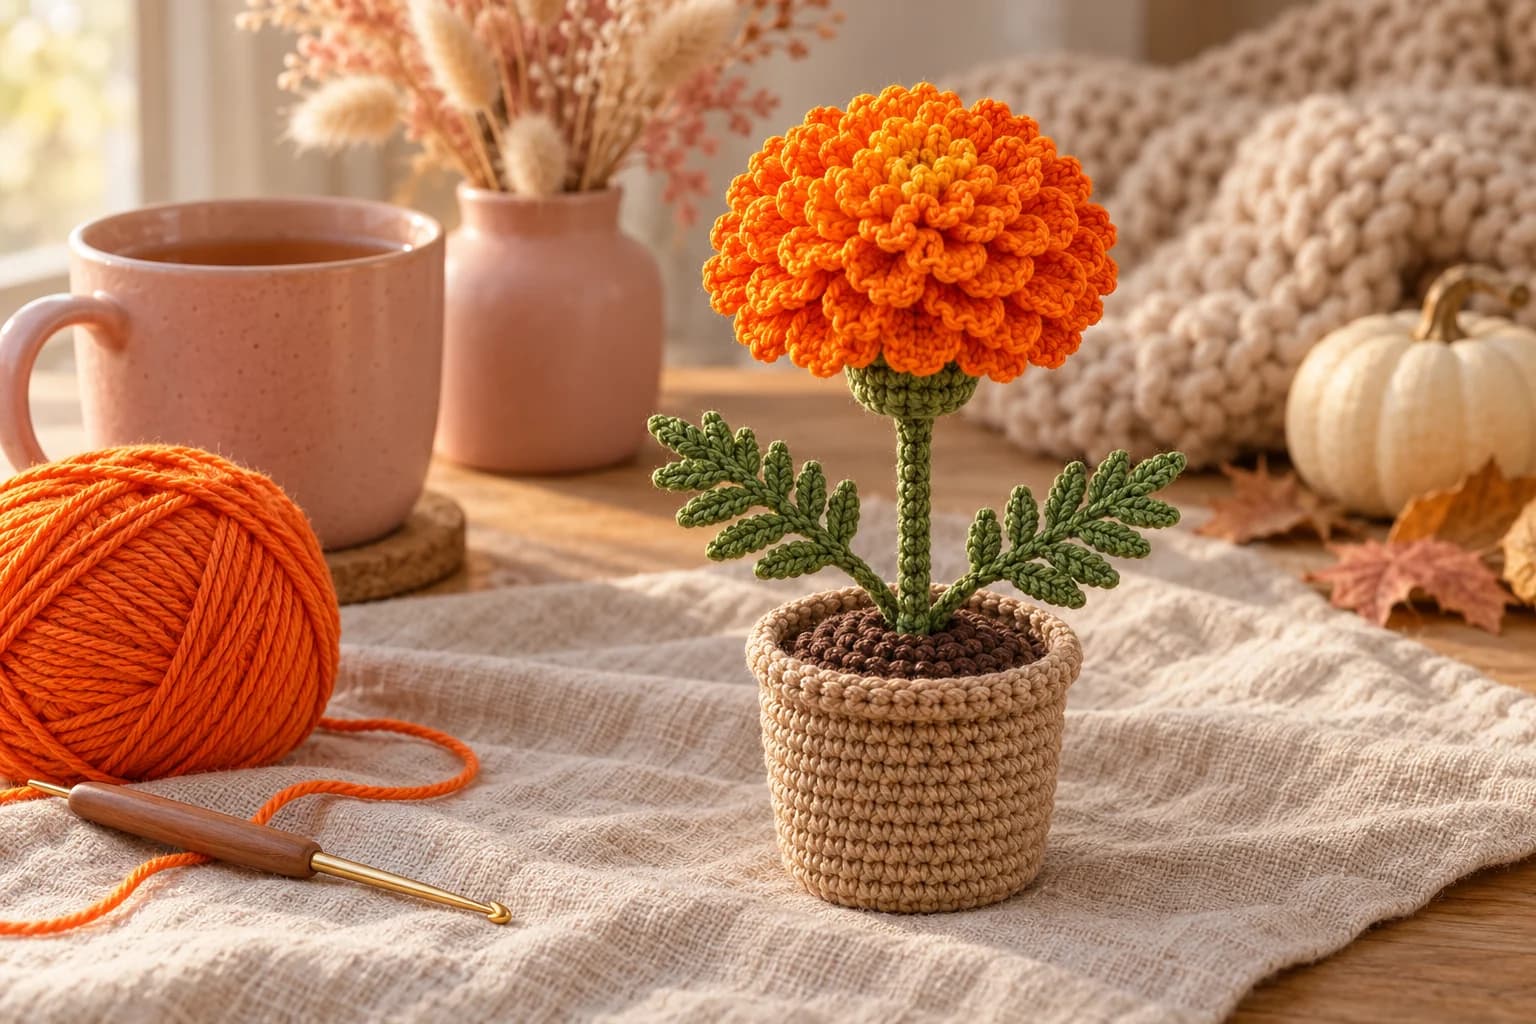
This free crochet marigold flower pot pattern makes a vibrant little potted marigold, about 5 inches tall, with a ruffled orange bloom, two feathery leaves and a tan pot filled with textured soil. The flower is worked in rounds, with petals in the front loops and the base in the back loops, so the ruffles stack up on their own. A wire inside the stem keeps it standing straight. You'll need about 80 yards of DK cotton, a 3 mm hook and 4 to 5 hours.
Key Takeaways
- 84 ruffled petals in 5 layers, all worked in one piece from the center out.
- Front loops for petals, back loops for the base: that's the whole trick.
- The stem is wire covered in single crochet, anchored deep inside the pot.
- About 80 yd (73 m) of DK cotton: 40 yd orange, 25 yd tan, 10 yd green, 7 yd brown.
Why I love this little marigold
Marigolds are my favorite fall flower. That deep, glowing orange looks like a little piece of October sunlight, and a crochet one never wilts. This one sits on a windowsill, a desk or a bookshelf, and it makes a sweet gift for anyone who loves plants but forgets to water them.
The bloom is the star. Each layer of petals grows out of the front loops of a round, then you go back to the back loops and grow the base for the next layer. The petals are crowded into single loops, so they ruffle and curl like real marigold petals. You don't have to shape a thing.
The rest is quick: a little cup-shaped pot with a rope rim, a soil disc in back loops for texture, and two feathery leaves made from a chain. Why not make a row of three for the windowsill?
Skill level. Easy-intermediate. You need a magic ring, sc, dc, inc in the round, front and back loops, and crocheting over a wire. The reverse single crochet rim is optional.
What you'll need
Yarn: DK #3 cotton, such as Paintbox Yarns Cotton DK. Cotton gives crisp petals and a matte, natural look.
| Color | Used for | Amount |
|---|---|---|
| Bright orange | Flower (plus a little golden yellow, optional) | about 40 yd |
| Tan or light sand | Pot | about 25 yd |
| Leaf green | Stem, calyx, leaves | about 10 yd |
| Brown | Soil | about 7 yd |
I worked those amounts out from the stitch counts. The petals take the most yarn: each of the 48 big petals uses about 17 inches.
Hook and notions
- 3 mm (US C/D) hook.
- 6 in (15 cm) of 18-gauge floral wire, green if you can find it.
- Round-nose pliers or small flat pliers, to bend the wire.
- A small handful of polyester fiberfill.
- Optional: a few glass beads or poly pellets in a small bag, to weigh the pot down. Skip them if you don't have any.
- Optional: a dab of fabric glue.
- A stitch marker, a tapestry needle and scissors.
Gauge and finished size
Gauge: about 5.5 sc per inch in the round. It isn't critical, but keep it firm: the pot should hold its shape and the stuffing shouldn't show.
Finished marigold: about 5 in (13 cm) tall. The pot is about 2 in (5 cm) wide and 1.75 in (4.5 cm) tall, and the flower is about 2 in (5 cm) across. Petals ruffle differently for everyone, so measure your first one.
Abbreviations (US crochet terms)
- ch = chain
- sl st = slip stitch
- sc = single crochet
- dc = double crochet
- inc = 2 sc in the same stitch
- rev sc = reverse single crochet (crab stitch)
- FLO / BLO = front loop only / back loop only
- MR = magic ring
- st(s) = stitch(es)
- rnd(s) = round(s)
UK crocheters: this pattern uses US terms. US single crochet = UK double crochet, and US double crochet = UK treble crochet.
The pieces at a glance
| Piece | Color | Make |
|---|---|---|
| Marigold flower | Orange | 1 |
| Calyx | Green | 1 |
| Stem (over wire) | Green | 1 |
| Leaves | Green | 2 |
| Pot | Tan | 1 |
| Soil | Brown | 1 |
The pattern — step by step
Part 1 — The marigold flower
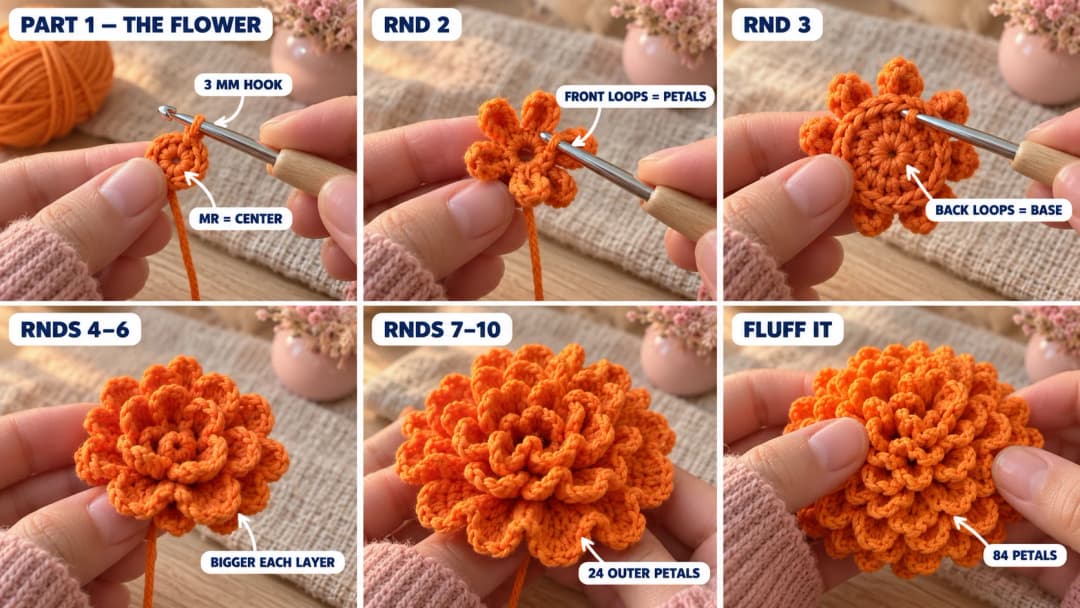
With orange. The flower is worked in joined rounds from the center out. The magic ring is the center of the flower. The petals grow from the front loops, and the base grows from the back loops behind them.
Petal rounds go into the front loops of the round before. Base rounds go into the back loops of that same round. So each base round goes back to the round two rounds earlier.
Golden center (optional). For a glowing center like a real marigold, work Rnds 1 and 2 in golden yellow, then switch to orange for Rnd 3. That's about 2 yd of yellow.
- Rnd 1: MR, 6 sc in the ring. Pull it closed tight. Sl st to the first sc. (6)
- Rnd 2 (petals): Working in the FLO of Rnd 1: (sl st, ch 2, dc, ch 2, sl st) in each st around. (6 petals)
- Rnd 3 (base): Working in the BLO of Rnd 1: inc in each st around. Sl st to the first sc. (12)
- Rnd 4 (petals): Working in the FLO of Rnd 3: (sl st, ch 2, 2 dc, ch 2, sl st) in each st around. (12 petals)
- Rnd 5 (base): Working in the BLO of Rnd 3: (sc, inc) × 6. Sl st to the first sc. (18)
- Rnd 6 (petals): Working in the FLO of Rnd 5: (sl st, ch 3, 3 dc, ch 3, sl st) in each st around. (18 petals)
- Rnd 7 (base): Working in the BLO of Rnd 5: (2 sc, inc) × 6. Sl st to the first sc. (24)
- Rnd 8 (petals): Working in the FLO of Rnd 7: (sl st, ch 3, 4 dc, ch 3, sl st) in each st around. (24 petals)
- Rnd 9 (base): Working in the BLO of Rnd 7: sc in each st around. Sl st to the first sc. (24) No increases here, so the base cups slightly and the flower domes.
- Rnd 10 (outer petals): Working in both loops of Rnd 9: (sl st, ch 3, 4 dc, ch 3, sl st) in each st around. (24 petals)
Fasten off and weave in the ends on the back. You have 84 petals in 5 layers.
Fluff the flower with your fingers: push the small center petals up and fan the outer ones out, so the bloom looks round and full from the front.
Part 2 — The stem, calyx and leaves
Stem (green, over wire).
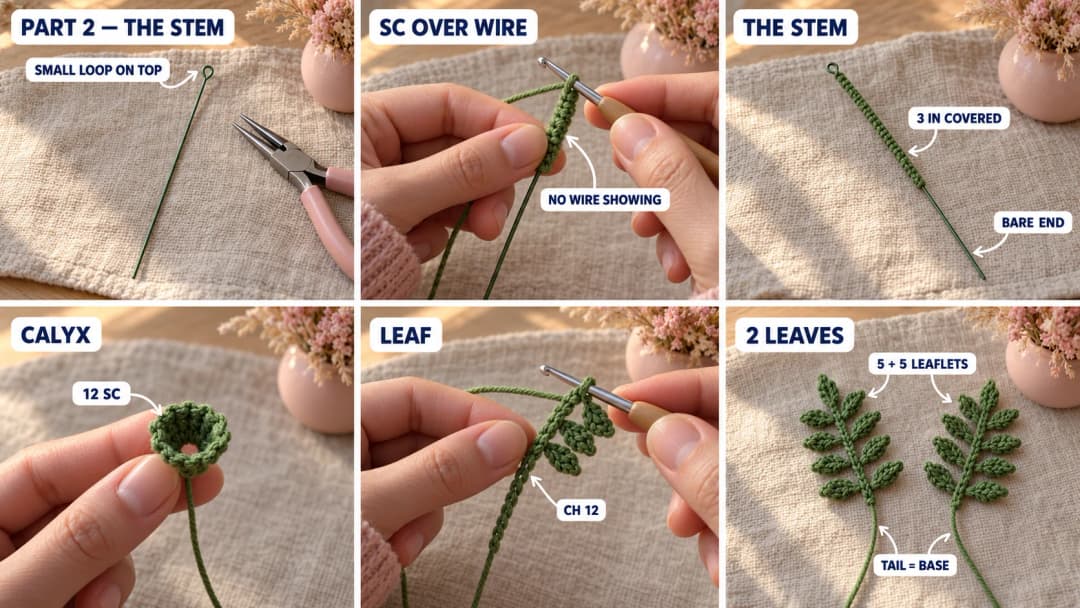
- With the pliers, bend the top ¼ in (6 mm) of the wire into a tiny closed loop, so there's no sharp end. Leave the bottom straight for now: you'll bend it after it goes through the soil.
- Crochet over the wire. Make a slip knot on the hook. Hold the wire along the yarn, just under the top loop. Insert the hook under the wire, yarn over, pull up a loop, yarn over and pull through both loops: that's 1 sc around the wire. Keep working sc around the wire, pushing the stitches together so no wire shows.
- Cover about 3 in (7.5 cm) of the wire, leaving the bottom 2.5 in (6.5 cm) bare. Fasten off and secure the end with a few stitches through the last sc, or a dab of fabric glue.
Calyx (green). The little green cup under the flower. The magic ring is the bottom, where the stem passes through.
- Rnd 1: MR, 6 sc in the ring. Don't pull the ring closed yet: leave a hole wide enough for the stem, and keep a 4-in starting tail. (6)
- Rnd 2: Inc in each st around. (12)
- Rnd 3: Sc in each st around. (12)
Sl st in the next st and fasten off, leaving a 10-in tail.
Leaves (make 2, green). Each leaf is a chain spine with little leaflets on both sides, like a real marigold leaf. The slip knot end is the base of the leaf.
- Leave an 8-in (20 cm) starting tail. Ch 12.
- Leaf tip: Sl st in the 2nd ch from the hook.
- Side 1: Ch 3, sl st in the 2nd ch from the hook, sc in the next ch (one leaflet made), sl st in the next 2 ch of the spine. Repeat from * to * 5 times in all. You're now at the base. (5 leaflets)
- Side 2: Rotate the work and work up the other side of the spine, in the free loops of the chain: repeat from * to * 5 times. You're back at the tip. (5 leaflets)
Fasten off. Weave this end back down the spine toward the base. Keep the 8-in starting tail for sewing.
Part 3 — The pot, soil and assembly
Pot (tan). The magic ring is the center of the base. The last round is the rim.
- Rnd 1: MR, 6 sc in the ring. (6)
- Rnd 2: Inc in each st around. (12)
- Rnd 3: (Sc, inc) × 6. (18)
- Rnd 4: (2 sc, inc) × 6. (24)
- Rnd 5: (3 sc, inc) × 6. (30)
- Rnd 6: (4 sc, inc) × 6. (36)
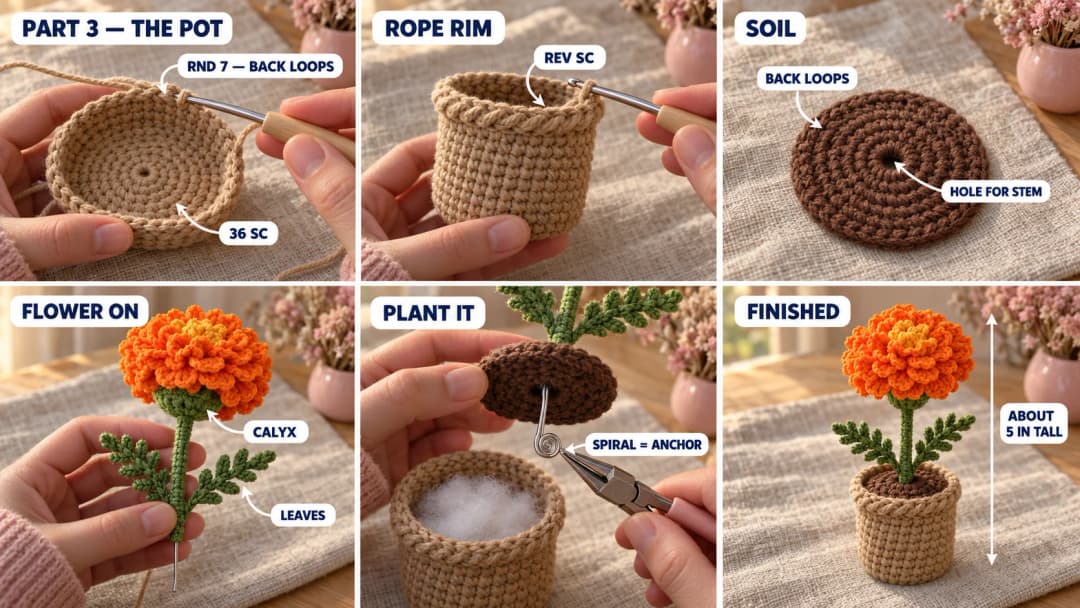
- Rnd 7: Sc in the back loop only of each st around. (36) This makes the edge of the flat base.
- Rnds 8–15: Sc in each st around, 8 rounds. (36)
- Rnd 16 (rope rim): Rev sc in each st around, working from left to right. (36) If you'd rather not do crab stitch, work a loose sl st round instead.
Fasten off and weave in the ends. Work this pot in continuous spiral rounds, with a marker in the first stitch of each round.
Soil (brown). The magic ring is the center, where the stem goes in.
- Rnd 1: MR, 6 sc in the ring. Pull it almost closed, leaving a hole for the wire. (6)
- Rnd 2: Working in the BLO, inc in each st around. (12)
- Rnd 3: BLO: (sc, inc) × 6. (18)
- Rnd 4: BLO: (2 sc, inc) × 6. (24)
- Rnd 5: BLO: (3 sc, inc) × 6. (30)
- Rnd 6: BLO: (4 sc, inc) × 6. (36)
The back loops leave little ridges that look like soil. Fasten off, leaving an 18-in (45 cm) tail.
Assembly
- Flower on the stem. Slide the calyx down onto the stem from the top, so the wire goes out through the magic ring and the cup opens up. Pull the starting tail to snug the ring around the stem, and knot it. Push the top loop of the wire into the back of the flower, right through the center of Rnd 1. With orange yarn, sew around the wire loop a few times, through the Rnd 1 stitches, so the flower can't spin.
- Calyx. Slide the calyx up against the back of the flower. Sew its edge to the back of the flower with the 10-in tail, then wrap the tail around the top of the stem twice and weave it in.
- Leaves. Sew the base of each leaf to the stem, on opposite sides, about ½ in (1.2 cm) above where the green ends. Point them out and slightly up.
- Fill the pot. If you're using a weight, drop the bag of beads into the bottom of the pot. Stuff the pot firmly, up to about Rnd 14.
- Plant the stem. Push the bare bottom of the wire through the hole in the center of the soil, from the top, until the green part sits on the soil. Now bend the bottom 1 in (2.5 cm) of wire into a flat little spiral with the pliers. Push the spiral deep into the stuffing in the pot, and add stuffing around it so the stem stands straight.
- Close the pot. Set the soil disc inside the pot on Rnd 14, about two rounds below the rim. Sew its edge to the inside of the pot all the way around with the 18-in tail. Top up the stuffing before you close the last inch, so the soil is firm.
Give the flower a gentle wiggle. The stem should stay put and stand straight.
Safety. This marigold has a wire stem, so it's a decoration, not a toy for children. Keep it away from little ones and pets. To clean it, dust it gently or spot wash with a damp cloth, and let it dry upright.
Make it yours — quick variations
| Variation | Change from base pattern |
|---|---|
| Yellow marigold | Work the whole flower in sunflower or golden yellow. |
| Blush pot | Make the pot in blush pink or cream instead of tan. |
| Marigold bouquet | Make 3 flowers on stems of different lengths. For a wider pot, add one more increase round, (5 sc, inc) × 6, to both the pot base and the soil, then work the rest of the pot on 42 sts. |
| Loose stem | Skip the pot and use a single long stem in a bud vase or a fall bouquet. |
Troubleshooting the three things that go wrong
The flower looks flat, not round
The petals need help to stand up. Push the center petals up with your fingertip and fan the outer layers back. If it's still flat, work Rnd 9 a little tighter, so the base cups more.
The stem leans
The wire isn't anchored deep enough. Push the wire spiral further down into the pot and pack stuffing around it on all sides before you sew the soil on.
The pot rim flares out
Your rev sc round is too loose. Rework it with a 2.75 mm hook, or swap it for a snug sl st round.
Frequently asked questions
How long does the marigold flower pot take? About 4 to 5 hours. The flower takes about 2 hours, because the petal rounds are long. The pot and soil take about an hour and a half, and the stem, leaves and assembly take another hour or so.
How much yarn do I need? About 80 yd (73 m) of DK cotton: about 40 yd of orange, 25 yd of tan, 10 yd of green and 7 yd of brown. Small amounts, so it's a great scrap project.
Can I make it without wire? Yes, but the stem will flop. Instead, chain 15 in green, sc back along the chain, and roll it tightly around a wooden skewer cut to 4.5 in. It's sturdy and has no sharp ends.
Can I use worsted yarn? Yes, with a 3.5 mm hook. Everything grows by about a quarter, so the marigold ends up about 6 in tall, and you'll need about 100 yd in all.
Can I sell marigold pots made from this pattern? Yes, you're welcome to sell finished pots made from this free pattern at markets, on Etsy or as gifts. Please credit "Pattern by Wavode" in your listing and link back to this page. What you can't do is republish this write-up or my photos as your own pattern.
Related patterns on Wavode
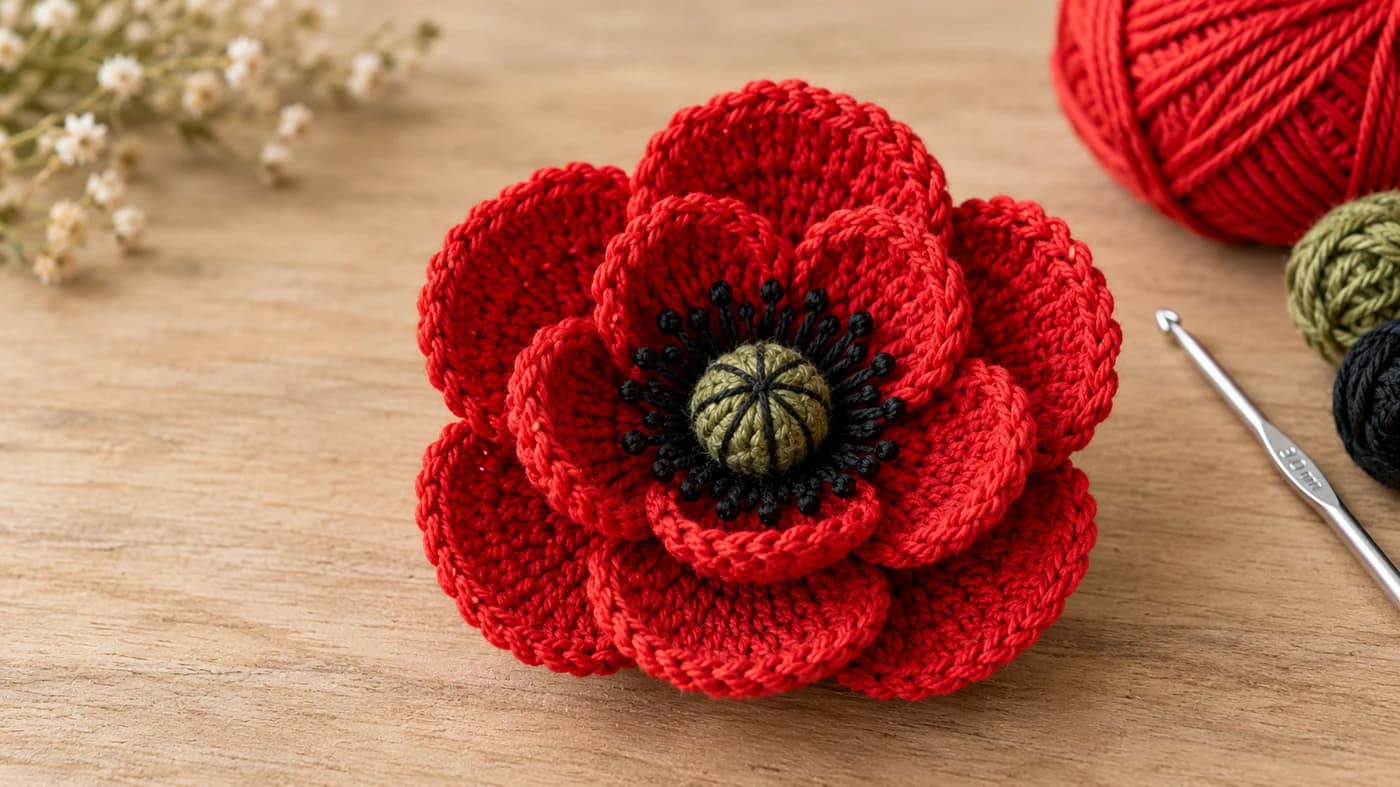
- Crochet poppy flower: a bold red poppy with a dark center.
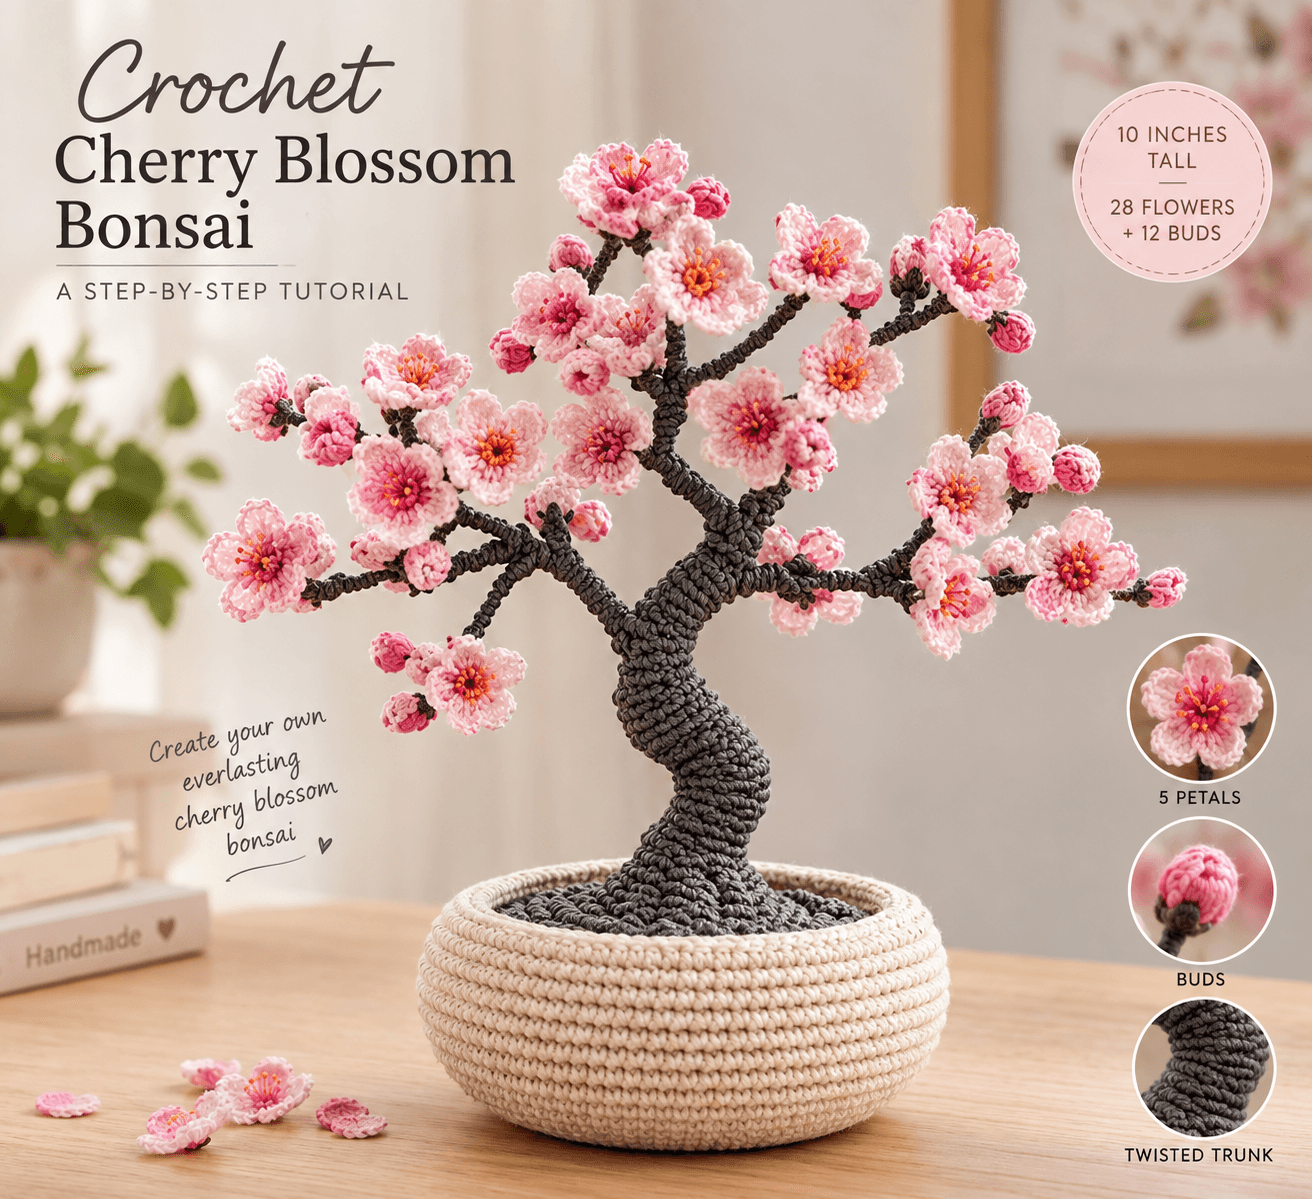
- Mini cherry blossom bonsai: another little potted plant for the desk.
- How to crochet a pumpkin: an easy fall pumpkin to go with your marigold.
- Crochet maple leaf: a fall leaf appliqué.
- Crochet lily bouquet: a bouquet of lilies in purple and pink.
Made a marigold? Tag #wavodecrochet on Pinterest. I re-pin every finished make and credit the maker.
Pattern by Clara Hartwell for Wavode. Questions? Email me at support@wavode.com.