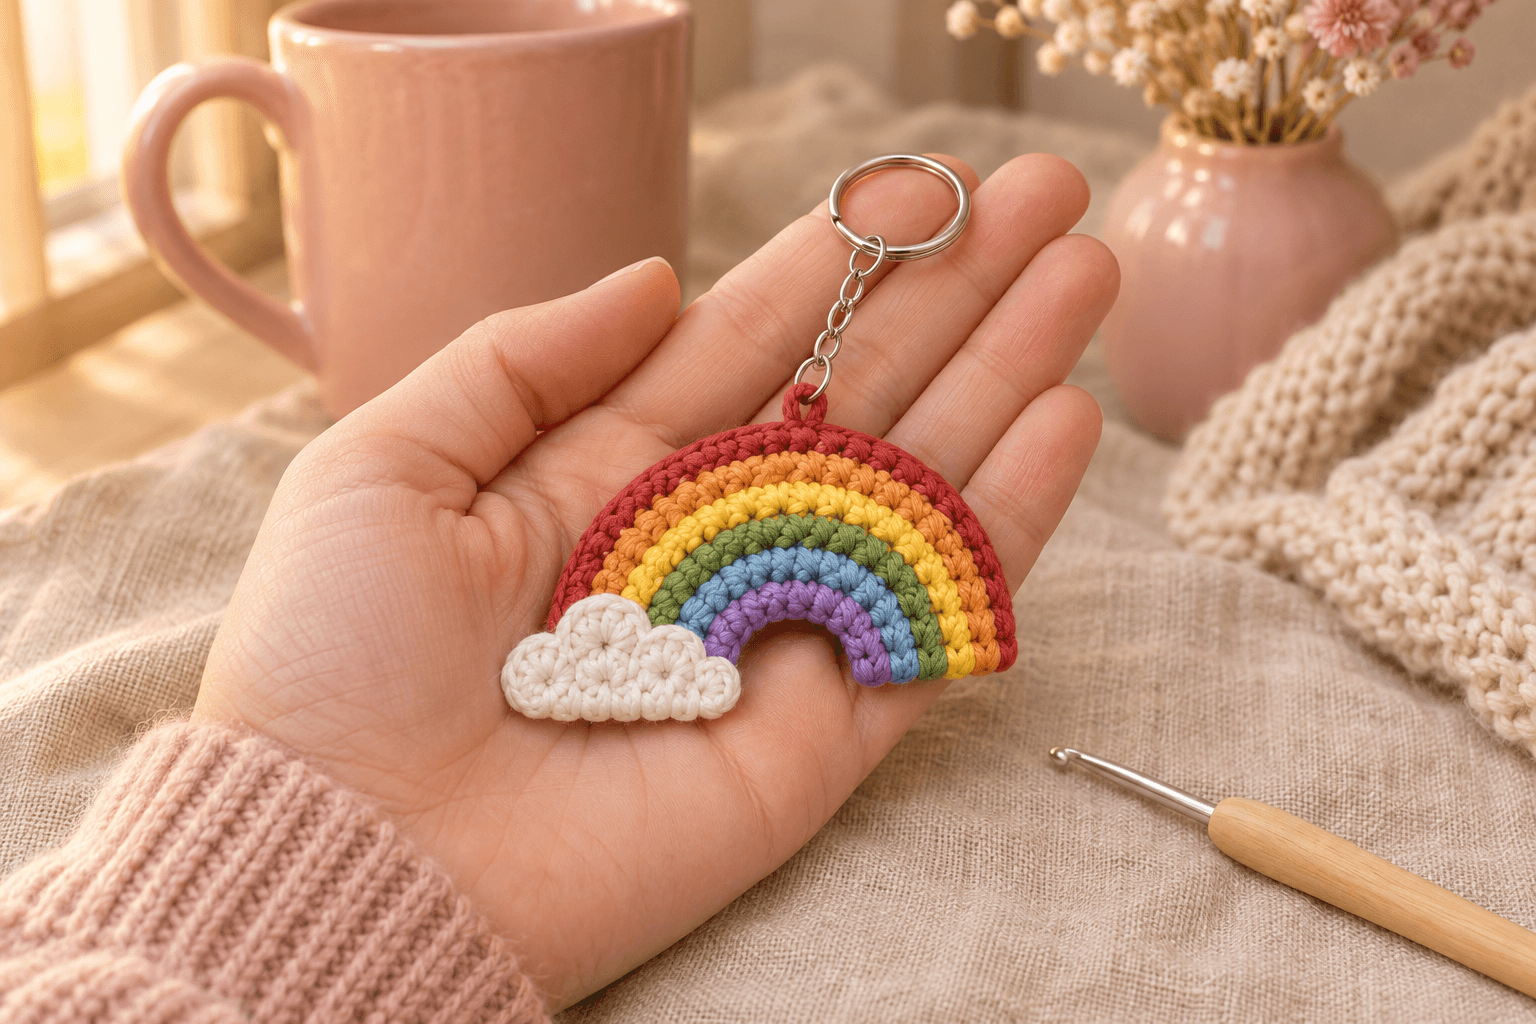
No-Sew Crochet Kitty Keychain

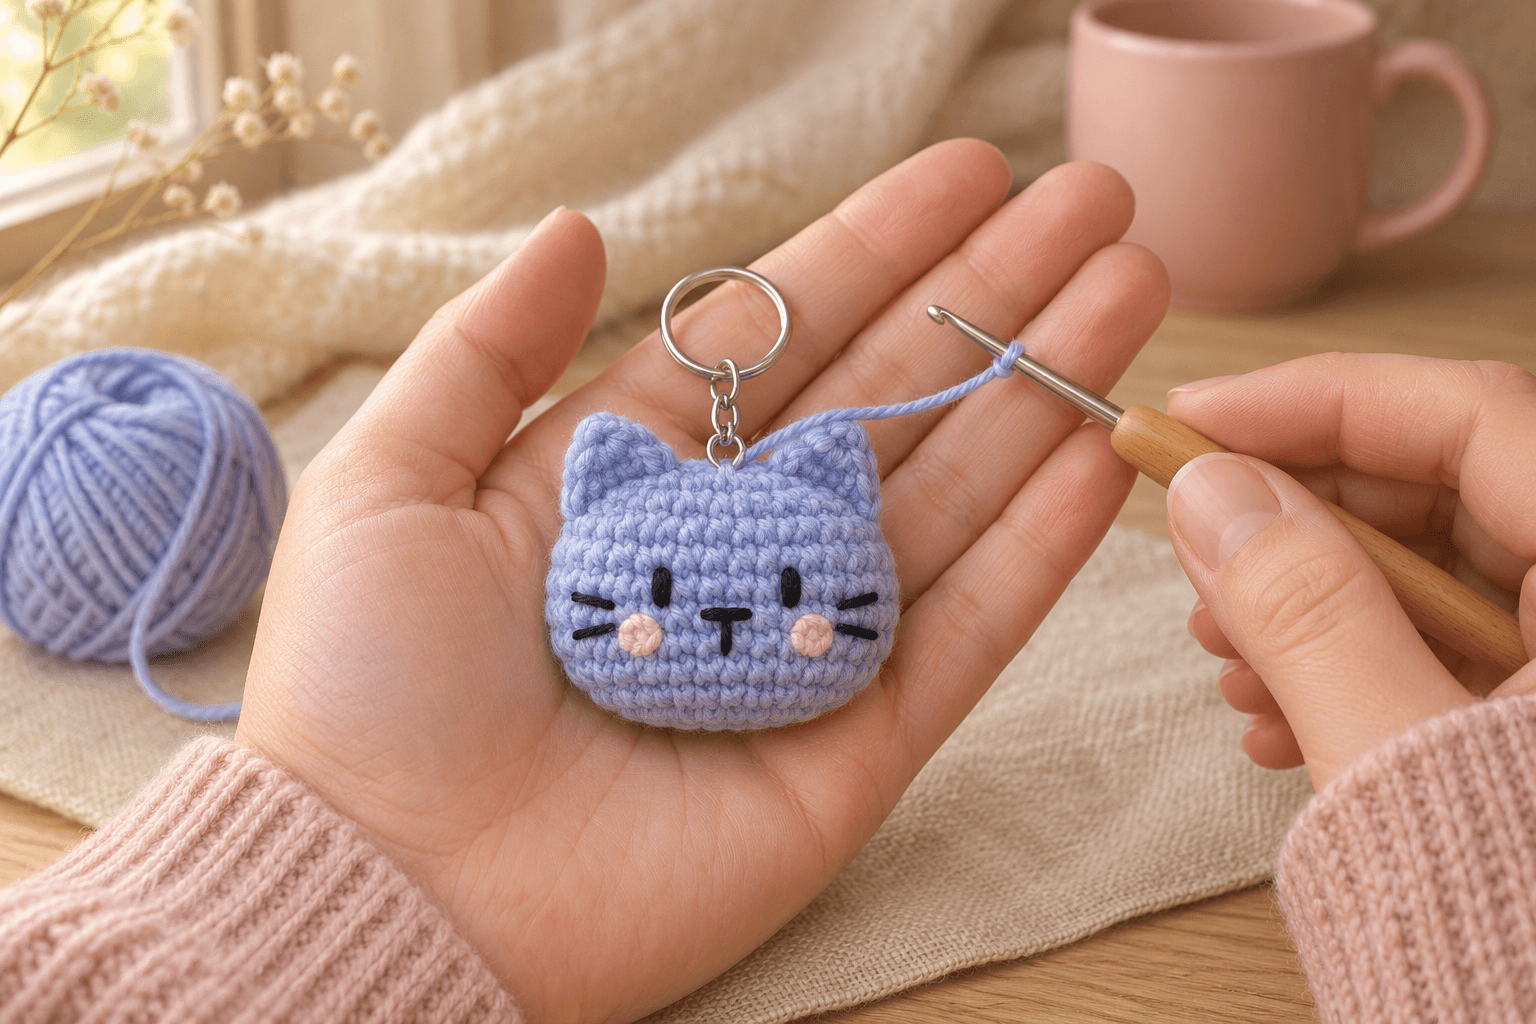
The little ears are my favorite detail on this kitty keychain. They’re crocheted right onto the stuffed head, and a few black embroidery stitches give the kitty its whiskers and expression.
What you’ll need for the kitty keychain
- Yarn of your choice for the head, plus black yarn for the face
- A hook that makes a firm fabric with your yarn. The tutorial uses a 3 mm hook.
- Tapestry needle, stuffing, stitch marker and scissors
- Keyring with a short chain and connector
- Optional pins and pink blush
Your finished size and yarn use will vary with your yarn and hook. Crochet tightly enough to keep the stuffing from showing through the stitches.
US terms. MR = magic ring, ch = chain, sl st = slip stitch, sc = single crochet, hdc = half double crochet, dc = double crochet, inc = two sc in one stitch, dec = invisible single crochet decrease. For a dec, pick up the front loops of the next two stitches, yarn over and pull through both front loops, then yarn over and pull through both loops on the hook.
Work in a spiral, moving the marker to the first stitch of each round. For joined rounds, sl st into the first sc, ch 1 and start the next round in that same sc. Neither the join nor the chain counts. Round totals are in parentheses.
Part 1 — Crochet the kitty head
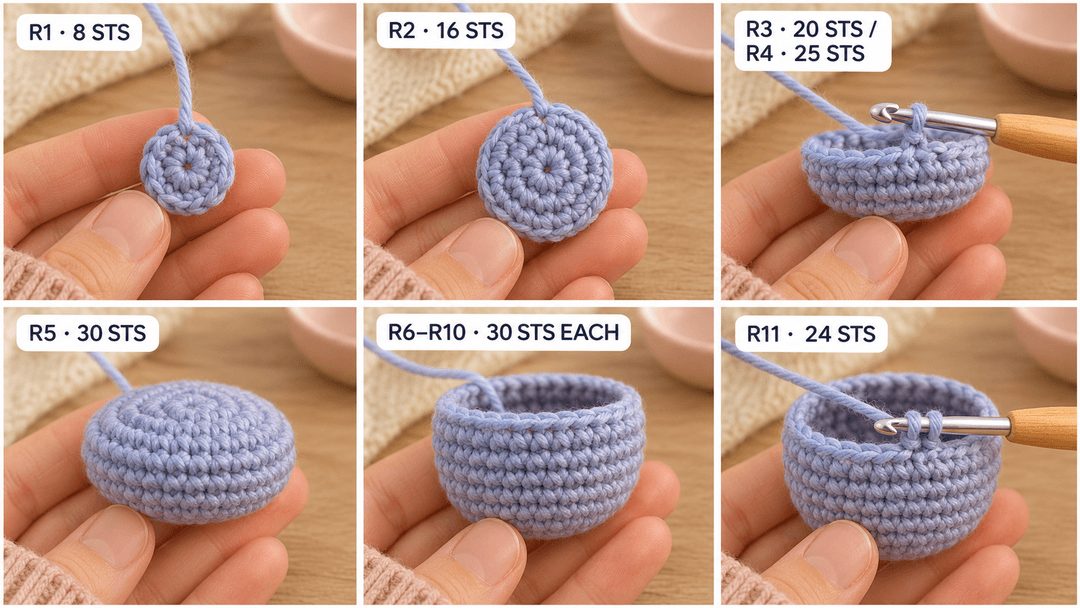
Head (main color, Make 1). The magic ring is the crown and the final round is at the underside.
- R1: MR, 8 sc in the ring. (8)
- R2: inc × 8. (16)
- R3: (sc 3, inc) × 4. (20)
- R4: (sc 3, inc) × 5. (25)
- R5: (sc 4, inc) × 5. (30)
- R6-R10: sc around. (30) Five rounds.
- R11: (sc 3, dec) × 6. (24)
Part 2 — Embroider the kitty face and close the head
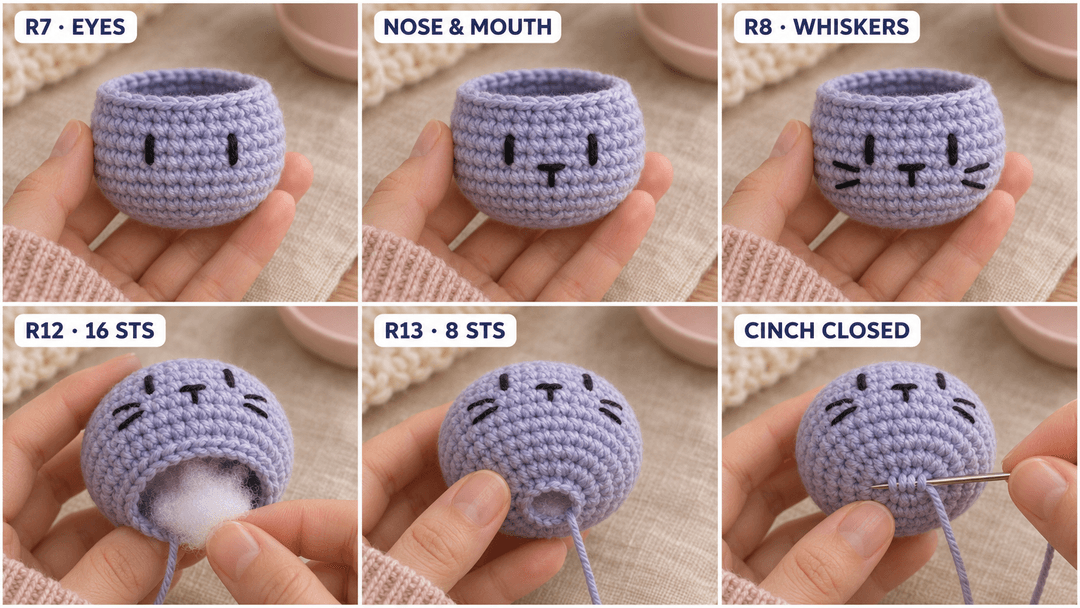
With the crown up and the head still open, mark the center stitch of the face on R7. Use black yarn and your tapestry needle.
- Make a short vertical eye three stitches to either side of the center, leaving five stitches between the eyes. Retrace each eye to thicken it.
- Embroider a short horizontal nose just below R7 on the center line. Add a short vertical stitch down from the nose.
- At about R8, start one or two stitches outside each eye. Embroider two whiskers per side, each two to three stitches long. Angle the upper whisker upward toward the outside and keep the lower one horizontal. Secure the ends inside the head.
- R12: (sc, dec) × 8. (16) Stuff until the head holds its shape without stretching the stitches open.
- R13: dec × 8. (8)
Sl st into the first stitch of R13. Cut the yarn, leaving a tail for cinching and weaving in. Thread it through all eight front loops and pull gently to close the underside. Secure and bury the tail.
Part 3 — Crochet both ears directly onto the head
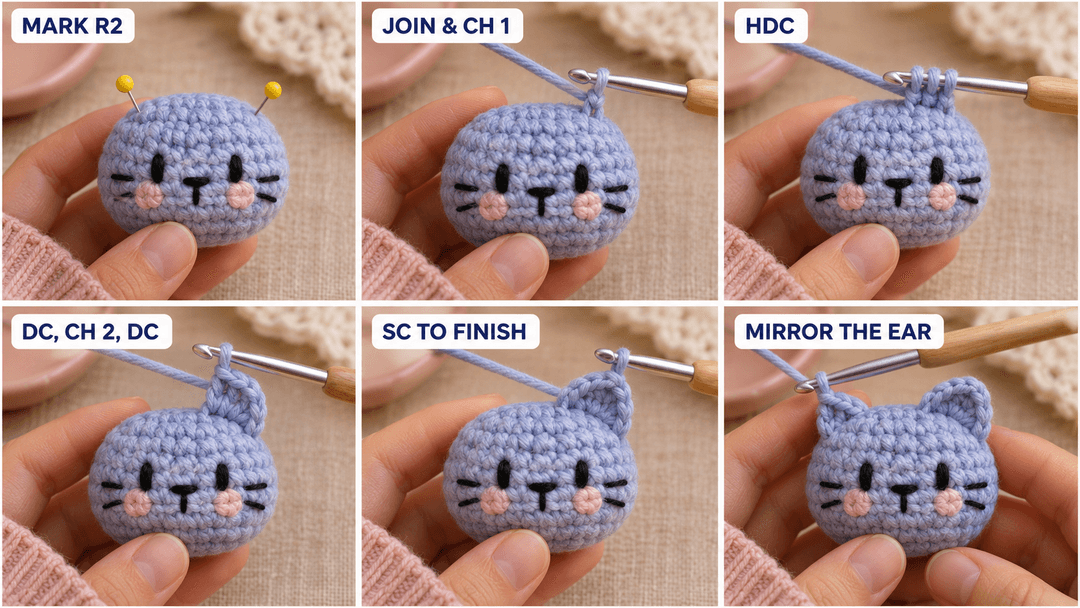
With the kitty facing you, mark a point on each side of R2. Check from the front that the two points sit at the same height and depth.
- First ear. Join at the marked point and ch 1. Work into the next three surface points in order: hdc, then (dc, ch 2, dc) in one point, then sc. Fasten off.
- Second ear. Join one round higher than the marked point and ch 1. Work in reverse: sc, then (dc, ch 2, dc) in one point, then hdc, then sl st into the marked point. Fasten off.
Secure the ends under each ear and bury them inside the head.
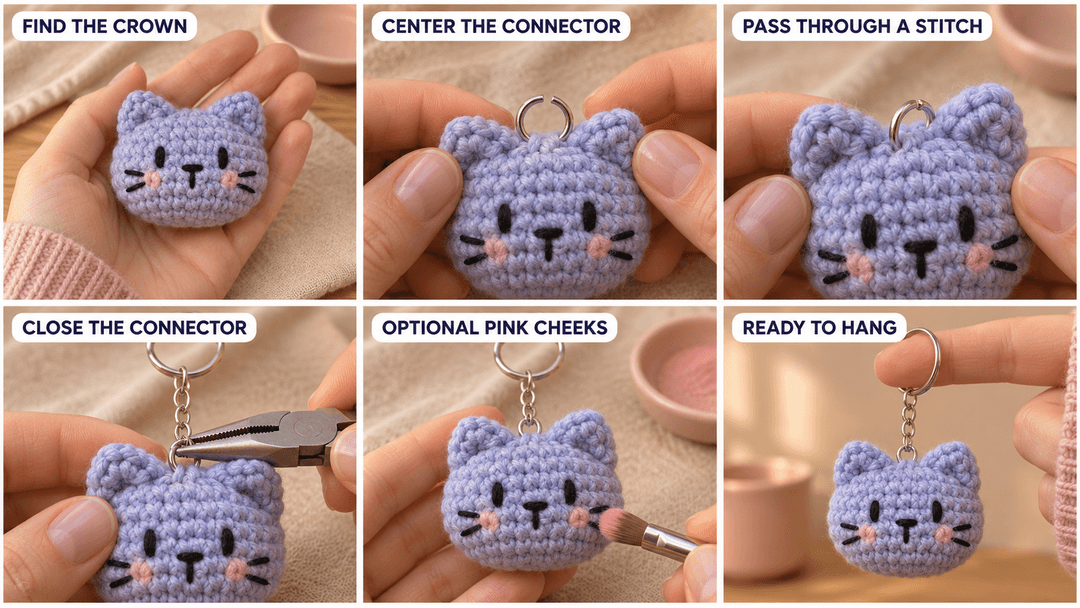
Attach the keyring between the kitty ears
Fix the connector at the crown, centered between the ears. If you like, add a little pink blush under each eye. Keep the metal keyring away from children under three.
I’d make a second kitty in the color of a friend’s cat. Share your little whiskers with #wavodecrochet.