Crochet Star Keychain

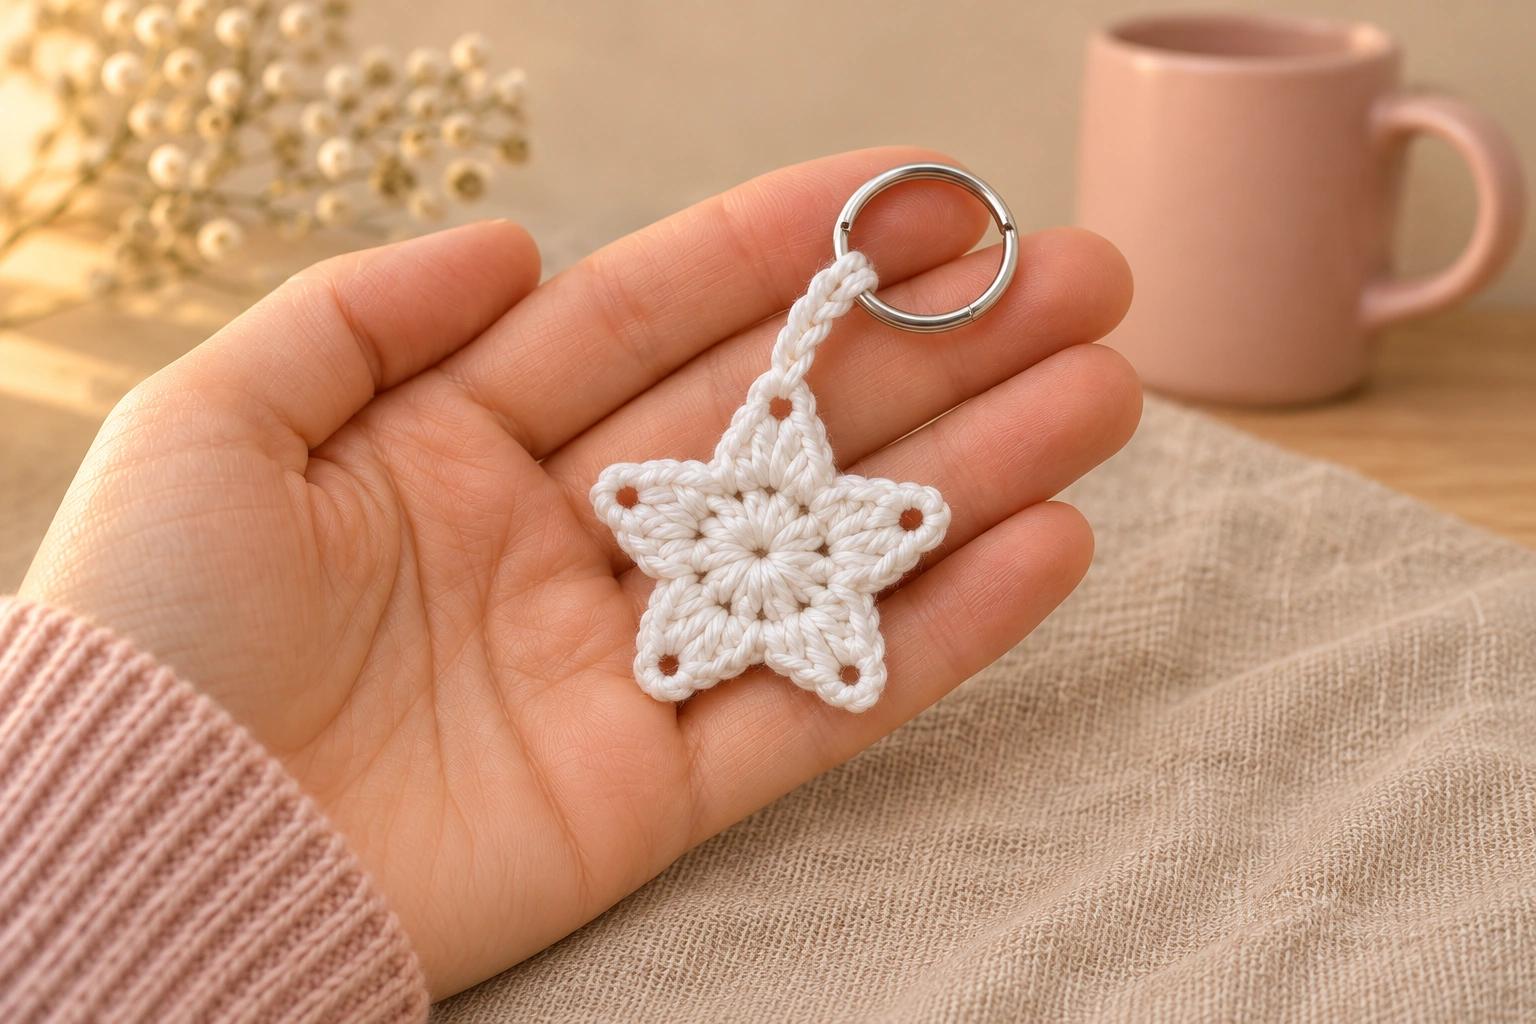
I like a little white star against the dark lining of a bag. This crochet star keychain is about 1¼ in (3.2 cm) across. It has five points, each with a small opening at the tip.
The star lies flat after just two rounds. I put the loop through the top point so the other four spread out beneath the ring.
| At a glance | |
|---|---|
| Finished size | About 1¼ in (3.2 cm) across the star, excluding the loop and ring |
| Yarn | About 4 yd of white sport #2 cotton-acrylic |
| Hook | 2.25 mm (B/1) |
| Pieces | 1 crocheted star with a loop worked onto it, plus 1 metal split ring |
| Time | About 20–30 minutes |
| Skill | Easy. Magic ring, joined rounds, sc, hdc and dc. |
Yarn, hook and ring for the star keychain
- White yarn: About 4 yd (3.7 m) of sport #2 YarnArt Jeans, 55% cotton and 45% acrylic, 175 yd (160 m) per 50 g.
- Hook: 2.25 mm (B/1) for the star and loop.
- Hardware and tools: One small metal split key ring about ¾ in (1.9 cm) across, one stitch marker, a blunt tapestry needle and scissors.
Tension. Aim for about 6½ sc per inch in a snug single crochet swatch with this yarn and hook. The star uses taller stitches, so treat its finished size as an estimate.
Stitches (US terms). MR = magic ring, ch = chain, sl st = slip stitch, sc = single crochet, hdc = half double crochet, dc = double crochet, st = stitch, R = round. Join both rounds with a sl st. The starting chain of R2 and the joining slip stitches stay out of the stitch count. Mark the first stitch of each round.
Making the five-point star in two rounds
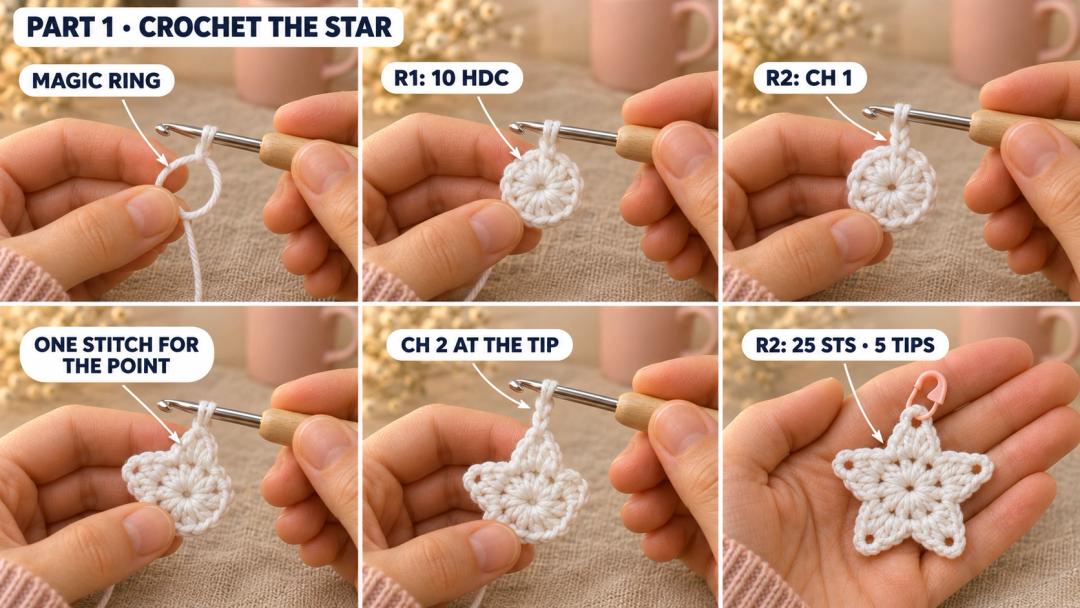
Star (white, 2.25 mm hook, Make 1). The magic ring is the center of the star. R2 makes its outer edge. Keep the same side facing you for both rounds.
- R1: MR, 10 hdc in the ring. (10) Pull the ring snug and sl st in the first hdc.
- R2: Ch 1, (sc in the next st, work hdc, dc, ch 2, dc and hdc all in the following st) × 5. (25) The five ch-2 spaces sit at the tips. Sl st in the first sc.
Start the first sc of R2 in the same hdc that holds the R1 join. The sc dips into a valley, and the group beside it rises to a point. At the first point, put a marker in its ch-2 space. That's the spot for the key ring loop.
Tip. After the ch 2, go back into the same base stitch for the second dc and hdc. The two sides of the point should rise from the same spot.
Fasten off at the valley, leaving a 4 in (10 cm) tail. Use a needle to hide that tail along the back of R2 and the starting tail along the back of R1. Tug gently on each point to open its shape.
Adding the key ring so the star hangs from one point
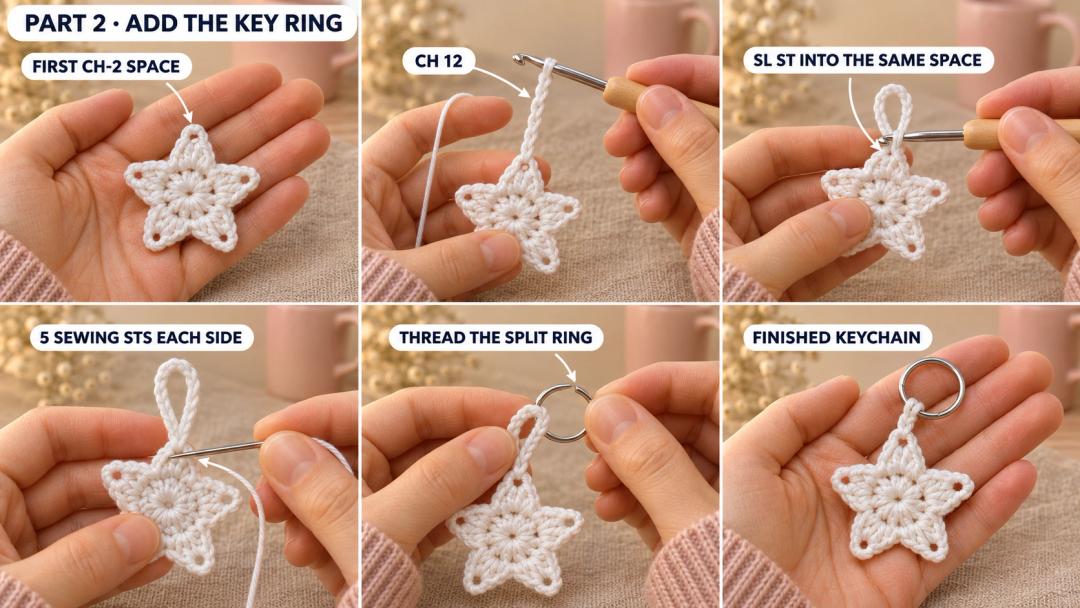
- Hold the marked point at the top. With white yarn and a 4 in (10 cm) starting tail, join with a sl st in the marked ch-2 space.
- Ch 12, then sl st back into the same space to close the loop. Cut the yarn with a 6 in (15 cm) tail and pull it through the last loop on the hook.
- On the back, take 10 small sewing stitches through the base of the chain loop and into the stitches of the point. Work five on each side of the opening, using the dc and hdc on that side for a firm hold. Pull the sewing thread snug enough to hold the loop without drawing the point in. Weave in both ends on the back and take out the marker.
- Slide the white loop onto the split ring just as you would slide on a key. Hold the ring up and give the star a gentle tug to check the join. If the chain stretches with wear, run a strand of matching yarn through the chain links and sew its ends into the point.
Safety. Keep the metal ring away from children under 3. For a flat star to sew onto a gift tag, finish after R2.
I like the white star on a navy bag. It also makes a little extra to tuck into a gift for someone who's just got a new set of keys.
UK terms: US sc = UK dc, US hdc = UK htr, US dc = UK tr.
Made a star? Tag #wavodecrochet so I can see where it ended up.