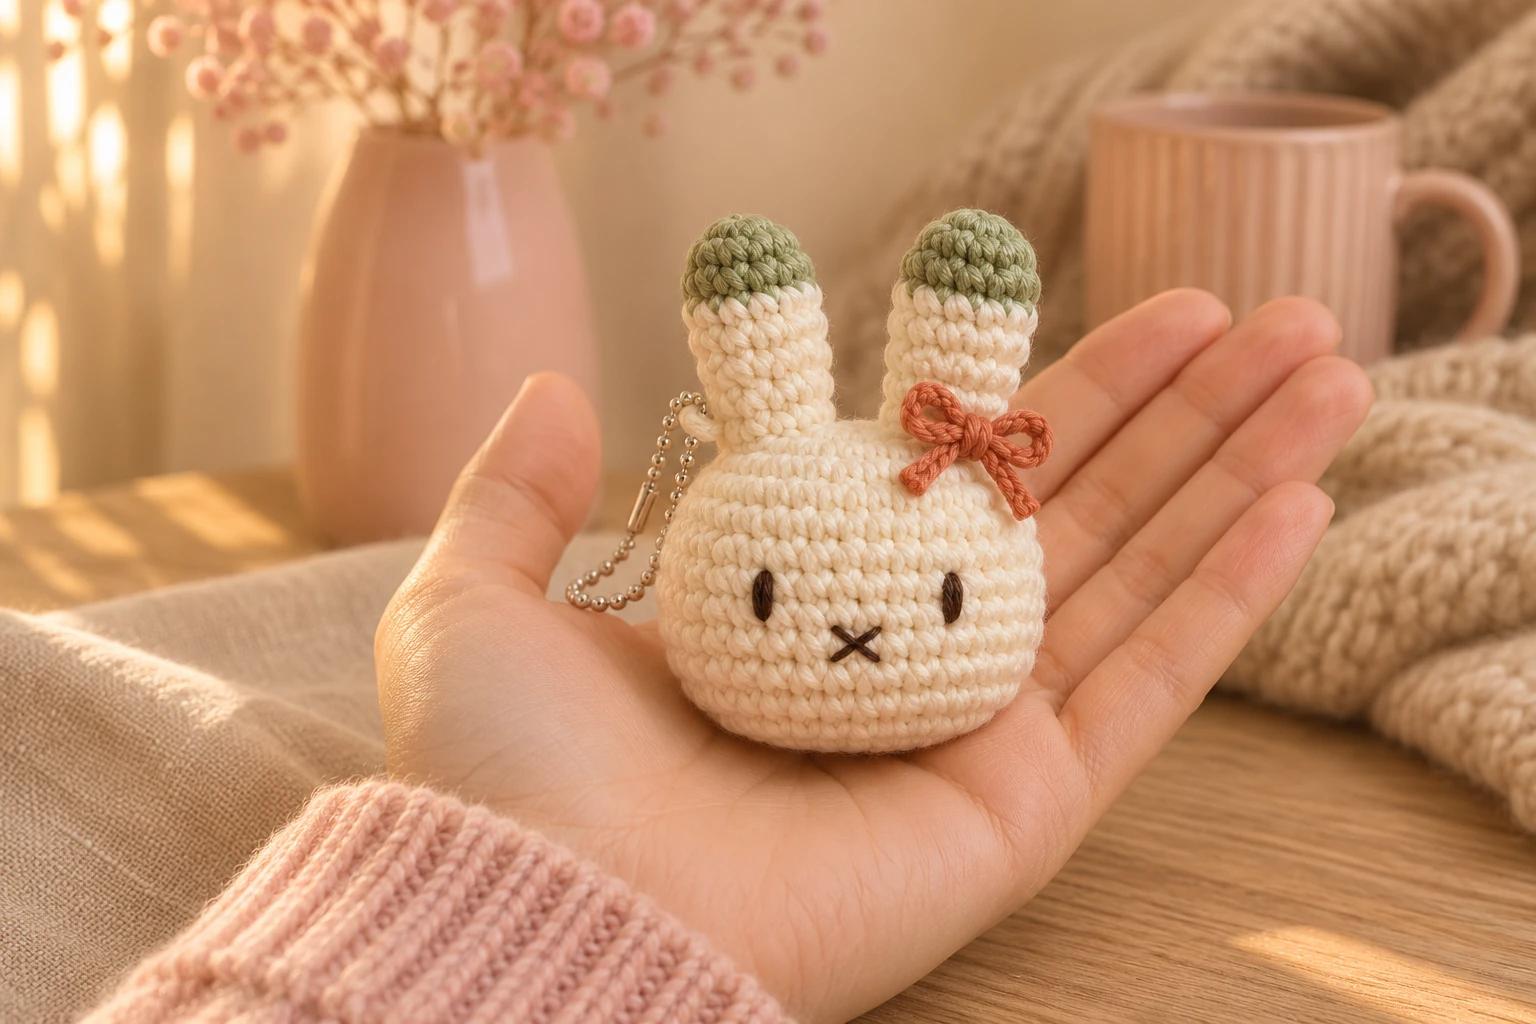
Crochet Mini Purse Keychain - Free Pattern with Two Handles and a Flower Button

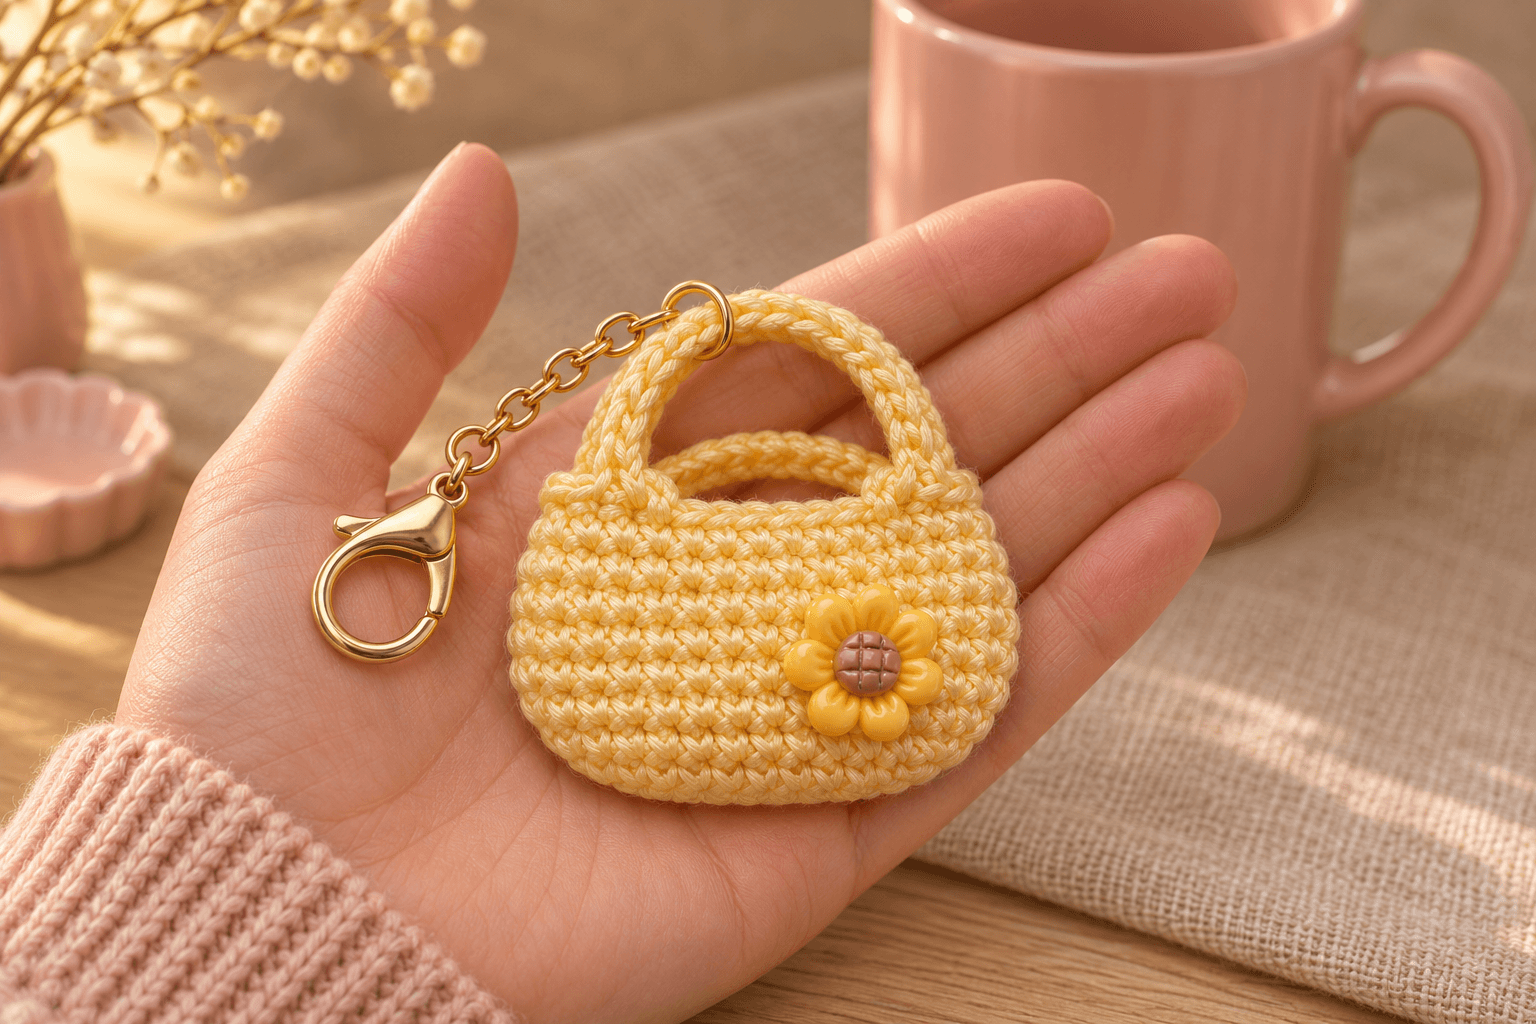
This crochet mini purse keychain measures about 2 2/3 in (6.8 cm) across when laid flat. I start at the rounded base and crochet both handles into the rim. A little stuffing gives the purse its shape, and a flower button sits just below the handles.
| At a glance | |
|---|---|
| Finished size | About 2 2/3 in (6.8 cm) wide when laid flat, excluding hardware |
| Yarn | About 20 yd of DK #3 cotton in butter yellow or tangerine |
| Hook | 2.5 mm |
| Pieces | 1 crocheted piece per keychain |
| Time | About 1 hour |
| Skill | Easy, with spiral rounds, increases and chain arches |
What you'll need for the mini purse
- Yarn. The reference uses 2 mm cotton amigurumi yarn. For the size above, use DK #3 cotton, such as Paintbox Yarns Cotton DK (100% cotton, 137 yd / 125 m per 50 g). Allow about 20 yd in butter yellow or tangerine for one purse.
- Hook. 2.5 mm.
- Hardware. One keychain clasp with a short chain and a smooth jump ring. Use two pairs of flat-nose pliers to open and close the ring.
- Tools and finishing. A stitch marker, tapestry needle, scissors and a pinch of synthetic fiberfill. The flower button and cold craft glue are optional. A small snap is optional for a purse that opens. A ready-made beaded charm can clip onto the hardware if you'd like to add a name.
Tension. With DK cotton, aim for about 6 sc per inch (2.5 cm) and about 6 rounds per inch in the body. I keep the stitches snug so the filling stays tucked inside. A different yarn weight changes the finished size.
US terms. MR = magic ring, ch = chain, sc = single crochet, inc = 2 sc in the same stitch, sl st = slip stitch, st = stitch, R = round. Work in a continuous spiral and move the marker into the first stitch of each round. Counts appear in parentheses.
The pattern starts with the rounded purse body
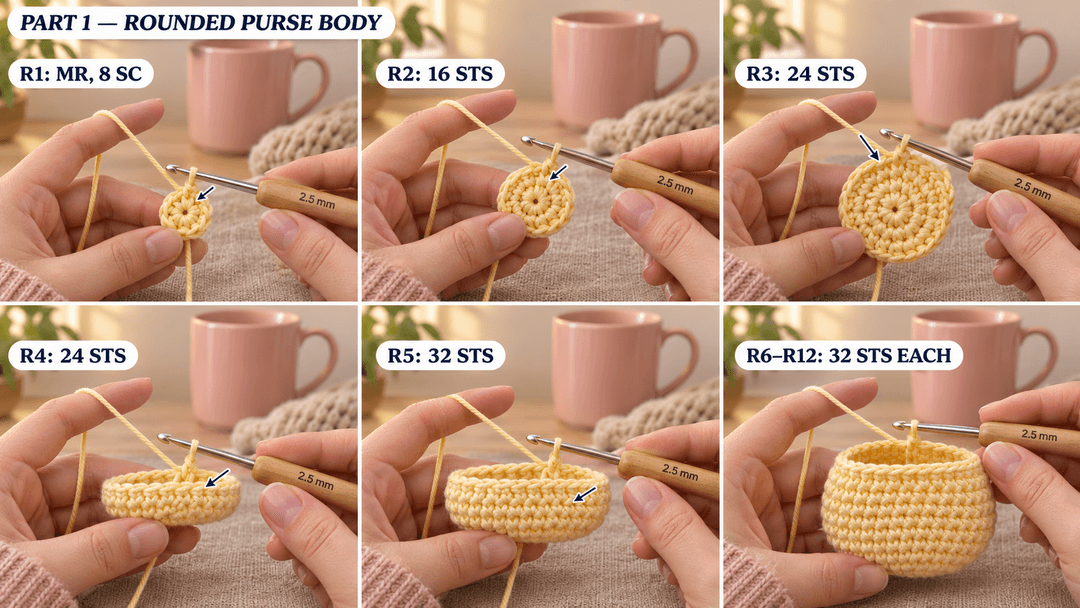
Purse (butter yellow or tangerine, 2.5 mm hook, Make 1). The magic ring sits under the purse. The last rounds form the top opening and both handles.
Single crochet in an X. Insert your hook and catch the yarn with a yarn under to pull up the first loop. Yarn over and pull through both loops to finish. Use the same stitch for both legs of each increase.
- R1: MR, 8 sc in the ring. (8) Ch 1 first to secure the ring and count from the first sc.
- R2: inc × 8. (16)
- R3: (sc, inc) × 8. (24)
- R4: sc around. (24)
- R5: (sc 2, inc) × 8. (32)
- R6-R12: sc around. (32) 7 rounds.
Shaping the two purse handles and edging the rim
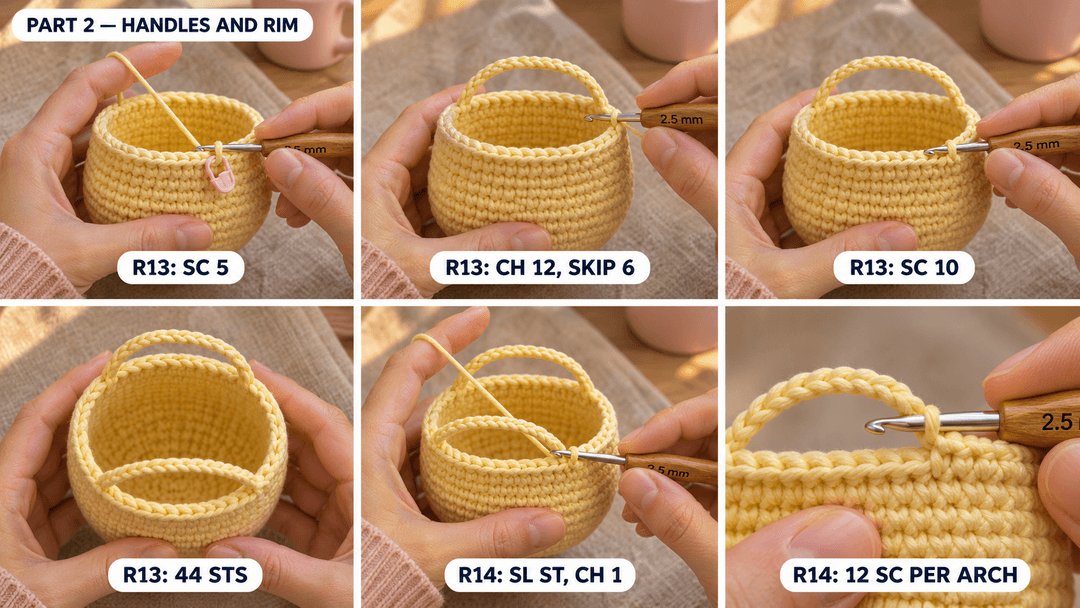
Keep your marker at the start of the round. The handles are two arches made from the working yarn, and each arch crosses six stitches of the rim.
- R13: Sc 5, ch 12, skip 6 sts, sc 10, ch 12, skip 6 sts, sc 5. (44) 20 sc and 24 ch.
- R14: (Sl st in the next sc, ch 1) × 4, sl st in the next sc, 12 sc around the first ch-12 arch, (sl st in the next sc, ch 1) × 9, sl st in the next sc, 12 sc around the second ch-12 arch, (sl st in the next sc, ch 1) × 5. (62) 20 sl st, 18 ch and 24 sc.
Work the 12 sc around each chain arch, catching the whole chain under the hook. Slide the stitches along the arch until they sit evenly between its ends.
Tip. Hold the rim flat between your fingers as you go. A loose chain between slip stitches lets the edge stay supple.
After the final ch 1, cut the yarn with a 6 in (15 cm) tail. Pull the tail through the loop and weave it into the inside edge at the top opening.
Stuffing the mini purse and adding the flower button
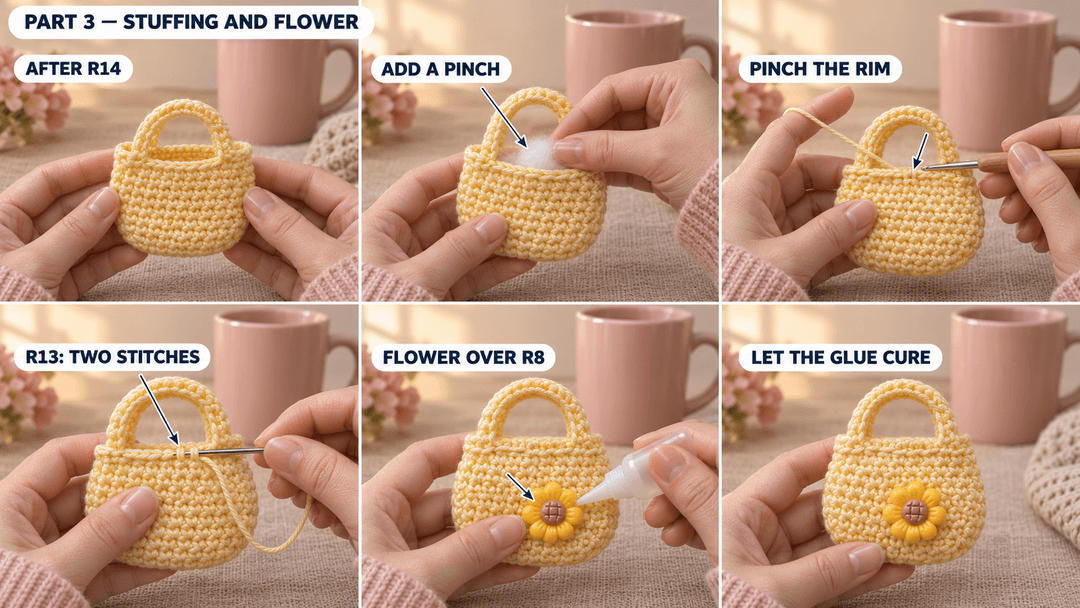
Lay the purse down with one handle facing you. The middle of that handle marks the front. Tuck a pinch of fiberfill into the body and squeeze it gently between your fingers. Leave the rim soft enough to pinch closed.
Bring the two sides of the top opening together halfway between the handles, at the marked round start. With matching yarn, take two small stitches through both layers just under the edging at R13, between the last and first sc. Tie the ends together inside and tuck them into the purse.
If you'd like the purse to open, leave the body empty and sew a small snap to the same spot inside the opening.
Optional flower. Place the button on the lower front, over R8 and directly under the middle of the front handle. Dab cold craft glue on the back, press it onto the purse and let the glue cure as directed before using the charm.
Clipping the keychain onto the purse handle
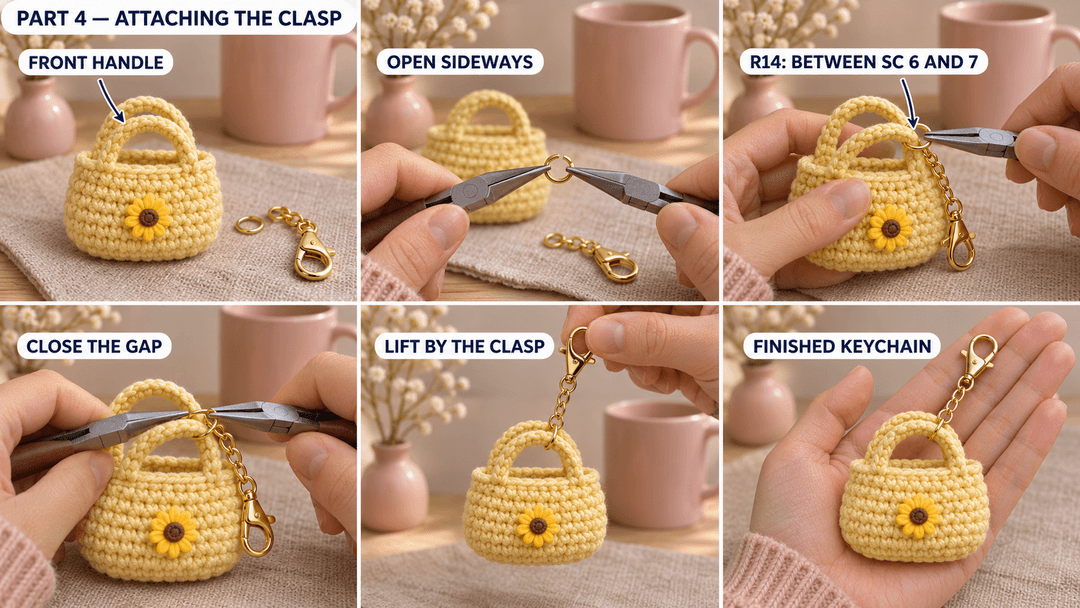
Hold the purse with its flower facing you and both handles above it. Open the jump ring sideways with two pairs of pliers. Slip it around the front arch near the top, between the sixth and seventh sc of R14, then twist it closed until the ends meet. For a handle that will see a lot of use, run matching yarn under the backs of all 12 handle sc and back again, then weave both ends into the rim. Clip an optional beaded charm to the hardware.
Safety. Keep the clasp and any small decorations away from children under 3. For a child under 3, omit the hardware and embroider the flower directly onto the fabric.
UK terms: US sc is UK dc.
I like the tangerine version with the same yellow flower. It gives the pair a little something in common, especially if you're making one for a friend.
Made a mini purse? Tag #wavodecrochet on Pinterest so I can see it.