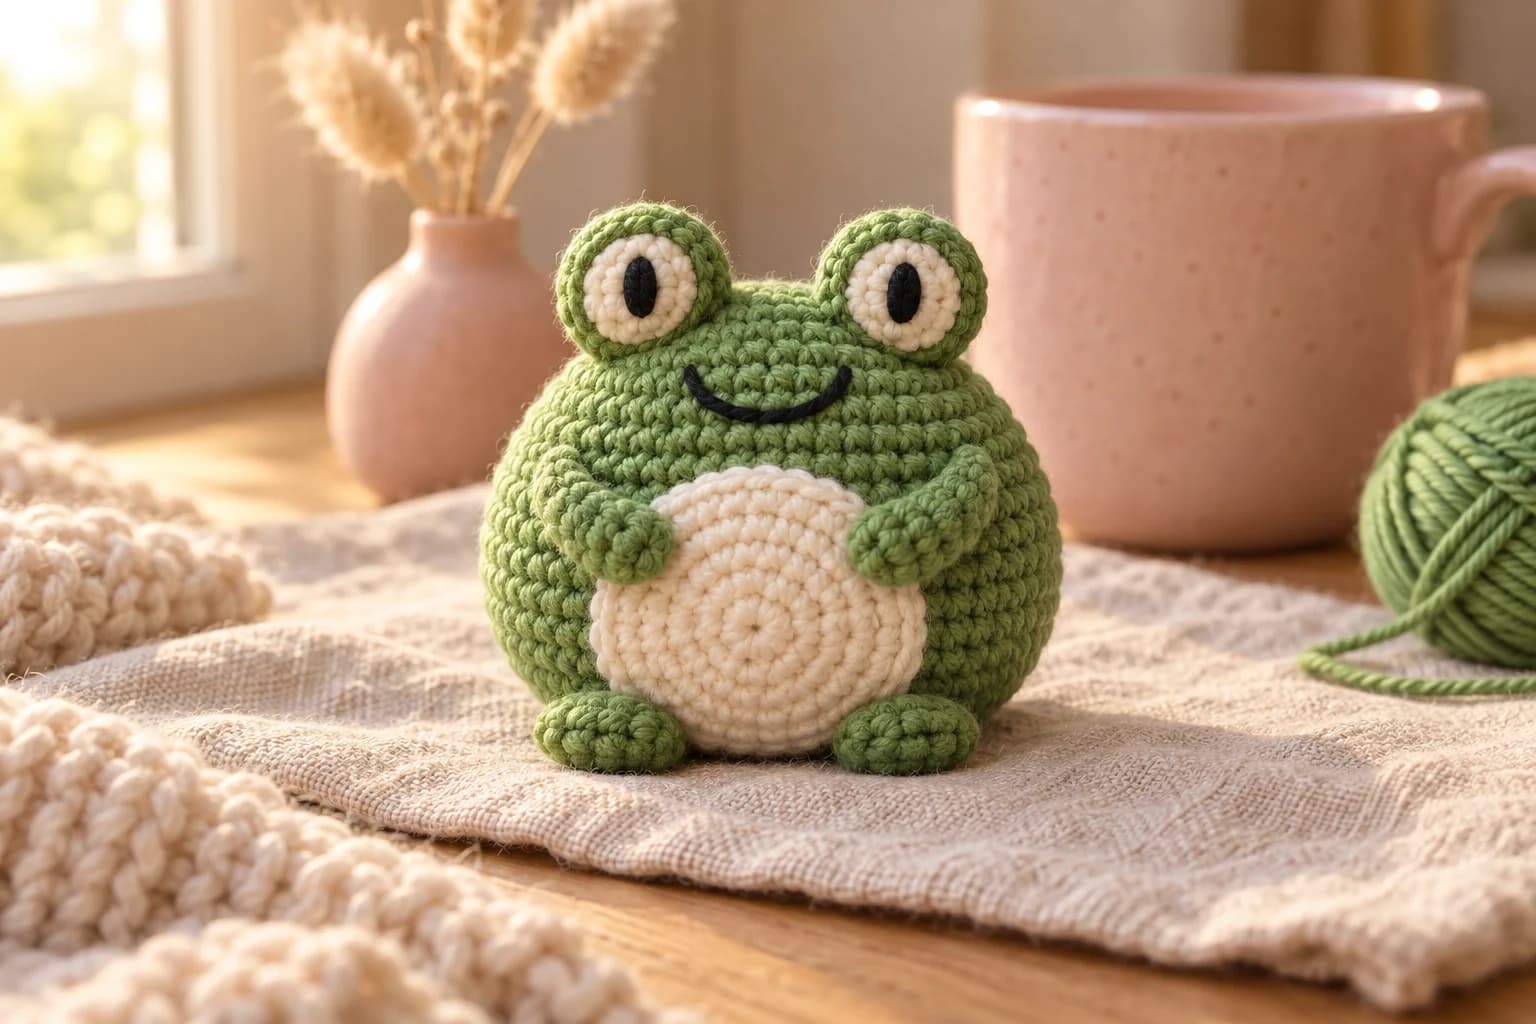
Mini Blue Turtle Amigurumi Free Crochet Pattern

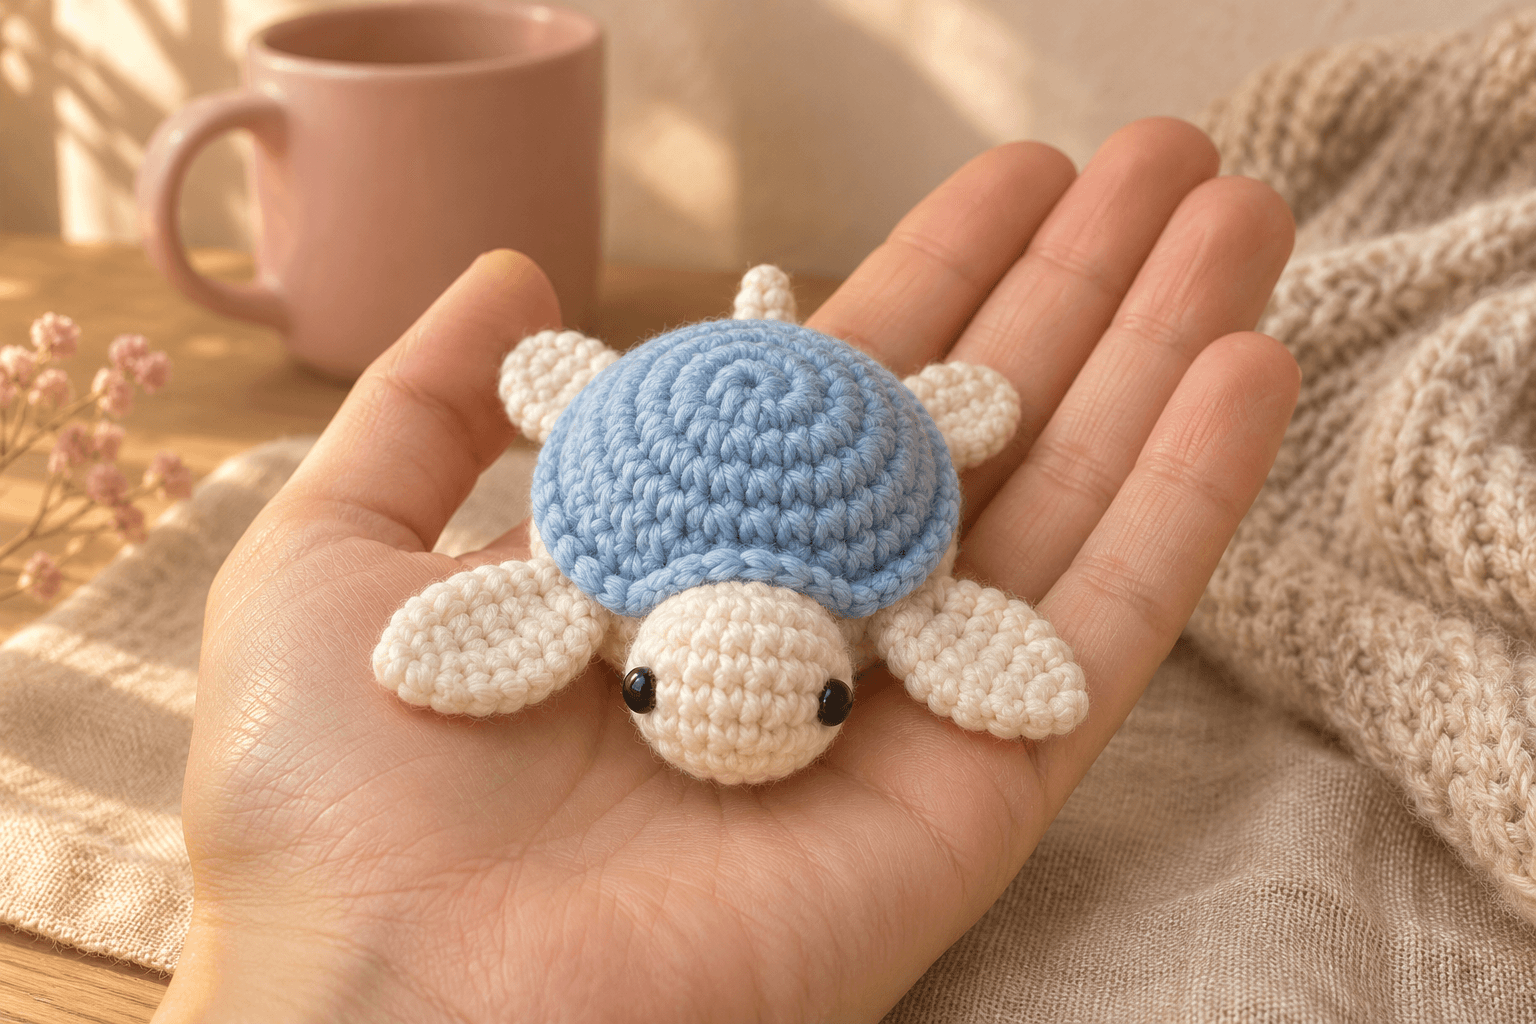
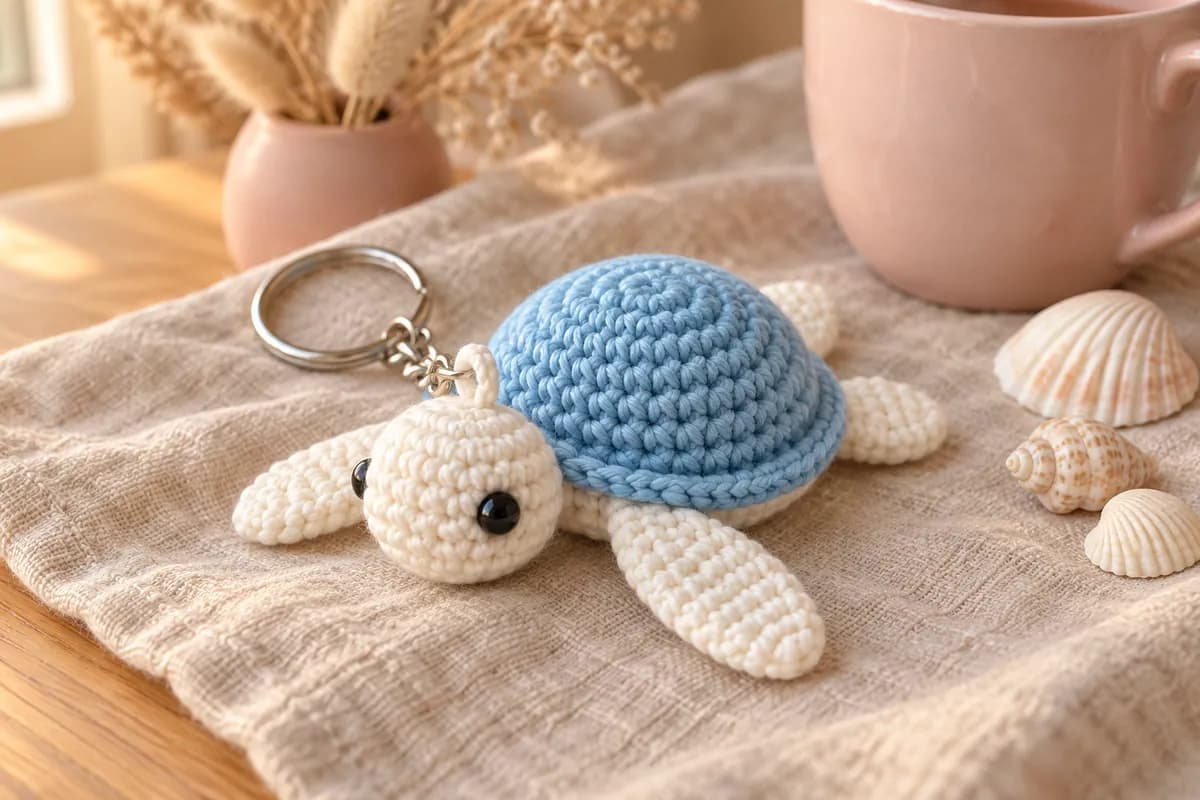
My favorite part of this mini crochet turtle is the blue lip that runs around the shell. It reminds me of the edge of a saucer. I call her Cove. Her cream flippers are broad at the front and short at the back.
I pin the flippers in place and look down at Cove from above before I crochet them in. That's when I can see if one little flipper is pointing sideways while its partner points straight back.
| At a glance | |
|---|---|
| Finished size | Varies with yarn and gauge |
| Yarn | Blue and cream in the same weight |
| Hook | Match your yarn. Try 3 mm with Anywool. |
| Pieces | 8 |
Yarn, hook and finished size for the mini turtle
- Yarn: Choose a blue and a cream yarn of the same weight. Yarn-a Anywool is one option. It is 40% wool and 60% acrylic, about 56 yd (51 m) per 45 g ball.
- Hook: Use the same hook throughout. Try 3 mm with Anywool, or pick a hook that makes a firm fabric with your yarn.
- Filling and notions: Polyester fiberfill, two 5 mm black safety eyes or black embroidery yarn, a tapestry needle, scissors, stitch markers and pins.
Tension. Work your single crochets snugly so the filling stays inside the fabric. If the filling shows between the stitches, try a smaller hook. Finished size and yarn use depend on your yarn and how tightly you crochet.
Stitches and abbreviations
US terms: magic ring (MR), single crochet (sc), slip stitch (sl st), increase (inc, 2 sc in one stitch), decrease (dec, sc 2 stitches together through their front loops), and back loop only (BLO).
Work in continuous spirals. Mark the first stitch and move the marker up each round. The number in parentheses is the stitch count. When counting placements, count the marked stitch as stitch 1.
Making the four flippers
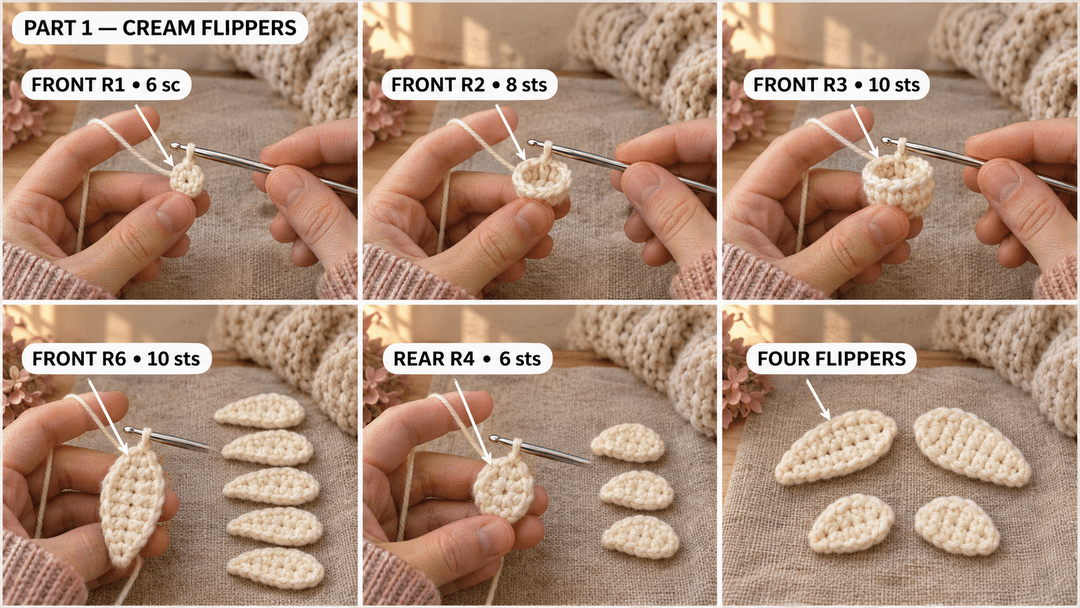
Front flippers (cream, chosen hook, Make 2). The magic ring is the tip and R6 is the base.
- R1: MR, 6 sc in the ring. (6)
- R2: (sc 2, inc) × 2. (8)
- R3: (sc 3, inc) × 2. (10)
- R4-R6: sc around. (10) 3 rounds.
Sl st in the next stitch and fasten off with a 4 in (10 cm) tail. Weave it inside the base and leave the opening flat and unstuffed. Pin the two lips together in five pairs, starting at one corner and ending at the other. Use each stitch of R6 once.
Rear flippers (cream, chosen hook, Make 2). The magic ring is the tip and R4 is the base.
- R1: MR, 4 sc in the ring. (4)
- R2: (sc, inc) × 2. (6)
- R3-R4: sc around. (6) 2 rounds.
Sl st in the next stitch and fasten off with a 4 in (10 cm) tail. Weave it inside the base. Leave it unstuffed and pin R4 flat into three pairs, one loop of stitches on each side of the opening.
Shaping the turtle’s head and placing the eyes
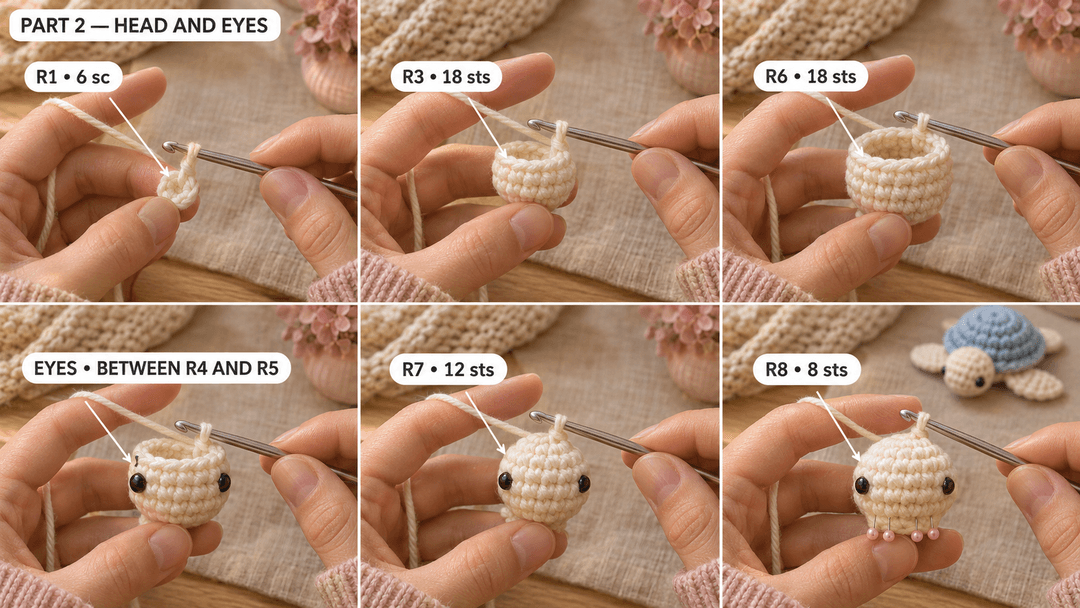
Head (cream, chosen hook, Make 1). The magic ring is the nose end. R8 ends at the neck.
- R1: MR, 6 sc in the ring. (6)
- R2: inc × 6. (12)
- R3: (sc, inc) × 6. (18)
- R4-R6: sc around. (18) 3 rounds.
Place the eyes between R4 and R5, above stitches 5 and 15 of R4. The short arc across stitch 1 is the top of the head. Secure the backs while you can still reach inside. Cove's face is just the two black eyes.
Safety. Keep the plastic-eye version away from children under three. For a little one, embroider both eyes with black yarn and secure the ends inside the head.
- R7: (sc, dec) × 6. (12)
- R8: (sc, dec) × 4. (8)
Stuff the head softly through the neck. Keep the last round clear for joining. Sl st in the next stitch and fasten off with a 4 in (10 cm) tail. Weave it into the neck. With the eyes upright, pinch R8 flat from top to bottom and pin the four pairs from one side to the other.
Crocheting the blue shell and its raised rim
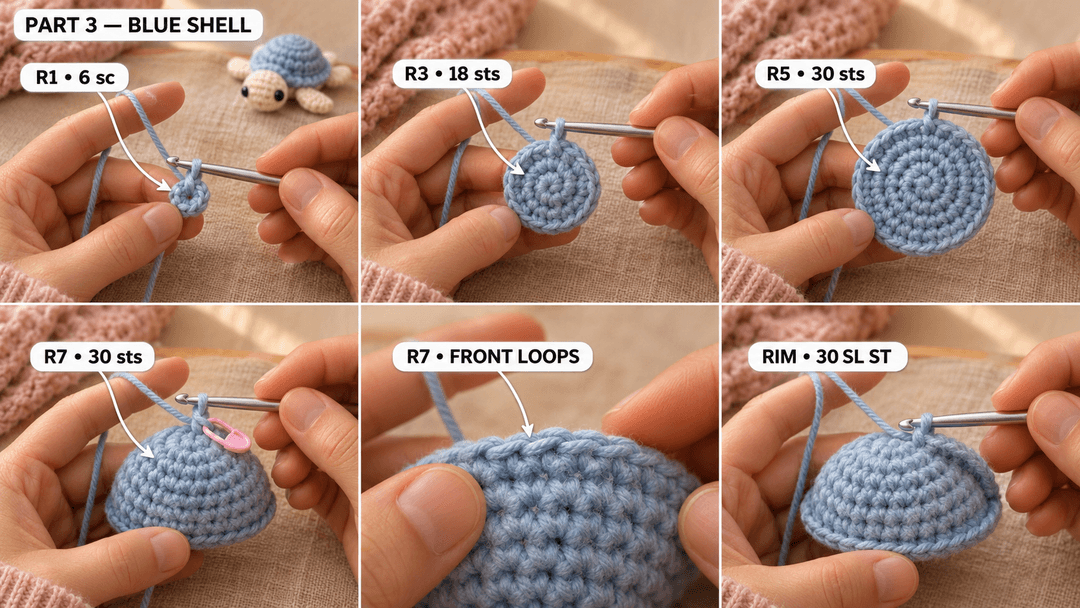
Shell (blue, chosen hook, Make 1). The magic ring sits at the top of the blue dome. The open edge becomes the underside seam.
- R1: MR, 6 sc in the ring. (6)
- R2: inc × 6. (12)
- R3: (sc, inc) × 6. (18)
- R4: (sc 2, inc) × 6. (24)
- R5: (sc 3, inc) × 6. (30)
- R6-R7: sc around. (30) 2 rounds.
Leave the blue yarn on your hook. Find the marker in R7. Cove's neck sits across that spot, half on either side. I use the back loops to catch the cream pieces and save the front loops for the little blue lip.
Joining the head and flippers in one round
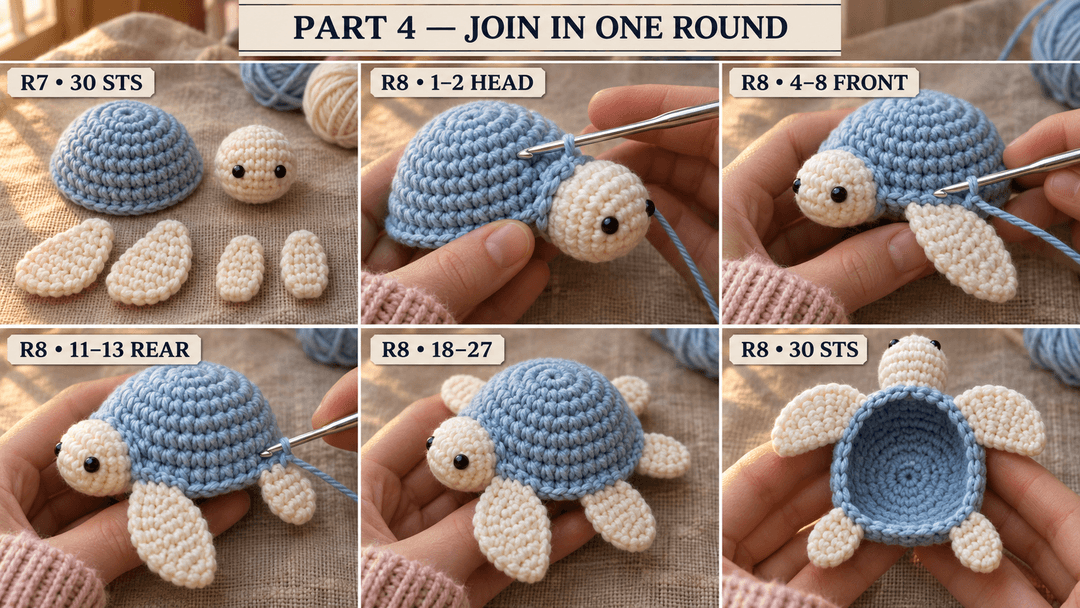
Hold the dome right side out and put the appendage bases inside the edge. Aim the nose and flipper tips out, with the eyes facing up toward the dome. Pin the neck across the round boundary. Starting at one side of the flattened neck, pin its four pairs to R7 stitches 29, 30, 1 and 2 in that order.
With the first cream pair still pinned, slide your hook through the blue back loop, then through both cream stitches. Make one blue sc and pull the pin out. When you reach a gap, work into the blue back loop by itself.
- R8: In BLO, sc around. (30) Use this placement order:
Join the head over stitches 1–2, sc in 3, join a front flipper over 4–8, sc in 9–10, join a rear flipper over 11–13, sc in 14–17, join the other rear flipper over 18–20, sc in 21–22, join the other front flipper over 23–27, sc in 28, and join the rest of the head over 29–30.
Sl st in the first stitch of R8 and fasten off with a 4 in (10 cm) tail. Weave it into the inside edge. For the rim, take a fresh strand of blue and pull up a loop through the unused front loop of R7 stitch 30.
- Rim: sl st in each unused front loop of R7, starting in stitch 1 and ending in stitch 30. (30)
Cut a 4 in (10 cm) tail, draw it through the last loop and weave both ends inside the shell. If the rim draws the shell in above the flippers, pull back those slip stitches and work them a little looser.
Closing the cream belly and adding the little tail
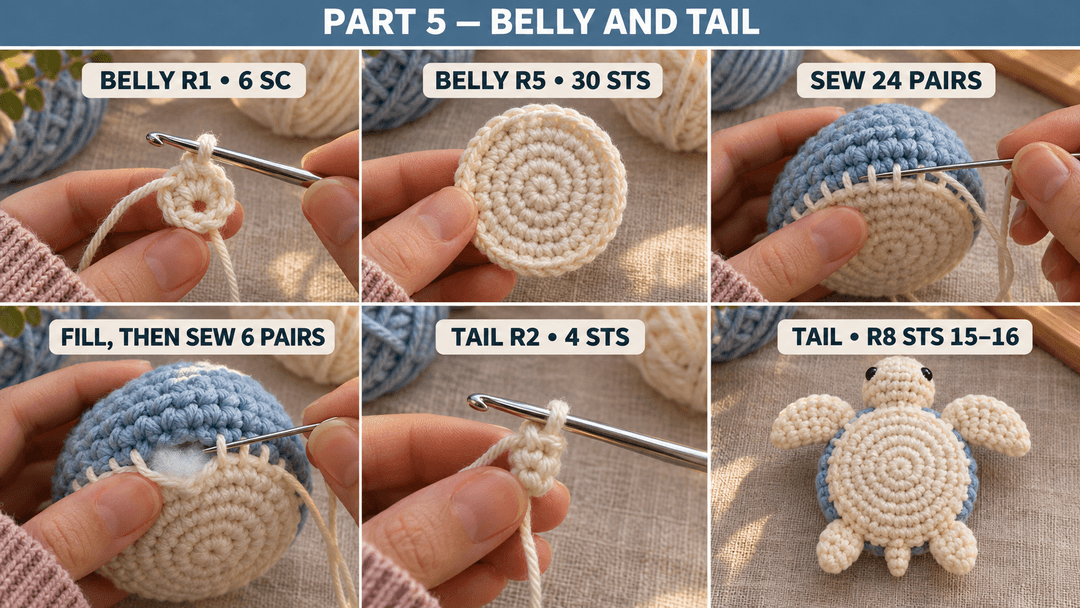
Belly (cream, chosen hook, Make 1). The magic ring is the underside center. The last round is the sewing edge.
- R1: MR, 6 sc in the ring. (6)
- R2: inc × 6. (12)
- R3: (sc, inc) × 6. (18)
- R4: (sc 2, inc) × 6. (24)
- R5: (sc 3, inc) × 6. (30)
Sl st in the next stitch and fasten off with a 16 in (41 cm) tail. With the cream side facing out, pin the belly to the shell opening. Match its first stitch to the first stitch of blue R8 and count around the physical edge from there. Whipstitch 24 matched pairs, one stitch per pair. Tuck the filling in a pinch at a time, then set Cove belly-down on the table. If she rocks on the cream disc, take out a pinch before you sew the last six pairs. Sew the last six pairs and hide the tail inside.
Tail (cream, chosen hook, Make 1). The magic ring is the tip and R2 is the base.
- R1: MR, 4 sc in the ring. (4)
- R2: sc around. (4)
Sl st in the next stitch and leave an 8 in (20 cm) sewing tail. Flatten the base into two pairs and leave it unstuffed. Sew one pair to the belly edge beneath blue R8 stitch 15 and the other beneath stitch 16. Point the little tip back between the rear flippers. Hide the yarn end inside the shell.
UK terms: US sc is UK dc, and sl st is the same in both.
I'd use a scrap of sea green for Cove's companion and keep the same cream for the flippers. I'd sit them nose to nose on the windowsill.
Made a Cove of your own? Tag #wavodecrochet on Pinterest so I can see those little flippers.