Crochet Flower Coaster – Free Pattern with a Scalloped Edge

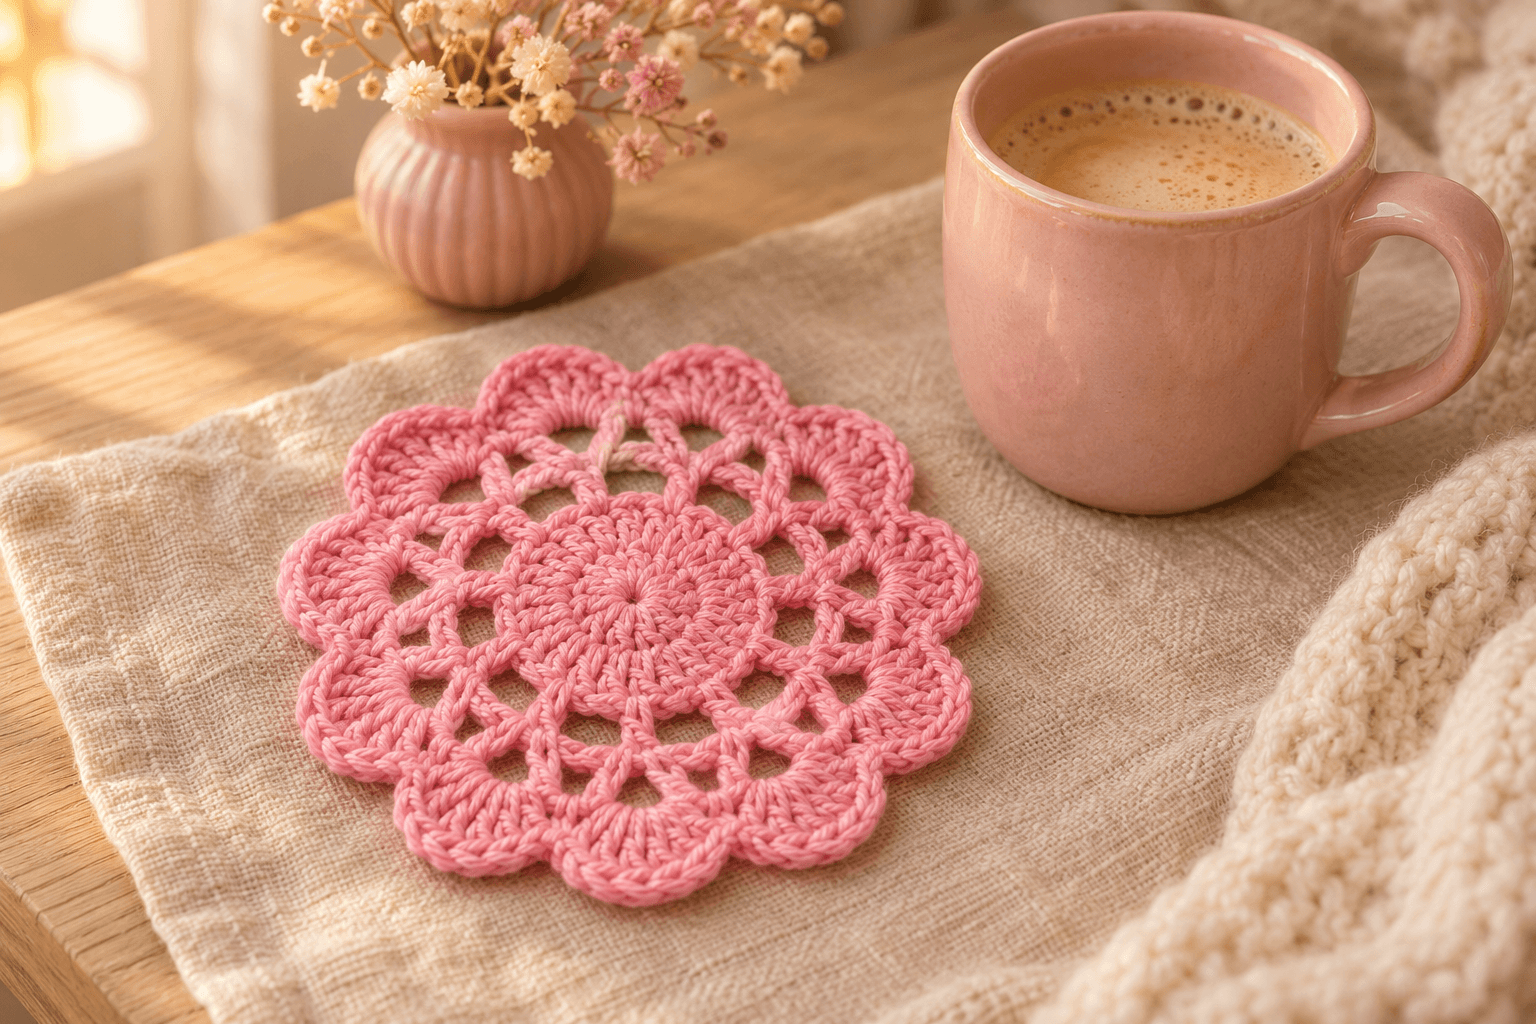
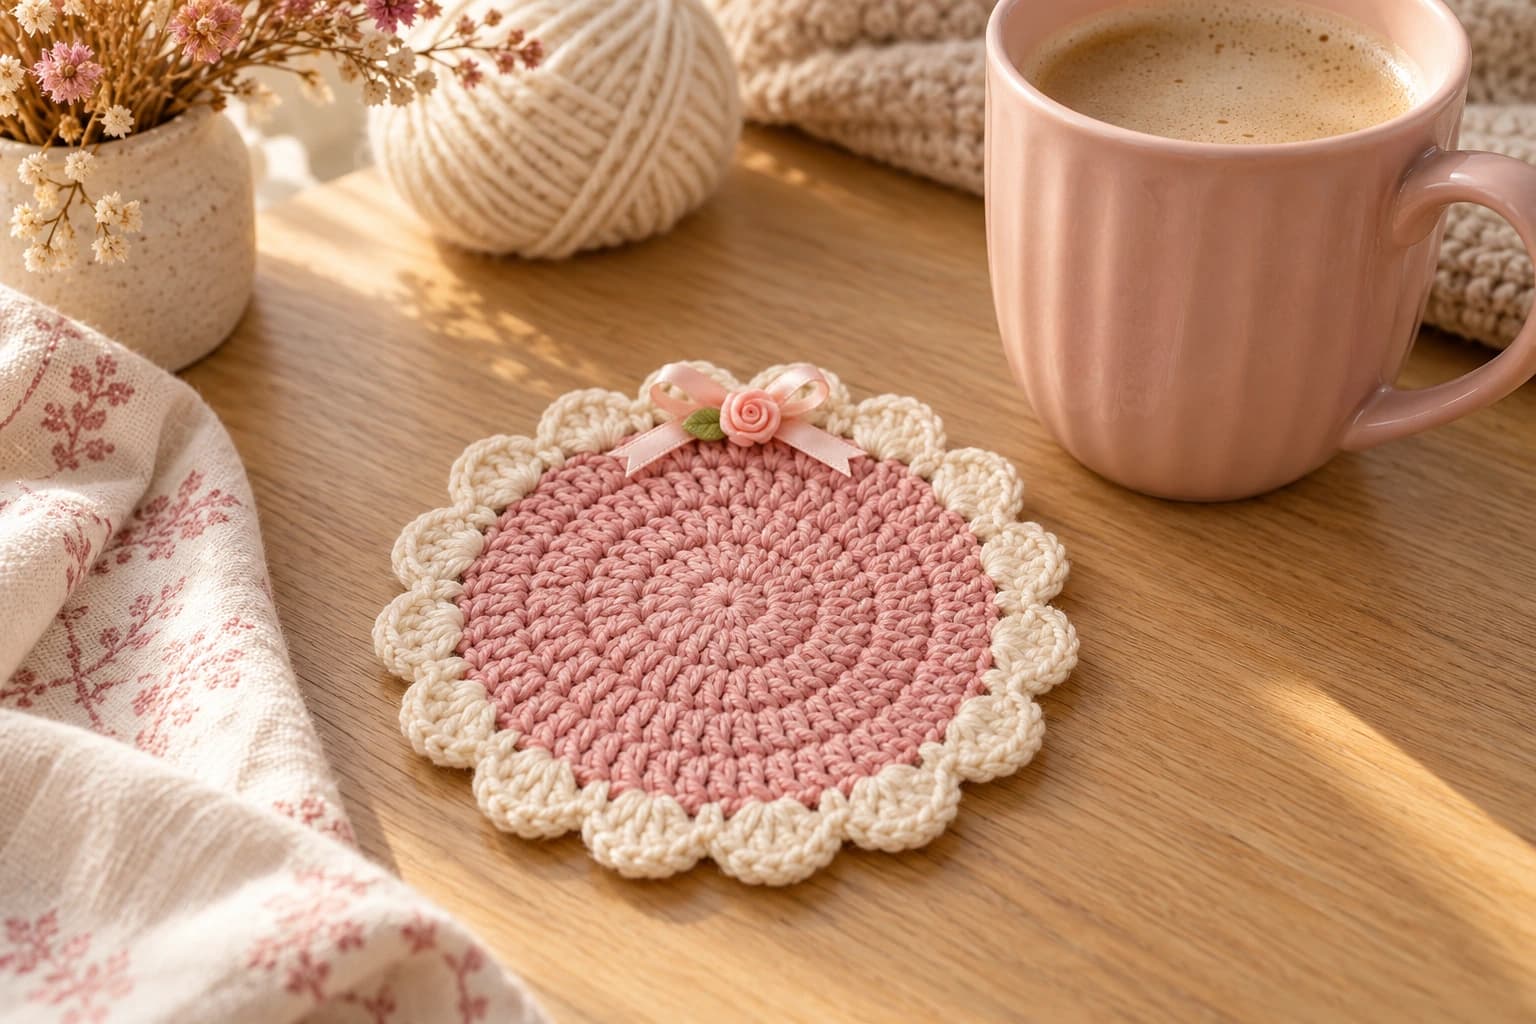
I like a flower that can stay on the coffee table after the vase is empty. This crochet flower coaster has a close-worked center, an airy ring and ten rounded scallops, all worked outward from one magic ring. The pink makes the flower shape especially easy to see.
The last round is my favorite detail. Each fan opens between two motifs from the previous round, while a slip stitch dips into the little arch beside it. Those high fans and low joins give the edge its soft, wavy outline. The placement matters more than the speed, so I explain that round separately below.
| At a glance | |
|---|---|
| Yarn | Worsted #4 acrylic in pink; worsted #4 cotton is an alternative |
| Hook | 5 mm (H/8) |
| Pieces | 1 |
| Construction | 4 joined rounds, worked from the center outward |
| Edge | 10 scallops |
| Skills | Magic ring, chains, double crochet and slip stitches |
Yarn and hook for the flower coaster
- Yarn: smooth worsted #4 acrylic in pink, or worsted #4 cotton for a firmer coaster. Keep the same yarn throughout the four rounds.
- Hook: 5 mm (H/8).
- Small things: scissors, a tapestry needle and a removable stitch marker if you find the starting chain hard to spot.
Set your usual cup on the finished coaster to check the fit. Its base should rest comfortably inside the scalloped edge. Yarn thickness and your tension affect the finished diameter.
Stitches, in US terms: magic ring (MR), chain (ch), double crochet (dc), slip stitch (sl st), stitch (st). A ch-2 space is the opening underneath two chains; insert the hook into that opening.
Work in joined rounds without turning. At the start of each round, ch 3 counts as one dc. Mark its third chain if needed, and join into that chain where instructed. The counts in parentheses include the starting ch 3 as one dc; chains in the arches and joining slip stitches are listed separately.
The pattern - the flower center and openwork rounds
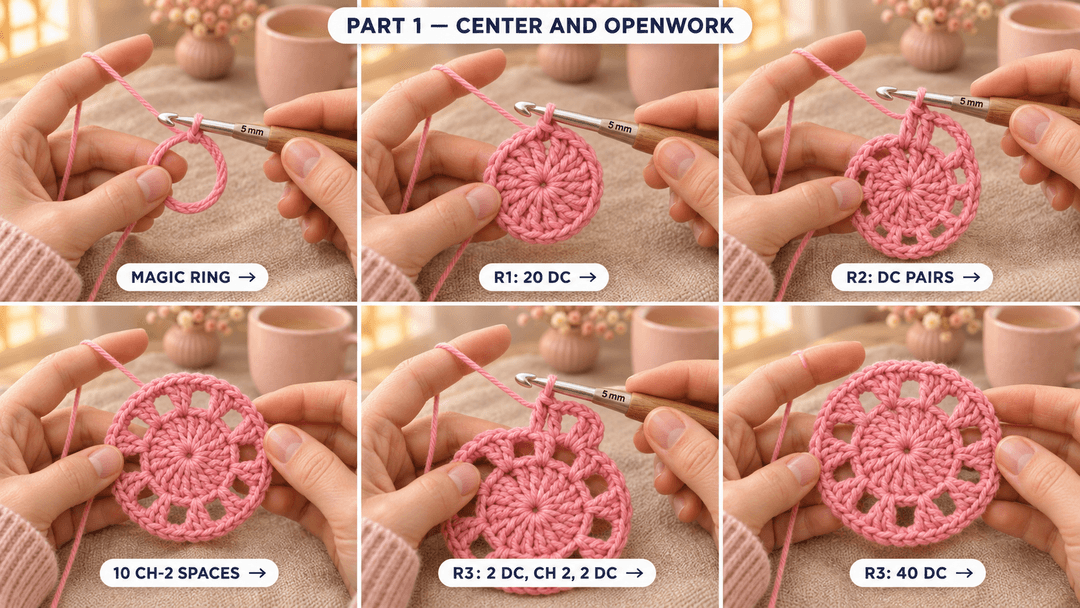
Flower coaster (pink, 5 mm hook, Make 1). The magic ring becomes the center of the coaster. The final round becomes the outside edge.
- R1: MR, ch 3, work 19 dc into the ring. Pull the ring closed and sl st into the third ch of the starting ch 3. (20)
- R2: ch 3, dc in the next st, ch 2; work [dc in each of the next 2 sts, ch 2] 9 times. Join with a sl st into the third ch of the starting ch 3. (20)
R2 has 10 pairs of dc and 10 ch-2 spaces. Work straight into the next stitch after each arch. Don't skip any stitches: the chains sit above the pairs rather than replacing stitches from R1.
Tip. Make the final ch 2 before joining R2. That last arch is easy to miss, and the next round needs all ten spaces.
- R3: ch 3, work (2 dc, ch 2, 2 dc) into each of the first 9 ch-2 spaces; work (2 dc, ch 2, 1 dc) into the last ch-2 space. Join with a sl st into the third ch of the starting ch 3. (40)
Join to the starting ch 3 to finish that last motif. Each of the 10 motifs has a little ch-2 arch in its middle.
Spread the coaster on your palm before starting the edge. Find an arch inside a motif, then slide your finger to the gap between that motif and its neighbor. Those are the two places your hook will visit next.
Ten scallops around the flower coaster
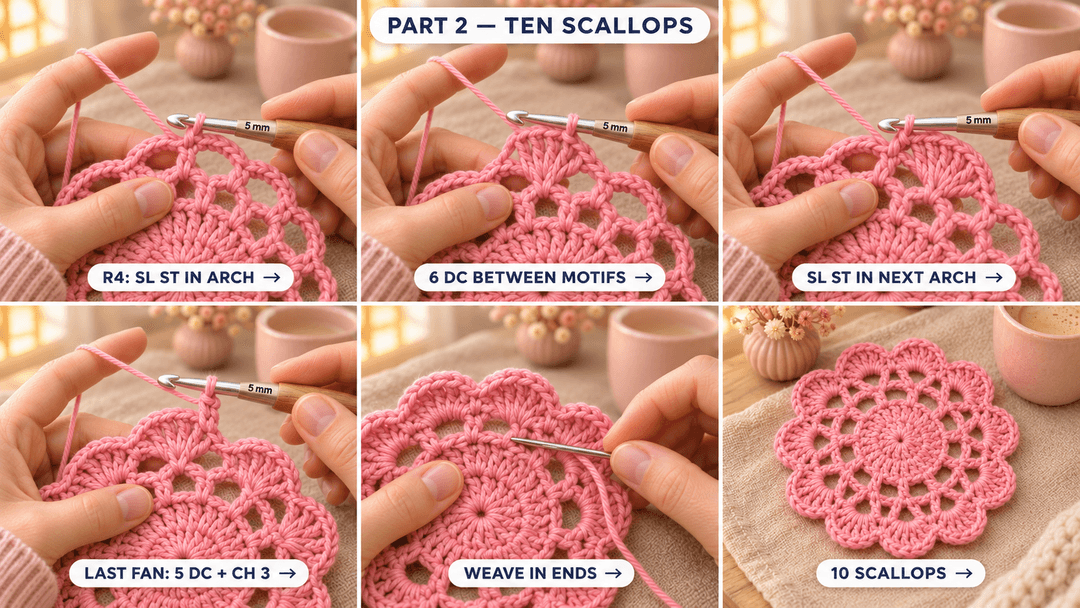
I tuck each slip stitch inside a ch-2 arch, then spread the next fan between neighboring motifs. The arches become little valleys, with rounded hills between them.
- R4: ch 3, sl st into the first ch-2 space; work [6 dc into the gap between the current motif and the next motif, sl st into the next ch-2 space] 9 times; work 5 dc into the remaining gap between motifs. Join with a sl st into the third ch of the starting ch 3. (60)
Here's that edge slowly:
- Make the starting ch 3, then slip stitch into the first ch-2 arch of R3.
- Move along the edge past the next two dc. Find the gap before the following motif begins.
- Work 6 dc into that gap, inserting the hook around the opening between the motifs.
- Move past the next pair of dc and slip stitch into the following ch-2 arch. Keep that slip stitch relaxed enough for the coaster to lie flat.
- Continue around until you have made nine full fans and reached the final gap.
- Work 5 dc into the final gap, then join to the third starting chain. The starting ch 3 completes this tenth fan.
You now have 10 scallops, each with six dc equivalents, and 10 anchoring slip stitches in the ch-2 arches. The 60-dc count includes the starting ch 3 and excludes those anchoring slip stitches.
Tip. If a scallop seems to fill an arch instead of sitting between two arches, check where the hook went. The six dc belong in the gap between motifs; reserve each ch-2 arch for a slip stitch.
Finishing the coaster and laying it flat
Cut the yarn, leaving a tail about 6 in (15 cm) long. Pull the tail through the working loop and snug it down. Turn the coaster over and thread the tail onto your tapestry needle.
Pass the needle through the backs of several nearby stitches, then change direction and pass back through another section. Keep the stitches relaxed as you pull the yarn through. Secure the magic-ring tail the same way, checking that the center stays closed, then trim both ends.
Lay the coaster on a level table and gently spread the scallops with your fingertips. If the edge is drawn inward, first check that the slip stitches have enough slack and that every fan is in its correct gap.
Optional blocking: if the yarn label permits wet blocking, dampen the coaster, press it gently in a towel and lay it flat to dry. Ease each scallop into shape without stretching the arches. Skip this step if the coaster already lies flat. Follow the yarn label for washing and drying.
A matching set for the coffee table
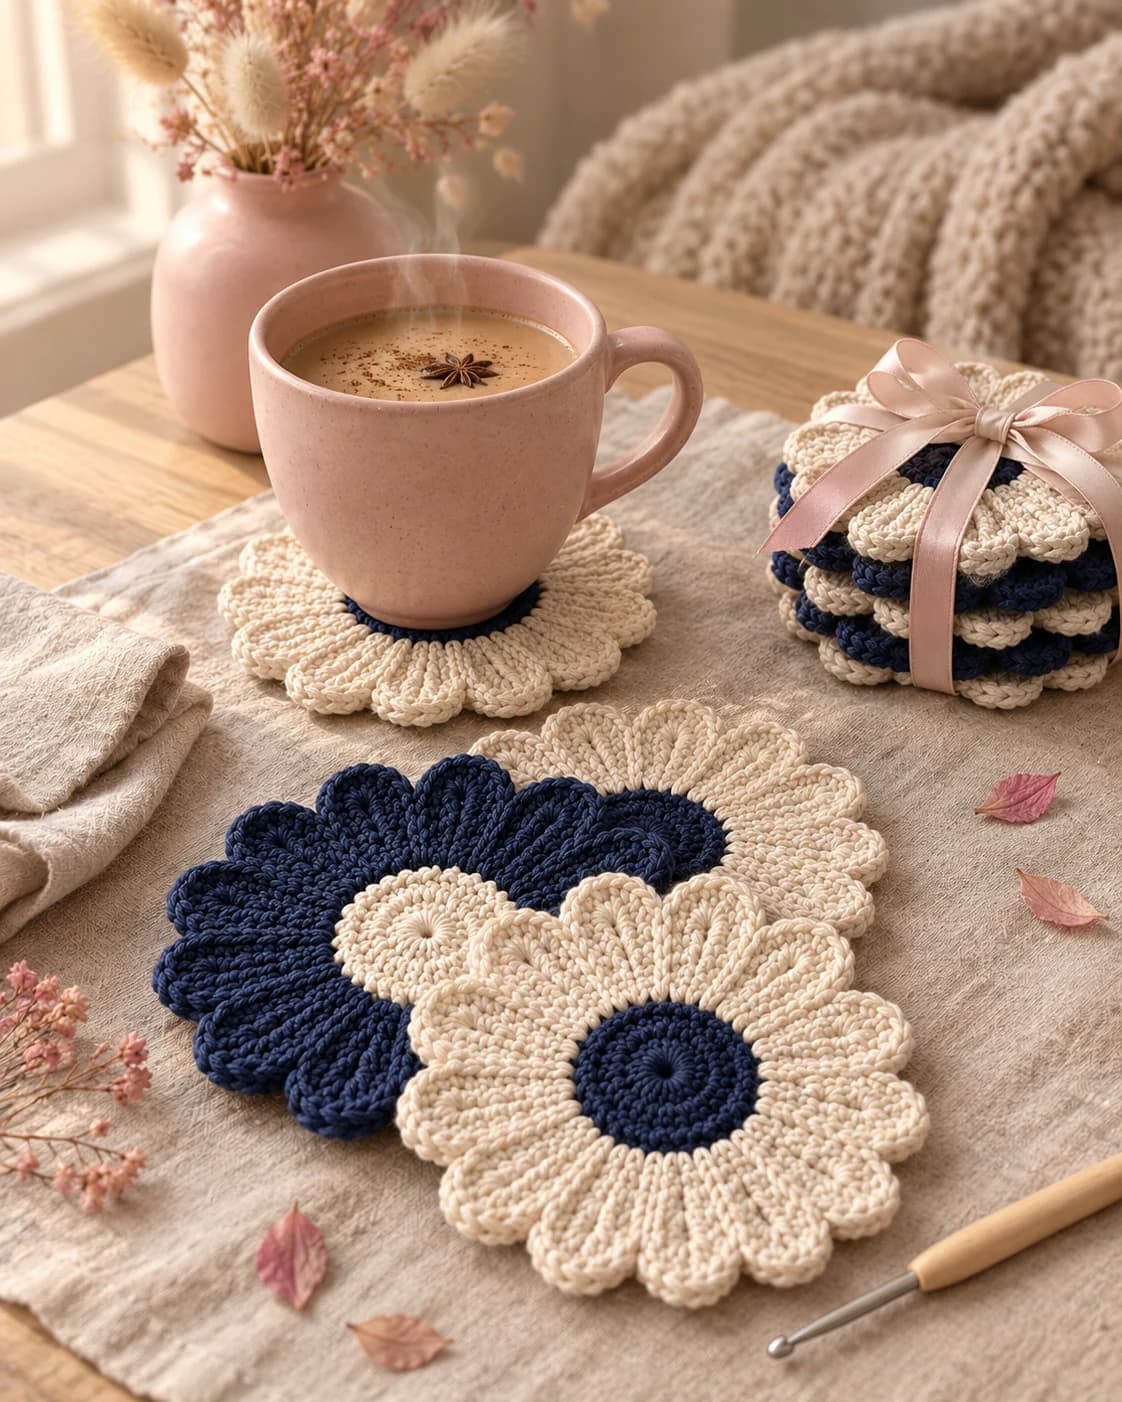
I like the idea of a small stack in soft pink, cream and pale mint, with each coaster worked in one color. Keep the yarn weight and hook the same across the set so the edges look consistent beside one another.
Let each coaster dry completely before stacking it. For a gift, tie the stack loosely with a ribbon so the scallops stay rounded.
UK terms: US dc = UK treble crochet; ch and sl st keep the same names.
Made a little flower for your table? Tag #wavodecrochet on Pinterest so I can see your colors.