Cropped Balloon-Sleeve Crochet Sweater

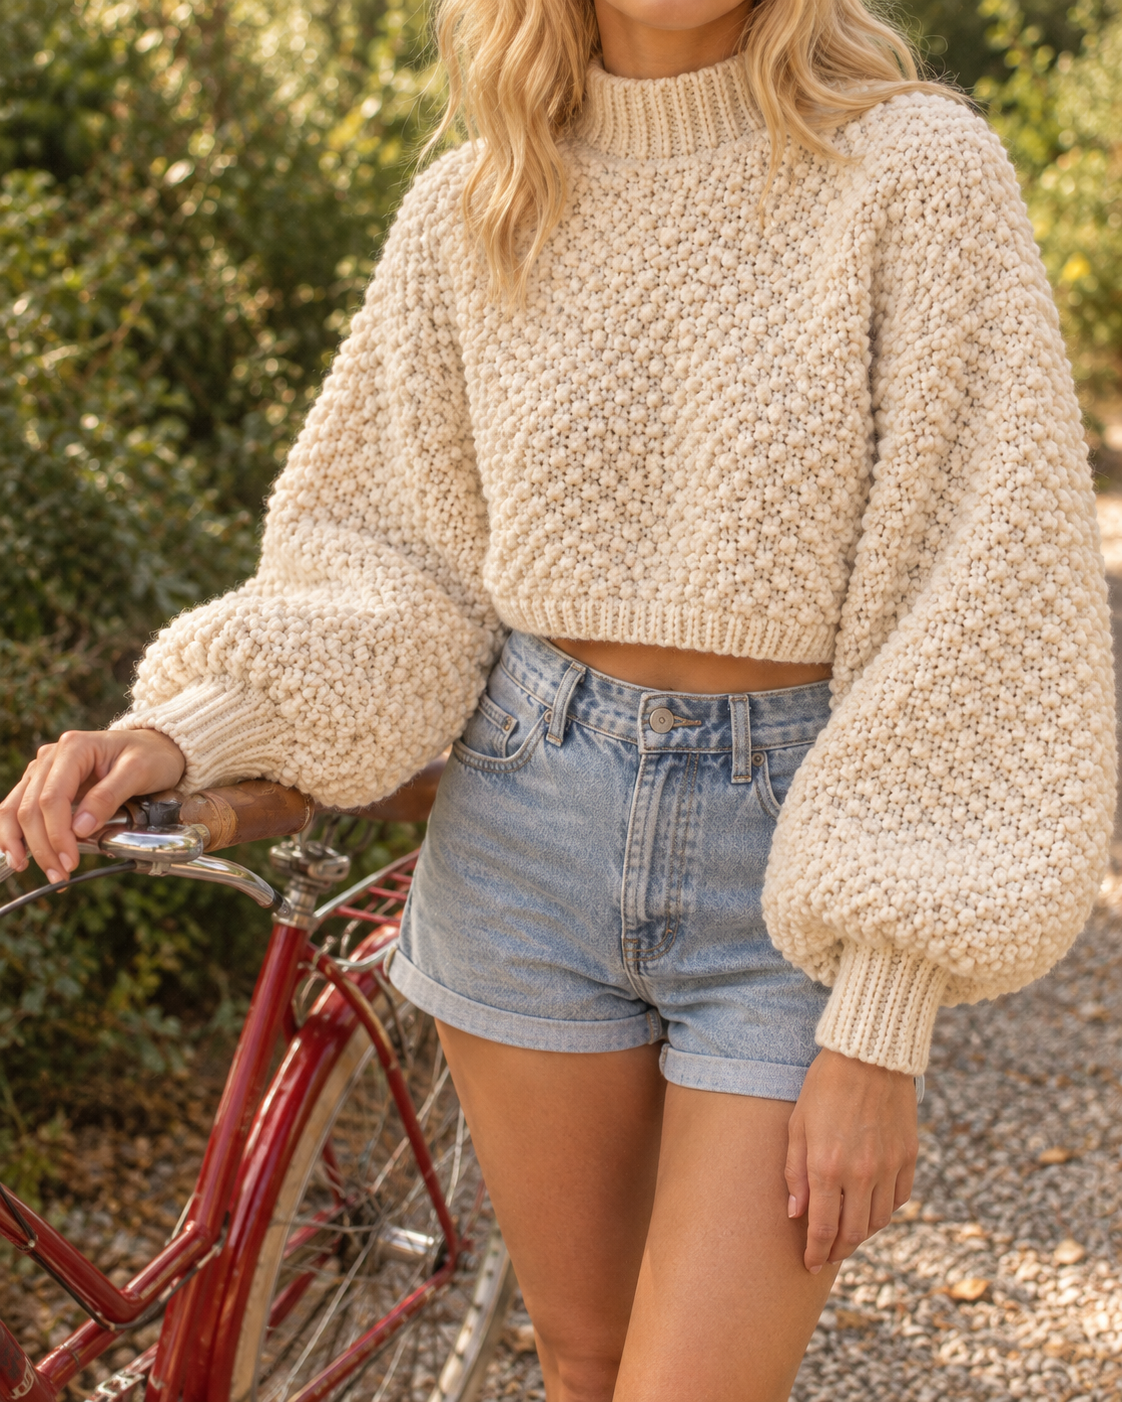
This free cropped crochet sweater uses bulky weight yarn, a 7 mm hook, and moss stitch texture worked over two body rectangles and two dramatically full sleeves to build the boxy, textured pullover with gathered bishop sleeves that's everywhere on Pinterest right now. You crochet the front and back panels, two wide straight sleeves, then gather each sleeve into a snug ribbed cuff for the balloon effect. Graded in 5 sizes, about 950 yards average, 14 to 18 hours over a long weekend.
Pattern at a glance
A cropped, oversized pullover in 5 sizes (bust 41–58 in, finished length 16–18 in) worked entirely in moss stitch — a bumpy, woven-look texture built from single crochet and chain-1 spaces. Two flat body rectangles, two wide unshaped sleeves gathered into ribbed cuffs, and a tall ribbed mock neck.
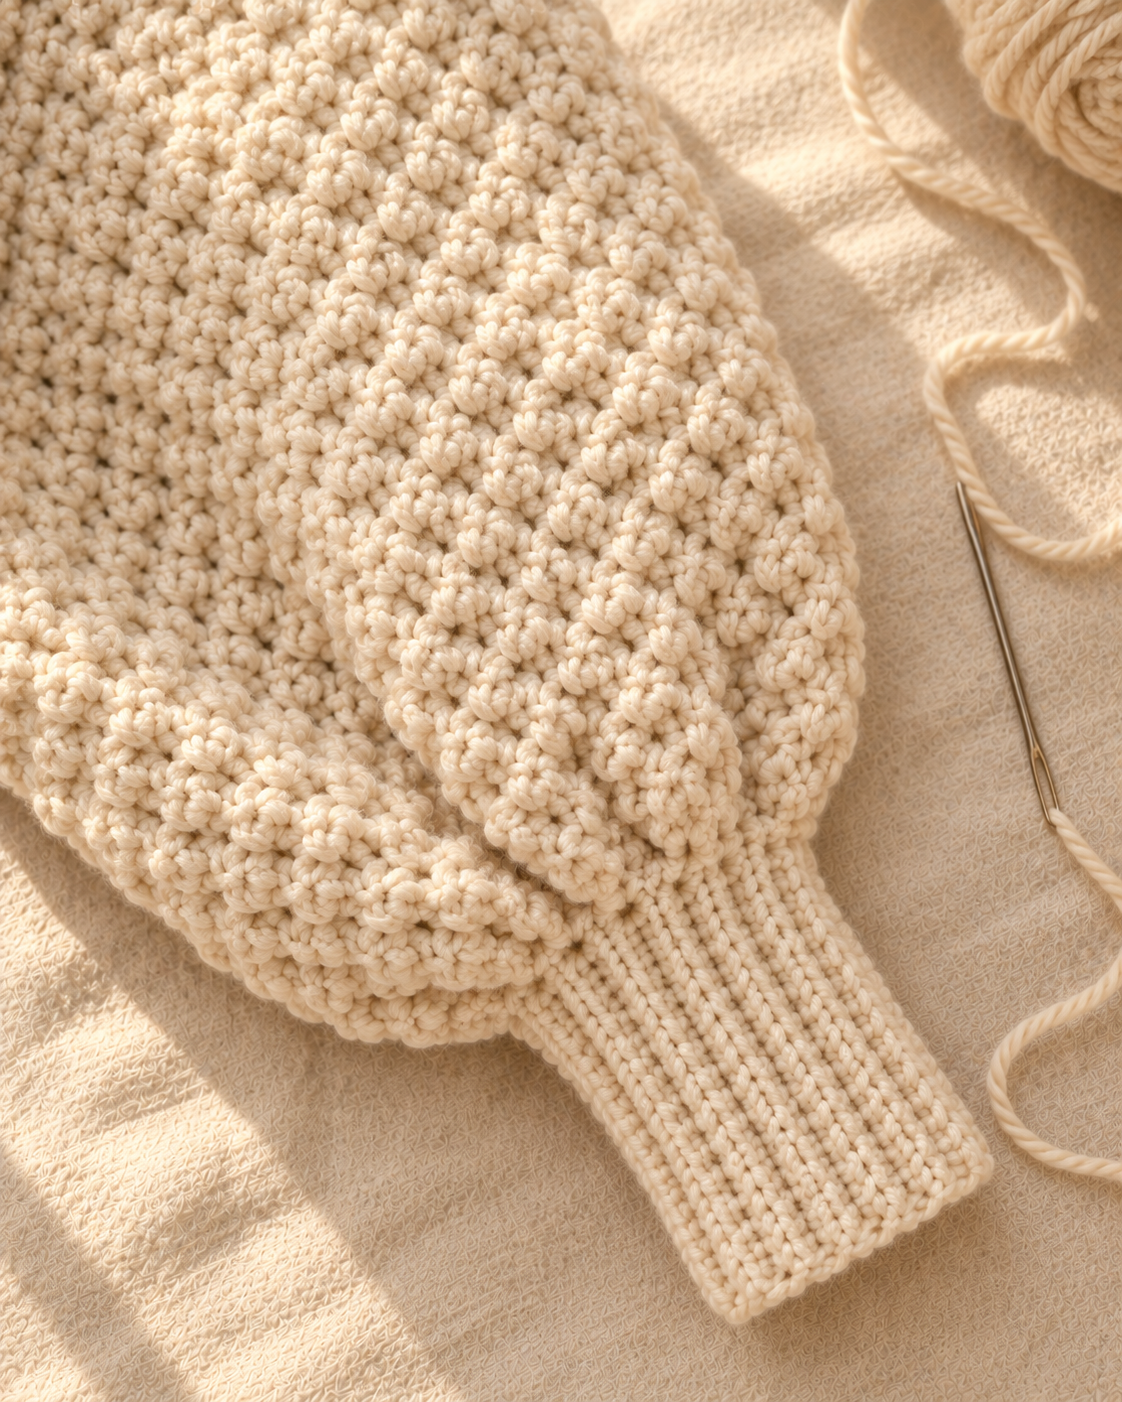
The signature detail is the sleeve: instead of tapering gradually to the wrist, it stays wide the whole way down and gets gathered into a narrow cuff — that's what gives it the dramatic balloon poof you see in the reference photo.
Why the balloon sleeve is worth the extra step
Most drop-shoulder crochet sweaters — including my navy and cream striped version — taper the sleeve gradually from armhole to cuff with decrease rows. This one doesn't. The sleeve stays wide the entire length, and the fullness gets gathered into the cuff at the very end, the same way a sewing pattern gathers fabric into a cuff with a row of basting stitches.
The payoff is that dramatic, romantic poof through the forearm that a tapered sleeve simply can't produce, no matter how loosely you crochet it. I made my first one skeptical that "gathering" a crocheted edge would actually work — it does, and it's genuinely easier than counting decrease rows.
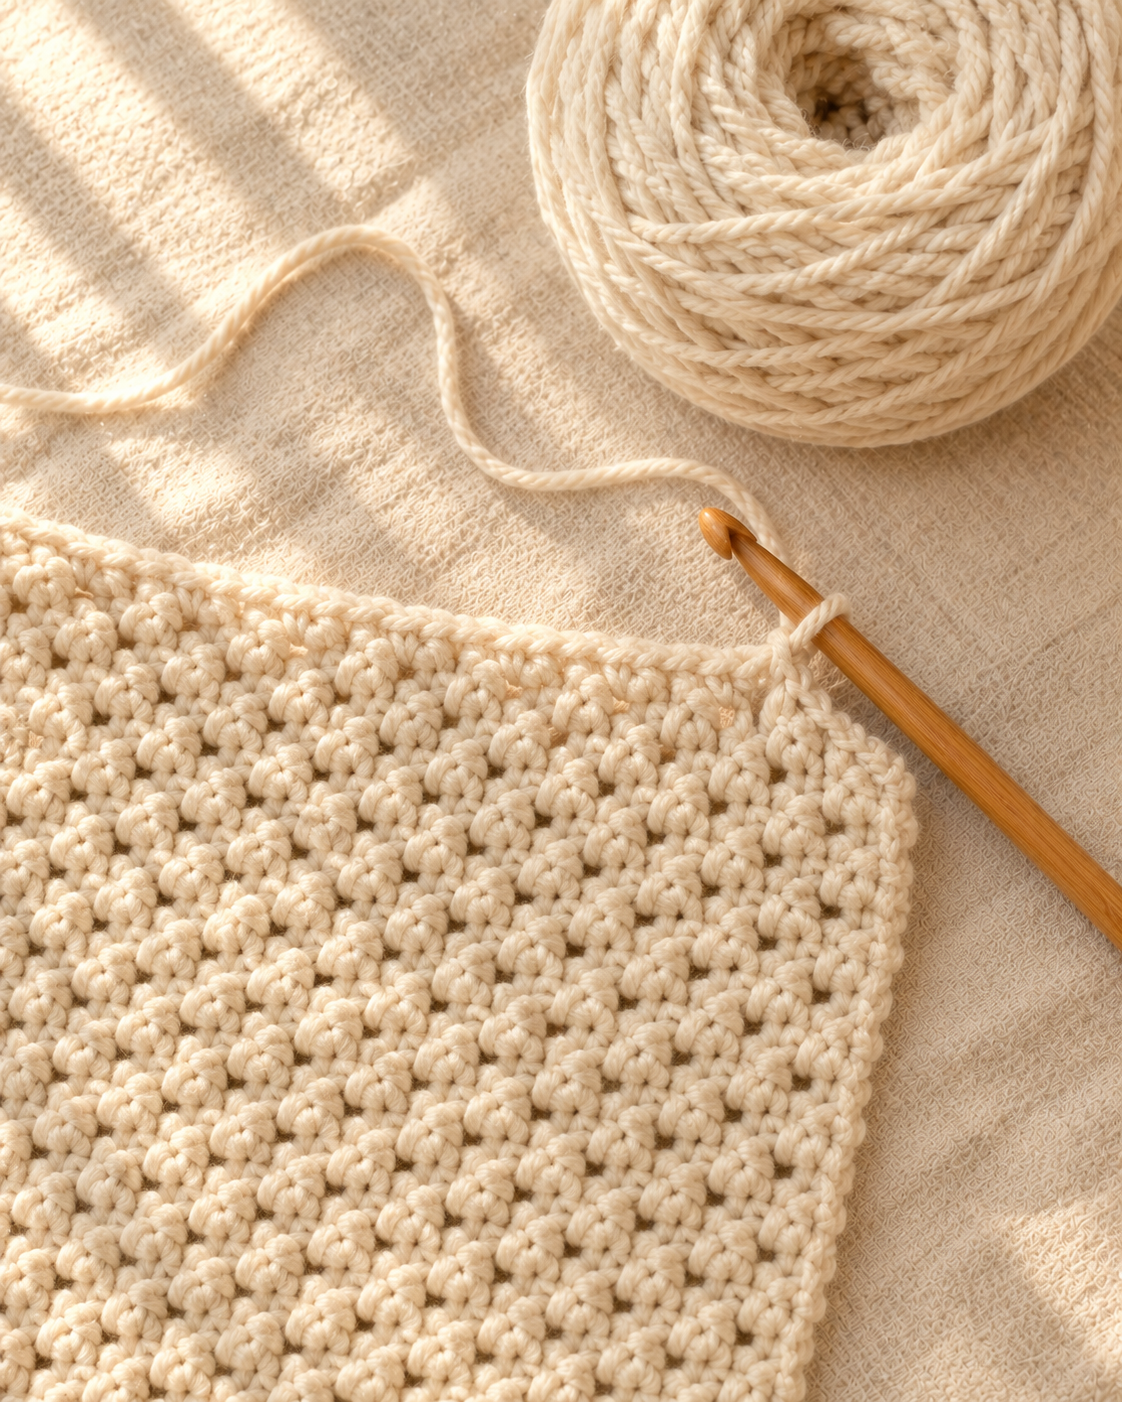
Moss stitch is doing the other half of the work here. It's a two-row repeat of single crochet and chain-1 spaces, offset so the gaps in row 2 sit under the stitches of row 1 — the woven, nubby texture you see in the photo, worked at a scale that reads clearly in bulky yarn. If you've made my chunky moss stitch blanket, you already know this stitch.
Skill level. Intermediate beginner. You need chain, single crochet, moss stitch (an easy two-row repeat), back-loops-only ribbing, and a whipstitch seam with intentional gathering. No raglan increases, no set-in sleeve shaping.
What you'll need
Yarn (bulky weight #5, ~800–1,150 yd total depending on size — see the size chart)
- Cream / oatmeal — Lion Brand Wool-Ease Thick & Quick in Fisherman, Paintbox Wool Mix Chunky in Cream, or Hobbii Jarl in Off White.
- A wool blend gives the best stitch definition for moss stitch and the softest drape for a garment this chunky. Pure acrylic works but reads flatter and less "boutique."
Hooks
- 7 mm (US L/11) — for the body panels and sleeves.
- 6 mm (US J/10) — for the ribbed cuffs and mock neck. The smaller hook keeps the ribbing snug enough to gather against.
Notions
- Tapestry needle, jumbo eye.
- 6 stitch markers (shoulder seams, armhole placement, cuff gathering points).
- Measuring tape, small sharp scissors.
Gauge
- Moss stitch: 10 sts × 12 rows = 4 in (10 cm) on a 7 mm hook.
- Ribbing (6 mm hook, back loops only): 11 sts × 12 rows = 4 in.
Gauge matters here — more than in almost anything else I've published. A sweater's fit depends on hitting these numbers. Crochet a 6-inch swatch in moss stitch before starting. If you're off by more than half a stitch per inch, change hook size.
Abbreviations (US crochet terms)
- ch — chain
- sc — single crochet
- sl st — slip stitch
- st(s) — stitch(es)
- sp — space
- BLO — back loops only
- rep — repeat
- RS / WS — right side / wrong side
The moss stitch (practice swatch first)
Moss stitch is the whole pattern — once you have this repeat down, the rest of the sweater is just following the size numbers.
Foundation: Chain any odd number.
Row 1: Sc in the 2nd ch from hook. Ch 1, skip next ch, sc in next ch; repeat across. Turn.
Row 2: Ch 1 (does not count as a st). Sc in the first ch-1 sp. Ch 1, skip next sc, sc in next ch-1 sp; repeat across, ending with a sc into the turning chain space. Turn.
Repeat Row 2 for the whole panel. Every row after the first is identical — the offset happens automatically because you're always working into the space, not the stitch, from the row before.
Size chart
| Size | Bust (oversized fit) | Length | Sleeve length | Total yardage |
|---|---|---|---|---|
| XS | 41 in | 16 in | 17 in | 800 yd |
| S | 44 in | 16 in | 17 in | 850 yd |
| M | 49 in | 17 in | 18 in | 950 yd |
| L | 52 in | 17 in | 18 in | 1,050 yd |
| XL | 58 in | 18 in | 18 in | 1,150 yd |
Instructions below are written XS (S, M, L, XL). This sweater runs oversized by design — if you'd rather a closer fit, size down one from your usual bust measurement.
The pattern — step by step
Part 1 — Front and back panels (make 2, identical)
With 7 mm hook:
Foundation: Ch 51 (55, 61, 65, 73).
Row 1: Sc in 2nd ch from hook. Ch 1, skip next ch, sc in next ch; repeat across. Turn.
Row 2 onward: Ch 1. Sc in first ch-1 sp. Ch 1, skip next sc, sc in next ch-1 sp; repeat across, ending in the turning chain. Turn.
Continue in moss stitch until the panel measures 16 in (16, 17, 17, 18) from the foundation. Fasten off, leaving a 24-inch tail.
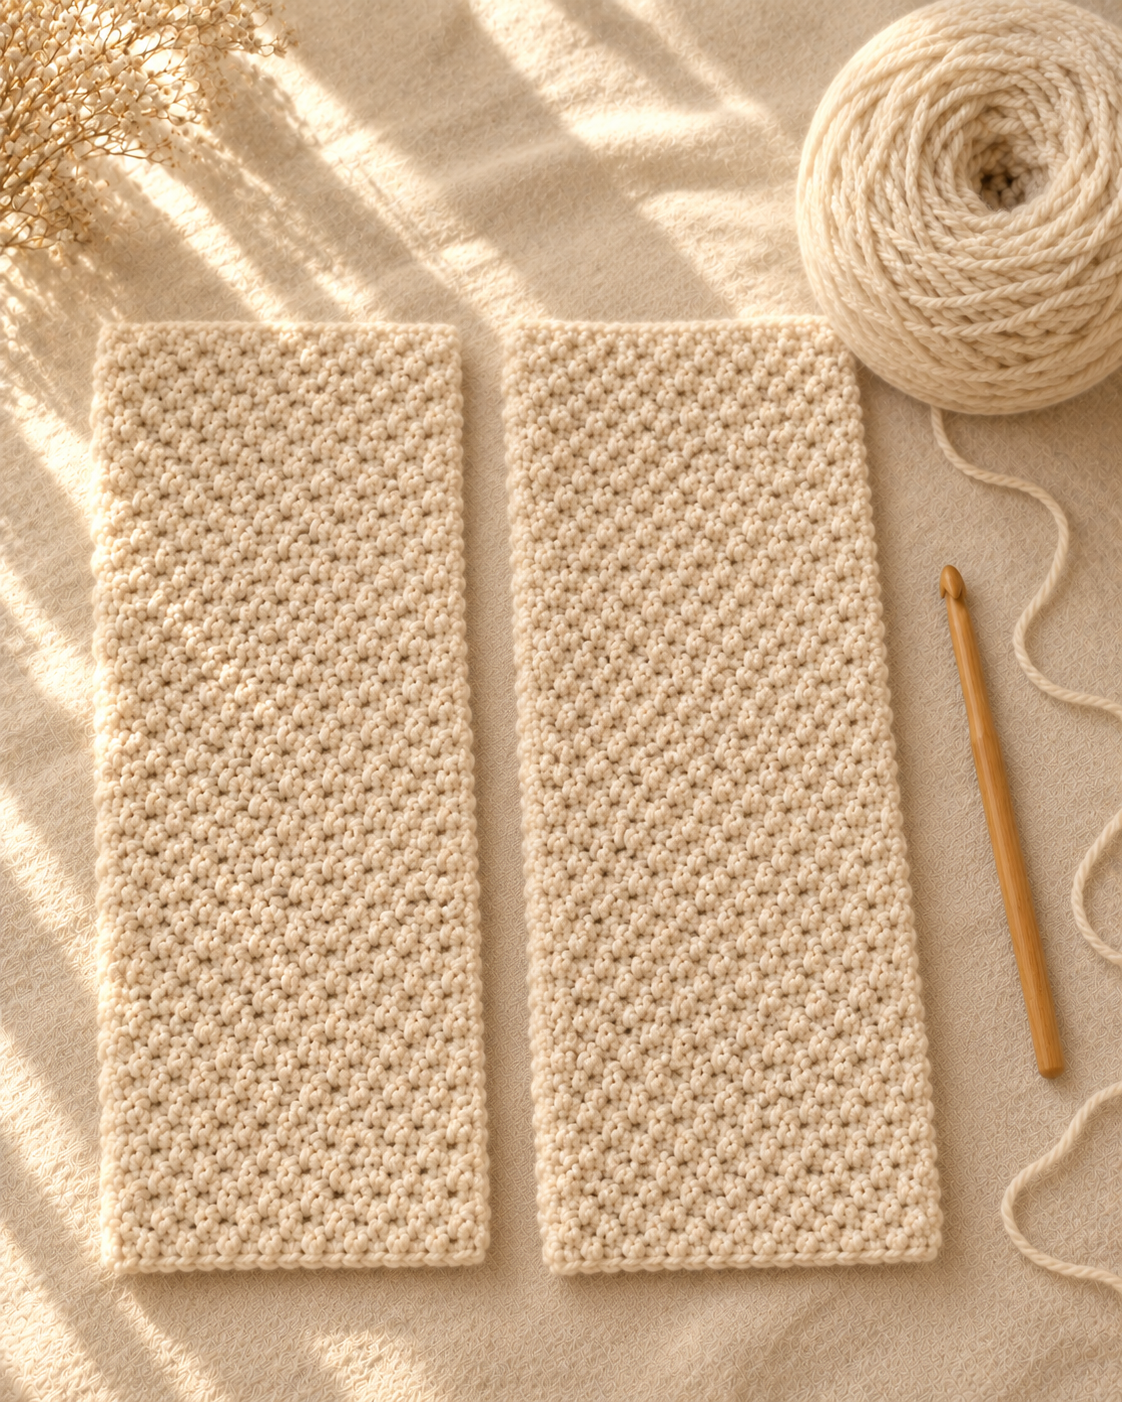
Make a second, identical panel — this is your back. Both panels should measure the same width, about 20.5 in (22, 24.5, 26, 29.25) — that's half your total bust per size.
Part 2 — The sleeves (make 2, unshaped)
This is the piece that makes the balloon shape — no decreases, no tapering.
Foundation: Ch 45 (45, 49, 49, 53).
Row 1: Sc in 2nd ch from hook. Ch 1, skip next ch, sc in next ch; repeat across. Turn.
Row 2 onward: Continue in moss stitch exactly as the body panels, with no increases or decreases at any point.
Work straight until the sleeve measures 17 in (17, 18, 18, 18) from the foundation edge. Fasten off, leaving a 20-inch tail.
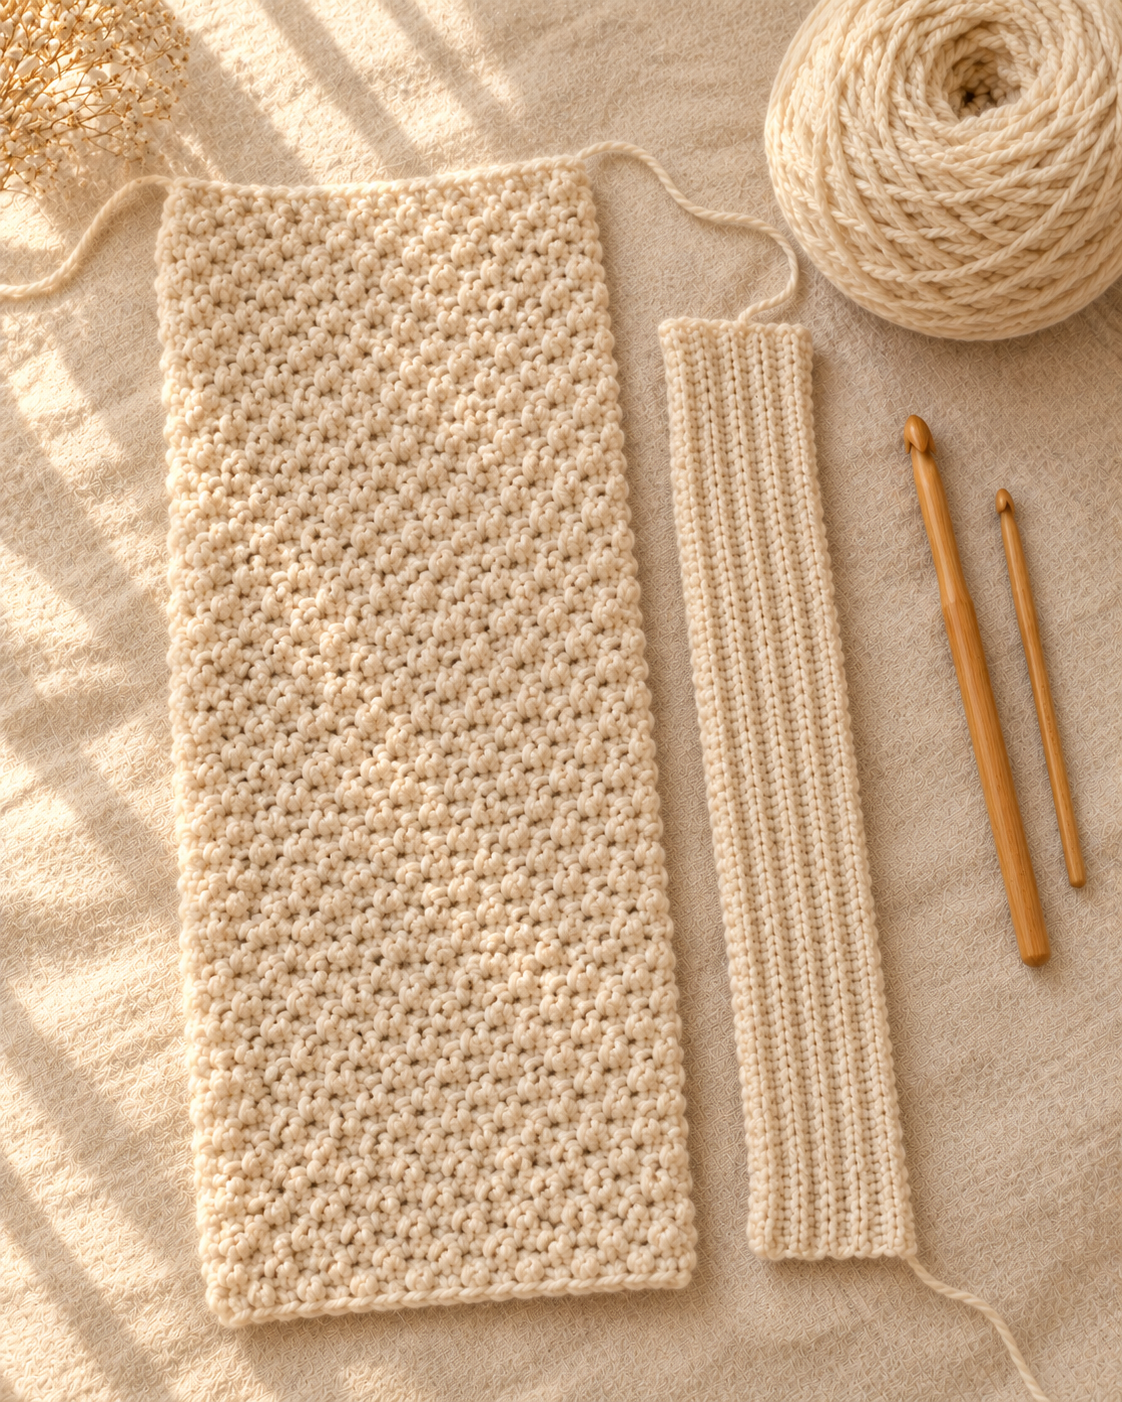
Repeat for the second sleeve. Both sleeve rectangles should be identical top to bottom — wide the whole way, exactly as pictured above next to the narrow cuff piece.
My finding: The first time I made this sweater, I panicked halfway down the sleeve because it looked far too wide to ever become a fitted cuff. Trust the pattern here — the gathering step in Part 4 is doing more work than it looks like it should, and a wide flat rectangle really does become a full, romantic sleeve once it's eased into the ribbing.
Part 3 — Ribbed cuffs (make 2) and mock neck
Switch to the 6 mm hook. These are worked as separate flat strips, then joined into rounds when you attach them.
Cuffs: Ch 25 (25, 27, 27, 29).
Row 1: Sc in 2nd ch from hook and each ch across. Turn. (24 (24, 26, 26, 28) sc)
Rows 2–14: Ch 1, sc BLO in each st across. Turn.
Fasten off, leaving a 12-inch tail. This narrow ribbed strip is noticeably shorter than the sleeve's bottom edge — that gap is intentional and gets gathered in Part 4.
Mock neck: Ch 58 (62, 66, 70, 74).
Row 1: Sc in 2nd ch from hook and each ch across. Turn.
Rows 2–14: Ch 1, sc BLO in each st across. Turn.
Fasten off, leaving a 20-inch tail. Fourteen rows gives the tall, stand-up mock-neck collar from the reference photo; work fewer rows if you'd rather a shorter, foldover collar.
Part 4 — Assembly, including the sleeve gather
Five seams total: 2 shoulders, 2 armholes, 2 side-and-underarm, plus the 2 cuffs and 1 neckband. Work them in this order.
- Seam the shoulders. Lay both panels right side up. Using the tail and a tapestry needle, whipstitch across the top edge from each outer edge inward, working 13 (14, 16, 17, 19) stitches on each side. Leave the center 25 (27, 29, 31, 35) stitches open for the neck.
- Attach the sleeves. Measure 10 in (10.5, 11, 11.5, 12) down each side from the shoulder seam and mark with a stitch marker — that's your armhole depth. Pin the sleeve's top edge to the body between the two markers on front and back, easing evenly. Whipstitch in place.
- Seam the sides and underarms. Fold and pin each sleeve in half lengthwise, continuing down the body side to the hem. Whipstitch each side in one continuous seam from cuff opening to hem.
- Gather each cuff onto its sleeve. This is the step that makes the balloon shape. Fold the sleeve's bottom edge and the cuff strip's long edge right sides together, with the cuff's short ends joined into a small ring first (whipstitch them together). Pin the cuff evenly around the wider sleeve opening, distributing the extra sleeve fullness into small, even pleats as you go — roughly one small pleat every 3 to 4 stitches. Whipstitch the cuff to the sleeve all the way around, gathering as you pin.
- Attach the mock neck. Join the neckband's short ends into a ring the same way, matching it to your neck opening stitch count, then whipstitch it around the neck opening.
- Weave in every tail through 6 stitches in two directions.
Finishing touches
- Steam block the whole sweater before wearing. Moss stitch relaxes and evens out beautifully under steam — hover a garment steamer 6 inches above every panel and let the bumps settle into a uniform texture.
- Try it on before weaving the last tails. If the gather looks uneven on one cuff, unpick and redistribute the pleats — much easier now than after the ends are woven in.
- Handwash the first time. Cold water, wool-safe soap, roll in a towel to remove excess water, dry flat. That first wash sets the stitches and softens the hand of the yarn.
Care instructions
Handwash cold in wool-safe soap, lay flat to dry. Do not tumble-dry — bulky moss stitch loses its bounce and the drop shoulders can stretch out of shape in heat. Store folded, never hung, since a hanger will pull the shoulders long over time. Steam-block once a season to refresh the texture and re-set the sleeve gathers.
Frequently asked questions
How much yarn do I need for this sweater? For a mid-size (M, 49 in oversized bust) you need about 950 yards of bulky #5 yarn. Buy one extra skein as a safety margin for gauge swatching and dye-lot variation — running short mid-sleeve is the most common regret I hear about from makers of this pattern.
Can I make the sleeves less dramatic? Yes. Work the sleeve foundation chain 6–8 stitches narrower per size, and gather it onto the same cuff width. Less starting fullness means a softer, less exaggerated balloon.
What's the difference between this and a tapered drop-shoulder sleeve? A tapered sleeve, like my striped pullover, narrows gradually with decrease rows and fits close at the wrist without any gathering. This sleeve stays wide the whole way and only narrows at the very end, gathered into a ribbed cuff — that's what produces the rounded, poofy silhouette instead of a straight taper.
Is moss stitch hard to learn? No — it's a two-row repeat of single crochet and chain-1 spaces, and once you've worked the first two rows, every row after uses the exact same instructions. It's slower than plain single crochet because of the chain-1 spaces, which is part of why this pattern budgets a full weekend rather than one evening.
Can I sell finished sweaters made from this pattern? Yes — you're welcome to sell physical sweaters made from this free pattern at craft fairs, Etsy, or as gifts. Please credit "Pattern by Wavode" on your listing and link back to this page. What you can't do is republish this write-up or my photos as your own pattern.
Related patterns on Wavode
- Navy and cream striped crochet sweater — the tapered-sleeve version of this same drop-shoulder construction, if you'd rather skip the gathering step.
- Chunky crochet blanket, textured moss stitch throw — practice the exact stitch this sweater uses on a forgiving, flat project first.
- Long crochet cardigan, oversized olive duster — an open-front layer in the same bulky-yarn, boxy-silhouette family.
Made this sweater? Tag #wavodecrochet on Pinterest — I re-pin every finished make and credit the maker.
Pattern by Clara Hartwell for Wavode. Questions? Email me at support@wavode.com.