Crochet Lily of the Valley Keychain Pattern

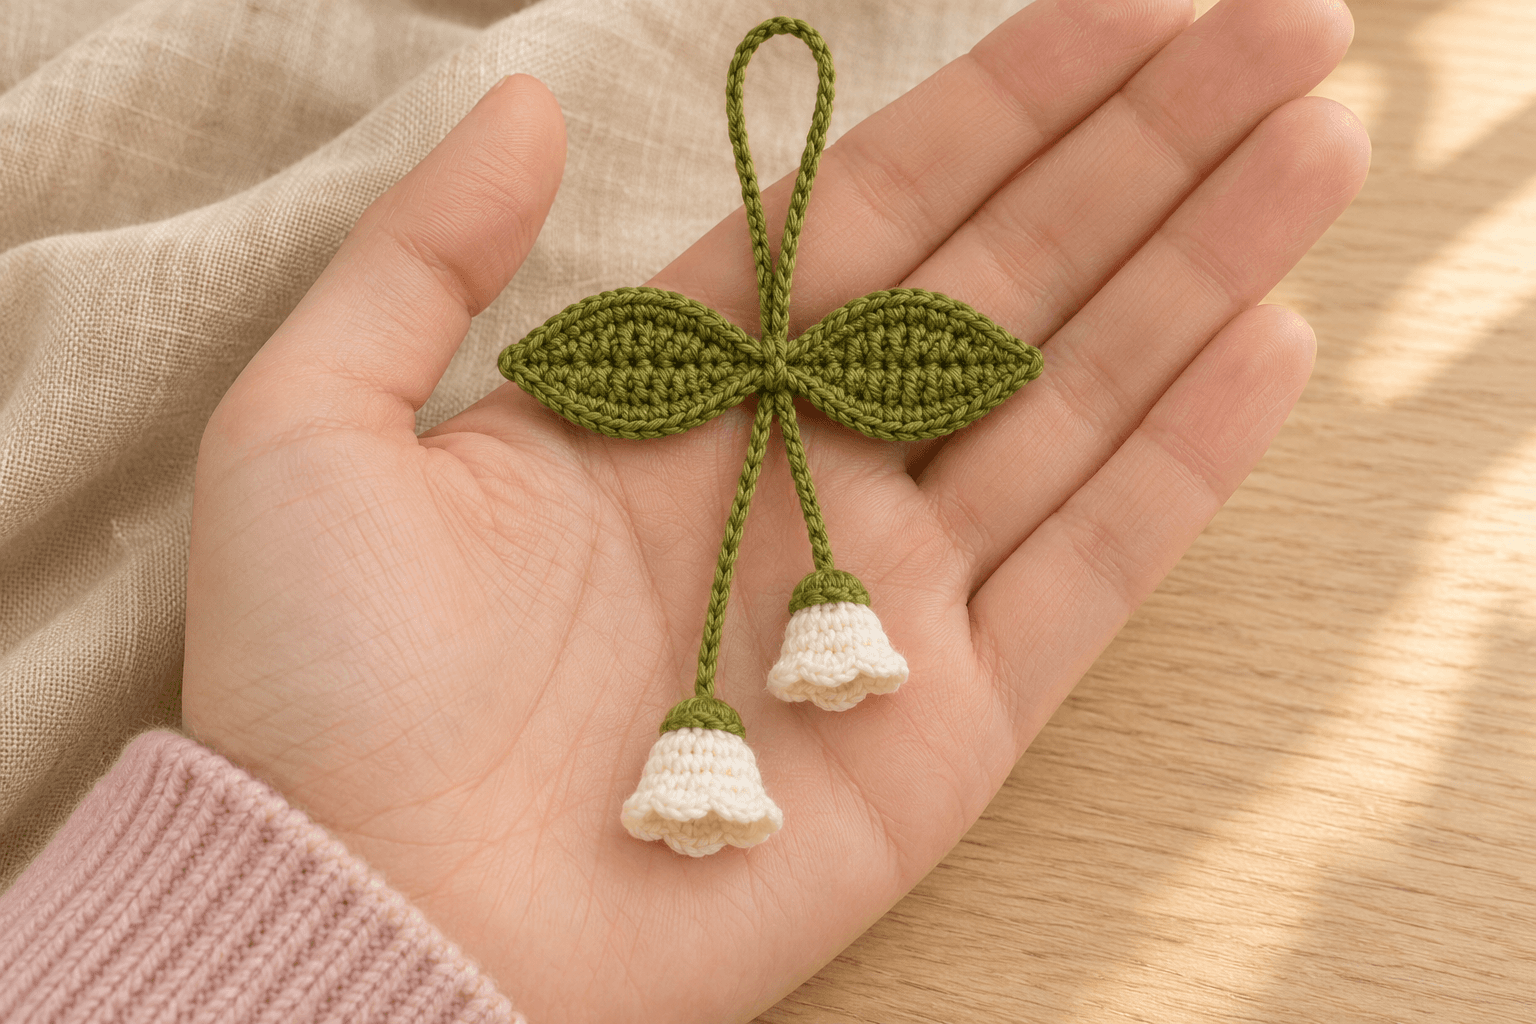
Two little bells hang from a green cord in this crochet lily of the valley keychain. Each bell starts with a green cap and ends in six scallops. The cord passes through the narrow middle of the leaf, where two slip stitches pinch the shape in.
| At a glance | |
|---|---|
| Pieces | 1 cord, 1 leaf, and 2 bells |
| Cord | 55 chains |
| Bell | 4 joined rounds with 6 puffs and 6 scallops |
| Size | Depends on your yarn, hook, and tension |
| Skills | Working around a foundation chain, joining rounds, and making puffs |
Yarn and tools for the lily of the valley keychain
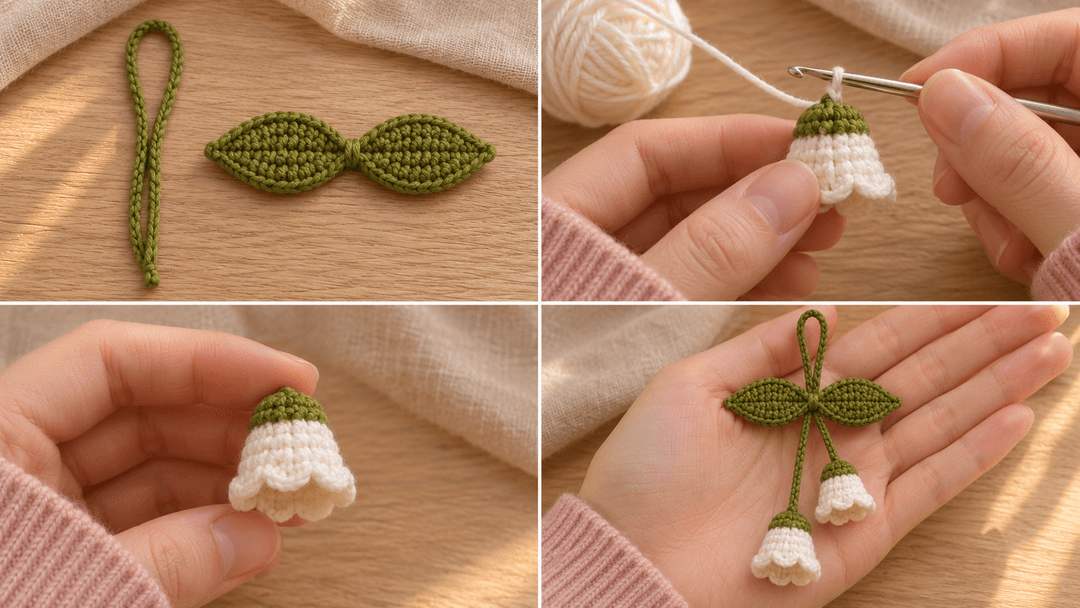
- Yarn: Green for the cord, leaf, and caps. Use a contrasting color for the bells. White gives the flowers their familiar lily-of-the-valley look.
- Hook: Choose a hook that suits your yarn. Use the same hook throughout for matching bells.
- Tools: A tapestry needle, scissors, and removable stitch markers.
US terms: ch = chain, sl st = slip stitch, sc = single crochet, hdc = half double crochet, dc = double crochet, st = stitch, ch-1 sp = chain-1 space. Each instruction is worked into the next stitch or chain unless it says to work several stitches into the same place.
Making the 55-chain hanging cord
With green yarn, ch 55 and fasten off. Leave a sewing tail at each end. Both tails will pass through the leaf, and each will secure one bell. Keep the chains comfortably loose so the cord bends at the top of the loop.
Shaping the leaf around a foundation chain
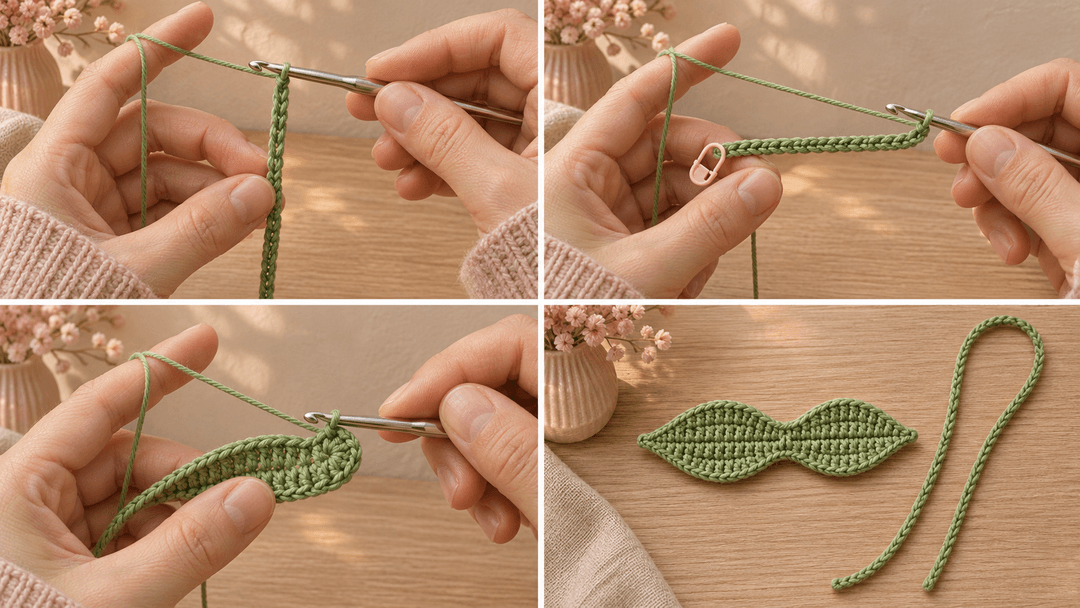
The leaf has two broad sections and a narrow waist. The slip stitch on each side marks the waist and gives the cord a place to pass through.
Foundation: With green yarn, ch 16.
- First side. Starting in the second ch from the hook, work sc, hdc, dc in each of the next 3 ch, hdc, sc, sl st, sc, hdc, dc in each of the next 3 ch, hdc, 3 sc in the last ch. Mark the first sc. (17 sts)
- Opposite side. Rotate the work and continue in the unused loops of the foundation chain. Work hdc, dc in each of the next 3 loops, hdc, sc, sl st, sc, hdc, dc in each of the next 3 loops, hdc, 2 sc in the last loop. (15 sts)
- Join with a sl st in the marked first sc. Ch 1, fasten off, and weave in the ends. (32 sts around, including the 2 shaping slip stitches)
Look for the two slip stitches directly across from one another at the narrow middle. If they’re hard to see in your yarn, mark them now for assembly.
Crocheting two puff-stitch flower bells
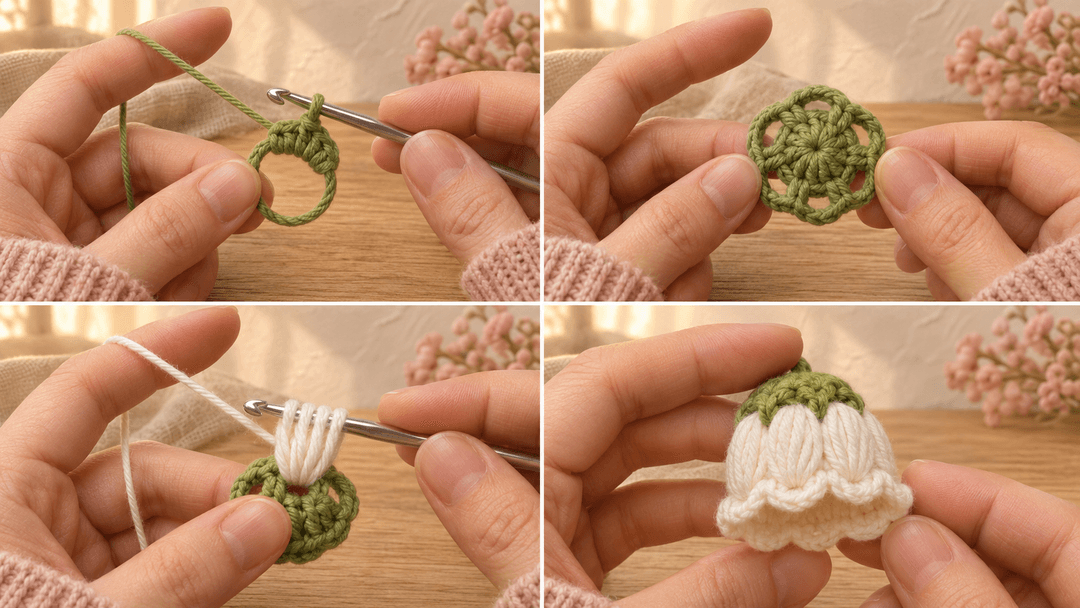
Make two matching bells. Work in joined rounds with the same side facing you. The magic ring is the top of the green cap. The final scallops form the open rim.
Puff stitch. Yarn over, insert your hook into the indicated space, yarn over, and pull up a loop. Work that sequence six times total in the same space. You’ll have 13 loops on your hook. Yarn over and draw through all 13 loops. The ch 1 that follows closes the puff and makes the space for the scalloped round. Draw the loops up to an even height so the hook can slide through them together.
- R1: With green, make a magic ring. Ch 1 for height, work 5 sc into the ring, and pull it closed. Join with a sl st in the first sc. (5 sc)
- R2: Ch 3 to count as the first dc. Mark the third chain, then ch 1. Work (dc, ch 1) in each of the 5 sc. Join with a sl st in the marked chain. Ch 1 and fasten off. (6 dc, 6 ch-1 spaces)
- R3: With the flower color, draw a loop through any ch-1 sp and ch 2 for height. Work (puff, ch 1) in that space and in each of the 5 remaining spaces. Mark the ch 1 after the first puff. Join with a sl st in that marked ch. (6 puffs, 6 ch-1 spaces)
- R4: Ch 1. Work (sc, 2 dc, sc) in each of the 6 ch-1 spaces between the puffs. Join with a sl st in the first sc. Ch 1, fasten off, and weave in the flower-color ends. (24 sts, 6 scallops)
Count the six open spaces as you finish the green cap. Each one gets a puff. On the final round, all four stitches of a scallop go into one space, with the two taller stitches sitting between the single crochets.
Threading the leaf and attaching the bells
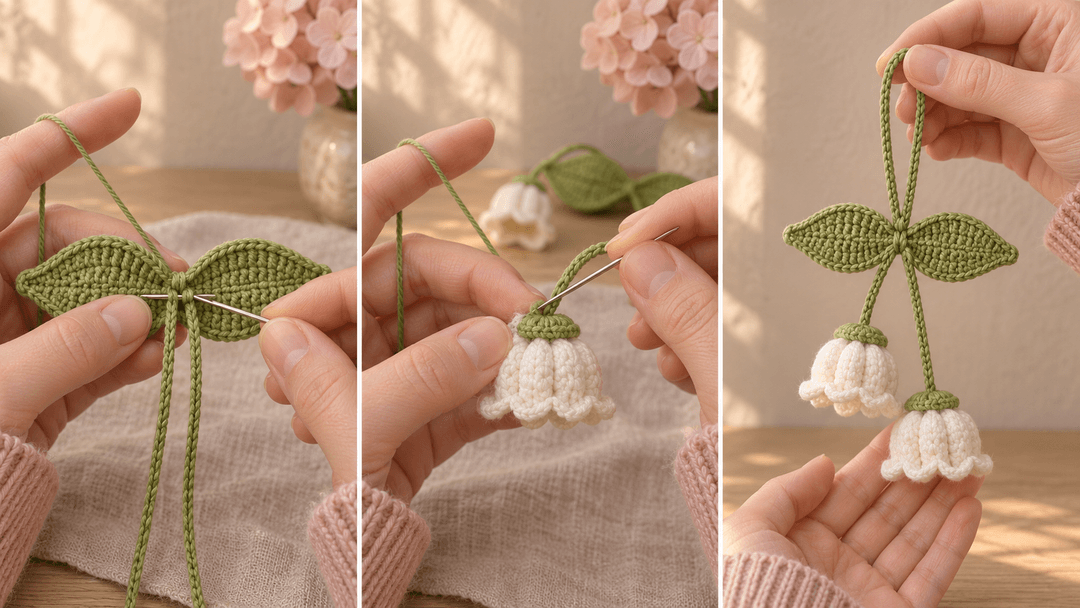
- Fold the green cord so both tails point down. Thread the tails onto a tapestry needle and pass them through the two shaping slip stitches at the leaf’s waist. Pull them through until the hanging loop is the length you want.
- Position a bell with its green cap toward the leaf and its scalloped rim facing down. Thread one cord tail through the top of the cap at the magic-ring center. If the ring is closed tightly, pass the needle between stitches immediately beside its center.
- From inside the bell, take a small stitch through the green cap with the tail, knot it securely, and weave in the end along the green stitches. Repeat with the second bell on the other tail. If you want one bell to hang lower, draw more cord through the leaf on that side before securing it.
- Hold up the loop and check that both bells hang with their scallops down.
Lily of the valley keychain questions
Why does the cap have six spaces when the first round has five stitches?
The starting ch 3 stands in for one dc, and the ch 1 immediately after it makes the first space. Then each of the five sc gets a dc and ch 1. That gives the bell six spaces for its puffs.
Where does the hook go for the scalloped edge?
Put the hook into the ch-1 space between two puffs. Work all four stitches of the scallop into that opening. Move to the next space and repeat around the bell.