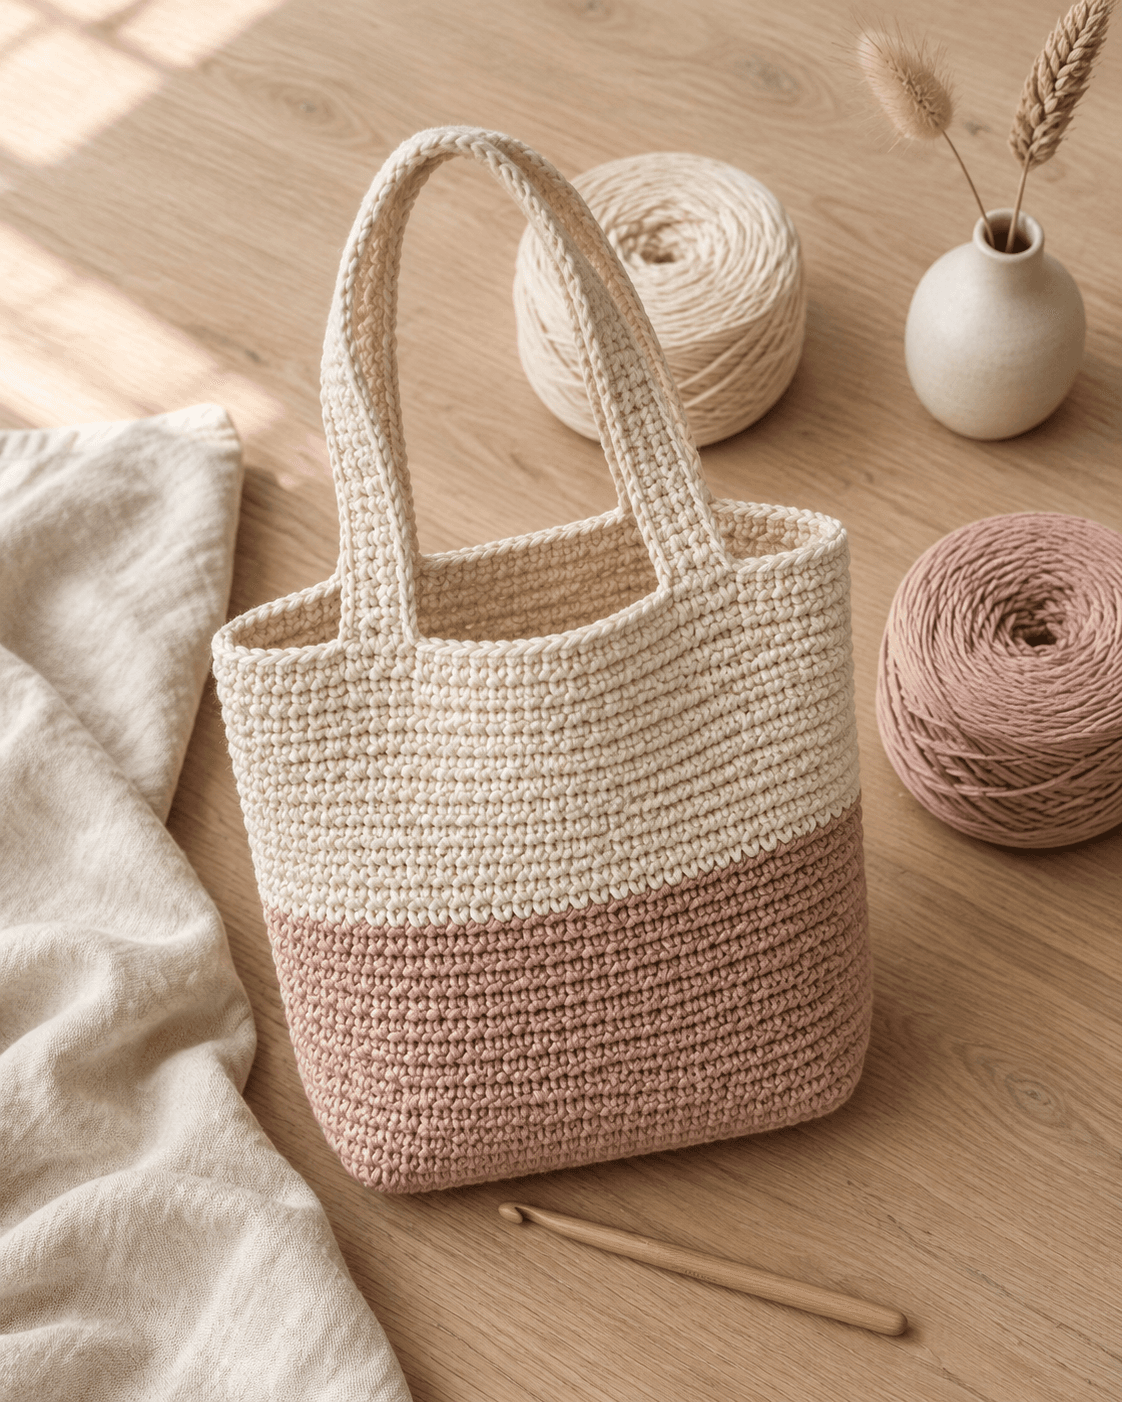
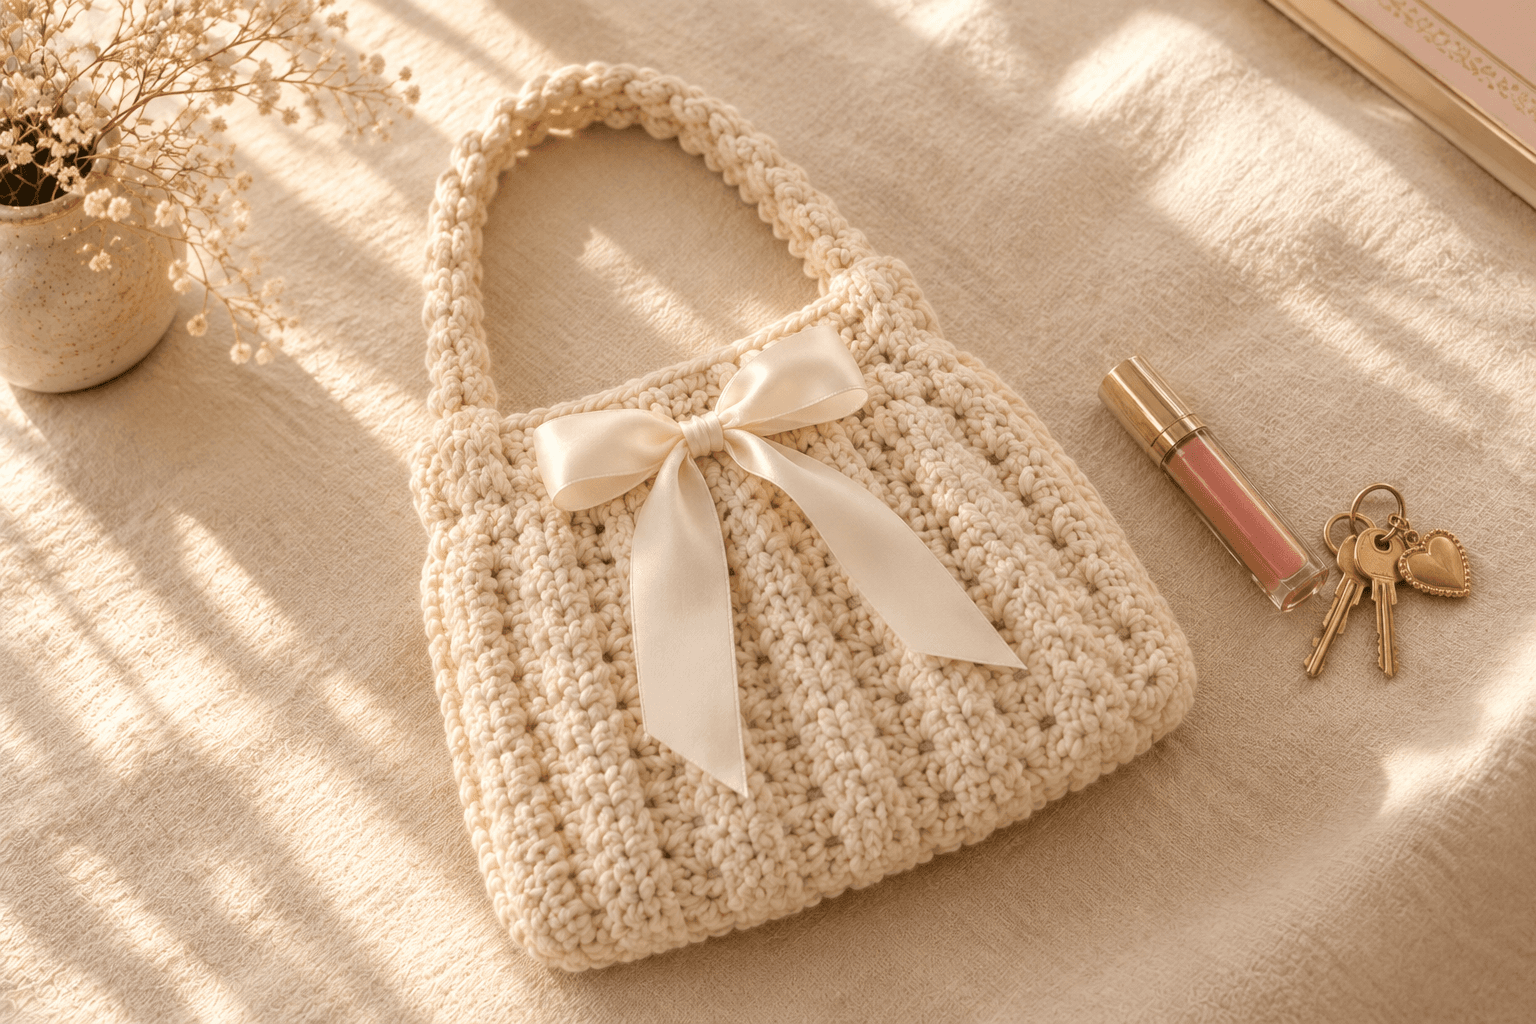
Crochet Waffle Stitch Bag

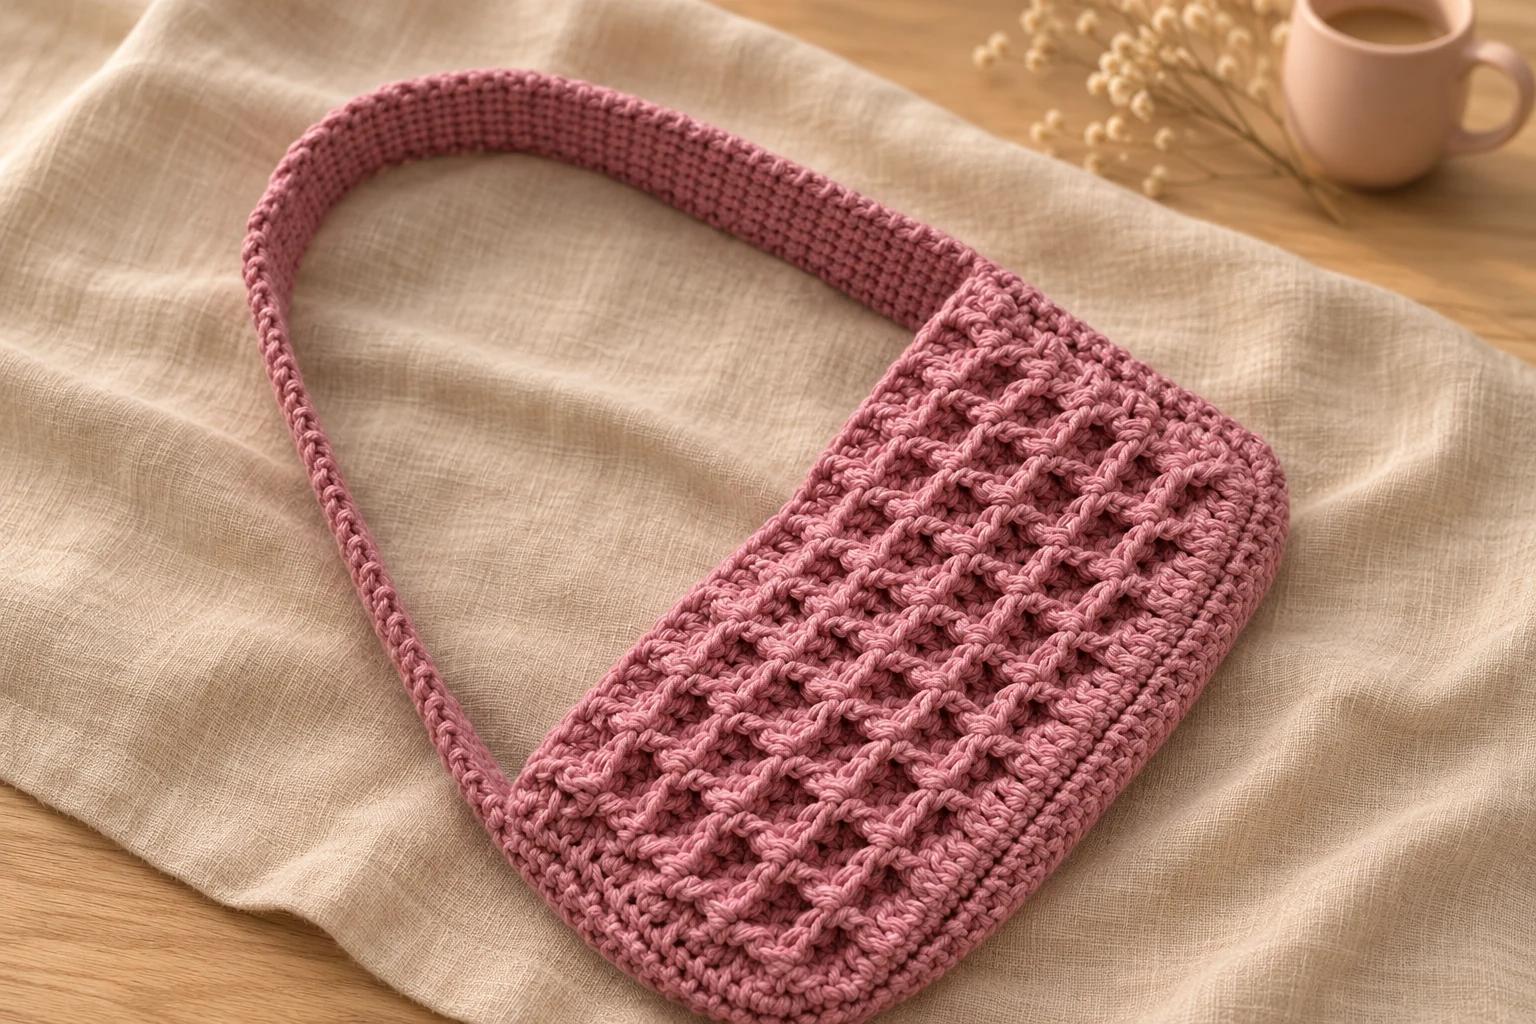
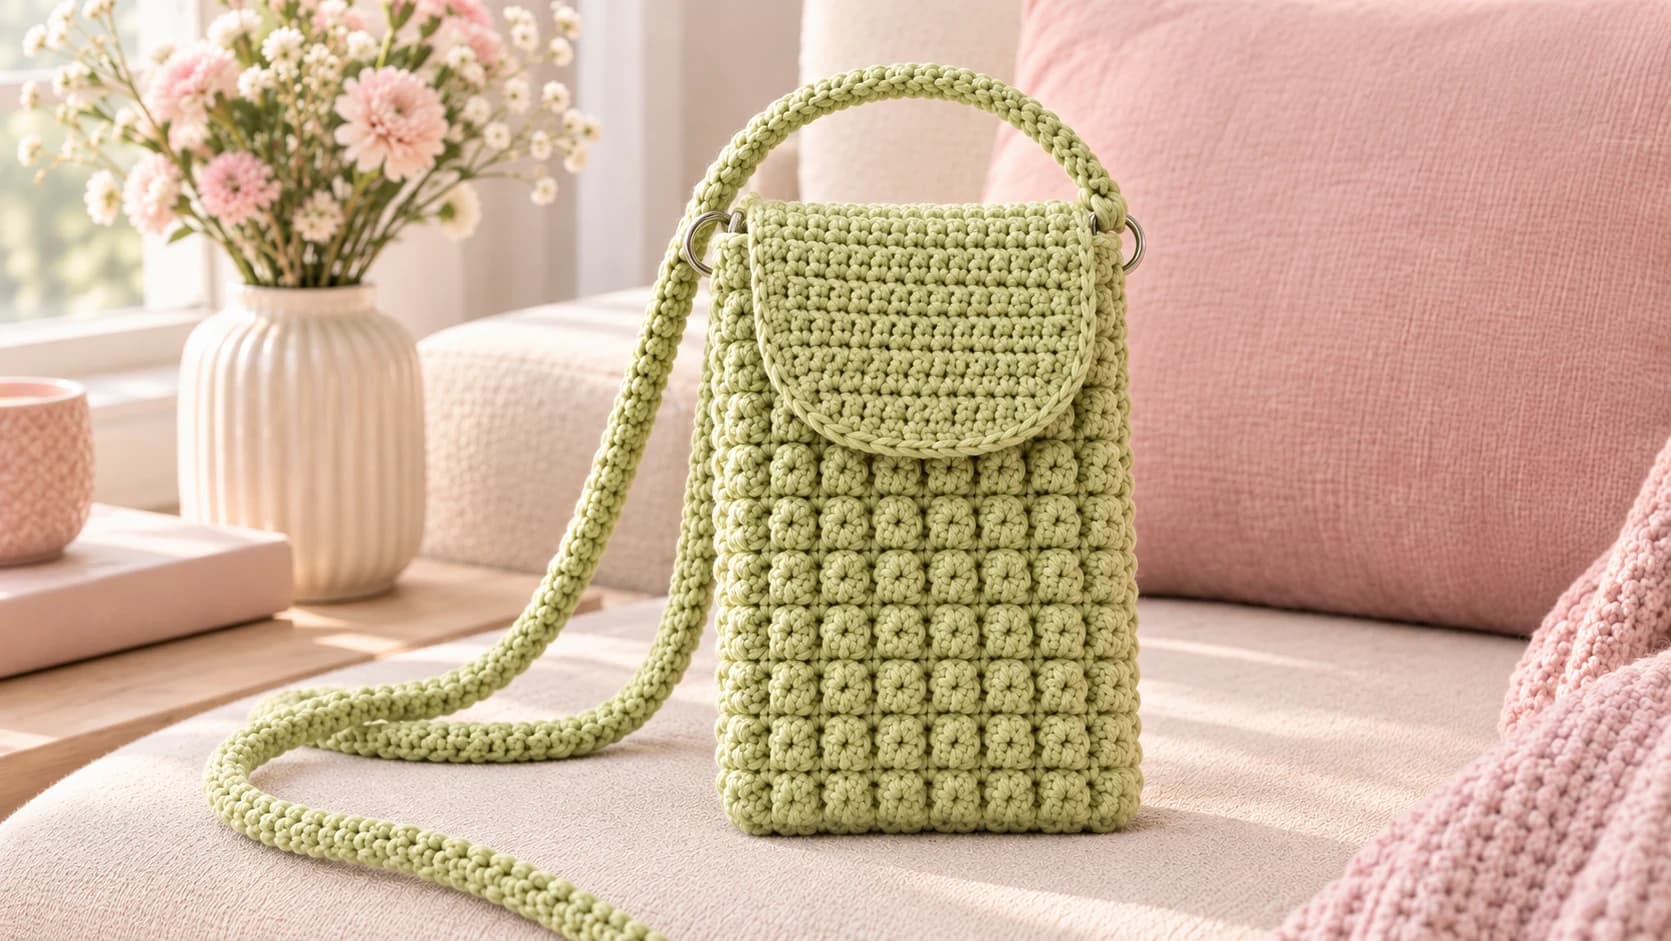
I love a stitch you can feel with your fingertips. The little squares on this crochet waffle stitch bag make a soft, raised grid, and dusty pink cotton shows every ridge. The finished bag measures about 8 in (20.3 cm) wide and just under 5 in (12.7 cm) tall, excluding the handle.
The strap is the detail I like best. It continues down one side, under the bottom and up the other side, giving the bag its depth. Thermal stitch makes that strip thick and firm. Once the waffle repeat feels familiar, the panels settle into a comfortable rhythm; the strap is the patient part.
| At a glance | |
|---|---|
| Finished size | about 8 in (20.3 cm) wide × just under 5 in (12.7 cm) tall, excluding the handle |
| Yarn | 130 g of 100% cotton, worsted #4, in dusty pink or your chosen color |
| Hook | 5 mm (H/8) |
| Pieces | 3 |
| Construction | flat waffle panels sewn to a continuous thermal stitch strip |
| Skill | easy, with front post double crochet, stacked single crochet and thermal stitch |
Cotton, hook and finished waffle bag size
Use 130 g of worsted #4, 100% cotton and a 5 mm hook throughout. Pick a color you enjoy looking at for a while: there is a lovely long stretch of thermal stitch ahead. A smooth cotton makes the raised waffle squares easy to see.
You will also need a yarn needle, scissors and four removable stitch markers. The markers are optional in the tutorial, but I keep them for the upper ends and bottom corners while sewing. Reuse the same four when you attach the second panel.
The size above is the size given in the tutorial. Different cottons can produce different-sized panels, even when their labels share the same yarn weight. Measure both panels flat and keep them the same size. The continuous strip is made to a measured length of about 35 in (89 cm) before its ends are sewn together; part of that length becomes the sides and bottom.
The waffle stitches and straight row edges
US terms: ch = chain; st = stitch; sc = single crochet; dc = double crochet; FPdc = front post double crochet; BLO = back loop only. The number in parentheses at the end of each row is its stitch count. Work flat in turned rows.
Stacked single crochet
This replaces the first dc of every waffle row after Row 1 and counts as one stitch.
- Turn the panel without making a turning chain.
- Make an sc in the first stitch.
- Insert the hook through the side loop of that sc and make another sc on top.
At the end of the next row, work into the top of this stacked stitch. I like the tidy edge it gives the panels.
Front post double crochet
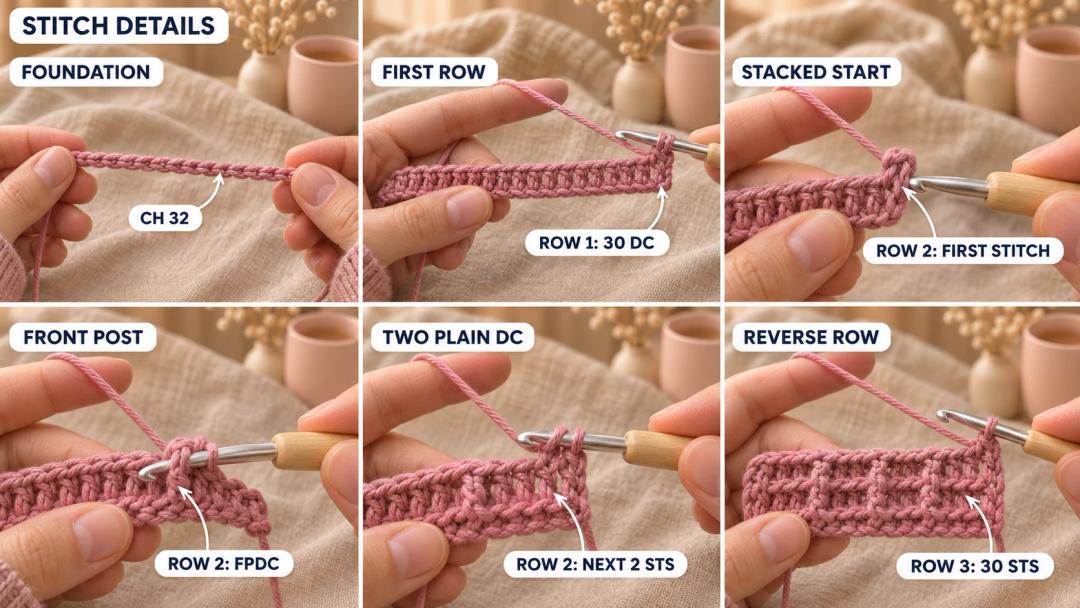
Yarn over. Insert the hook from front to back beside the next stitch post, then bring it out on the other side of that same post. Yarn over and pull up a loop. Yarn over and pull through two loops twice.
Tip. A front post stitch uses the post instead of its top loops. Skip those top loops when you move to the next stitch, or the row will grow.
Thermal single crochet
Insert the hook through the back loop of the current stitch and the unused loop directly below it from the preceding row. Yarn over and pull through both fabric loops. Yarn over and pull through the two loops on the hook.
Tilt the strip toward you to find the lower loop. Each thermal stitch joins the current row to the row below, building a dense little band.
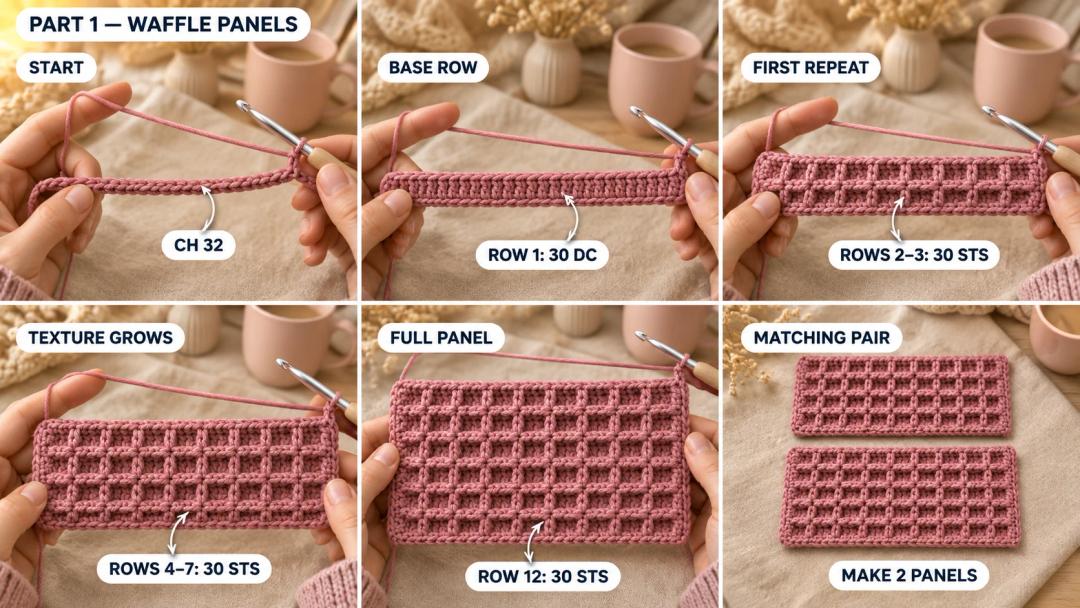
Part 1 — Making the two waffle stitch panels
Dusty pink cotton, 5 mm hook. Make 2. The foundation edge becomes the bottom of the bag. The final row becomes its upper opening.
Ch 32. Turn the chain over to find the back bumps.
- Row 1: dc in the 3rd ch from the hook and in each remaining ch, working into the back bumps. (30)
- Row 2: turn without chaining, stacked sc in the first st, (FPdc in the next st, dc in each of the next 2 sts) × 9, FPdc in the next st, dc in the last st. (30)
- Row 3: turn without chaining, stacked sc in the first st, dc in the next st, (FPdc in each of the next 2 sts, dc in the next st) × 9, dc in the last st. (30)
- Row 4: repeat Row 2. (30)
- Row 5: repeat Row 3. (30)
- Row 6: repeat Row 2. (30)
- Row 7: repeat Row 3. (30)
- Row 8: repeat Row 2. (30)
- Row 9: repeat Row 3. (30)
- Row 10: repeat Row 2. (30)
- Row 11: repeat Row 3. (30)
- Row 12: repeat Row 2. (30)
Keep the yarn attached for the border. The raised square face goes on the outside of the bag.
Tip. Count 30 stitches before moving to the next row. If the last stitch feels tucked away, look for the top of the stacked sc at the edge.
Adding the 56-stitch border to each panel
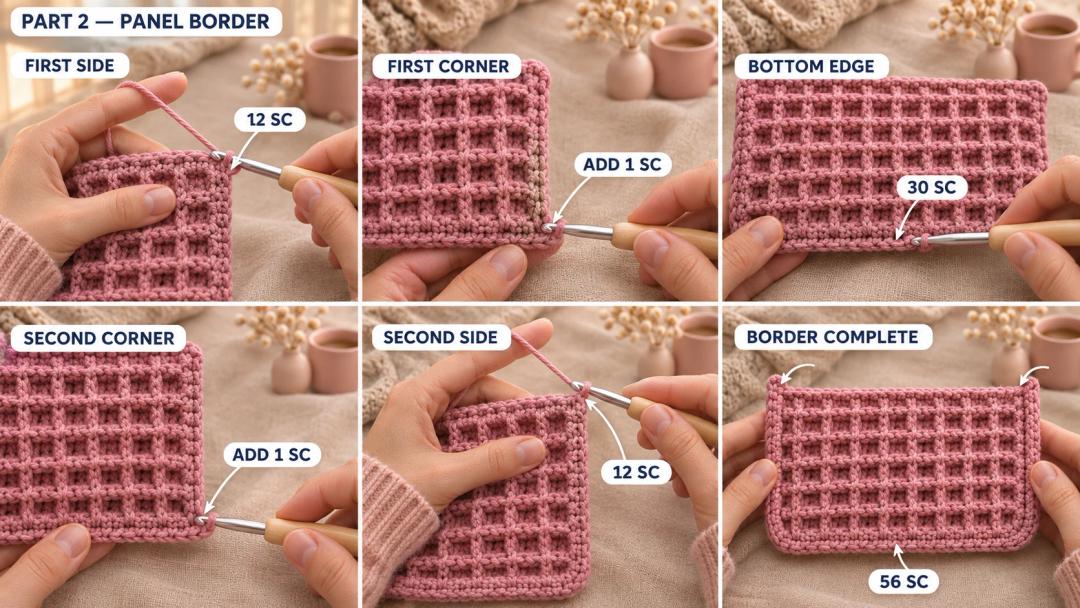
Continue with the same yarn and hook. Turn the panel so you can work down its side from the live loop. Keep the top edge open.
- First side: work 12 sc down the row ends, placing one in each row end. Put a marker in the first sc.
- First bottom corner: make 1 additional sc in the same insertion point as the 12th side sc.
- Bottom: sc in each of the 30 available foundation-chain stitches across the bottom.
- Second bottom corner: make 1 sc in the bottom row-end space on the other side.
- Second side: make another sc in that same row-end space, then 1 sc in each remaining row end up to the top, giving 12 side sc. Mark the final sc.
The border has 56 sc. Fasten off and leave a 6 in (15 cm) tail at the upper end to weave in later. Repeat for the other panel.
The tutorial spaces the side stitches by the waffle squares: about two side sc beside each two-row square. Keep the border relaxed enough for the panel to lie flat.
The thermal stitch strap that forms the gusset
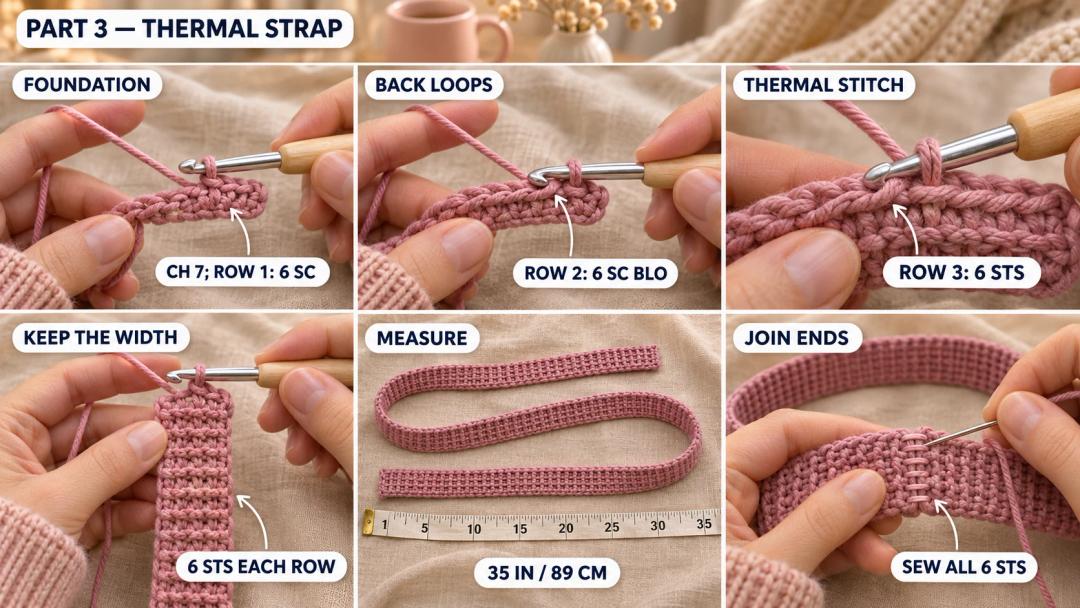
Dusty pink cotton, 5 mm hook. Make 1. Work a straight strip, then sew its short ends together to make a loop.
Ch 7.
- Row 1: sc in the 2nd ch from the hook and in each remaining ch, working into the back bumps. (6)
- Row 2: ch 1, turn, sc BLO in each st across. (6)
- Row 3: ch 1, turn, thermal sc in each st across. (6)
- Rows 4–260: ch 1, turn, thermal sc in each st across. (6)
The ch 1 does not count as a stitch. About 260 rows is the tutorial's reference for a strip measuring 35 in (89 cm). Measure as you go and stop at that length; your row count can differ.
Tip. Keep six stitches in every row, especially at the ends. Thermal stitch is slow to grow, so I settle in with something good to watch and check the width occasionally.
Fasten off, leaving a 12 in (30 cm) tail. Lay the strip flat and bring the short ends together without twisting it. With the tail, sew across all six matching stitches. Turn the join over and sew through the remaining available loops to close the gap on the other face. Secure the yarn and weave in the ends.
Sewing the waffle bag panels to the strap
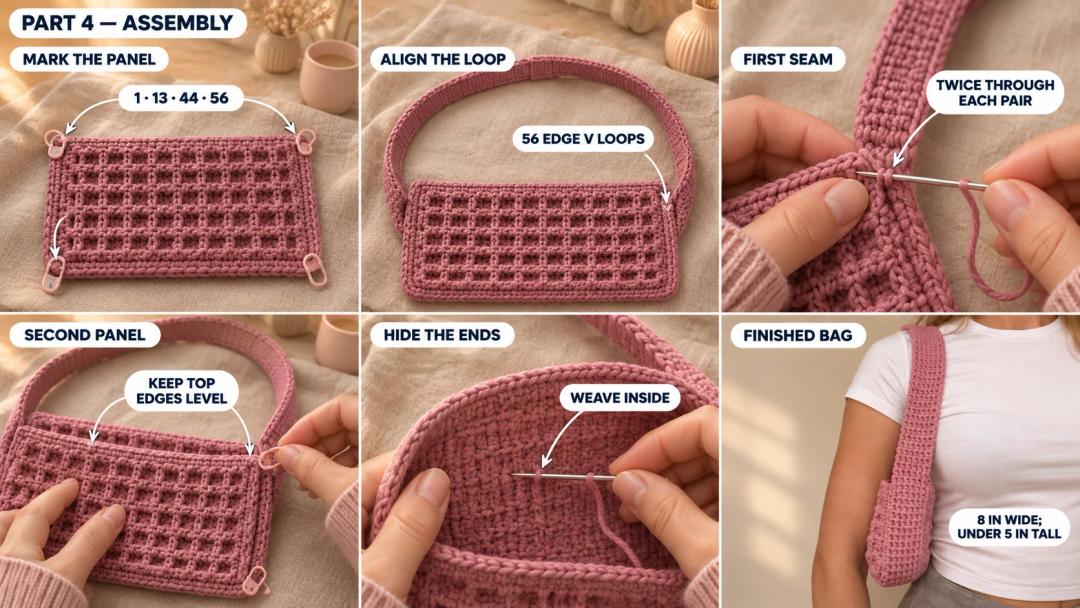
Lay one panel with the raised waffle squares facing outward and its final row at the top. Arrange the strap loop around the panel's sides and bottom. Keep the strap's short-end seam in the handle section above the opening.
Match the corners before sewing
Use the first border stitch at the upper edge as your starting point. Count along the border down one side and around the bottom.
- Put markers in border stitches 1, 13, 44 and 56: the two upper ends and the two extra bottom-corner stitches.
- Find the small V-shaped loops along one long edge of the strap.
- Match border stitch 1 to a strap-edge V near the upper corner. Clip them together.
- Match each following border stitch to the next consecutive V, clipping the bottom corners and the other upper end as you reach them. Use 56 consecutive V-shaped edge loops for the panel.
- Check that the panel rests flat between the markers and the remaining strap rises above the opening as the handle.
Sew the first panel
Cut about 59 in (1.5 m) of matching yarn and thread the needle. Start at the upper corner.
Pass the needle through the front loop of the strap-edge V and the back loop of the matching panel-border stitch, as viewed from your sewing side. Bring the yarn back toward you and pass through that same pair of loops again. Move to the next pair and repeat.
Work down the side, around the bottom and up to the other upper corner, passing through each pair twice. Keep the seam snug without gathering the cotton. Take the yarn end inside the bag, secure it and weave it through the fabric.
Sew the second panel
Turn the bag over. Set the second panel against the opposite long edge of the strap with its waffle face outward and its top edge level with the first panel.
Align its upper ends and bottom corners directly opposite the first panel's matching points. Transfer the four markers one at a time, keeping both panels aligned as you move them. Sew the second panel to the strip in the same way, using a fresh 59 in (1.5 m) length of yarn.
Leave the top edges open. Weave in the remaining panel tails on the inside.
Keeping your cotton waffle bag in shape
Smooth the bag between your hands and straighten the bottom corners. The waffle squares should sit on the outside, with the thick strip running evenly between the panels. Check the seams near the upper opening before adding your belongings.
Follow your cotton yarn's care label for washing. Support the bag while it dries and reshape the panels gently. I keep the load light so the raised squares stay crisp and the handle sits comfortably on my shoulder.
Dusty pink makes this little bag feel soft and quiet. A favorite cotton color is enough to make it yours; I would tuck it into a gift bag with a small handwritten note inside.
UK terms: US sc = UK dc; US dc = UK tr; US FPdc = UK front post tr.
Made a waffle stitch bag? Tag #wavodecrochet on Pinterest so I can see your color.