Crochet Bee Plush: Free Amigurumi Pattern (Beginner-Friendly)

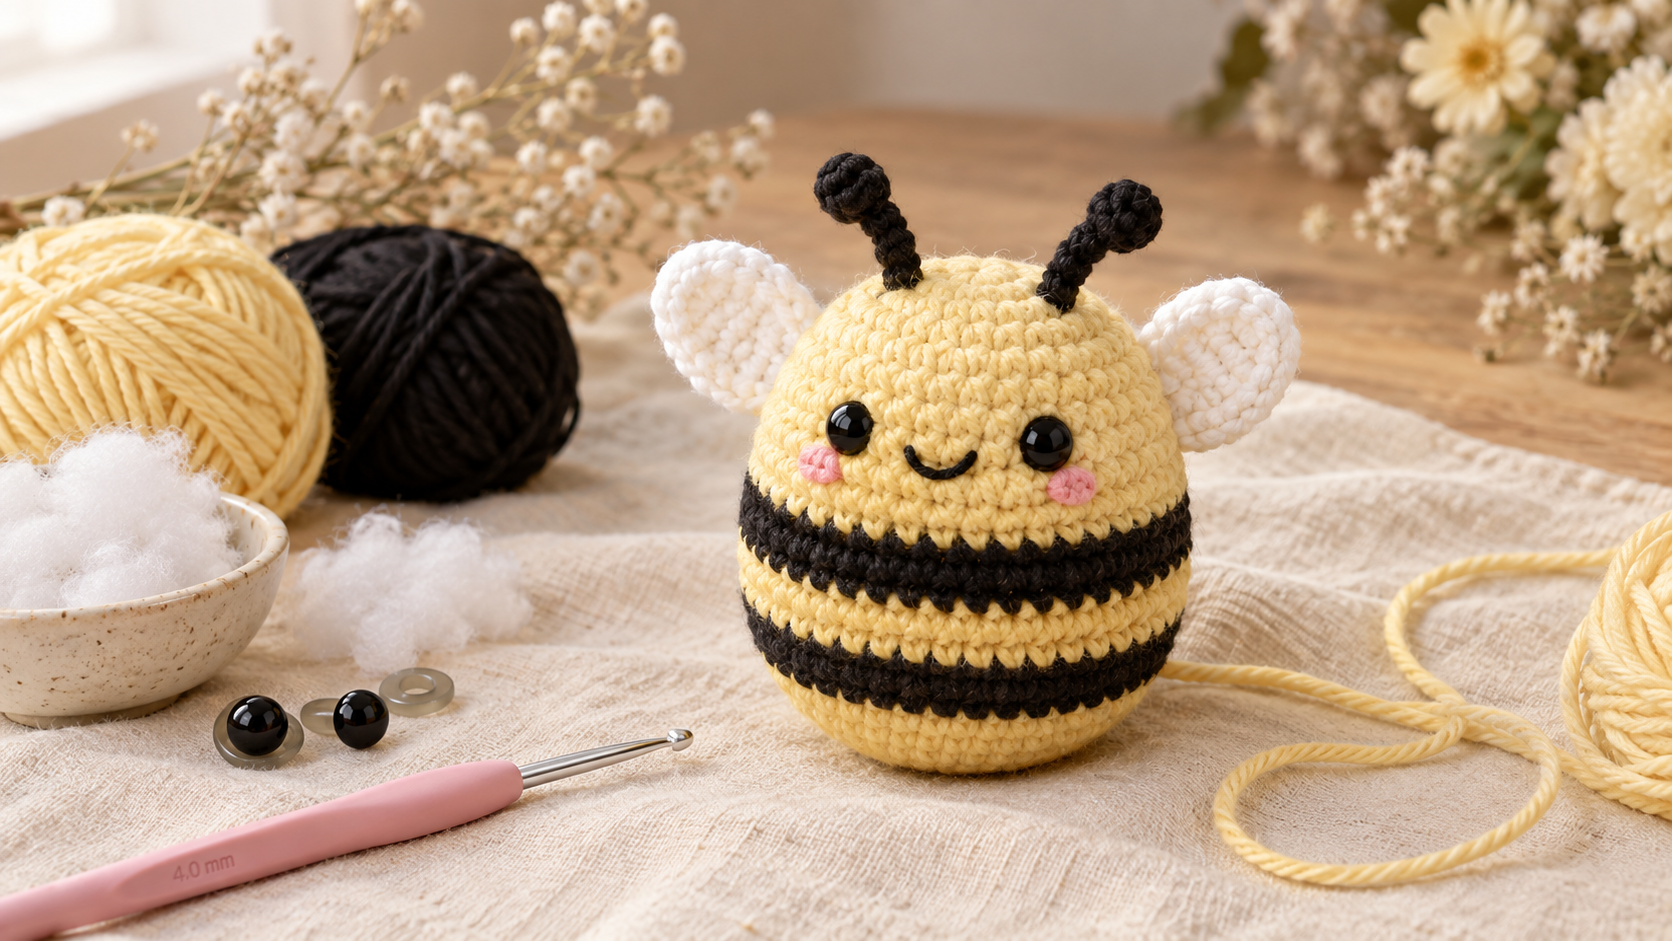
I hooked this whole bee — body, stripes, wings, antennae — in one evening on my sofa, and it took me exactly 2 hours and 14 minutes from cast-on to the last stitch on the wings. No sewing the body together, no fussy assembly, just a color change every few rounds and a tiny pair of wings sewn on at the end.
Key Takeaways
- You need only two colors of DK yarn (pale yellow + black) and a small scrap of white for the wings.
- The body is worked in one continuous piece from the top down — no seaming.
- Total working time: about 2 hours for an intermediate beginner, 3 hours if it's your first amigurumi.
- Finished size: roughly 9 cm (3.5 inches) tall — fits in the palm of your hand.
Why I love this bee pattern
This little bee has become the pattern I hand new crocheters when they ask what to make after their first granny square. It uses only two stitches you already know (single crochet and slip stitch), the color changes are gentle, and it stands up on its own without any wire or armature. My daughter has one on her nightstand, my mother-in-law asked for one after seeing mine, and I've now made eleven of them in various yellows.
There's also something quietly satisfying about how quick the payoff is. You start with a magic ring, and forty rounds later you're holding a chubby bee. No week-long project fatigue.
What you'll need
Everything on this list fits in a sandwich bag. If you already crochet, you probably own most of it.

- Pale yellow DK yarn — about 40 g. I use Paintbox Cotton DK in Buttercup.
- Black DK yarn — about 10 g for the stripes and antennae. Any DK cotton works.
- A scrap of white DK yarn — 5 g is plenty for the wings.
- A 3.5 mm or 4 mm crochet hook. I prefer 3.5 mm for a tighter fabric so the stuffing doesn't peek through.
- A pair of 8 mm black safety eyes (or two black beads if you're making this for a baby — safety eyes can come loose).
- Polyester fibrefill stuffing — a small handful.
- A yarn needle, small sharp scissors, a stitch marker, and a scrap of pink embroidery thread for the cheek blush.
Total material cost the last time I made one: $2.80. That's why bees make such easy gifts.
Stitches and abbreviations
The whole pattern uses only these:
- MR — magic ring
- ch — chain
- sc — single crochet
- inc — increase (2 sc in the same stitch)
- dec — invisible decrease (sc2tog through front loops)
- sl st — slip stitch
- BLO — back loop only
- ( ) x N — repeat everything in parentheses N times
I work all rounds in a continuous spiral (no joining), and I mark the first stitch of every round with a locking stitch marker so I don't lose count. If you've never done that before, place your marker in the first stitch, work all the way around, and when you hit the marker again you're at the end of the round — move the marker up and keep going.
The Bee Pattern
Read through the whole pattern once before you start. It's short.
Body — starts in yellow
Round 1: MR, 6 sc into the ring. (6)
Round 2: inc in every stitch. (12)
Round 3: (sc, inc) around. (18)
Round 4: (2 sc, inc) around. (24)
Round 5: (3 sc, inc) around. (30)
Round 6: (4 sc, inc) around. (36)
Rounds 7–9: sc in every stitch. (36 for 3 rounds)
Round 10: switch to black. sc in every stitch. (36) — this is stripe 1.
Rounds 11–12: switch back to yellow. sc in every stitch. (36 for 2 rounds)
Round 13: switch to black. sc in every stitch. (36) — stripe 2.
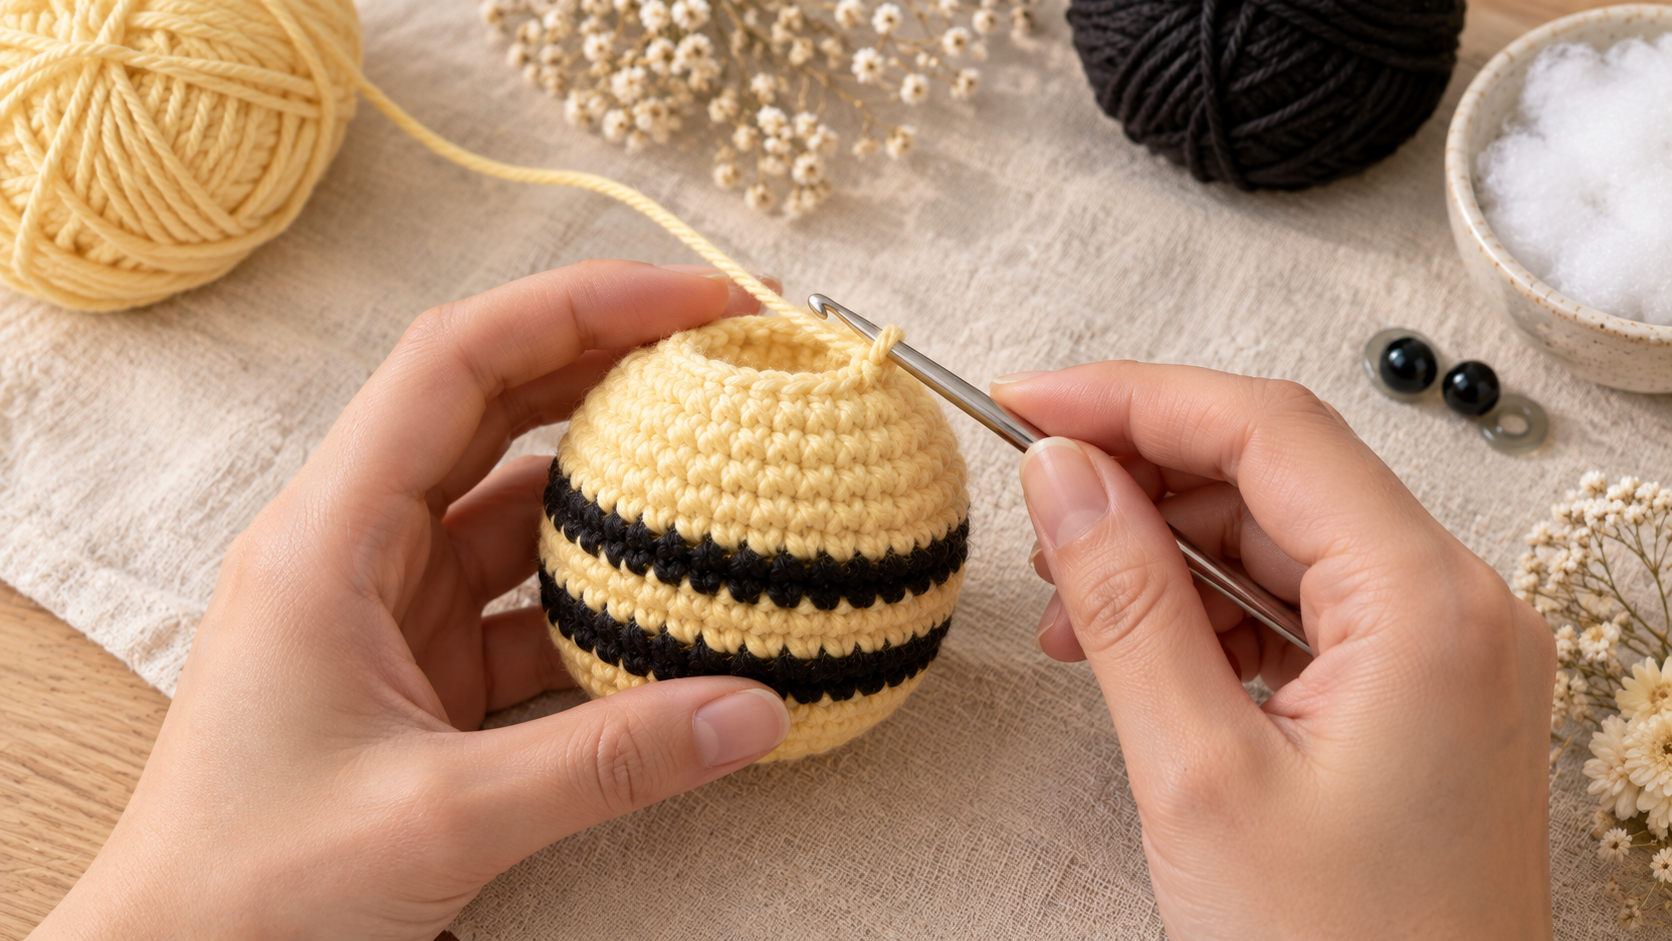
Rounds 14–15: switch back to yellow. sc in every stitch. (36 for 2 rounds)
This is where I stop and insert the safety eyes — right between rounds 5 and 6 counted from the top, about 6 stitches apart. Push the posts through from the front, snap the washers on from the inside. Once they're in, you can't move them, so eyeball it first.
Round 16: switch to black. sc in every stitch. (36) — stripe 3.
Rounds 17–18: switch back to yellow. sc in every stitch. (36 for 2 rounds)
Start stuffing now — firm but not rock hard. If you overstuff, the stitches spread and you'll see white through the yellow. Keep adding a little more stuffing as you decrease.
Round 19: (4 sc, dec) around. (30)
Round 20: (3 sc, dec) around. (24)
Round 21: (2 sc, dec) around. (18)
Round 22: (sc, dec) around. (12)
Round 23: dec around. (6)
Cut yarn leaving a 15 cm tail. Thread through the front loops of the last 6 stitches, pull tight to close, and weave in on the inside. Body done.
Wings (make 2 identical) — in white
Round 1: MR, 6 sc into the ring. (6)
Round 2: (sc, inc) around. (9)
Round 3: sc in every stitch. (9)
Round 4: sl st in every stitch to firm the edge, then fasten off leaving a 20 cm tail for sewing.
The wings are deliberately small — bee wings look right when they're a third the size of the body. Bigger wings make the whole thing read as a butterfly.
Antennae — in black
Cut two 15 cm lengths of black yarn. For each one: thread through a yarn needle, push through the top of the head, back down through a stitch next to it, and knot the two ends together on top. Trim to about 2 cm. If you want a little bulb at the top, tie a tiny knot in each strand before trimming.
Assembly
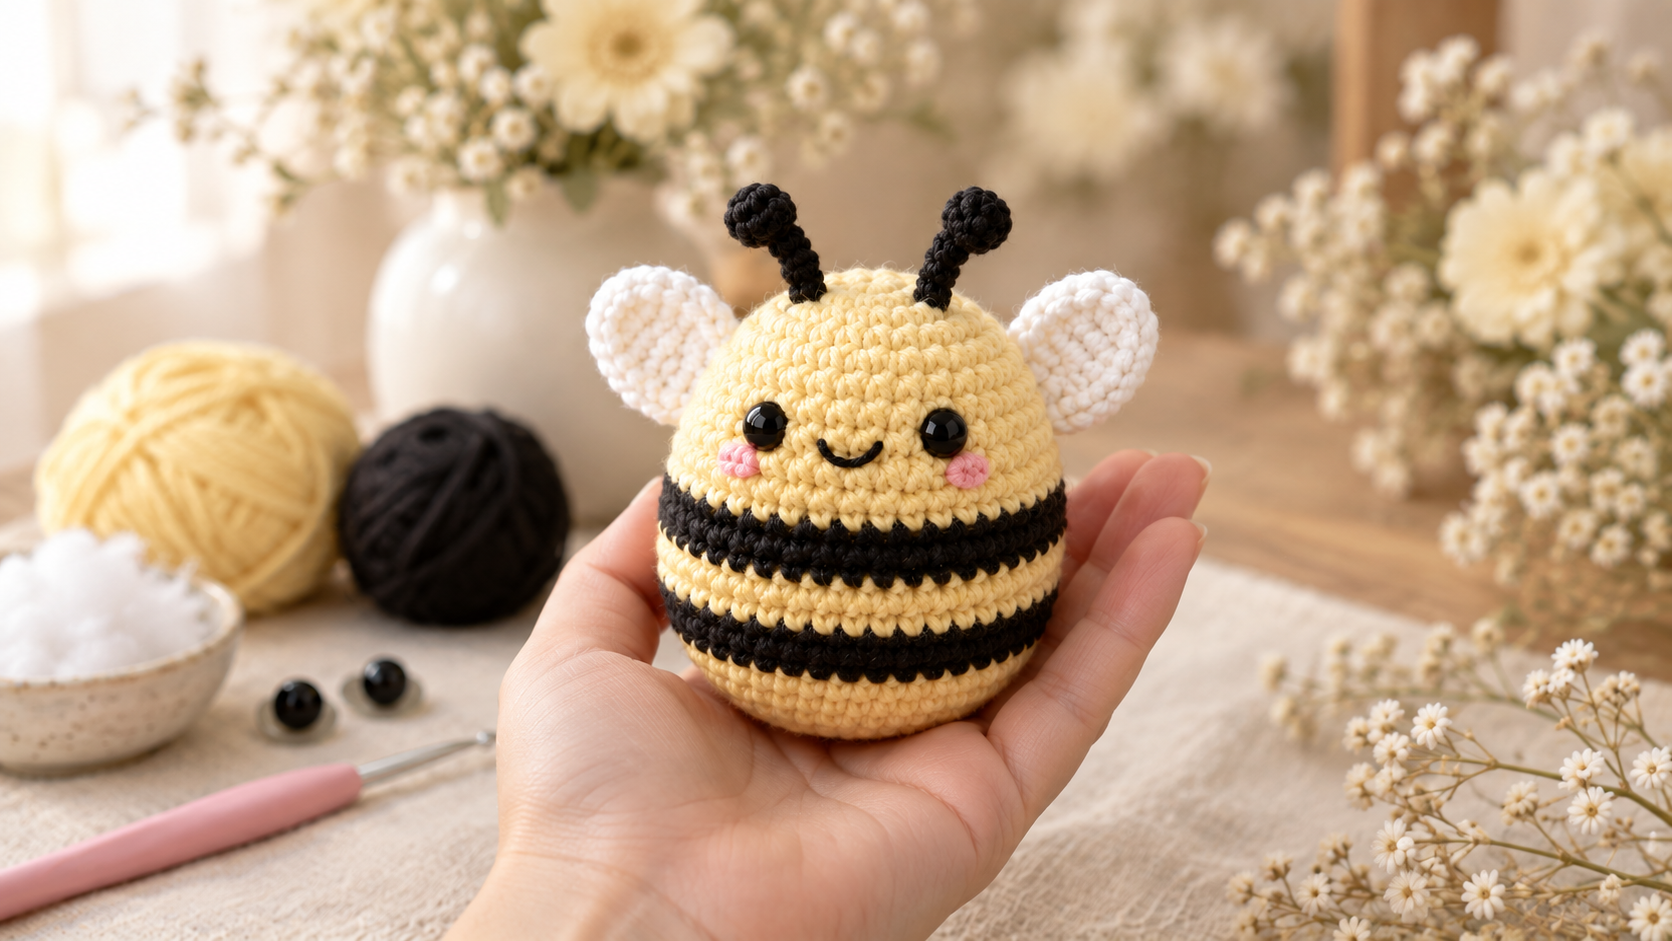
Only three things to do after the pieces are made:
- Sew the wings on using the long tails from the wings themselves. Place them just below the top of the head, sitting side by side (not overlapping) at a slight angle so they lift outward. Sew around the entire base of each wing so it stands firm and doesn't flop.
- Add the cheek blush by threading a strand of pink embroidery thread and making two tiny satin-stitch ovals under and slightly outward from each eye. Two or three passes is enough — you want a whisper of pink, not full circles.
- Add a small smile in black embroidery thread — one curved stitch between and slightly below the eyes. I use a single strand of embroidery thread pulled tight to make the smile crisp.
Weave in every remaining tail with your yarn needle, tugging each one an inch through the stuffing before snipping so nothing pops out later.
My best tips after eleven bees
- Tighten your gauge. If your stitches feel loose, drop to a 3 mm hook. Cotton yarn especially wants to gap when it's worked at the recommended hook size.
- Change colors at the last yarn-over. Don't complete the last stitch of the yellow section in yellow — draw through with the black. It hides the color transition completely.
- Do not skip the invisible decrease. A regular sc2tog leaves a visible hole in amigurumi. The invisible decrease (front loops only) is what makes the finished piece look smooth.
- Stuff progressively. If you wait to stuff until the closing rounds, you can't reach the top of the head anymore.
Every bee I've made has come out with slightly different personality — the eye placement is what does it. Try eyes closer together for a sleepier look, further apart for a wide-eyed baby-bee vibe.
Yarn substitutions that work
If you can't get Paintbox Cotton DK, here's what I've tested and liked:
- Ricorumi DK cotton — perfect gauge, comes in a great buttery yellow. Slightly more expensive per gram but a 25 g ball is enough for one bee body.
- Yarn and Colors Must-Have Cotton — Buttercup or Lemon. A touch softer than Ricorumi, blocks beautifully.
- Any 100% acrylic DK in a warm yellow — cheaper, machine-washable, ideal if this bee is going to a kid who will love it hard.
Avoid fuzzy yarns (mohair, brushed alpaca) — the fuzz swallows the stripes and eyes.
Frequently Asked Questions
How long does a crochet bee take to make?
For an intermediate beginner, the whole bee takes about 2 hours — roughly 90 minutes for the body, 20 minutes for the two wings, and 10 minutes for assembly. If it's your very first amigurumi, allow 3 hours so you can slow down on the increase and decrease rounds without stress.
What's the best yarn for amigurumi bees?
100% cotton DK gives the best stitch definition and holds the round shape without stretching. I use Paintbox Cotton DK; Ricorumi DK and Yarn and Colors Must-Have are equally good. Acrylic works if the bee is for a child and needs to be machine-washable, but expect softer stitch definition.
Do I need safety eyes for a crochet bee?
Safety eyes give the cleanest look and cost about $2 for a bag of twenty online. For a bee going to a baby under three, skip safety eyes entirely — embroider two French knots in black yarn instead, or use two small black beads sewn on with locking stitches. Safety eyes can be pulled out by strong little fingers.
Can I make this bee larger?
Yes — switch to worsted-weight yarn and a 5 mm hook and the finished bee will come out about 13 cm tall (5 inches). Everything else in the pattern stays exactly the same. For a jumbo bee, use chunky yarn and an 8 mm hook and you'll get a 20 cm (8 inch) plush that makes an excellent gift.
Can I sell bees I make from this pattern?
Yes — you're welcome to sell finished bees from my patterns up to a small-shop scale (about 200 per year). Please don't resell the pattern itself. If you'd like to feature the pattern in a magazine, kit, or larger commercial context, drop me a note at support@wavode.com.
What to make next
If this bee is your first amigurumi and you want to keep the streak going, my no-sew pond turtle pattern uses the same one-piece construction with a color change for the shell. It's the natural next step and takes about the same amount of time.
Whatever you make, tag me on Pinterest — I'll re-pin every bee I see.