Chunky Lamb Plush

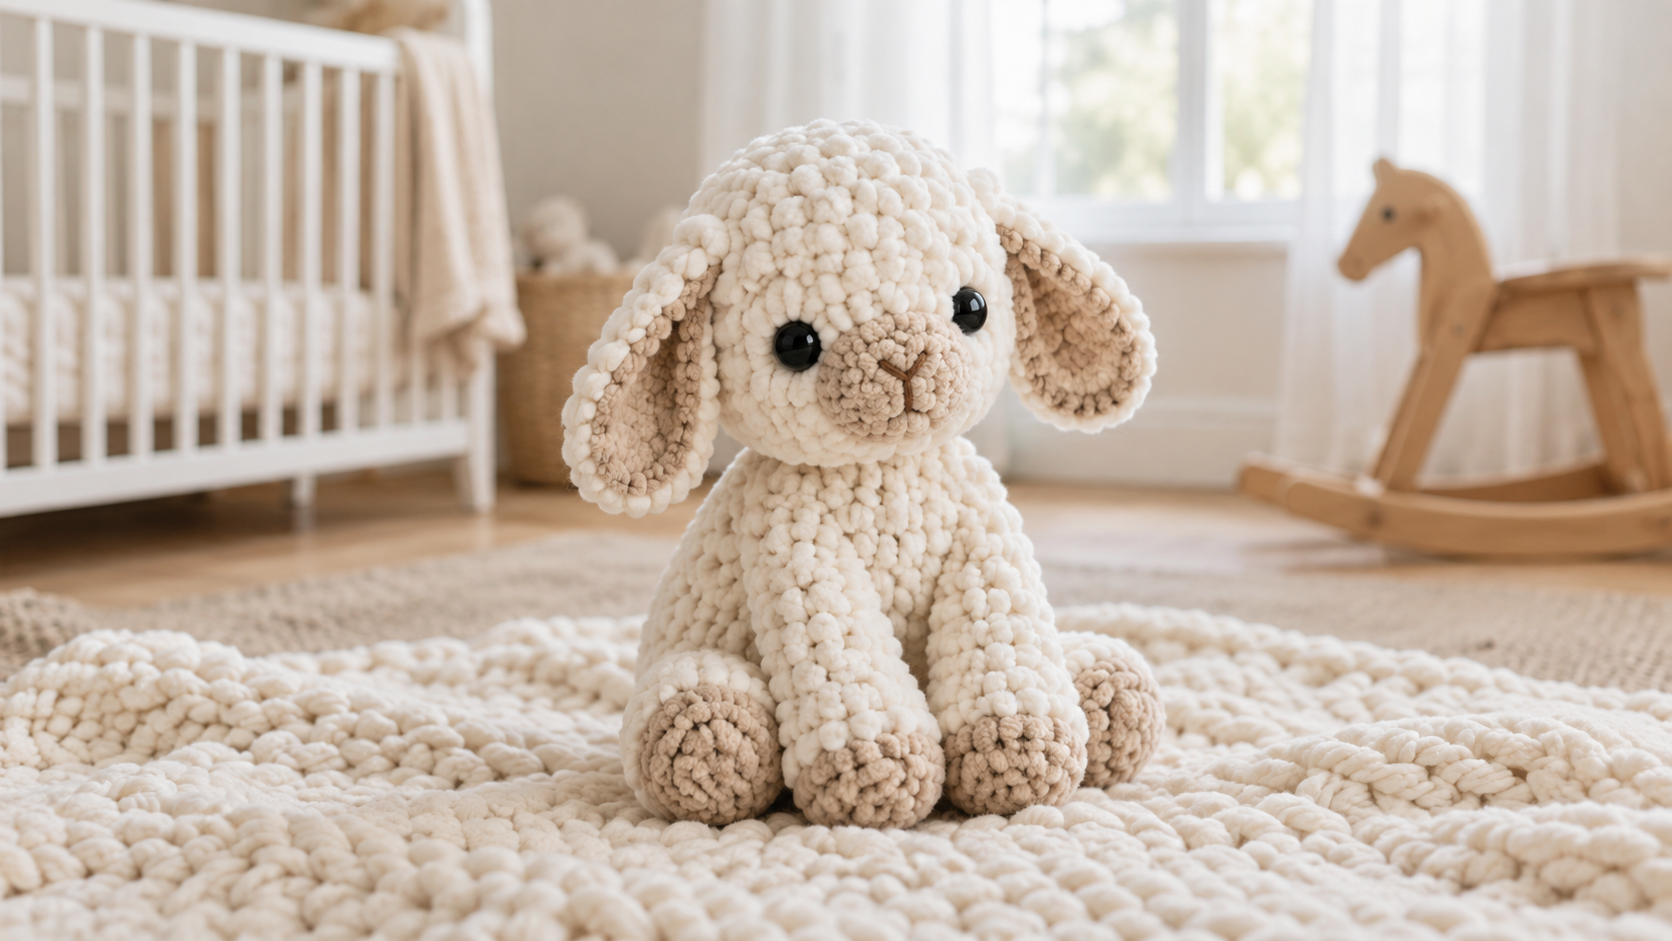
The easiest chunky lamb plush uses one skein of cream chenille "blanket" yarn, a 6.5 mm hook, and single crochet in continuous rounds — 12 inches of squishy nursery-ready lamb in two evenings. Bulky #6 chenille (Bernat Blanket or Hobbii Snuggle) does most of the fluffy-fleece work for you, so the whole plush comes together in six simple pieces: head, body, two ears, and two legs. Around 180 yards total and a couple of safety eyes are all you need.
Key Takeaways
- Chunky lamb worked entirely in single crochet on a 6.5 mm hook — no color changes, no tricky stitches.
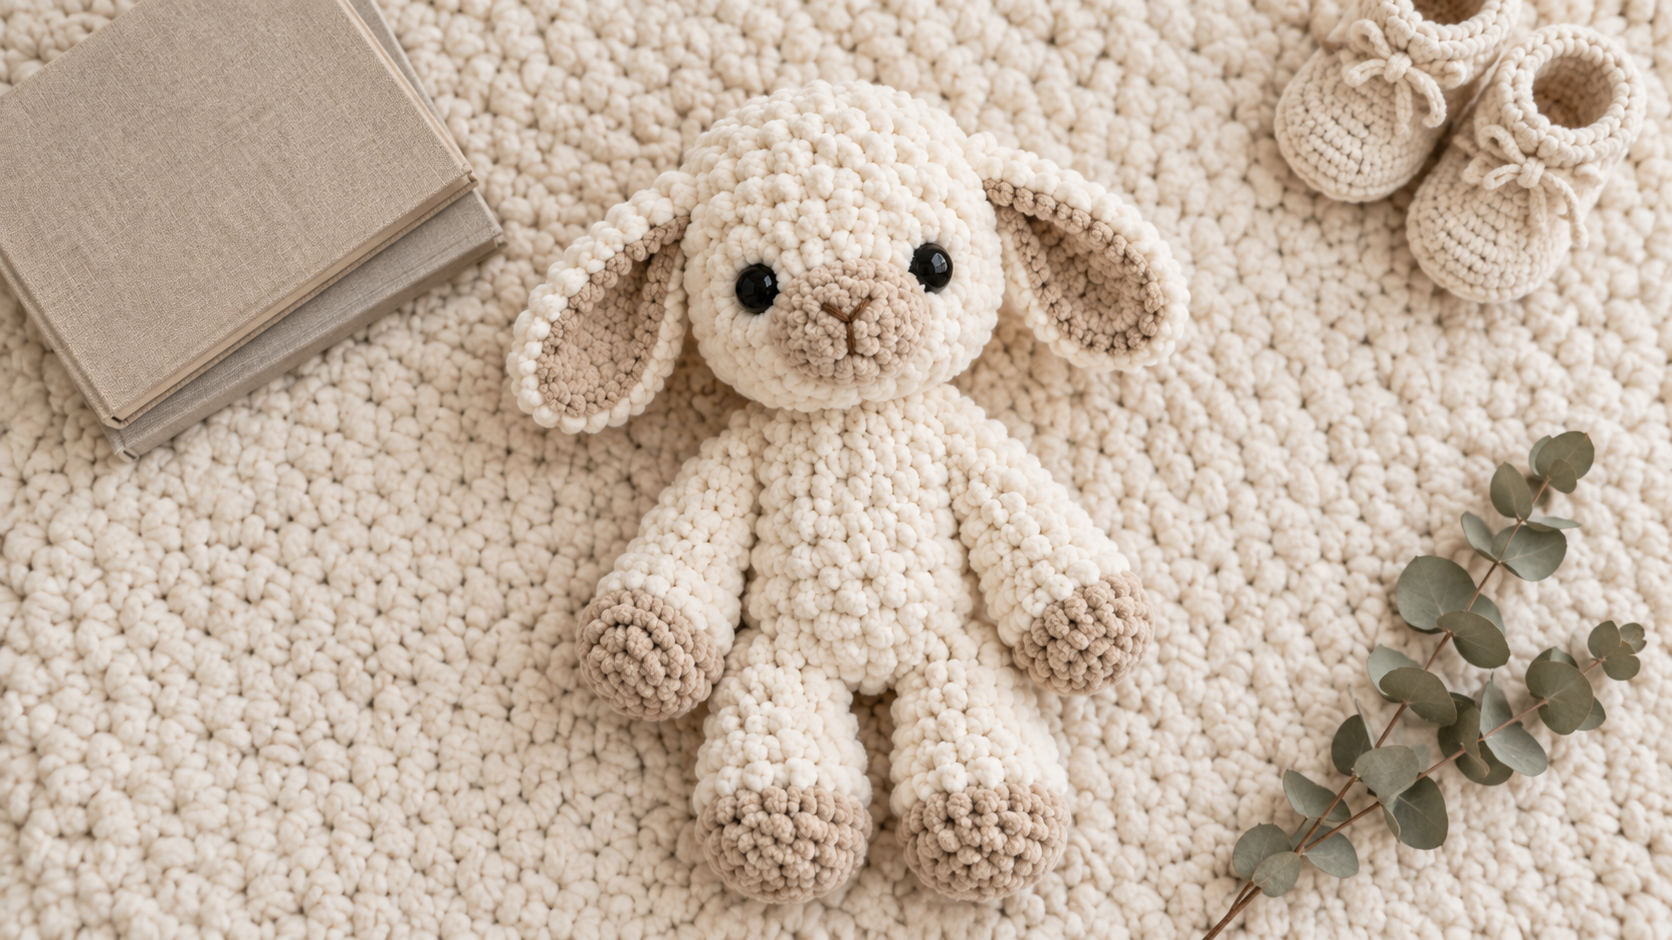
- 6 pieces total: 1 head, 1 body, 2 ears, 2 legs. Head and body are stitched together at the end for the classic sitting-lamb pose.
- 180 yd of bulky #6 chenille (about one 220-yd Bernat Blanket skein) in cream + a tiny bit of tan for the ear linings and face.
- Finishes in 5–7 hours over two evenings — a soft, washable baby-shower gift that photographs like a boutique plush.
Pattern at a glance
- Stitch: single crochet in continuous rounds throughout.
- Yarn: bulky #6 chenille "blanket" yarn, 180 yd total (150 yd cream + 30 yd tan/oatmeal).
- Hook: 6.5 mm (US K-10.5) — a smooth aluminum head works best with chenille.
- Notions: 2 × 12 mm safety eyes (black), polyfil stuffing, tapestry needle with a large eye, stitch marker.
- Construction: head in the round → body in the round → 2 ears flat → 2 legs in the round → sew head to body, ears to head, legs to body.
- Finished size: ~12 in (30 cm) sitting height, ~5 in (13 cm) wide at the belly.
- Time to complete: 5–7 hours over two evenings.
- Skill level: advanced beginner — sc, magic ring, increases, invisible decreases, seaming.
Why chenille is the friendliest yarn for a first amigurumi lamb
Chunky chenille yarn hides tension issues the way sheep's wool hides everything else. The pile of the yarn — those tiny velvet loops that make it feel like a stuffed animal already — closes over uneven stitches, so a first-time amigurumi maker gets a smooth, "boutique" surface without a decade of practice. It's also machine-washable (gentle cycle, mesh bag), which matters more for a nursery than most makers realize.
I made my first chenille lamb the weekend my sister-in-law announced her second pregnancy. She wanted "something soft, nothing squeaky, nothing with a battery." The lamb has been dragged around the house every day since, washed a dozen times, and still looks like the day I finished it.
What you'll need
Yarn (bulky #6 chenille "blanket" yarn, ~180 yd / 165 m total)
- 150 yd cream / off-white — Bernat Blanket in Vintage White, Hobbii Snuggle in Cream, or Yarn Bee Eternal Bliss in Ivory.
- 30 yd tan / oatmeal — Bernat Blanket in Sonoma or Taupe for the ear linings and face contouring.
Hook
- 6.5 mm (US K-10.5) — a smooth aluminum hook glides through chenille without snagging the pile. Clover Amour or Susan Bates Silvalume both work.
Notions
- 2 × 12 mm black safety eyes with washers (or embroidered French knots for babies under 12 months).
- Polyfil stuffing (about 6 oz total — chenille compresses more than cotton).
- Tapestry needle, jumbo eye (a chenille strand is chunky).
- Stitch marker (1 — the round join disappears into the pile, so a marker matters here).
- Small sharp scissors.
Gauge
- 10 sc × 10 rows = 4 in on a 6.5 mm hook, worked firm enough that stuffing doesn't peek through the pile. Chenille is forgiving; don't obsess over row gauge, but do keep stitches tight.
Abbreviations
- ch — chain
- sc — single crochet
- sl st — slip stitch
- MR — magic ring
- st(s) — stitch(es)
- inc — 2 sc in same stitch
- dec — invisible sc2tog (front-loops only, then pull through)
- rep — repeat
- BLO — back loops only
- FLO — front loops only
Part 1 — The lamb's head
Worked in continuous rounds with cream yarn, starting from a magic ring. Move your stitch marker up every round; chenille eats the join.
Round 1: 6 sc in MR. (6 sts) Round 2: Inc × 6. (12) Round 3: Sc 1, inc. Rep 6 times. (18) Round 4: Sc 2, inc. Rep 6 times. (24) Round 5: Sc 3, inc. Rep 6 times. (30) Round 6: Sc 4, inc. Rep 6 times. (36) Rounds 7–14: Sc in each st around. (36 for 8 rounds)
Insert the 12 mm safety eyes between Rounds 11 and 12, spaced about 6 stitches apart. (For a newborn recipient, skip the safety eyes and embroider French knots after stuffing.)
Round 15: Sc 4, dec. Rep 6 times. (30) Round 16: Sc 3, dec. Rep 6 times. (24) Round 17: Sc 2, dec. Rep 6 times. (18)
Stuff the head firmly with polyfil. Chenille compresses in the wash, so overstuff by about 20% more than feels right.
Round 18: Sc 1, dec. Rep 6 times. (12) Round 19: Dec × 6. (6)
Fasten off leaving a 20-inch tail for sewing the head to the body. Thread the tail through the remaining 6 sts and pull tight to close.
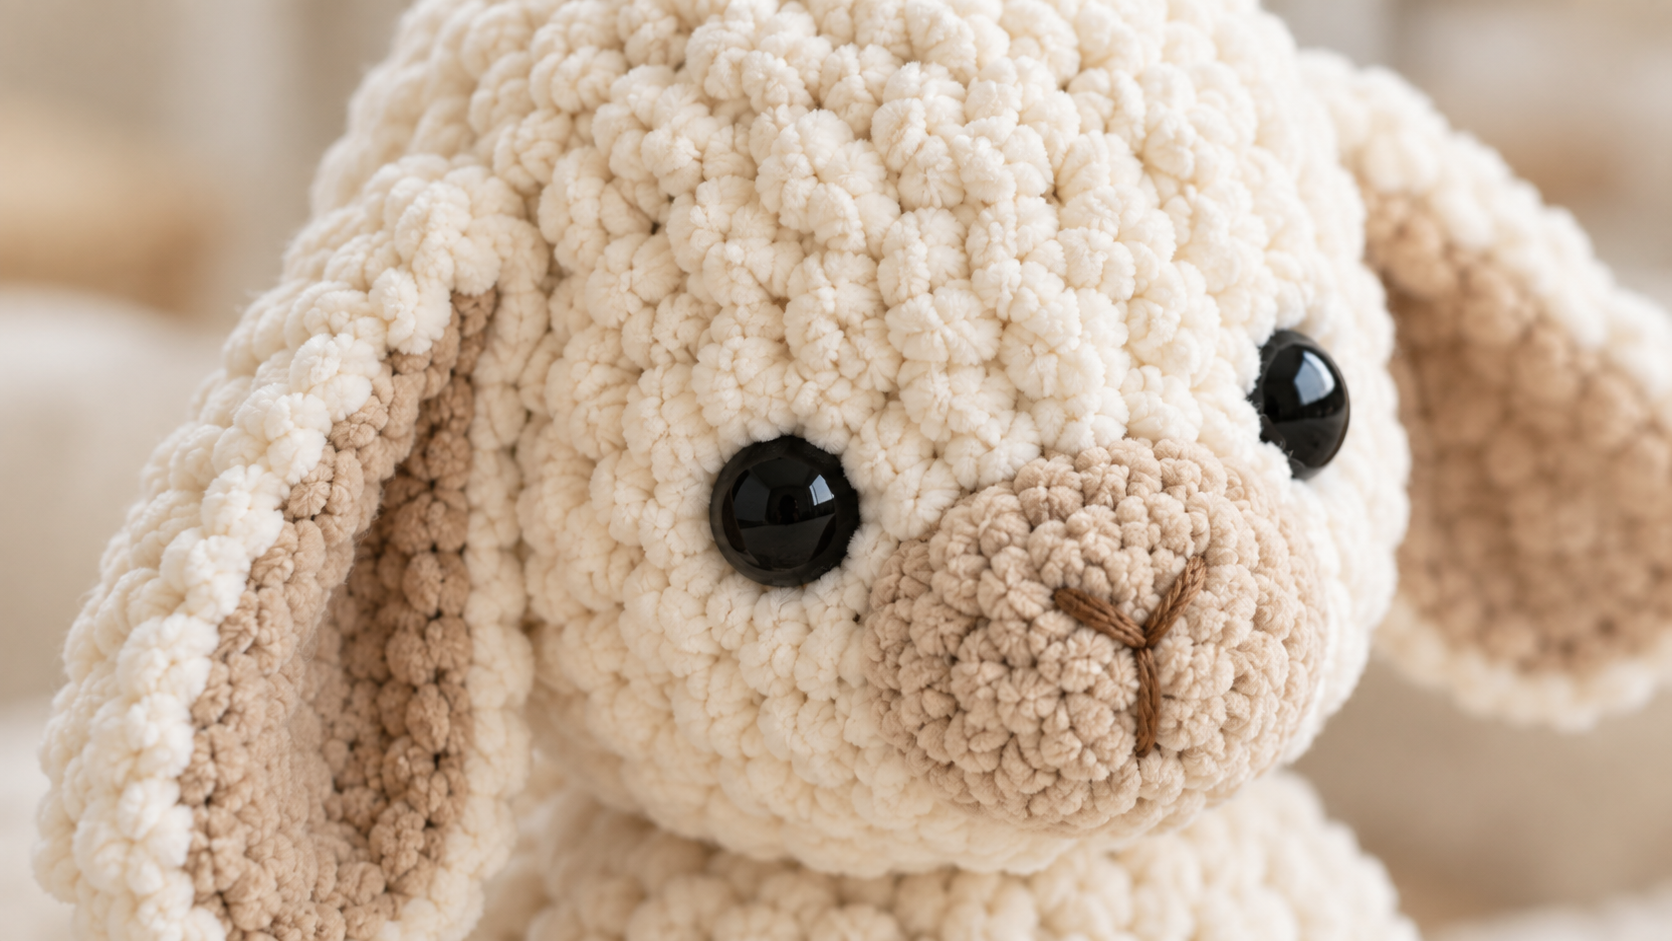
Muzzle detail: with tan yarn and a tapestry needle, embroider a small inverted-Y on the front of the head between Rounds 12 and 13, centered under the eyes. Two short slanted stitches meet in a soft point — that's your lamb nose.
Part 2 — The body
Worked in continuous rounds with cream yarn, from the top down. This is the classic bell-shaped sitting body.
Round 1: 6 sc in MR. (6) Round 2: Inc × 6. (12) Round 3: Sc 1, inc. Rep 6 times. (18) Round 4: Sc 2, inc. Rep 6 times. (24) Round 5: Sc 3, inc. Rep 6 times. (30) Round 6: Sc 4, inc. Rep 6 times. (36) Round 7: Sc 5, inc. Rep 6 times. (42) Rounds 8–18: Sc in each st around. (42 for 11 rounds) Round 19: Sc 5, dec. Rep 6 times. (36) Round 20: Sc 4, dec. Rep 6 times. (30)
Stuff the body firmly, shaping it into a rounded pear as you go.
Round 21: Sc 3, dec. Rep 6 times. (24) Round 22: Sc 2, dec. Rep 6 times. (18)
Add a little more stuffing.
Round 23: Sc 1, dec. Rep 6 times. (12) Round 24: Dec × 6. (6)
Fasten off, close the base, weave the tail into the belly.
Part 3 — The ears (make 2)
Small folded droop ears — the signature of a chunky lamb. Worked flat with cream for the outer and tan for the lining.
With tan yarn: Round 1: 4 sc in MR. (4) Round 2: Inc × 4. (8) Round 3: Sc 1, inc. Rep 4 times. (12) Cut the tan, leaving a 6-inch tail. Do not fasten off — pull through.
Join cream on the next stitch: Round 4: Sc in each st around. (12) Round 5: Sc 2, dec. Rep 3 times. (9) Sl st, fasten off, leave a 10-inch tail for sewing.
Fold each ear in half lengthwise so the tan lining shows on one side — that's the ear ready to droop against the head.
Part 4 — The legs (make 2)
Small stubby legs for the sitting pose. Cream throughout.
Round 1: 6 sc in MR. (6) Round 2: Inc × 6. (12) Rounds 3–6: Sc in each st around. (12 for 4 rounds) Sl st, fasten off, leave a 10-inch tail. Lightly stuff each leg with a small pinch of polyfil — you want them soft, not firm.
Part 5 — Assembling your lamb
This is where the plush comes to life. Take your time here; assembly is 40% of the finished look.
- Sew the head to the body. Position the head on top-center of the body, tilted very slightly forward. Use the 20-inch head tail to whipstitch around the entire base of the head where it meets the body — about 18 stitches for a firm attach. Weave the tail deep into the head.
- Sew the ears on. Pin each ear on either side of the head at Round 7, angled slightly outward and downward so they droop naturally. Fold-side facing forward so the tan lining shows. Whipstitch the top edge of each ear to the head using the 10-inch tail — about 8 stitches per ear.
- Sew the legs on. Position both legs at the front-lower half of the body, about Round 20, spaced 4 stitches apart so the lamb sits balanced. The legs should stick forward, not down. Whipstitch the open edge of each leg to the body — about 10 stitches per leg.
- Embroider the mouth (optional). With tan yarn, add a tiny straight stitch under the muzzle inverted-Y. Two millimeters is plenty. Any more reads as a frown on a chenille surface.
Finishing touches
- Fluff the pile. Once assembled, brush the whole lamb gently with a soft bristle brush (a clean pet slicker brush works). Chenille flattens during stitching; brushing wakes the fleece up.
- Give the ears a gentle bend. Pinch each ear halfway down and hold for a few seconds. Chenille takes a soft crease that makes the ears droop realistically instead of standing straight.
- Steam very carefully. Hold a steamer 6 inches away from the surface for two seconds per side. Never touch chenille with a hot iron — the pile melts.
Care instructions
Machine-wash on cold, gentle cycle, inside a mesh laundry bag. Use a fragrance-free liquid detergent — no fabric softener (it coats the chenille pile and dulls it). Air-dry flat on a towel; reshape the head and body while damp. Do not tumble-dry; chenille pills badly under heat. Brush the pile back up with a soft brush once fully dry. Check the safety eyes after every third wash for looseness; re-glue behind the washer with a drop of fabric-safe adhesive if needed.
Troubleshooting the lamb
The head flops forward. The neck stitches were sewn too far forward on the body. Unpick, re-center the head one stitch back, and re-whipstitch.
Stuffing peeks through the pile. The gauge is too loose. Chenille stitches must be tight — go down half a hook size (6 mm) and try again on the next piece.
The lamb won't sit balanced. The legs are too far back or spaced too close. Move them forward one round and space them 4–5 stitches apart at the front-lower belly.
The ears stand straight up. They weren't attached with the fold facing forward. Unpick, re-fold the ears with the tan lining showing, and pin before sewing.
The chenille is snagging on the hook. Switch to a smooth aluminum hook (no bamboo, no wood). Aluminum glides; wood grips and shreds chenille fibres.
Frequently asked questions
Is chenille yarn safe for babies?
Bulky chenille labeled as "baby-safe" (Bernat Baby Blanket, Hobbii Snuggle Baby) is machine-washable and hypoallergenic. The American Academy of Pediatrics recommends no soft toys in the crib for the first 12 months regardless of yarn — even the softest plush. From 12 months on, chenille lamb plush is safe as a floor and playpen companion, and holds up to years of washing.
Can I make this lamb with regular worsted yarn?
Yes, but re-gauge. Use a 4 mm hook with worsted #4 yarn, keep the same stitch counts, and expect a finished size of about 7 in (18 cm) instead of 12 in. The pattern texture stays intact; the plush is just half the size and slightly less fluffy.
Why chenille instead of standard amigurumi cotton?
Cotton amigurumi shows every stitch. That's beautiful for detailed characters (see barnaby the teddy bear) but wrong for lamb fleece — you want a soft, undefined fluffy surface. Chenille reads as fleece straight off the hook, which is why every "boutique" plush at baby boutiques is chenille.
How is this different from a lovey?
A lovey has a small head sewn to a flat blanket. This is a full free-standing plush — head, body, ears, legs, no blanket. Loveys are safer for cribs from 12 months; free-standing plush like this lamb belongs on the shelf, in the playpen, or in bed with an older toddler.
Can I add a bow or flower crown?
Yes. A blush satin ribbon tied around the neck (½ in wide, 12 in long) is the fastest add-on. For a flower crown, use the small blooms from the crochet flower bouquet in pink blush sewn onto a ch-30 headband.
Related patterns from my hook
- The barnaby teddy bear lovey uses the same magic-ring head construction if you want to build a whole nursery gift set.
- The piko the pond turtle amigurumi is the no-sew starter piece — great warmup before your first sew-together plush.
- The momo the bow kitten amigurumi shares the sitting-body shape and lands in the same nursery palette.
Ready to hook your chunky lamb?
Save this pattern to your Pinterest board, grab a skein of cream chenille and your smoothest aluminum hook, and start the head tonight. If you finish one, tag me on Pinterest — I love seeing the color combinations you dream up. Cream + tan is the classic, but grey + white, blush + cream, and full oatmeal all photograph beautifully in a modern nursery.