Crochet Stuffed Bunny Pattern

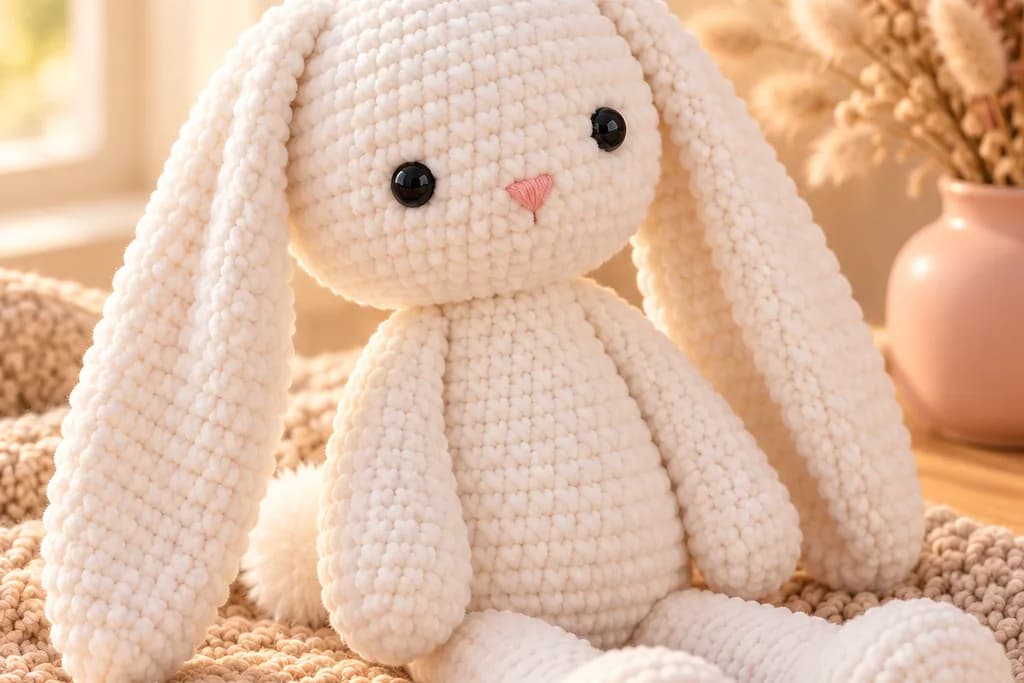
This crochet stuffed bunny is a soft white plush bunny with long floppy ears, dangly legs and a little pink nose. It's worked in plush chenille yarn, all in single crochet, in nine simple pieces that you sew together at the end. You'll need about 275 yards of super bulky plush yarn, a 5 mm hook and 6 to 8 hours.
Key Takeaways
- All single crochet in the round: a head, a body, 2 ears, 2 arms and 2 legs, plus a fluffy pom-pom tail.
- Long, unstuffed ears, about 10 in, flop to the sides, the way a real lop bunny's do.
- Lightly stuffed legs dangle, so the bunny sits up and still feels cuddly.
- About 275 yd (250 m) of plush yarn, which is two 300 g balls of Bernat Baby Blanket.
Why I love this plush bunny
There's something about a white bunny with floppy ears that makes everyone reach for it. This one is soft, a little bit dangly, and just the right size to tuck under an arm. It's the plush I make for baby showers, Easter baskets and anyone who needs a hug.
The pieces are all simple tubes and balls, so it's a great second or third amigurumi. If you've made a ball and a tube in single crochet, you can make every part of this bunny. The only fiddly bit is the sewing, and I'll walk you through where each piece goes.
Why plush yarn? It hides small tension wobbles, so the head comes out round and smooth even if your rounds aren't perfect. And the finished bunny feels like a store-bought toy, not a first project.
Skill level. Easy. You need a magic ring, sc, inc and dec in the round, stuffing, and some sewing and simple embroidery. Plush yarn is a little harder to count, so I'll show you how to keep track.
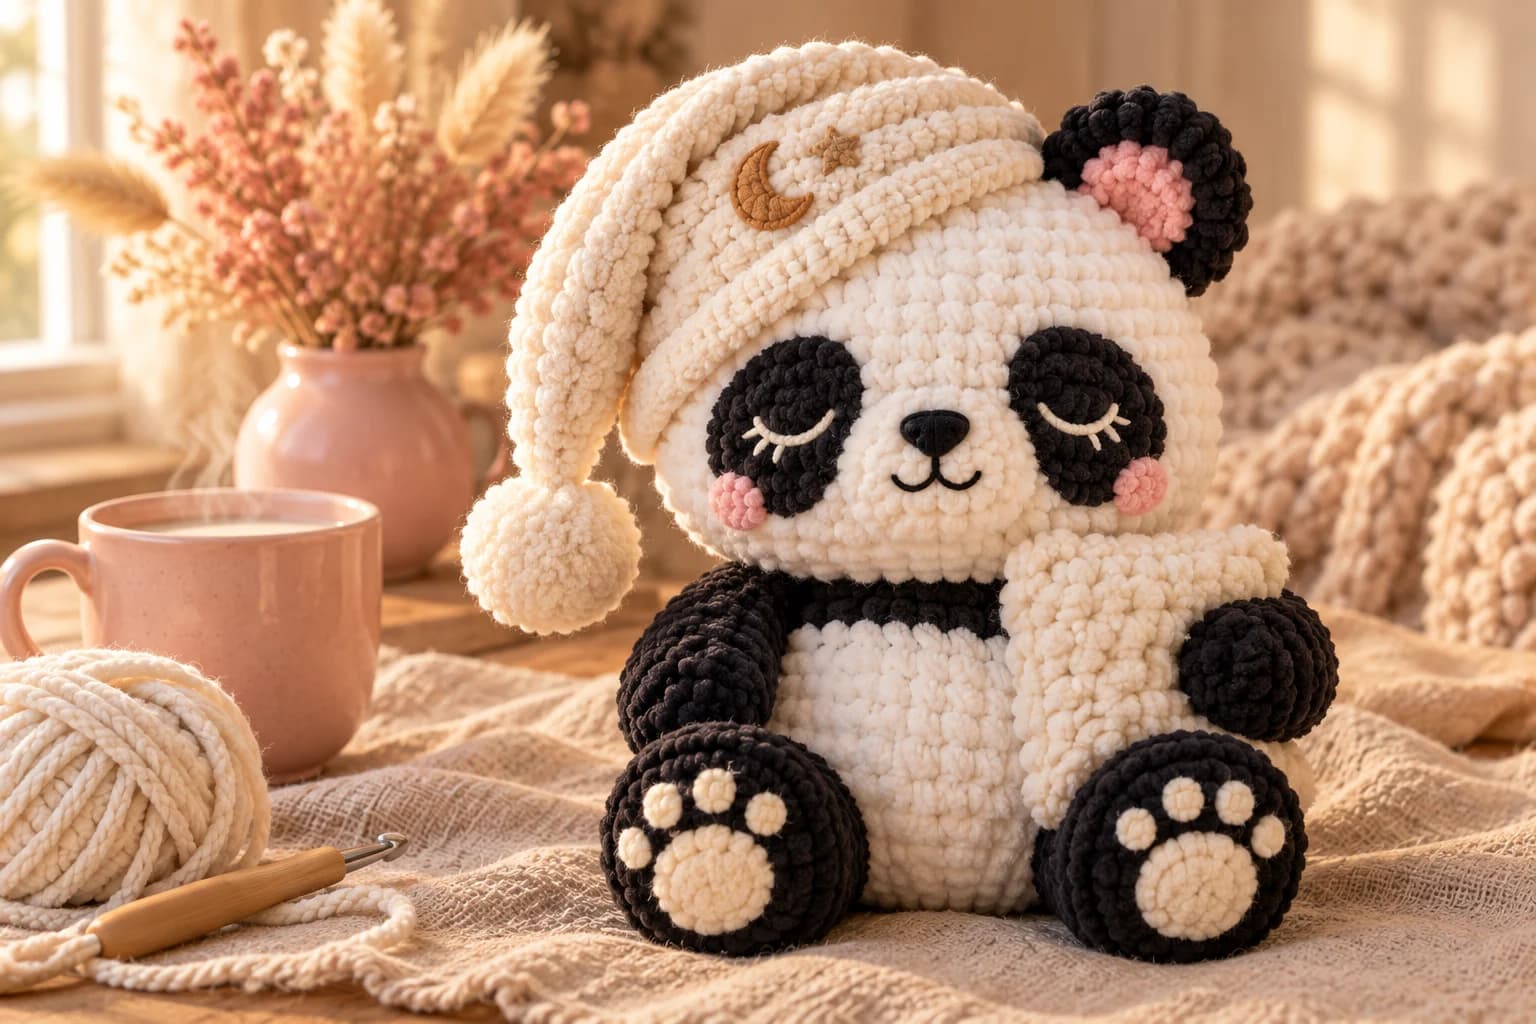
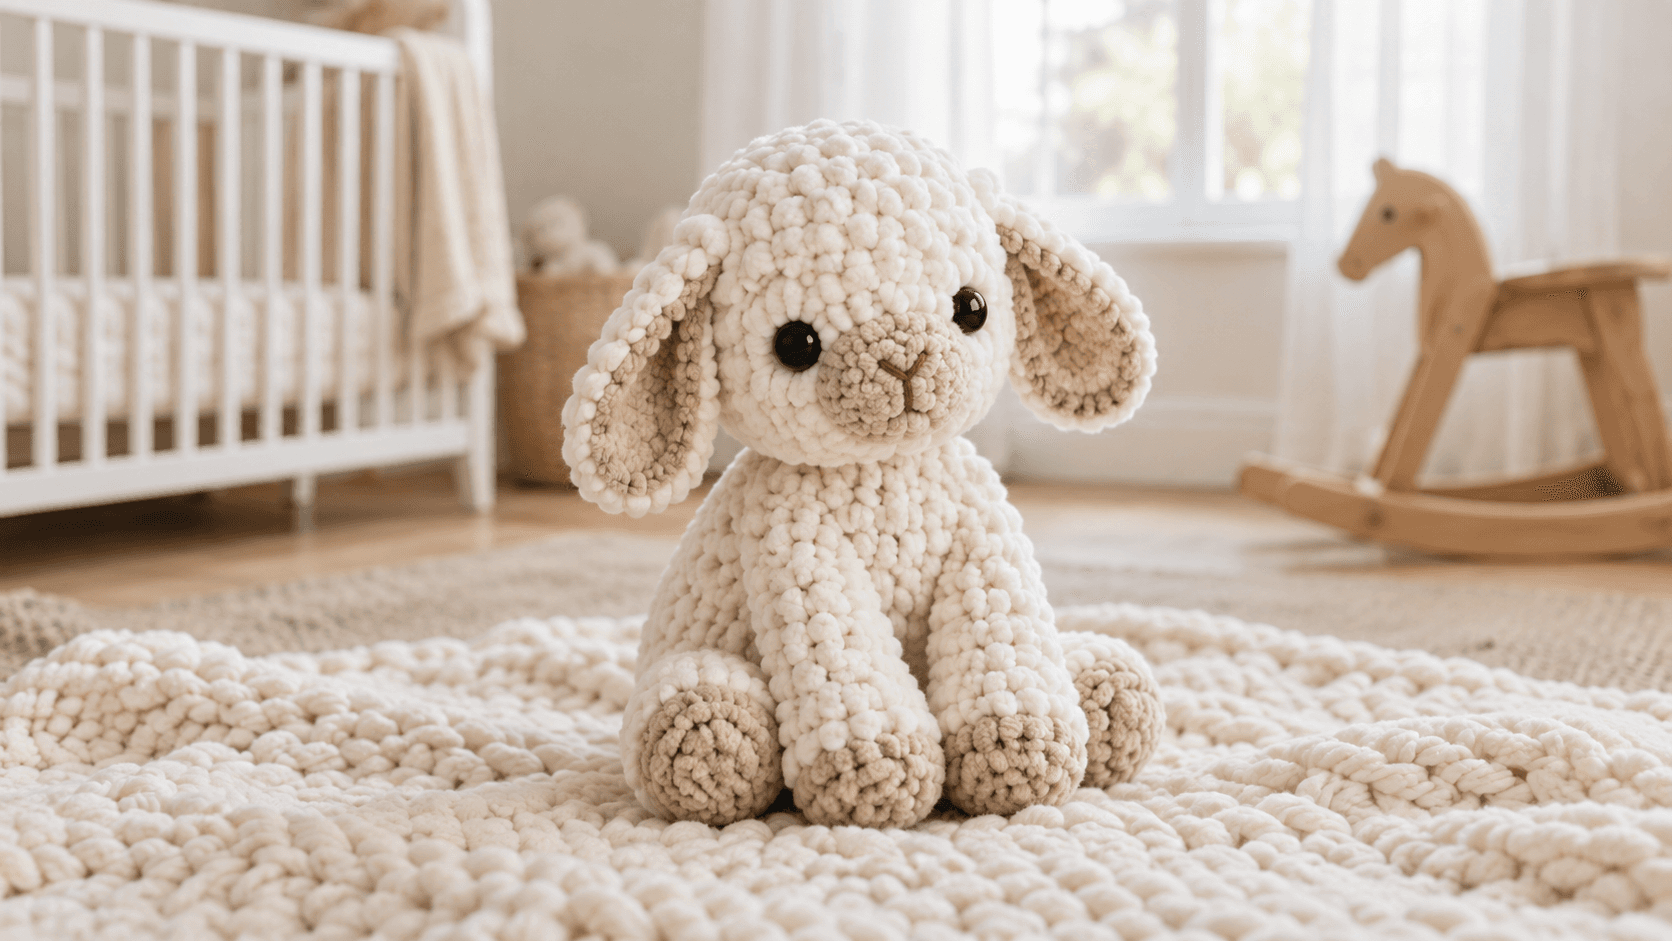
Looking for a matching friend? My sleepy panda and chunky lamb plush are made the same way.
What you'll need
Yarn: super bulky #6 plush chenille, such as Bernat Baby Blanket, in white: about 275 yd (250 m). That's two 300 g balls (220 yd each), with plenty left over. Plush yarn is soft, it washes well and it makes a big plush quickly.
Worsted scraps: pink for the nose, about 1 yd, and white, about 10 yd, for the pom-pom tail. Worsted is much easier to embroider with than chenille, and it fluffs up into a pom-pom.
I worked the plush amount out from the stitch counts: about 2,340 single crochet in all, at roughly 4 inches of plush yarn each, plus sewing tails.
Hook and notions
- 5 mm (US H-8) hook. It's much smaller than the label suggests. Plush yarn needs a tight fabric, or the stuffing shows between the stitches.
- Two 12 mm black safety eyes, or black worsted yarn to embroider the eyes.
- About 6 oz (170 g) of polyester fiberfill.
- A 2-in (5 cm) pom-pom maker (optional; three fingers work too).
- Stitch markers, a large-eye tapestry needle, pins and scissors.
Gauge and finished size
Gauge isn't critical, but tension is. Your stitches should be tight enough that the stuffing doesn't show through. As a check, after Rnd 6 the top of the head is still a flat circle of 36 sc: it should measure about 5 in (13 cm) across. If it's much bigger, go down to a 4.5 mm hook.
Round gauge: about 5 rounds to 2 in (5 cm), measured along the straight part of a tube, like an ear or a leg. That's the number to check, because the long pieces are mostly straight rounds: at this gauge, the 16 straight rounds of an ear plus its tip and base come to roughly 10 in (25 cm), and a leg to roughly 6½ in (16.5 cm). On the head and the body, the increase and decrease rounds curve around the shape, so their height can't be read straight from the round count.
Finished bunny, approximately: about 11 in (28 cm) tall sitting, plus the ears, and about 16 in (40 cm) from the top of the head to the toes when you hold it up. The ears are about 10 in (25 cm) long. These are guide sizes: your yarn, your tension and how firmly you stuff will all change them by an inch or so, so measure your first one. The head is a little wider than the body (36 sts against 30), which gives the big-headed, cuddly look.
Abbreviations (US crochet terms)
- MR = magic ring
- sl st = slip stitch
- sc = single crochet
- inc = 2 sc in the same st
- dec = single crochet two together (I use the invisible decrease through the front loops)
- st(s) = stitch(es)
- rnd(s) = round(s)
Work in continuous rounds, without joining. Move the stitch marker up at the start of every round.
Counting plush stitches. Chenille hides the V's. Feel for the stitch instead of looking for it: each stitch has a little hole to its right. On the long pieces, tie a scrap of yarn in every 5th round so you don't lose count.
The pieces at a glance
| Piece | Make | Starts at (MR) | Ends at | Stuffing |
|---|---|---|---|---|
| Head | 1 | Top of the head | Under the chin (closed) | Firm |
| Body | 1 | Bottom (sitting base) | Neck (left open) | Firm at the base, softer at the top |
| Ears | 2 | Tip of the ear | Base (open, flattened) | None |
| Arms | 2 | Paw | Shoulder (open, flattened) | Only the paw |
| Legs | 2 | Foot | Hip (open, flattened) | Foot firm, leg light |
| Tail | 1 | Yarn pom-pom (or a crocheted ball) | Tied in the middle | None |
The pattern — step by step
Part 1 — The head and face
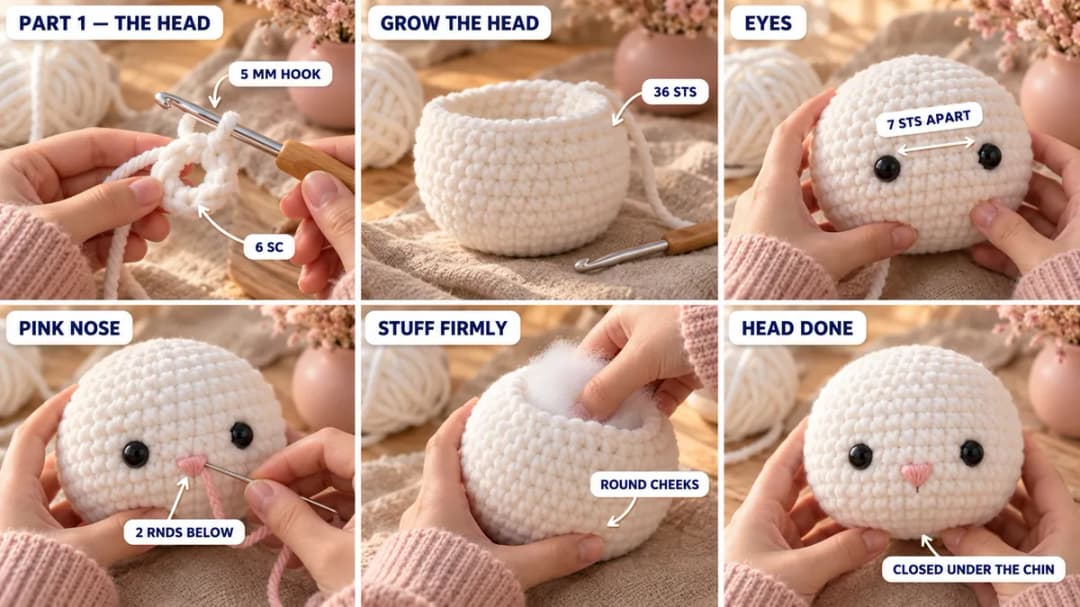
The magic ring is the top of the head. The last round closes under the chin, where the body is sewn on.
- Rnd 1: MR, 6 sc in the ring. (6)
- Rnd 2: Inc × 6. (12)
- Rnd 3: (Sc, inc) × 6. (18)
- Rnd 4: (2 sc, inc) × 6. (24)
- Rnd 5: (3 sc, inc) × 6. (30)
- Rnd 6: (4 sc, inc) × 6. (36)
- Rnds 7–14: Sc in each st around. (36) That's 8 rounds.
- Rnd 15: (4 sc, dec) × 6. (30)
- Rnd 16: (3 sc, dec) × 6. (24)
Eyes. Pick the side you like best as the face. Insert the safety eyes between Rnds 11 and 12, with 7 sts between them. Check them from the front before you snap the washers on. For a baby or a toddler, skip the safety eyes and embroider each eye with black worsted instead: 4 or 5 short stitches stacked on the same spot, over 1 st.
Nose (pink worsted). Centered between the eyes and 2 rounds below them, make a small upside-down triangle: 3 short horizontal stitches stacked over 2 sts, each one a little shorter than the one above. Knot the ends inside the head.
Stuff the head firmly, pushing the stuffing into the cheeks so the face is round.
- Rnd 17: (2 sc, dec) × 6. (18)
- Rnd 18: (Sc, dec) × 6. (12)
- Rnd 19: Dec × 6. (6)
Top up the stuffing, then fasten off. Thread the tail through the front loops of the last 6 sts, pull the hole closed and weave the tail in.
Part 2 — The ears (make 2)
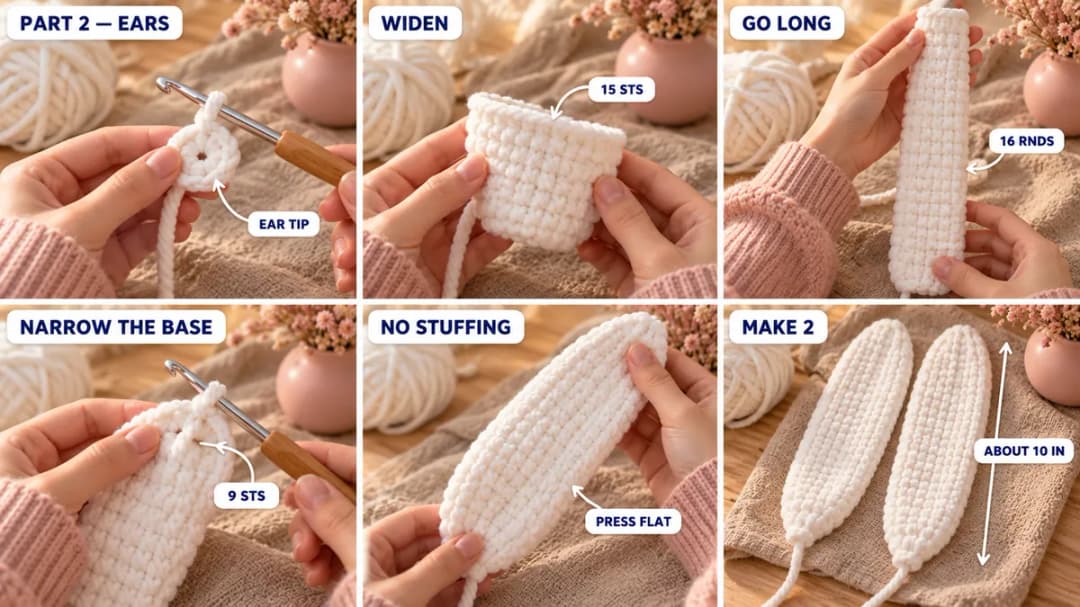
The magic ring is the tip of the ear. The open end is the base, which you sew to the head.
- Rnd 1: MR, 6 sc in the ring. (6)
- Rnd 2: (Sc, inc) × 3. (9)
- Rnd 3: (2 sc, inc) × 3. (12)
- Rnd 4: (3 sc, inc) × 3. (15)
- Rnds 5–20: Sc in each st around. (15) That's 16 rounds.
- Rnd 21: (3 sc, dec) × 3. (12)
- Rnds 22–23: Sc in each st around. (12)
- Rnd 24: (2 sc, dec) × 3. (9)
- Rnd 25: Sc in each st around. (9)
Fasten off, leaving a 12-in (30 cm) tail. Don't stuff the ears. Press each one flat, so it's a long soft paddle, wider in the middle and narrower at the base.
Each ear is roughly 10 in (25 cm) long at the round gauge above. Hold one against the head: if you want them longer, add rounds in the straight part, about 1 in for every 2½ rounds.
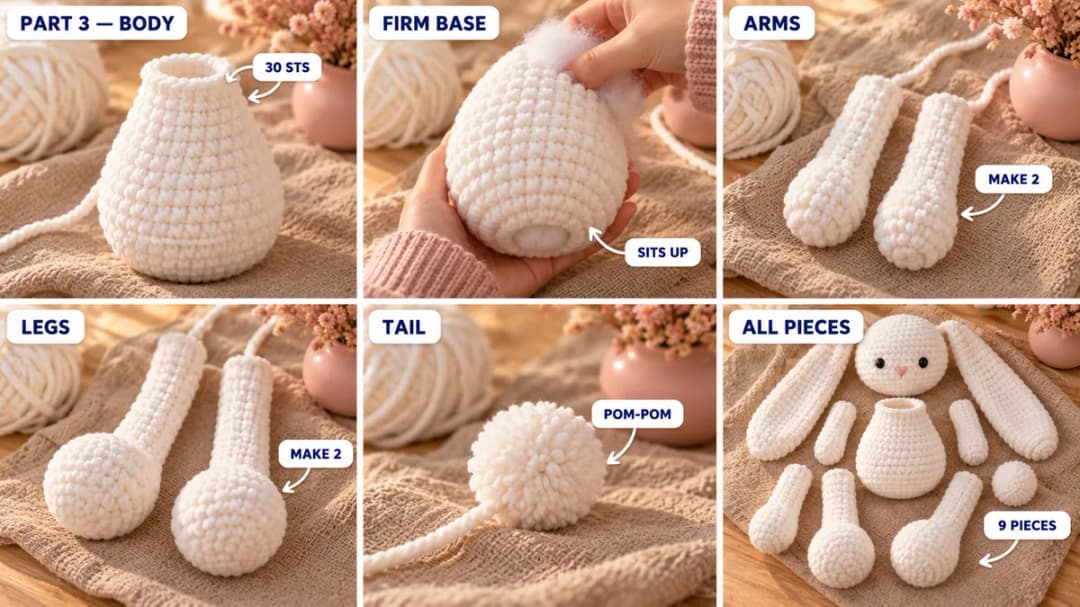
Part 3 — The body, arms, legs and tail
Body. The magic ring is the bottom of the body, the part the bunny sits on. The open end is the neck.
- Rnd 1: MR, 6 sc in the ring. (6)
- Rnd 2: Inc × 6. (12)
- Rnd 3: (Sc, inc) × 6. (18)
- Rnd 4: (2 sc, inc) × 6. (24)
- Rnd 5: (3 sc, inc) × 6. (30)
- Rnds 6–10: Sc in each st around. (30)
- Rnd 11: (8 sc, dec) × 3. (27)
- Rnds 12–13: Sc in each st around. (27)
- Rnd 14: (7 sc, dec) × 3. (24)
- Rnds 15–16: Sc in each st around. (24)
- Rnd 17: (2 sc, dec) × 6. (18)
- Rnd 18: Sc in each st around. (18)
Fasten off, leaving a 20-in (50 cm) tail for sewing on the head. Stuff the body firmly at the base, so the bunny sits up, and a little softer toward the neck.
Arms (make 2). The magic ring is the paw. The open end is the shoulder.
- Rnd 1: MR, 6 sc in the ring. (6)
- Rnd 2: Inc × 6. (12)
- Rnds 3–4: Sc in each st around. (12)
- Rnd 5: (4 sc, dec) × 2. (10)
- Rnds 6–12: Sc in each st around. (10)
Stuff only the paw, then press the arm flat. Fasten off, leaving a 12-in tail.
Legs (make 2). The magic ring is the sole of the foot. The open end is the hip.
- Rnd 1: MR, 6 sc in the ring. (6)
- Rnd 2: Inc × 6. (12)
- Rnd 3: (Sc, inc) × 6. (18)
- Rnds 4–6: Sc in each st around. (18)
- Rnd 7: (Sc, dec) × 6. (12)
- Rnds 8–17: Sc in each st around. (12) That's 10 rounds.
Stuff the foot firmly and the leg lightly, so it bends. Press the top flat. Fasten off, leaving a 12-in tail.
Tail. A fluffy yarn pom-pom, about 2 in (5 cm) across. Chenille doesn't fluff up, so use white worsted yarn, about 10 yd.
- Wrap the yarn about 80 times around a 2-in pom-pom maker, or around three fingers held together.
- Tie the bundle tightly in the middle with a 12-in piece of the same yarn, knotting it twice. Keep both long ends: you'll sew the tail on with them.
- Cut all the loops, fluff the pom-pom and trim it into a round ball.
Crocheted tail instead. For a baby, a crocheted ball is sturdier than a pom-pom: MR, 6 sc in the ring (6); inc × 6 (12); 2 rnds of sc (12); stuff firmly; dec × 6 (6). Fasten off, leaving a 10-in tail, and pull the hole closed with it.
Part 4 — Putting the bunny together
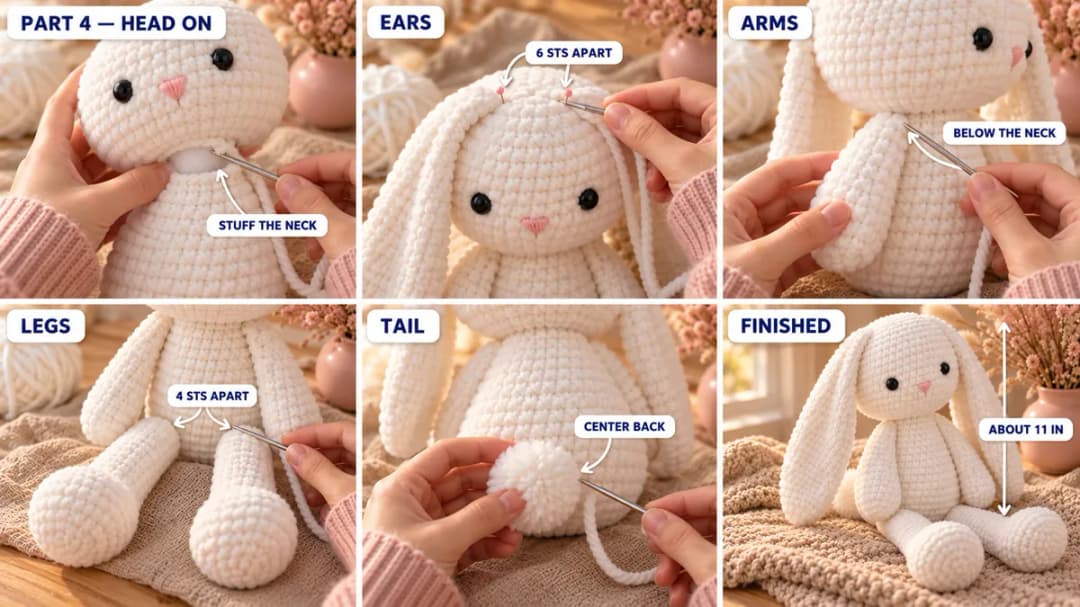
Sew everything with the long tails, in small whipstitches. Knot each tail inside the piece and hide the end in the stuffing.
- Head to body. Set the head on the neck opening of the body, face forward, with the closed chin point in the middle of the opening. Sew the last round of the body all around the head, through the head's stitches between Rnds 15 and 17. Add a little stuffing to the neck before you close the seam, so the head doesn't wobble.
- Ears. Pin the flattened base of each ear on top of the head, between Rnds 3 and 6, with about 6 sts between them, slanting slightly outward. Sew all around the base. Let the ears flop down the sides of the head.
- Arms. Pin one arm on each side of the body, just below the neck seam, flattened top facing up. Sew across the top of each arm, so it hangs down along the body.
- Legs. Pin the legs on the lower front of the body, between Rnds 4 and 7, about 4 sts apart, toes pointing forward. Sew across the top of each leg. The bunny now sits with its legs in front of it.
- Tail. Thread the two long ties of the pom-pom onto the needle and pass them through the middle of the back, between Rnds 5 and 7 of the body, a stitch apart. Knot them firmly inside the body.
Fluff the ears and legs, and give your bunny a squeeze.
Safety. Safety eyes are a small part, so I don't recommend them for children under 3. For babies and toddlers, embroider the eyes, sew every piece on with plenty of stitches, and check the seams from time to time.
Make it yours — quick variations
| Variation | Change from base pattern |
|---|---|
| Pink inner ears | Sew a strip of pink worsted in a long oval on the front of each ear before you sew it on. |
| Spring bunny | Tie a pastel ribbon in a bow around the neck. |
| Brown bunny | Work everything in caramel brown, with a cream tail. |
| Upright ears | Lightly stuff the bottom 3 in of each ear so they stand up before they flop. |
| Mini bunny | Use worsted yarn and a 3.5 mm hook for a bunny about 6 in (15 cm) tall sitting. |
Troubleshooting the three things that go wrong
The head wobbles
The neck needs more stuffing, and the seam needs to grip the head. Unpick a few stitches, push in more fiberfill, and sew through the head a little higher, at Rnd 15.
The bunny falls over
The base isn't firm enough, or the legs are pulling it forward. Add stuffing to the bottom of the body, and move the legs a little further back, closer to the sides.
I lose count in the chenille
Tie a scrap of contrasting yarn in every 5th round, and count stitches by feeling for the holes. If a round comes out one stitch off, add or skip one in the next round. Plush yarn hides it.
Frequently asked questions
How long does this stuffed bunny take? About 6 to 8 hours. The head takes about an hour and a half, the ears about an hour, the body and limbs two to three hours, and the sewing about an hour.
How much yarn do I need? About 275 yd (250 m) of super bulky plush yarn, plus a yard of pink worsted for the nose and about 10 yd of white worsted for the pom-pom tail. The plush is two 300 g balls of Bernat Baby Blanket.
Can I use regular yarn instead of plush? Yes. Worsted acrylic with a 3.5 mm hook makes a smaller bunny, about 6 in (15 cm) tall sitting, with the same counts. Use 9 mm safety eyes.
Is this bunny safe for a baby? With embroidered eyes and firmly sewn pieces, it's a good soft toy for little ones. Safety eyes aren't recommended for children under 3, and every plush should be checked for loose seams now and then.
Can I sell bunnies made from this pattern? Yes, you're welcome to sell finished bunnies made from this free pattern at markets, on Etsy or as gifts. Please credit "Pattern by Wavode" in your listing and link back to this page. What you can't do is republish this write-up or my photos as your own pattern.
Related patterns on Wavode
- Sleepy panda: a plush panda in a moon nightcap.
- Chunky lamb plush: a beginner-friendly cuddly lamb.
- Barnaby the teddy bear lovey: a soft lovey for babies.
- Free crochet snake pattern: a long, squishy plush snake.
Made a bunny? Tag #wavodecrochet on Pinterest. I re-pin every finished make and credit the maker.
Pattern by Clara Hartwell for Wavode. Questions? Email me at support@wavode.com.