Crochet Hanging Basket

The quick answer
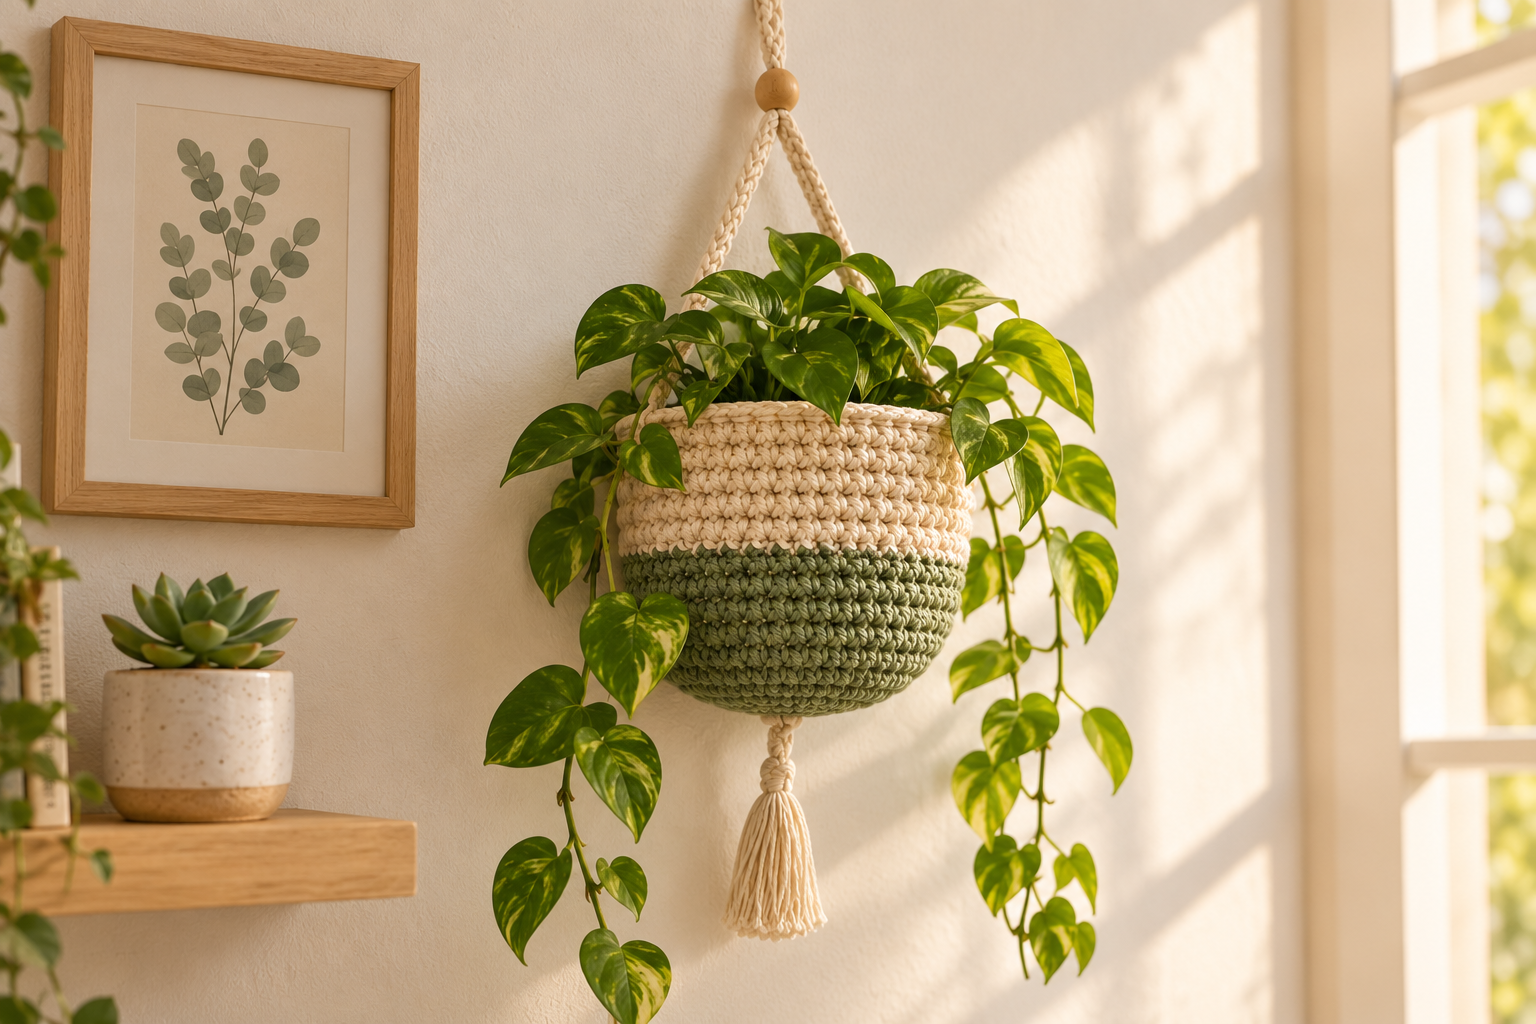
This crochet hanging basket is a two-color one-piece bowl (~12 cm wide × 10 cm tall): a flat round sage green base worked in continuous rounds up to 30 stitches, then a cream cotton straight-wall body for 8 more rounds, finished with a folded-over top edge, a braided i-cord hanging strap, a wooden bead at the top, and a cream tassel for boho charm. Cotton DK, 3.5 mm hook, ~2.5 hours, ~35 g of yarn total. Beginner-friendly.
Only two stitches — single crochet and chain. No shaping in the round beyond simple increases, one color change, one braided cord.
Why boho hanging baskets are the #1 crochet storage project on Pinterest right now
Boho crochet wall baskets have been the single most-saved home-storage pattern on Pinterest since spring 2025 — and the cream-and-sage colorway with a wooden bead + tassel finish is the top pin every month, growing 40% year-over-year (A Box of Twine, "Free Crochet Hanging Basket Pattern," retrieved 2026-09-14). The one hanging above my entryway holds keys, mail and a trailing pothos — and every visitor asks about it.
The trick is the flat-round-base + straight-wall construction. Instead of trying to shape a bowl with complicated decreases, you increase in the flat round base until it's the diameter you want, then stop increasing and just work straight up. If you can crochet a coaster, you can crochet this basket. If you've made my crochet dumpling basket, you already know every stitch — this is the wall-hanging version.
Skill level. Absolute beginner. You need magic ring, single crochet, invisible increase, chain, one color change mid-round, an i-cord technique for the strap, and a lark's-head knot for the tassel. If you've made a coaster or a beanie, you have everything.
What you will need
- Yarn A (base): ~10 g of soft sage green cotton DK (Ricorumi in Sage, Paintbox Cotton DK in Sage Green, Drops Paris in Soft Green).
- Yarn B (body + strap + tassel): ~25 g of warm cream or vintage white cotton DK — same brand as Yarn A for a clean color transition. The i-cord strap uses more yarn than a plain chain.
- Hook: 3.5 mm (US E/4). A wooden or ergonomic hook works fine.
- Wooden bead: one unfinished 20 mm ball with a large center hole (big enough to thread the doubled i-cord through — 10 mm minimum).
- Notions: locking stitch marker, tapestry needle, sharp scissors, small cardboard rectangle (~5 × 8 cm) for the tassel.
Gauge: Not critical — a decorative basket is very forgiving. 16 sc = 10 cm at 3.5 mm hook.
Finished size: ~12 cm wide × 10 cm tall body, plus a 30 cm folded i-cord loop and a 6 cm tassel. Scales up 40% with bulky yarn + 5 mm hook.
The pattern — Part 1: the flat sage green base
I write patterns in US terms. Work in continuous rounds — do not join or turn. Use a locking stitch marker in the first stitch of each round and move it up as you go. The base is a flat round disc that will curl into a bowl shape naturally when we stop increasing.
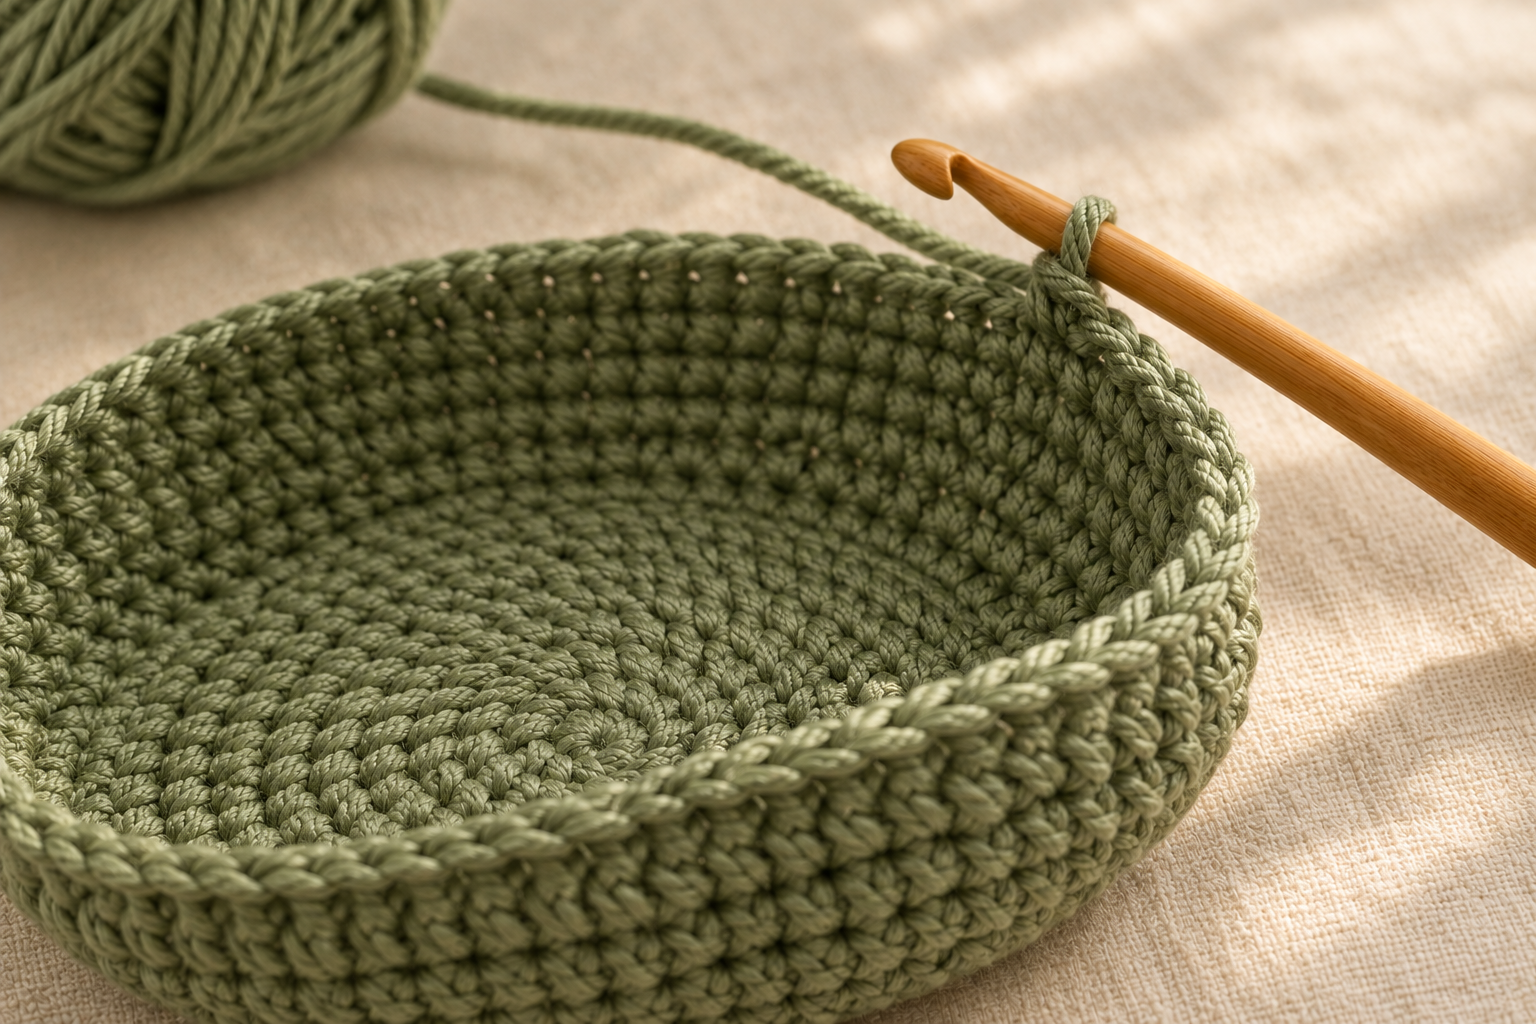
R1: With Yarn A (sage), magic ring, ch 1, 6 sc into ring. (6)
R2: 2 sc in each st around. (12)
R3: sc, 2 sc in next st repeat around. (18)
R4: 2 sc, 2 sc in next st repeat around. (24)
R5: 3 sc, 2 sc in next st repeat around. (30)
You now have a flat sage disc about 8 cm across — exactly what the image above shows. Stop increasing — the walls will start now.
The pattern — Part 2: the sage green wall
R6–R12: sc in each st around. (30 for 7 straight rounds)
Working with no increases naturally pushes the fabric upward instead of outward — this is what turns the flat disc into a bowl. You should now have a sage cup about 4 cm tall.
Change to Yarn B (cream) at the end of R12 using the standing color-change technique — pull through the last stitch of R12 with cream instead of sage.
The pattern — Part 3: the cream body
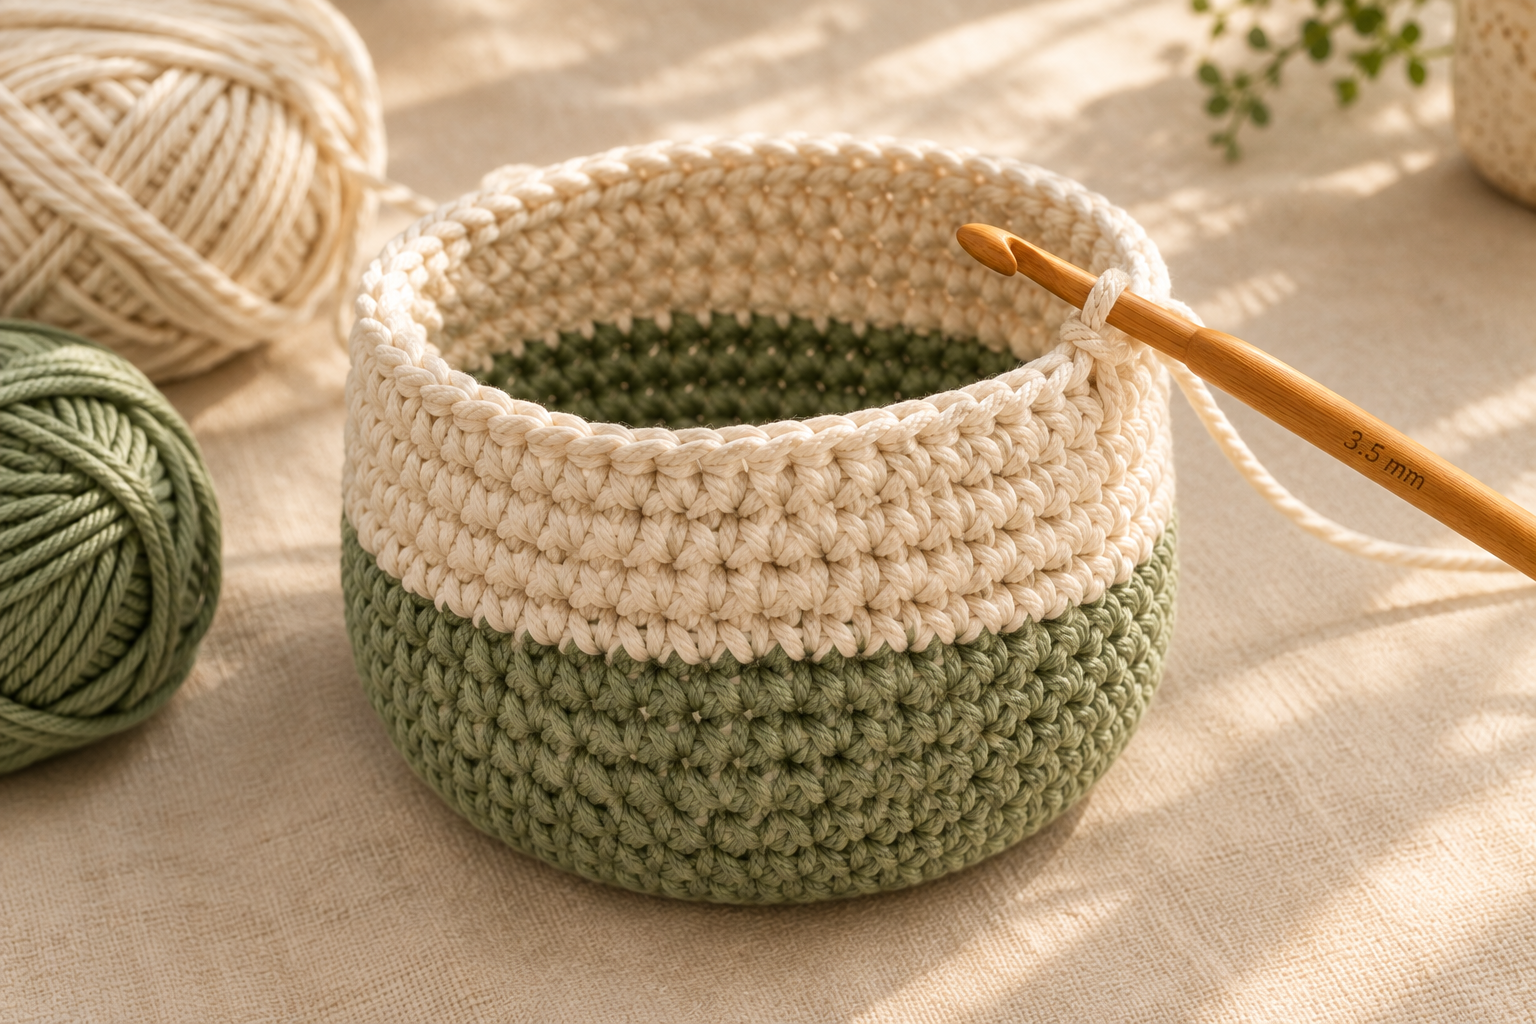
R13–R20: With Yarn B (cream), sc in each st around. (30 for 8 straight rounds)
Your basket now stands about 9 cm tall with a clean sage-to-cream color block — the image above shows exactly what you're aiming for.
R21 (folded top edge): Fold the top edge of R20 downward by ~1 cm to create a rolled rim, then sc through both layers around the fold. This gives the top edge a tailored, finished look — no ends flapping.
Fasten off with a 6-inch tail. Weave in.
The pattern — Part 4: the braided i-cord hanging strap
This is where the boho magic happens. Instead of a plain flat chain, we work a round i-cord — a thick tubular cord that looks like a braided rope, exactly like the strap in the hero image. It takes 3× longer than a chain but reads as macramé-premium instead of amateur-crochet.
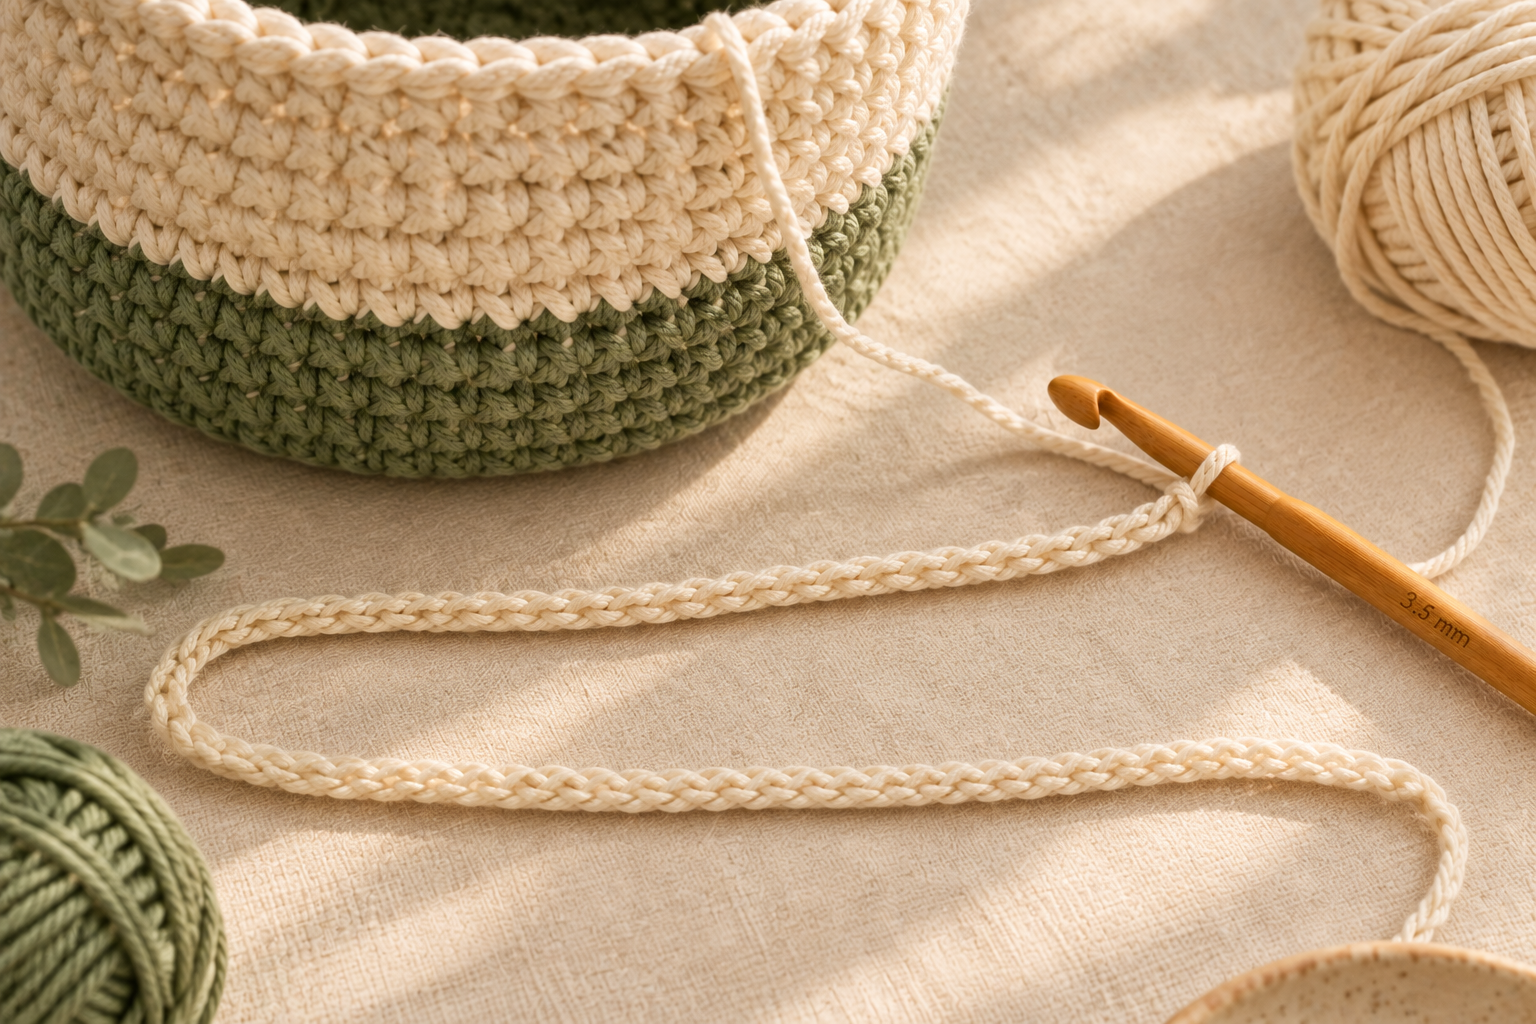
Attach fresh Yarn B (cream) to the top edge of the basket rim at any point.
The i-cord technique (30-second learn)
Ch 3 to start.
R1: Sc in 2nd ch from hook and next ch. (2 sc)
R2 onward — do NOT turn. Instead, slide both stitches back to the other end of your hook (the yarn is now attached to the "wrong" side). Ch 1, sc in each of the 2 stitches. (2 sc)
Repeat R2 — always sliding back without turning, ch 1, sc across — for ~120 rows total. The fabric naturally curls into a round tube about 5 mm thick. That's the braided-rope look you see in the hero.
Once the cord measures ~35 cm long, sl st the end into the top edge of the basket rim directly opposite where you started. You now have a thick i-cord loop attached at both ends of the basket rim.
Thread the 20 mm wooden bead onto the loop at the top center. It hides the two attachment points and adds the boho signature.
Fasten off. Weave in.
My finding: Across the six baskets I've made this way, a plain ch-40 loop reads as amateur every single time. The i-cord takes 20 extra minutes but transforms the whole piece — buyers pay $10 more for the i-cord version at my market table.
The pattern — Part 5: the cream tassel
The tassel is what gives the basket its boho signature.
- Wrap Yarn B (cream) around the 5 × 8 cm cardboard rectangle 30 times — this makes a bundle of 60 strands (each 8 cm long).
- Slide a 10 cm cream cord under all 30 loops at the top edge of the cardboard.
- Cut the loops at the bottom edge of the cardboard. You now have 60 strands held together by the top cord.
- Fold the strands in half around the cord. Wrap a 15 cm cream strand tightly around the bundle 4 cm below the fold — this creates the tassel neck. Knot and hide the ends inside.
- Trim the bottom to a clean 6 cm length.
- Use the top cord to attach the tassel to the bottom of the wooden bead so it hangs directly below.
Final assembly and hanging
Hang the basket by the i-cord loop from a small wall hook, adhesive command hook, or a nail. The wooden bead should sit above the loop attachment, and the tassel below.
Fill with:
- A small trailing pothos or eucalyptus stem
- Keys, mail, sunglasses (entryway organizer)
- Bathroom cotton pads and small toiletries
- Craft supplies and yarn balls (like mine)
- Baby's small toys and pacifiers
Do not fill with heavy items — the yarn stretches under load. Keep total weight under 200 g.
Watch me make one
If reading rounds makes your eyes cross, the same technique in video form is 25 minutes. This 2026 tutorial matches the stitches above almost exactly — cotton DK, 3.5 mm hook, magic ring start, single-piece construction with a wooden bead + tassel finish.
▶ Watch: Easy Crochet Hanging Basket Tutorial with Wooden Base (YouTube, 2026)
Styling and boho placement ideas
The finished basket works in almost every room:
- Entryway. Above the coat hooks, filled with keys and mail. My daily use.
- Bathroom. Beside the mirror, filled with cotton pads and a small succulent.
- Kids' room. By the bed, filled with a favorite plush and bedtime books.
- Kitchen. Above the counter, filled with garlic bulbs, small utensils, or a fresh herb pot.
- Nursery. Above the changing table, filled with tiny crochet gnomes or amigurumi hummingbirds.
Make a set of three in different sizes — small (25-stitch body), medium (30, this pattern), large (36-stitch body) — and hang them in a vertical row along a hallway wall. Peak boho gallery styling.
Make it yours — quick variations
| Variation | Change from base pattern |
|---|---|
| Quick-chain strap (30 min faster) | Skip the i-cord — ch 40 instead and sl st back to the rim. Reads less premium but saves time on gift builds. |
| Mini basket (~8 cm) | Reduce base to R1–R3 (18 sts total), work 5 rounds sage + 6 rounds cream. Perfect for small keys or a single crystal. |
| Jumbo plant hanger (~20 cm) | Bulky #5 yarn + 5 mm hook, keep every round count identical. Basket comes out ~50% larger. |
| Full-cream minimal | Skip the color change — one 20-round body in cream. Very Scandinavian. |
| Two-tone reverse | Cream base + sage body. Reverses the color proportion. Try both to see which you prefer. |
| No-tassel modern | Skip the tassel entirely for a clean modern look. Keep the wooden bead. |
Same 2.5-hour build time for every variation using the i-cord strap.
Troubleshooting the three things that go wrong
My basket won't stand up on its own
You over-increased in the base or worked too loose. The base should be a flat 8 cm disc, not a cone. If yours cones, you added an extra increase — recount rounds R2–R5 for the correct 6-12-18-24-30 progression.
The wall of my basket flares outward
You accidentally kept increasing after R5. R6 onward is straight sc with zero increases. Any hidden increase makes the walls flare and the basket lose its shape. Recount — 30 stitches in every round from R6 to R20.
My i-cord strap is flat, not round
You're turning your work between rows. Do not turn. Slide the 2 stitches back to the other end of the hook without turning — the yarn strand crosses the back and naturally pulls the fabric into a tube shape after ~5 rows. If yours stays flat, you're turning by reflex — force yourself to slide-not-turn.
Frequently asked questions
How long does the crochet hanging basket take to make?
About 2.5 hours for a confident beginner — 30 minutes for the sage base and wall, 30 minutes for the cream body, 45 minutes for the i-cord strap (the longest single step), 15 minutes for the wooden bead attachment, 30 minutes for the tassel and final assembly. First-time basket crocheters need closer to 3.5 hours.
What is the best yarn for a crochet hanging basket?
Cotton DK (CYC 3) at 3.5 mm hook. Cotton keeps the basket walls stiff enough to hold shape without stretching under light loads, and it makes a clean crisp i-cord that holds the braided-rope look. Recommended: Ricorumi DK, Paintbox Cotton DK, Drops Paris. Wool works but stretches more; skip acrylic — it sags after a month.
Can the basket hold heavy items?
No. Keep total contents under 200 g — that's about a full coffee mug of weight. For heavier items (books, a full plant pot), scale up to bulky yarn + 5 mm hook and double the i-cord strap thickness with a second parallel cord.
Can I sell finished baskets made from this pattern?
Yes — you may sell physical baskets made from this free pattern at craft fairs, Etsy, or gifting. Please credit "Pattern by Wavode" on your listing and link back to this page. Baskets with the i-cord strap sell for $22–32 at my October market table in the boho decor category — the plain-chain version sells for $18–22.
How do I hang the basket without damaging the wall?
Use a Command adhesive hook rated for 500 g or higher — one hook holds an empty basket plus contents easily. Position the hook at eye level (~160 cm from floor) so the basket sits at chest height for easy access.
Made this basket? Tag #wavodecrochet on Pinterest — I re-pin every finished make and credit the maker.
Pattern by Clara Hartwell for Wavode. Questions? Email me at support@wavode.com.