Crochet Owl Keychain

The quick answer
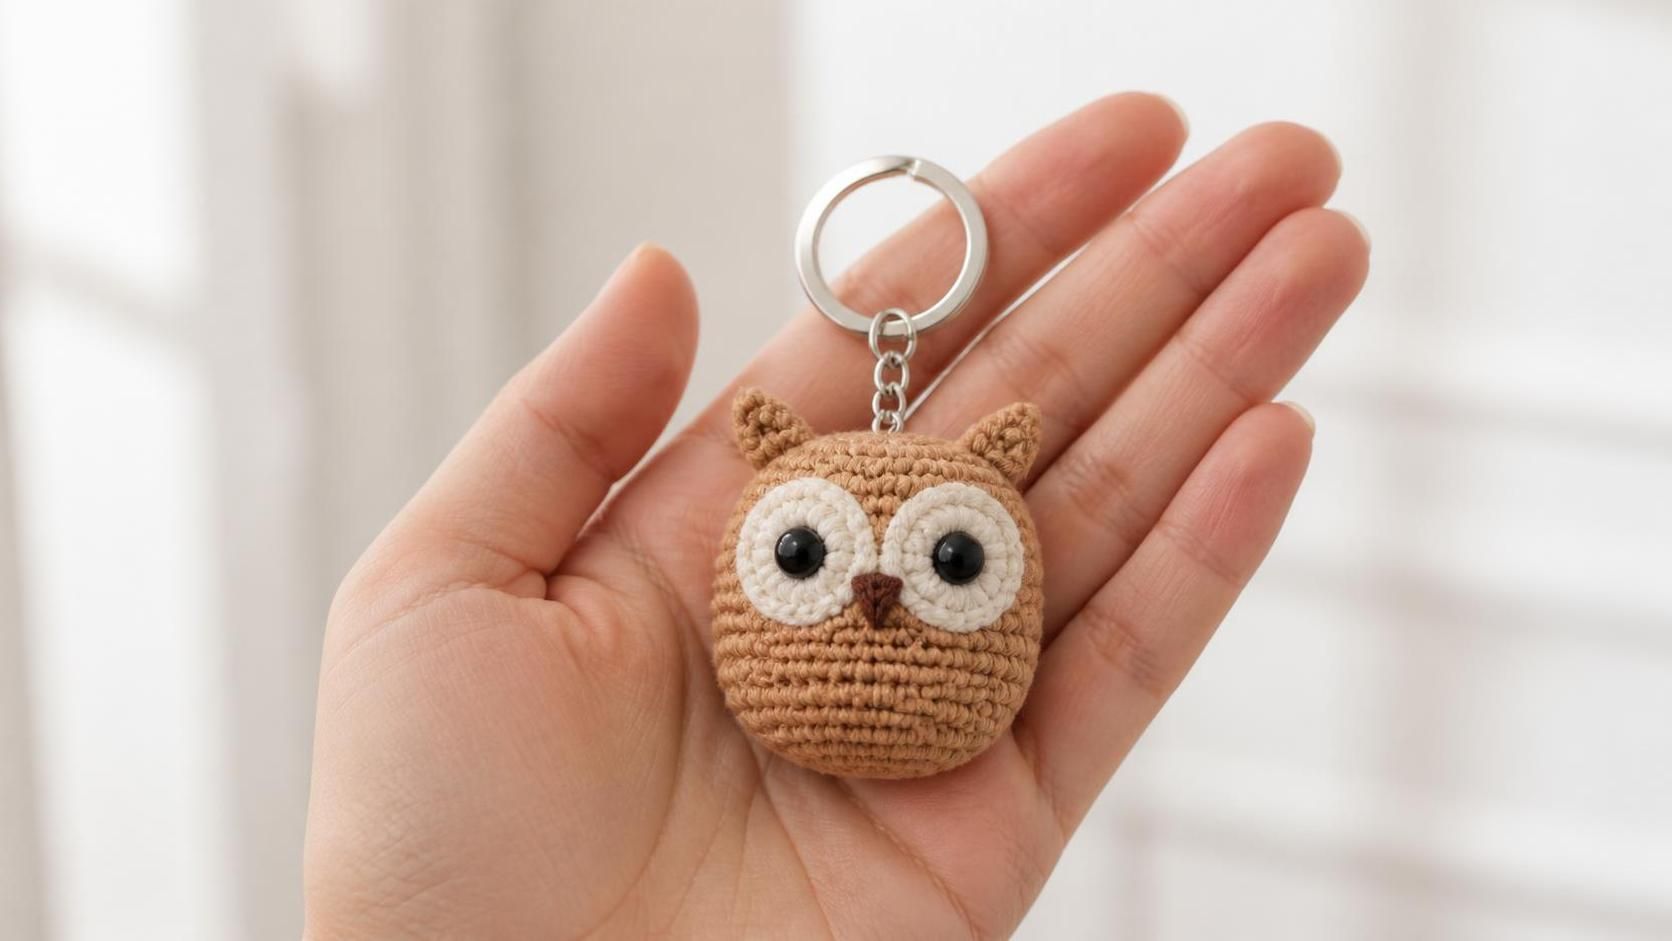
The mini crochet owl keychain is a one-piece amigurumi (~5 cm tall): a round tan body with a cream face disc, two big black safety eyes, a tiny brown beak, and two little ear tufts, mounted on a 25 mm silver split-ring keychain. Cotton DK, 2.5 mm hook, ~90 minutes, ~10 g of yarn total.
Fits on keys, a backpack, or a purse. Sturdier than a pom-pom, cuter than a plastic charm.
Why this owl outsells every other keychain at my market table
I have run a stall of crochet charms for two years and the mini owl is the one I refuse to stop making. Buyers pick it up because owls read as clever, calm, and gender-neutral — you can gift it to a teacher, a bookish friend, or a kid, and it lands every time. Every free owl keychain pattern I have tested runs 60–90 minutes; mine sits in the middle, worked in one continuous piece with no sewing beyond the face disc and beak.
The other reason it works: the big-eye ratio. A 5 cm body with 8 mm safety eyes gives you eyes that take up ~30% of the face — that's the Studio Ghibli proportion buyers respond to. Skip the ratio and the owl reads as flat. If you have made Piko the pond turtle before, you already know every stitch this pattern needs.
Skill level. Confident beginner. You need magic ring, sc, inc, invisible dec, and one whip-stitch attach. No color changes, no complicated shaping.
What you will need
- Yarn A (body + ear tufts): ~8 g of warm tan / camel cotton DK (Paintbox Cotton DK in Sandstone, Ricorumi in Camel).
- Yarn B (face disc): ~1.5 g of soft cream cotton DK.
- Yarn C (beak): a scrap (~0.5 g) of dark brown or espresso cotton DK.
- Hook: 2.5 mm (US B/C). Finer hook = denser fabric = sharper features.
- Safety eyes: 2 × 8 mm solid black.
- Fiberfill: one small handful of polyester stuffing.
- Keychain hardware: one 25 mm silver split-ring with attached small chain and lobster clasp.
- Notions: locking stitch marker, tapestry needle, sharp scissors.
Gauge: Not critical, but tighter is better. If you can see stuffing through the fabric, drop to a 2.0 mm hook.
The pattern — Part 1: the owl body (one piece)
I write patterns in US terms. Work in continuous rounds — do not join or turn. Use a locking stitch marker in the first stitch of each round and move it up as you go. This is worked as one seamless piece from crown to base.
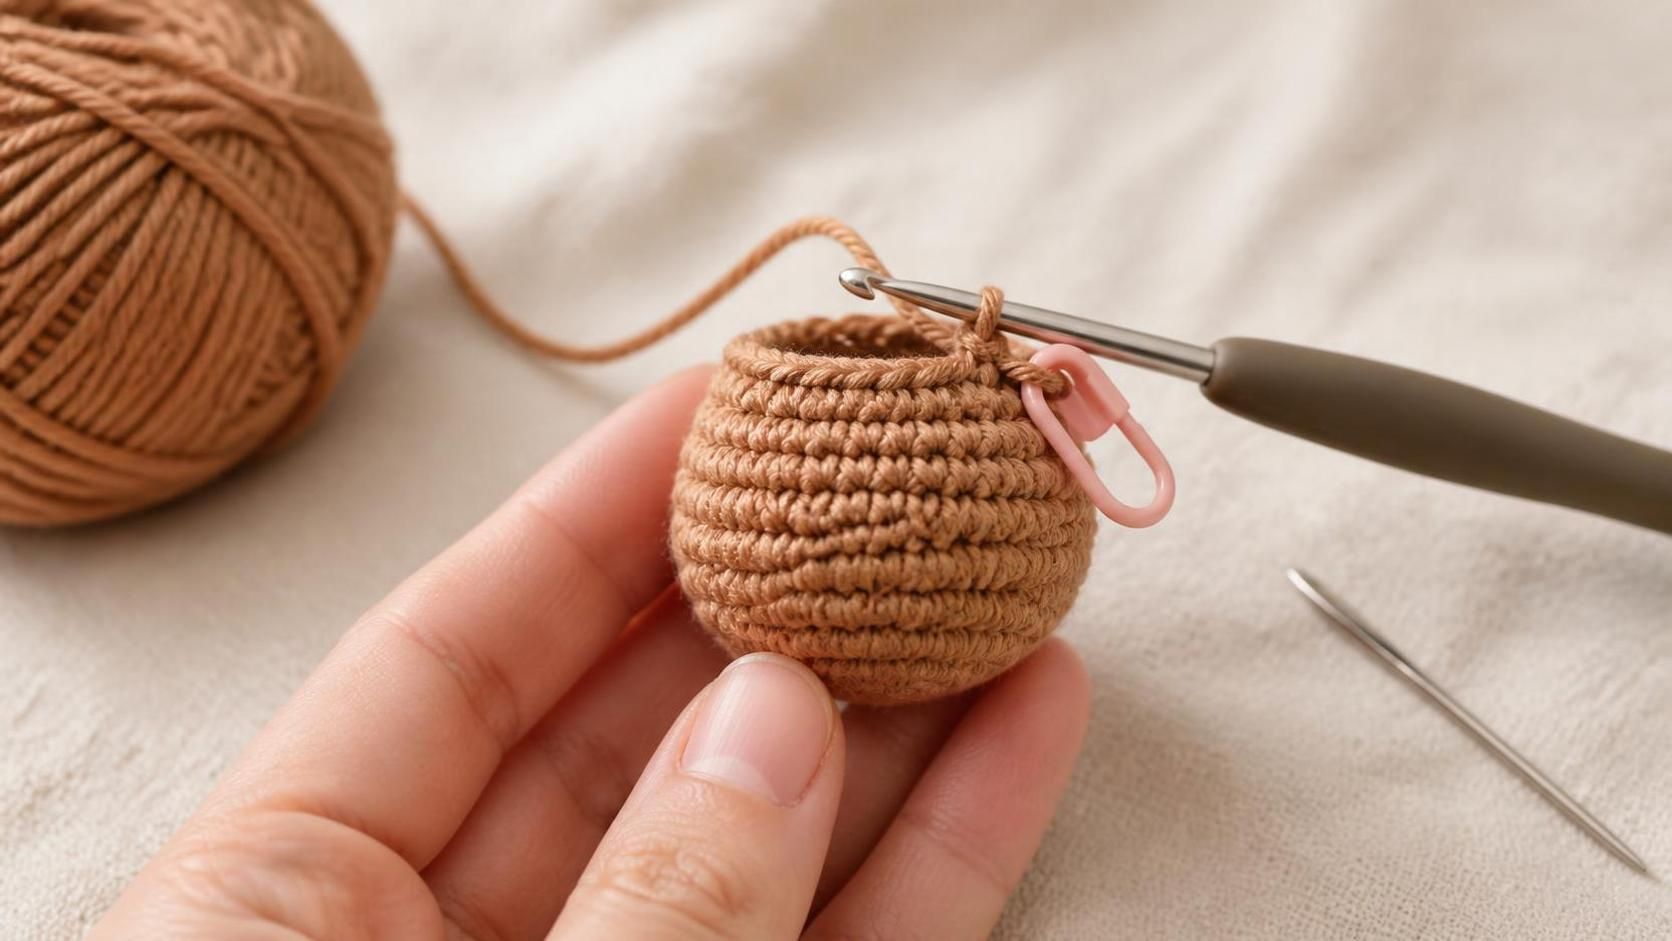
R1: With Yarn A, magic ring, 6 sc into ring. (6)
R2: Inc in each st. (12)
R3: sc, inc around. (18)
R4: 2 sc, inc around. (24)
R5–R10: sc in each st around. (24 for 6 rounds)
Insert the safety eyes between rounds 6 and 7, spaced 5 stitches apart — this is the "big-eye ratio" that gives the owl its face. Secure the washers on the inside now.
R11: 2 sc, dec around. (18)
Start stuffing firmly. Push the stuffing gently to keep the body round, not oval.
R12: sc, dec around. (12)
R13: dec around. (6)
Fasten off with a 6-inch tail. Thread through the last 6 stitches and pull tight to close the base. Weave the tail up into the body and out the crown — you will use it later to attach the keychain.
The pattern — Part 2: the cream face disc
The face disc is a flat oval of two overlapping circles that frame the eyes. This is what makes the owl read as an owl and not just a stuffed ball.
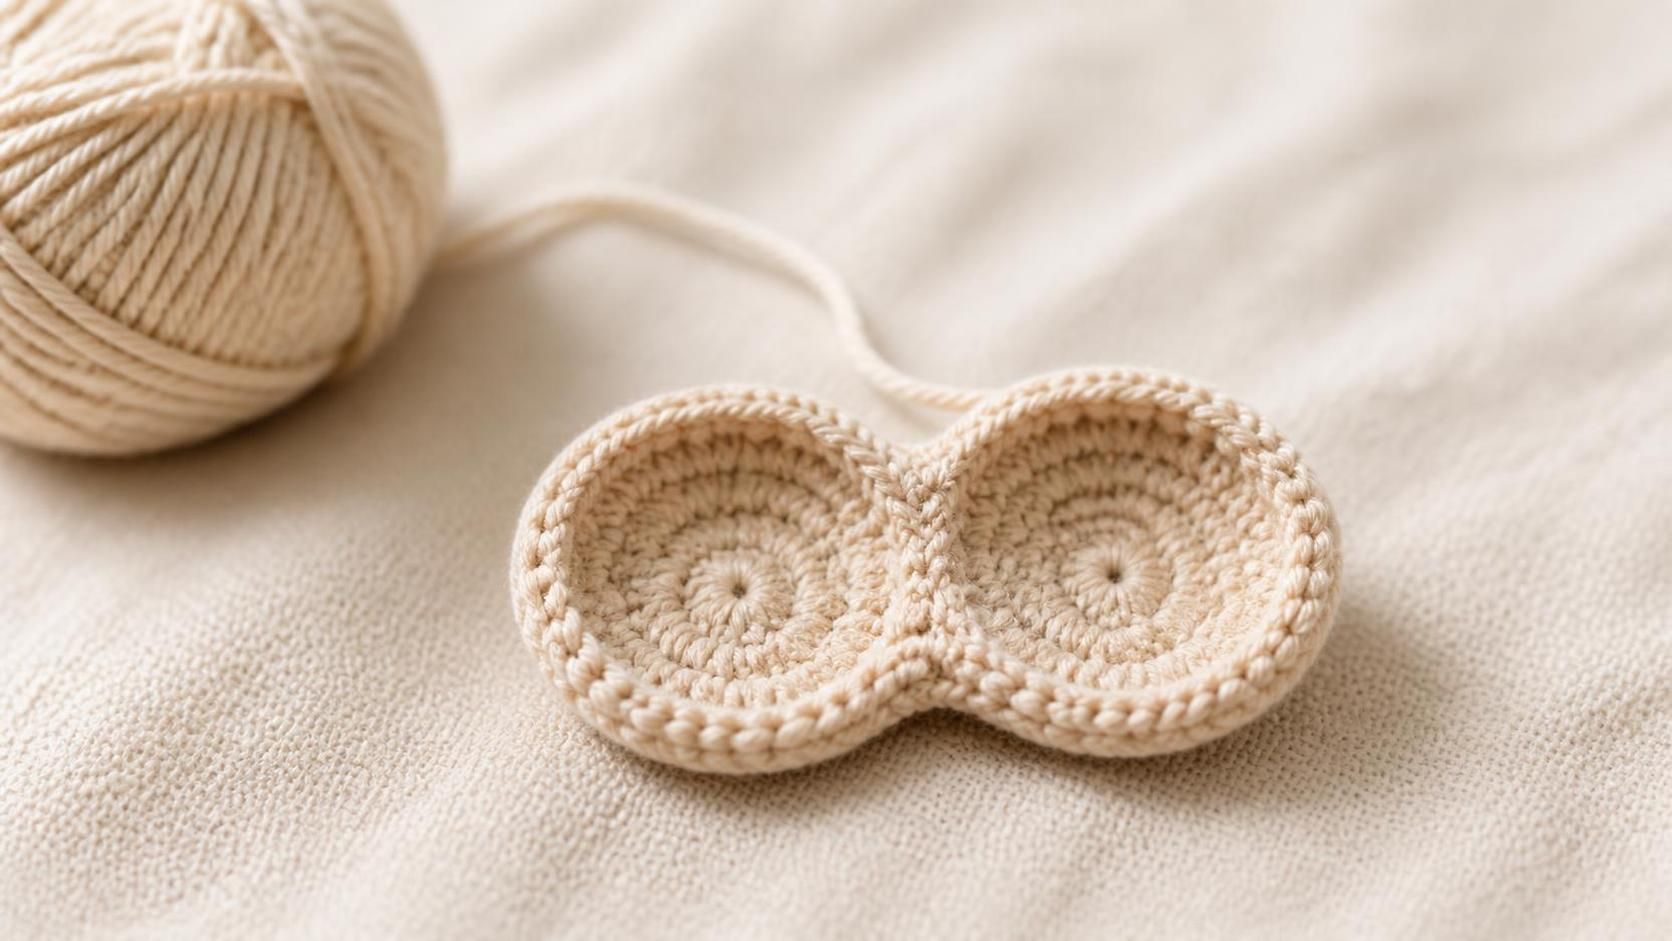
Round 1: With Yarn B, magic ring, 6 sc. (6)
Round 2: Inc in each st. Sl st to join. Fasten off. (12)
You now have a tiny cream disc, ~2 cm across. Make a second identical disc.
Overlap the two discs by about ⅓ their width and whip-stitch them together where they overlap — the result is a small figure-eight / peanut shape. This becomes the two eye framing circles.
The pattern — Part 3: the tiny beak and ear tufts
Two more mini pieces and you have every part of the owl.
The beak
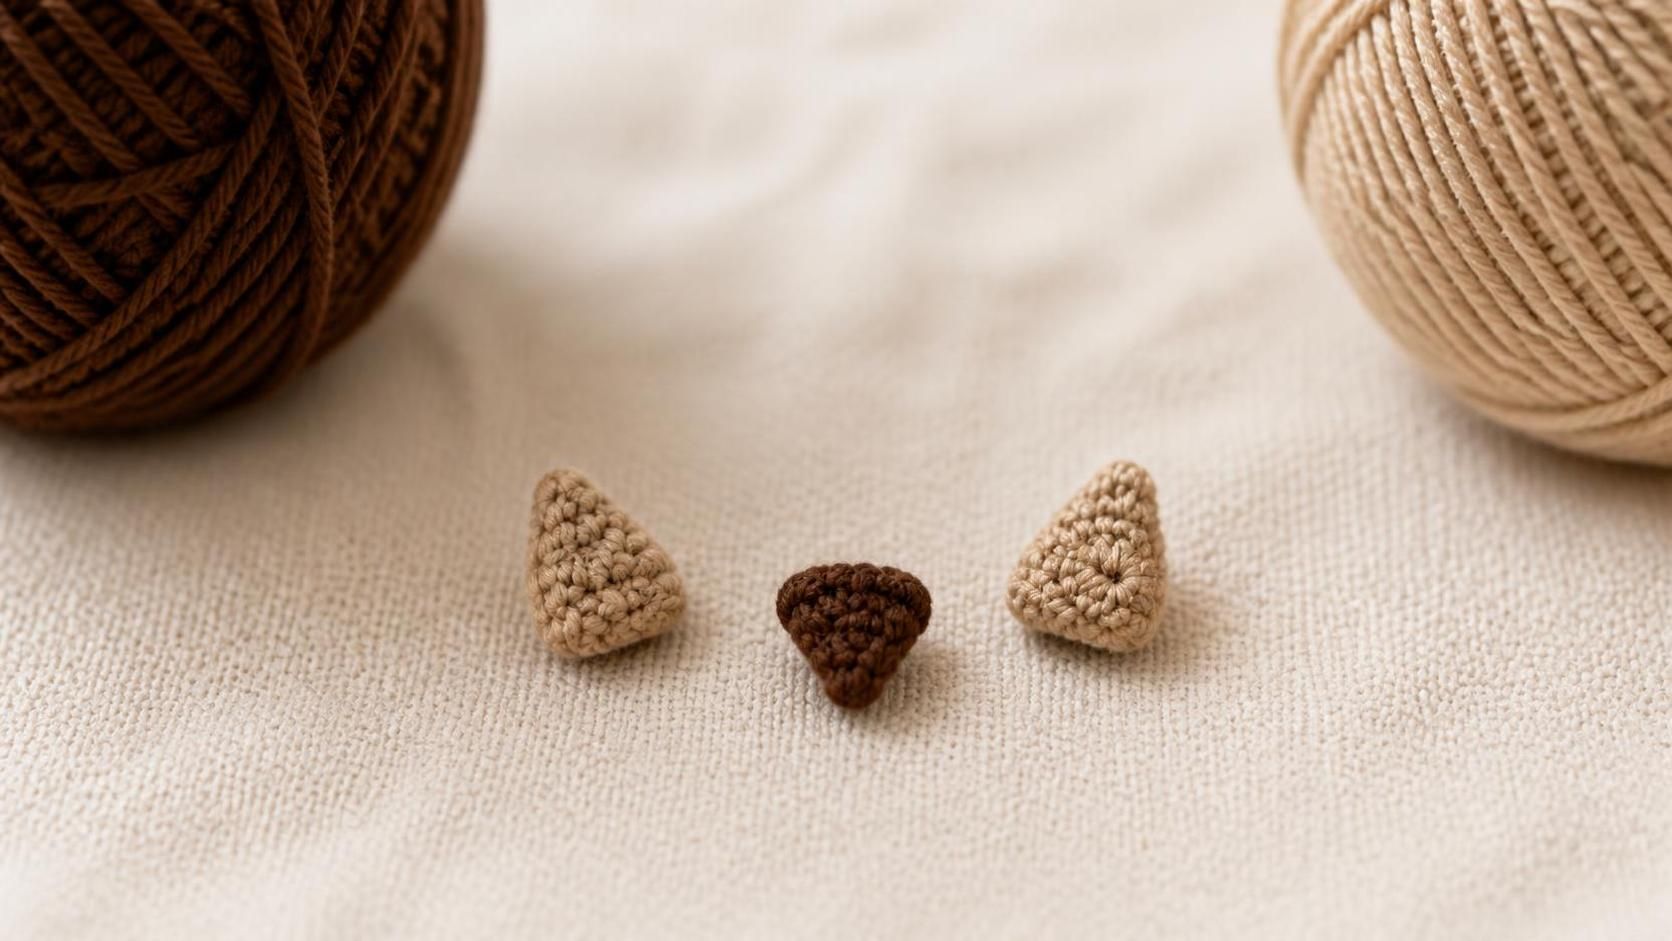
With Yarn C (brown), magic ring, 3 sc into ring. Pull the ring tight. Sl st to join and fasten off leaving a 4-inch tail. You have a tiny brown triangle — that's the beak.
The ear tufts (make 2)
With Yarn A (tan), ch 2. Work 3 sc into the 2nd ch from hook. Fasten off leaving a 4-inch tail. Roll the little curl into a tiny cone. That's one ear tuft. Make a second.
Final assembly — the face
This is the moment three tiny pieces become an owl.
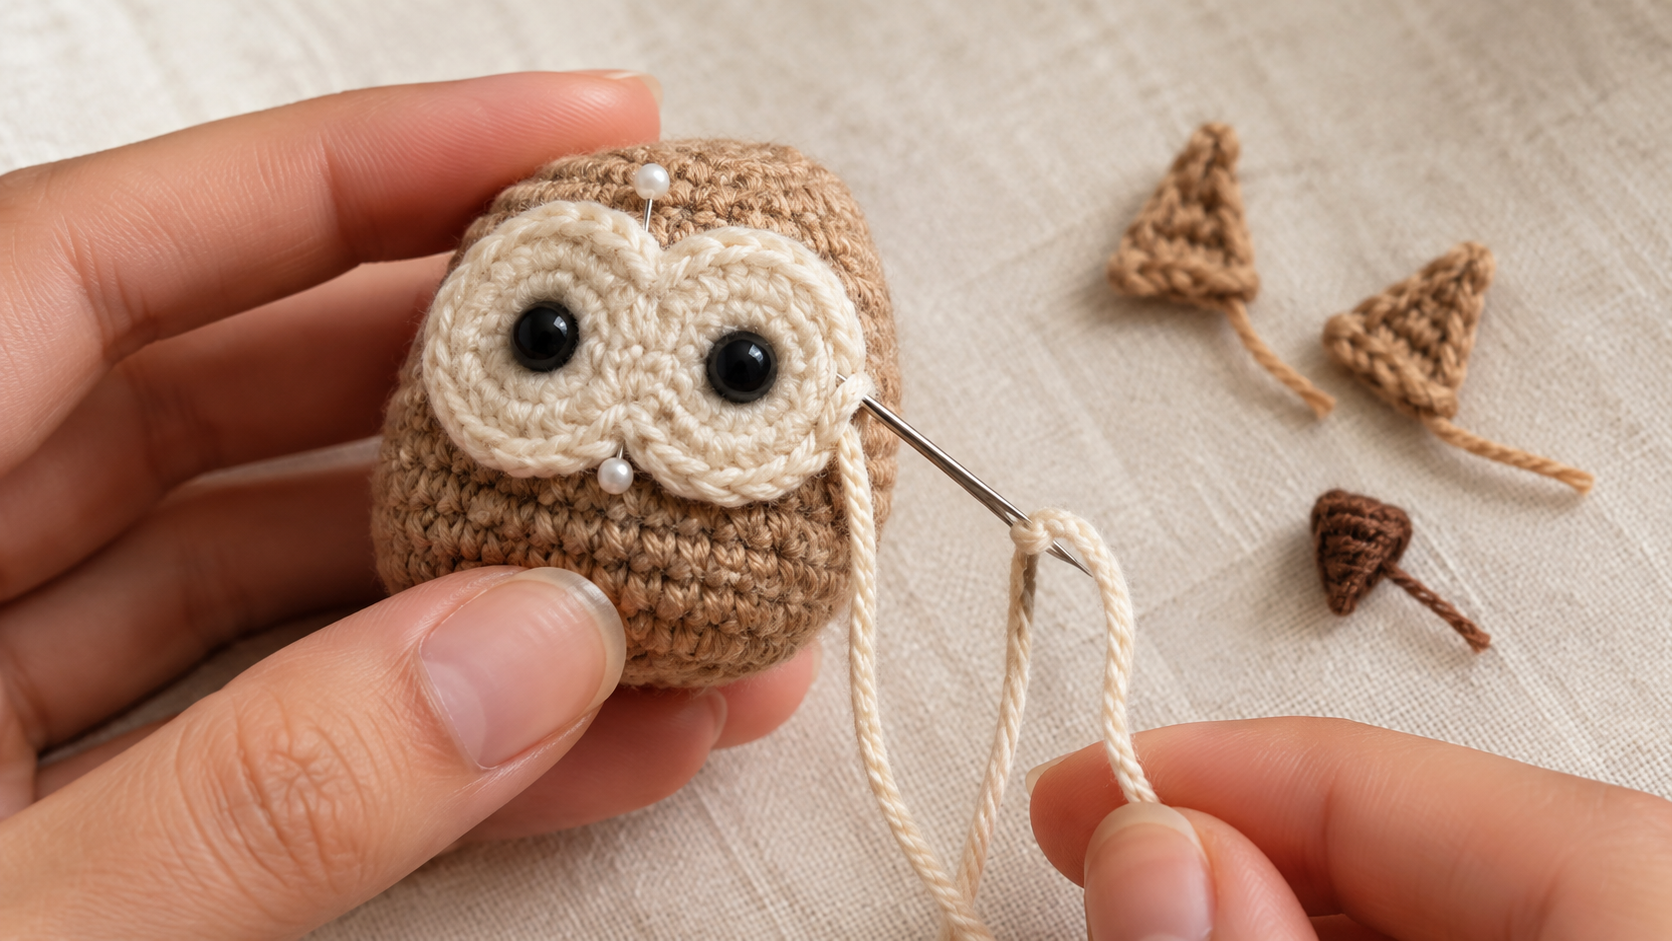
- Attach the face disc. Position the cream figure-eight so each round dip sits over one safety eye — the eyes poke through the two circle centers. Whip-stitch the outer edge of the disc to the owl body with the cream tail. Keep the stitches on the disc side so they hide.
- Attach the beak. Center the tiny brown triangle just below where the two disc circles meet. Two small stitches through the triangle base, secure, tuck the tail into the body.
- Attach the ear tufts. Position them on top of the crown, spaced ~1 cm apart, pointing slightly outward. Whip-stitch each cone base to the crown with 3 stitches. Weave tails into the body.
- Attach the keychain ring. Use the long tan tail from the crown (or a fresh 5-inch length of Yarn A). Loop it through the keychain split-ring and knot securely against the top of the owl's head between the ear tufts. Weave the tail into the body.
Adjust the owl so it faces forward with a slight upward tilt — that pose is what makes the eyes catch the light. The finished keychain stands about 5 cm tall on a 25 mm ring.
Styling and gift-wrapping
Slip the finished owl onto a small cardstock backer card printed with "Handmade with love — [your maker name]" for markets or gifting. The card doubles the visual footprint and lets buyers hang it on a display peg. This is the same tag trick I use in the mini amigurumi gift boxes tutorial — cheap, undetectable, transformative.
For a set, make three owls in three shades — the classic tan, a soft cream "snowy owl," and a deep grey "night owl" — and sell as "the wisdom trio" at market for 3× a single keychain price.
Make it yours — quick variations
| Variation | Change from base pattern |
|---|---|
| Snowy owl | Yarn A in soft white/cream. Face disc in slightly warmer cream. Very winter. |
| Barn owl | Yarn A in soft caramel. Face disc as a heart shape (two teardrop halves whip-stitched). |
| Great horned owl | Yarn A in charcoal grey. Longer ear tufts (5 sc instead of 3). |
| Pastel owl | Yarn A in dusty pink or sage. Very cute for kids' backpacks. |
| Sleeping owl | Skip safety eyes. Embroider two closed "u" eyes in dark brown thread. |
Same 90-minute build time for every variation.
Troubleshooting the three things that go wrong
My owl looks like a ball, not an owl
You skipped the face disc, or you placed the eyes too close together. The disc is what creates the owl silhouette; the 5-stitch eye spacing is what gives it a real owl face. Both are non-negotiable.
The ear tufts flop backward
You attached them too far back on the crown. The tufts should sit at the front third of the top, angled slightly forward. Re-position and re-stitch.
The keychain hardware pulls out of the head
You knotted the yarn to itself instead of stitching it through actual body stitches. The loop must catch the crown fabric, not just a yarn tail. Re-attach with 3 secure whip stitches through the top of the head between the ear tufts.
Frequently asked questions
How long does the crochet owl keychain take to make?
About 90 minutes for a confident beginner — 40 minutes for the body, 15 for the face disc, 10 for the beak and tufts, 25 for final assembly and keychain attachment. First-time mini amigurumi is closer to 2 hours if you re-count often.
What is the best yarn for a mini crochet owl?
Cotton DK (CYC 3) at 2.5 mm hook. Cotton keeps stitch definition on tiny features (face disc, tiny beak, ear tufts) and does not fuzz. Chenille blanket yarn works for a "fluffy owl" variation but hides the face details. Skip anything bulkier than DK — the scale collapses.
Can I make this without safety eyes?
Yes. Substitute two 8 mm black felt circles glued into place after the face disc is attached, or embroider closed "sleeping owl" eyes with dark brown floss. Safety eyes give the crispest look; felt is the safest for keychains that will be handled by young kids.
Can I sell finished owl keychains at markets?
Yes — you may sell physical keychains made from this free pattern. Please credit "Pattern by Wavode" on your listing and link back to this page. Reselling the pattern text (free or paid) is not permitted.
How do I stop the face disc from lifting at the edges?
Whip-stitch every 2 stitches around the entire outer edge, not just at the top and bottom. A face disc secured only at 4 points will lift; a fully stitched-down disc lies flat and lasts forever.
Made this owl? Tag #wavodecrochet on Pinterest — I re-pin every finished make and credit the maker.
Pattern by Clara Hartwell for Wavode. Questions? Email me at support@wavode.com.