Marigold the Garden Duck Crochet Pattern + a Free Ruffled Gardener Hat for Amigurumi

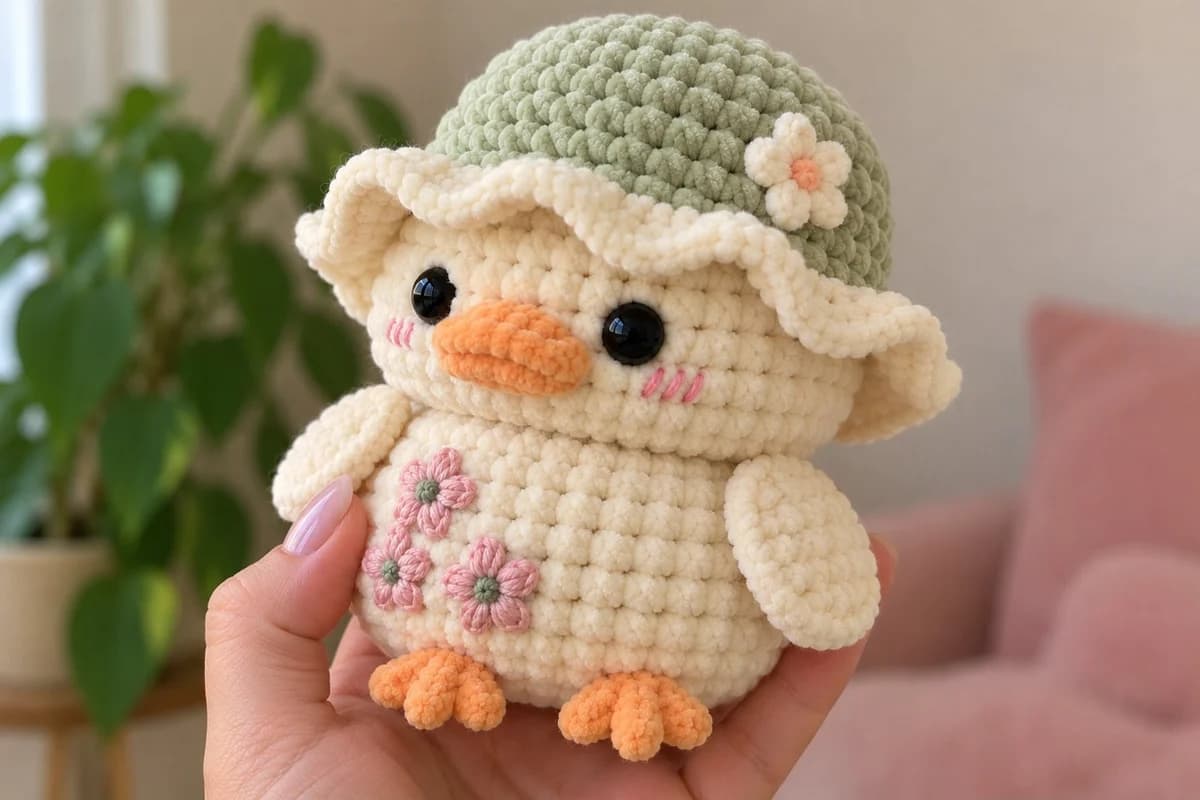
I wanted a duck that looked like she'd just come in from planting tulips, so I gave her a little sage hat with a wavy brim, and the hat ended up being the part people ask me for. Marigold is a chubby cream duck in bulky chenille, with apricot feet and beak, rosy cheeks, three tiny flowers on her tummy and a gardener's hat with a ruffled brim. She stands about 6 inches tall with her hat on, and squishes like a cushion.
The full duck pattern is a PDF in my shop. The hat is free right here, round by round: 10 rounds on a 5 mm hook, with a stitch-count rule so you can fit it on your own amigurumi too.
| At a glance | Marigold | The free hat |
|---|---|---|
| Size | about 5 in (13 cm) tall, 6 in (15 cm) with her hat | about 3½ in (9 cm) across the crown |
| Time | about 3 to 4 hours | about 45 minutes |
| Yarn | bulky #5 chenille, about 110–130 yd in all | about 20–25 yd sage + 20 yd cream |
| Hook | 5 mm (H-8) for every piece | 5 mm (H-8) |
| Level | easy | easy |
Why Marigold is so round: one head, one body, nothing to shape
Marigold is basically two balls of velvet. The head is a wide dome that flattens a little at the cheeks, and the body is a squat round base, flat underneath so she sits up on her own. There's no neck to shape and no legs to balance: the head is sewn straight onto the open top of the body, and the feet tuck underneath.
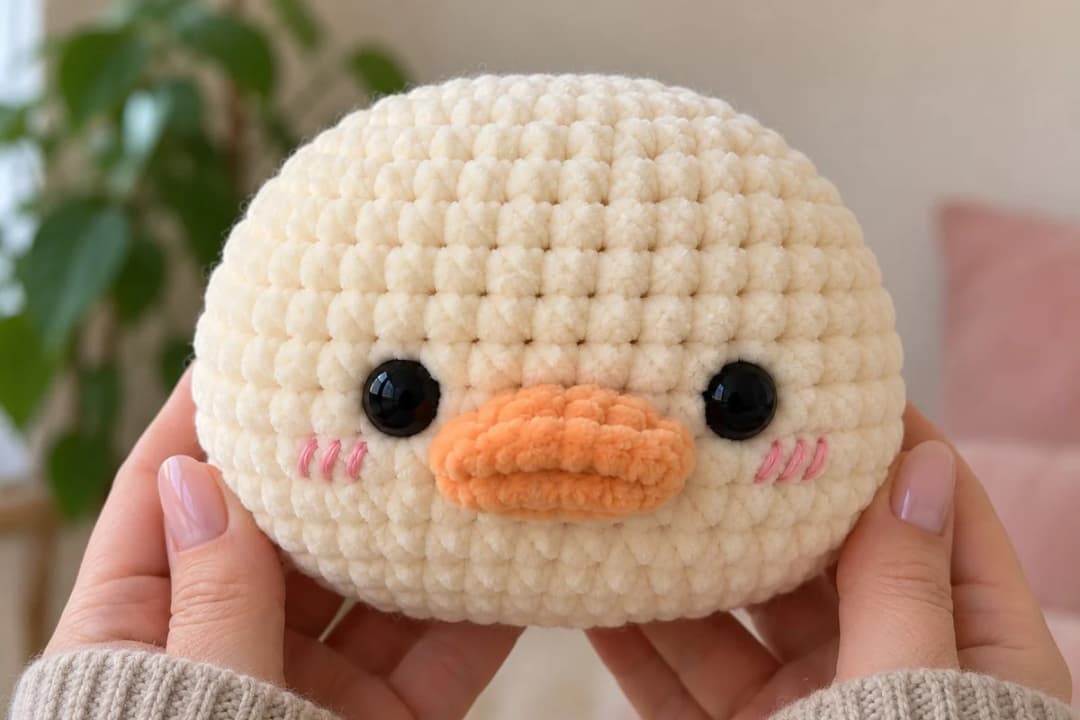
The face is what makes her. Her eyes sit wide apart, with 7 stitches between them, and her beak is a little crocheted bean that stands out about half an inch, with one long stitch across it for the bill line. Three slanted pink stitches under each eye give her those blushing cheeks. In the PDF, every one of those pieces is placed by round and stitch from a single marker, so both eyes end up level and the beak lands dead center.
Butter yellow, dusty blue or the classic cream: three colourways
Only the yarn changes; the counts stay the same.
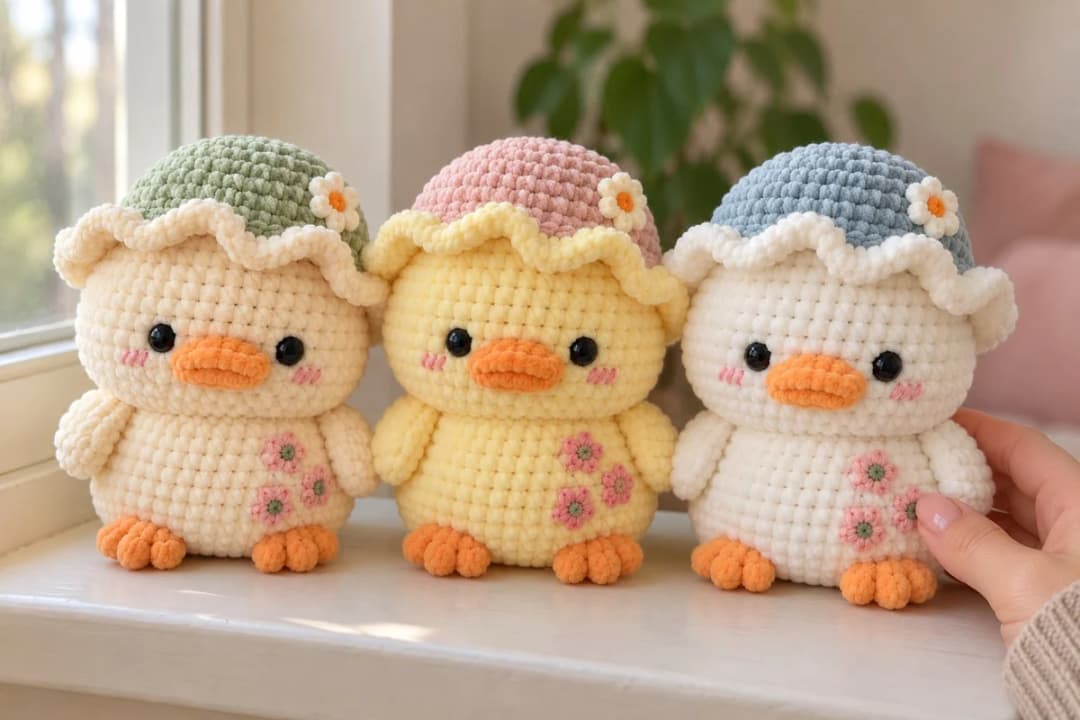
- Garden: cream duck, apricot feet and beak, sage hat. The original.
- Sunny: butter yellow duck, orange feet and beak, blush pink hat. The most "baby shower" of the three.
- Bluebell: white duck, apricot feet and beak, dusty blue hat. My favourite for a nursery shelf.
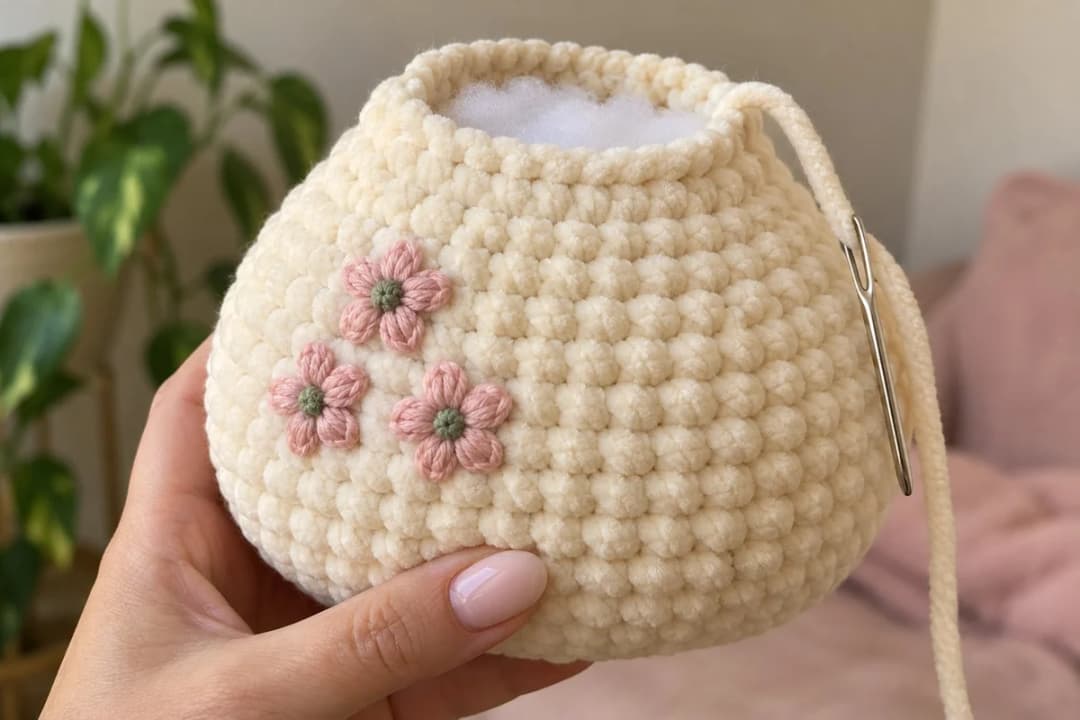
The tummy flowers are three little lazy daisy stitch flowers with a French knot in the middle, embroidered on the body before you stuff it. They're the kind of detail that takes five minutes and makes the whole duck look finished.
Bulky chenille on a 5 mm hook: keeping a big duck neat
Bulky chenille grows a duck in an afternoon, but it has its own habits. Here's what I watch for.
- Count by feel, not by sight. The pile hides the stitches. Run your fingertip over the top of the round and feel each "V", and keep a stitch marker in the first stitch of every round.
- Watch for worming. Sometimes a stitch twists into a little loop that pokes out of the fabric. Keep your tension even and give the yarn a light tug after each stitch, and it stays flat.
- Go tight enough to hide the stuffing. As a guide, about 11 single crochet and 13 rounds to 4 in (10 cm). If white fiberfill shows between your stitches, go down half a hook size.
- Stuff the body flat underneath. Fill it firmly, then press the bottom against the table. A flat base is what lets her sit without tipping onto her beak.
- Sew with the long tail, twice around. Chenille seams can loosen. A second pass of whipstitch around the neck keeps the head from wobbling.
Making the gardener's hat: the free pattern
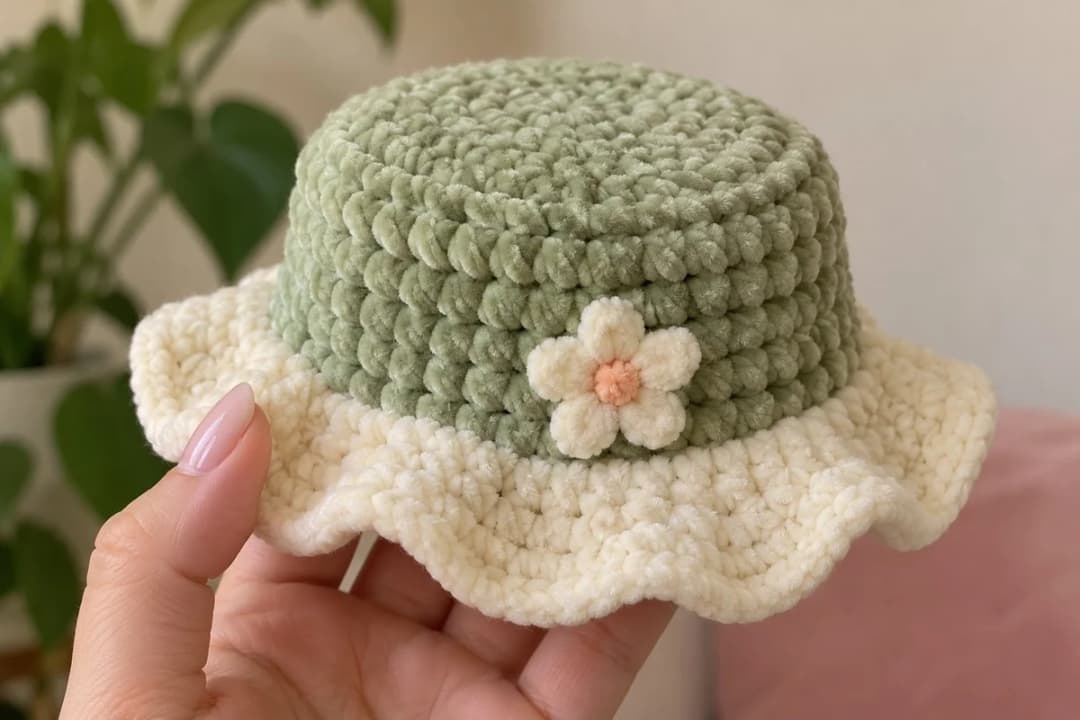
This is Marigold's own hat, the one in the PDF. The crown is worked from the top down, a back loop round turns it into the sides, and a cream brim in the front loops grows so fast that it ruffles on its own.
You'll need
- Yarn: bulky (#5) chenille, about 20–25 yd (18–23 m) of sage green for the crown and about 20 yd (18 m) of cream for the brim.
- Hook: 5 mm (H-8).
- Embroidery: a little cream and apricot thin yarn or floss for the daisy.
- Also: a stitch marker, a large blunt tapestry needle and scissors.
Stitches (US terms): magic ring (MR), single crochet (sc), increase (inc, 2 sc in the same stitch), slip stitch (sl st), back loop only (BLO), front loop only (FLO), fasten off (FO). Work in a continuous spiral, and move your marker up each round. Stitch counts are in parentheses.
The sage crown
- R1: MR, 8 sc in the ring. (8)
- R2: inc × 8. (16)
- R3: (sc, inc) × 8. (24)
- R4: (sc 2, inc) × 8. (32)
- R5: in BLO: sc in each st around. (32)
- R6–R7: sc in each st around, 2 rounds. (32)
Change to cream on the last stitch of R7: work it until 2 loops are left on the hook, then finish it with cream. Cut the sage, leaving a 4 in (10 cm) tail to weave in.
Tip: R5 is what turns a flat circle into a hat. Working only the back loops leaves a little ridge on the outside, and the crown folds down along it into straight sides.
The ruffled cream brim
- R8: in FLO: (sc 3, inc) × 8. (40)
- R9: (sc, inc) × 20. (60)
- R10: (sc 2, inc) × 20. (80)
Sl st in the next stitch and FO. Weave in both ends. The brim doubles from 40 to 80 stitches in two rounds, far more than a flat circle can hold, so it waves on its own. Don't fold it up: just push the waves gently outward with your fingertips so they spread evenly.
The daisy
On one side of the crown, on R6–R7 just above the brim, embroider 5 cream lazy daisy stitches in a ring for the petals, then an apricot French knot in the middle. Knot the threads on the inside of the hat.
Fitting the hat to your own amigurumi
The crown stops increasing at 32 stitches, which matches Marigold's head at its widest flat rounds. That's the rule to use on other toys: the hat fits a head that reaches the same stitch count before its plain rounds, in the same yarn and hook.
- Bigger head, say 40 stitches? Add one more increase round to the crown, (sc 3, inc) × 8, before R5. Then work the brim as (sc 4, inc) × 8 for 48, (sc, inc) × 24 for 72 and (sc 2, inc) × 24 for 96.
- Smaller head, 24 stitches? Skip R4, and work the brim as (sc 2, inc) × 8 for 32, (sc, inc) × 16 for 48 and (sc 2, inc) × 16 for 64. It still ruffles.
- Different yarn? The counts work in any yarn, but the size changes with it. Try the crown on the head before you start the brim.
To attach it, set the hat on the head with the daisy a little to one side and both eyes showing. Tack the crown with 4 small stitches through R6–R7 of the hat, front, back and both sides, without pulling tight. Leave the brim free so it keeps its waves.
Tip: if the hat slides down over the eyes, your hat tension is looser than your head's. Redo it one hook size smaller, same counts.
Where Marigold lives: nursery shelves and spring baskets
Mine sits on a bookshelf next to a little pot of herbs, and she moves to the kitchen windowsill when the tulips come up. She also makes a sweet baby shower or Easter gift, tucked in a basket with some paper grass. For a baby, embroider the eyes instead of using safety eyes, as the PDF explains.
If you're looking for a duck you can finish in a single evening, my crochet rubber duck pattern is a smaller, quicker one.
Inside the Marigold PDF: head to hat in 13 pages
The Marigold the Garden Duck PDF pattern walks you through the whole duck, from the magic ring of the head to the last tummy flower:
- 13 pages, with each round on its own line and the stitch count at the end.
- Step photos, from the open head with its marker to the finished duck in her hat.
- The head round by round, with the cheek shaping worked in.
- The face: safety eyes, the crocheted beak and its bill line, and the pink cheeks, all placed from one center-front marker.
- The body with its flat base and three embroidered tummy flowers.
- The wings and the chubby three-toed feet.
- The gardener's hat, the same as above, plus exactly where it sits on her head.
- Assembly stitch by stitch, three colourways, yardage per colour, chenille tips, and care and safety notes.
It's an instant download in English, US terms. You can sell the ducks you make from it in small quantities. Just credit Wavode as the designer.
Frequently asked questions
Can I make Marigold with regular yarn? Yes, the counts work in any yarn. In worsted cotton she comes out smaller and you'll see every stitch, so she looks more structured and less like velvet. Use a hook that gives you a tight fabric with your yarn.
Is Marigold safe for a baby? With plastic safety eyes and small sewn-on parts, she's a decoration rather than a toy for children under 3. For a baby, embroider the eyes, sew every piece on with a double seam, and check the seams now and then, since chenille can shed.
Is the hat in the PDF too? Yes. The PDF has the same hat with a photo and its exact placement on Marigold's head. The free version here also explains how to resize it for your own amigurumi.