Pippa the Little Elephant

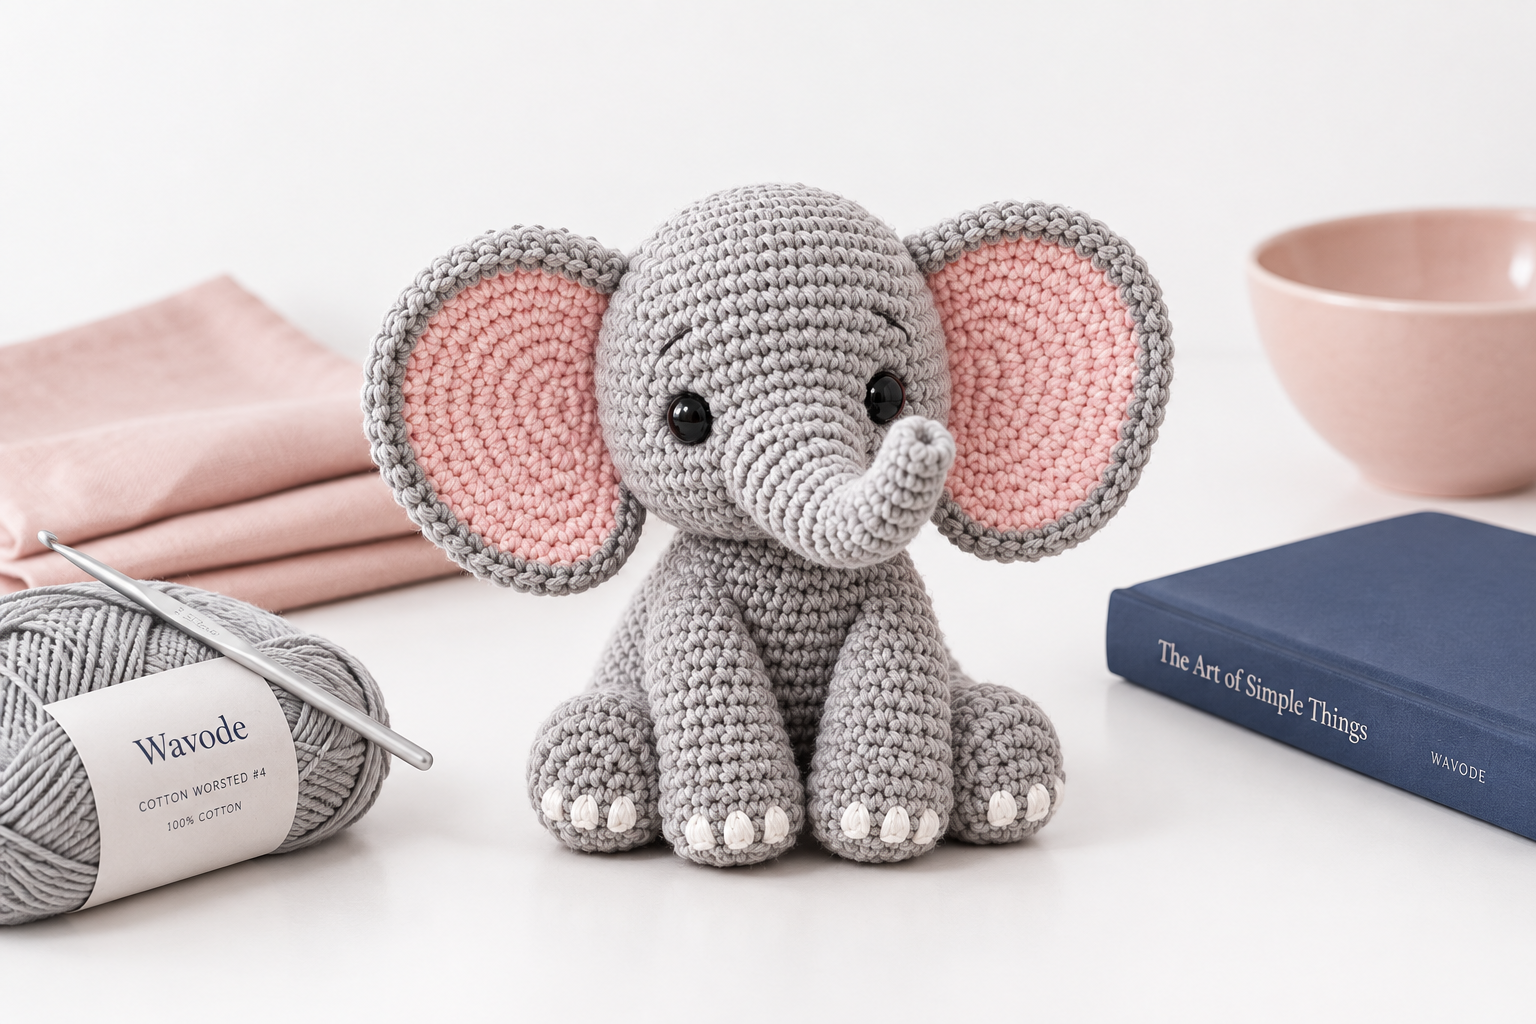
Pippa is a 9-inch sitting elephant worked entirely in single crochet on a 3.5 mm hook, with a curled trunk, oversized pink-lined ears, and three tiny toenails on each foot. She takes one 220-yard skein of grey worsted #4 cotton, a few grams of pink and white for the details, a pair of 9 mm safety eyes, and about 8–10 hours over three quiet evenings. The whole build is ten pieces: head, body, trunk, two double-layer ears, four legs, and a wispy tail — sewn together at the end for a classic, calm sitting pose.
Key Takeaways
- Beginner-friendly elephant amigurumi in worsted #4 cotton on a 3.5 mm hook — only sc, invisible decreases, and the magic ring.
- 10 pieces total: 1 head, 1 body, 1 trunk, 2 double-layer ears (grey outer + pink inner), 4 legs, 1 tail.
- About 220 yd grey + 20 yd blush pink + 5 yd white cotton — one skein of Sugar 'n Cream Overcast plus a couple of scrap balls.
- 8–10 hours across three evenings; finished elephant sits at 9 in (23 cm) and photographs beautifully for Etsy or as a baby-shower gift.
Pattern at a glance
- Stitch: single crochet in continuous spirals throughout.
- Yarn: worsted #4 cotton — 220 yd grey, 20 yd blush pink, 5 yd white.
- Hook: 3.5 mm (US E-4) — smaller than the yarn's ball-band recommendation. This is intentional for tight amigurumi fabric that hides the stuffing.
- Notions: 2 × 9 mm black safety eyes with washers, polyfil stuffing, tapestry needle, stitch marker, small sharp scissors.
- Construction: head in the round → body in the round → trunk in the round → 2 ears (each is a grey disc + a pink disc joined together) → 4 legs in the round → tail as a short chain → assembly.
- Finished size: ~9 in (23 cm) sitting height, ~8 in (20 cm) ear-tip to ear-tip.
- Time to complete: 8–10 hours over three evenings.
- Skill level: advanced beginner — magic ring, single crochet, invisible decrease, seaming a head to a body.
Why worsted cotton is the right yarn for a keepsake elephant
Cotton holds its shape. That matters more for an elephant than almost any other amigurumi shape, because the ears are large and the trunk is a hollow tube — both parts that flop when worked in acrylic. A stiff worsted cotton like Lily Sugar 'n Cream or Paintbox Simply Aran keeps the ears standing out to the sides the way a real baby elephant's do, and it lets the trunk hold its upward curl without wire.
I tried this pattern first in a soft acrylic and the ears drooped by the second day. Switching to cotton fixed it. If you want the ears extra rigid, work them at 3.25 mm instead of 3.5 mm and the fabric tightens up further.
What you'll need
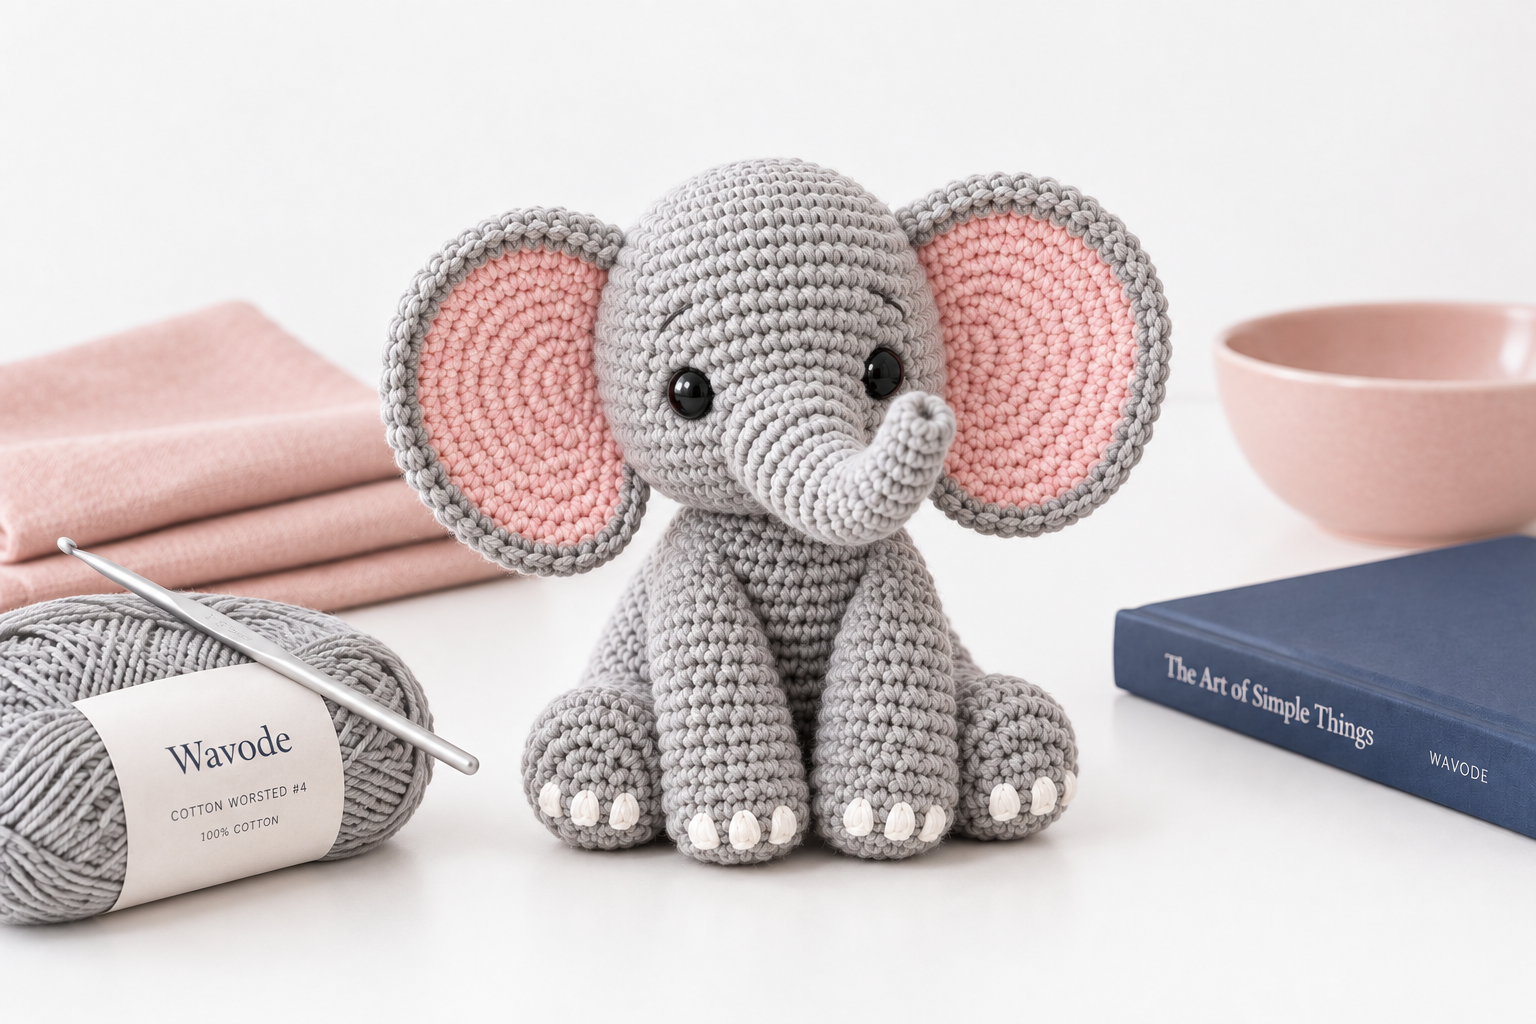
Yarn (worsted #4 cotton, ~245 yd / 224 m total)
- 220 yd grey — Lily Sugar 'n Cream in Overcast or Ecru Grey, Paintbox Simply Aran Cotton in Pebble Grey, or Bernat Handicrafter Cotton in Overcast. Lily Sugar 'n Cream and Bernat Handicrafter are worsted weight #4; do not swap for a DK #3 cotton like Paintbox Cotton DK or Scheepjes Catona — the elephant will finish smaller and looser.
- 20 yd blush pink — for the two inner-ear linings. Any worsted #4 cotton in a soft pink works; I used Lily Sugar 'n Cream Rose Pink.
- 5 yd white — for the toenail bobbles. Scrap.
Hook
- 3.5 mm (US E-4). A Clover Amour or Furls Streamline in this size makes long amigurumi rounds much kinder on your hands.
Notions
- 2 × 9 mm black safety eyes with locking washers. If the finished elephant is for a baby under 3, replace with small embroidered French knots in black cotton — see the safety note below.
- Polyfil stuffing, about 3 oz total. Cotton fabric wants firmer stuffing than chenille — pack the head and body until they hold their shape without wrinkling.
- Tapestry needle with a large eye.
- Stitch marker (1).
- Small sharp scissors.
Gauge
- Aim for a firm amigurumi fabric, tight enough that white polyfil doesn't peek through between stitches. A strict stitch-count gauge is less useful than that tension check — if you can see stuffing through the fabric, drop a hook size.
Abbreviations
- ch — chain
- sc — single crochet
- inc — 2 sc in the same stitch (increase)
- inv dec — invisible decrease (front loops of next 2 st, yarn over, pull through both, then complete like a sc)
- sl st — slip stitch
- st(s) — stitch(es)
- (...) × N — repeat instructions in parentheses N times
- MR — magic ring
All rounds are worked in continuous spirals unless a joined round is specified. Move your stitch marker up at the start of every round.
Head (make 1, in grey)
The head is worked from the crown down. The magic ring becomes the top of the head, between the ears; the last round is an open 18-stitch neck opening that matches the body's open neck one-to-one — you do NOT close the head. Save the long tail at the end — it seams the head to the body.
- R1: 6 sc in MR. (6)
- R2: inc × 6. (12)
- R3: (sc, inc) × 6. (18)
- R4: (2 sc, inc) × 6. (24)
- R5: (3 sc, inc) × 6. (30)
- R6: (4 sc, inc) × 6. (36)
- R7: (5 sc, inc) × 6. (42)
- R8–R15: sc in each st. (42, 8 rounds even)
- Eye placement: Between R12 and R13, place the safety eyes 7 stitches apart, centered on the front of the head. Secure the washers on the inside before continuing — it's easier than after stuffing.
- R16: (5 sc, inv dec) × 6. (36)
- R17: (4 sc, inv dec) × 6. (30)
- R18: (3 sc, inv dec) × 6. (24). Start stuffing firmly.
- R19: (2 sc, inv dec) × 6. (18). Stuff to full.
- R20: sc in each st. (18)
- Fasten off leaving a 20-inch (50 cm) tail. Do NOT close the neck opening. The 18-stitch opening will match the body's 18-stitch opening one-to-one during assembly.
Body (make 1, in grey)
The body is worked from the base upward, so the magic ring is the bottom (the sitting surface) and the closing round is the neck opening at the top.
- R1: 6 sc in MR. (6)
- R2: inc × 6. (12)
- R3: (sc, inc) × 6. (18)
- R4: (2 sc, inc) × 6. (24)
- R5: (3 sc, inc) × 6. (30)
- R6: (4 sc, inc) × 6. (36)
- R7–R14: sc in each st. (36, 8 rounds even)
- R15: (4 sc, inv dec) × 6. (30)
- R16–R17: sc in each st. (30, 2 rounds even)
- R18: (3 sc, inv dec) × 6. (24)
- R19: sc in each st. (24)
- R20: (2 sc, inv dec) × 6. (18)
- Stuff the body firmly to hold its sitting shape.
- Fasten off leaving a 12-inch (30 cm) tail. Do not close the top — you want an 18-stitch neck opening open, so the head's own tail can whipstitch it shut against the head's neck round.
Trunk (make 1, in grey)
Worked from the tip of the trunk toward the face. The magic ring becomes the tip (where the nostril hole shows), the last round is what gets sewn onto the face.
- R1: 6 sc in MR. (6)
- R2: inc × 3, sc × 3. (9). This uneven increase gives the trunk its slight curl.
- R3–R4: sc in each st. (9, 2 rounds even)
- R5: (2 sc, inc) × 3. (12)
- R6–R7: sc in each st. (12, 2 rounds even)
- R8: (3 sc, inc) × 3. (15)
- R9–R10: sc in each st. (15, 2 rounds even)
- Fasten off leaving a 12-inch (30 cm) tail. Stuff the trunk very lightly, leaving it flexible. Do not close the opening; the last-round edge is what you'll pin against the face and whipstitch on. When you assemble, curve the trunk upward while sewing — pin the lower edge first, then shape the upper half into a gentle upward curl before completing the seam.
Ears (make 2 grey outer discs + 2 pink inner discs)
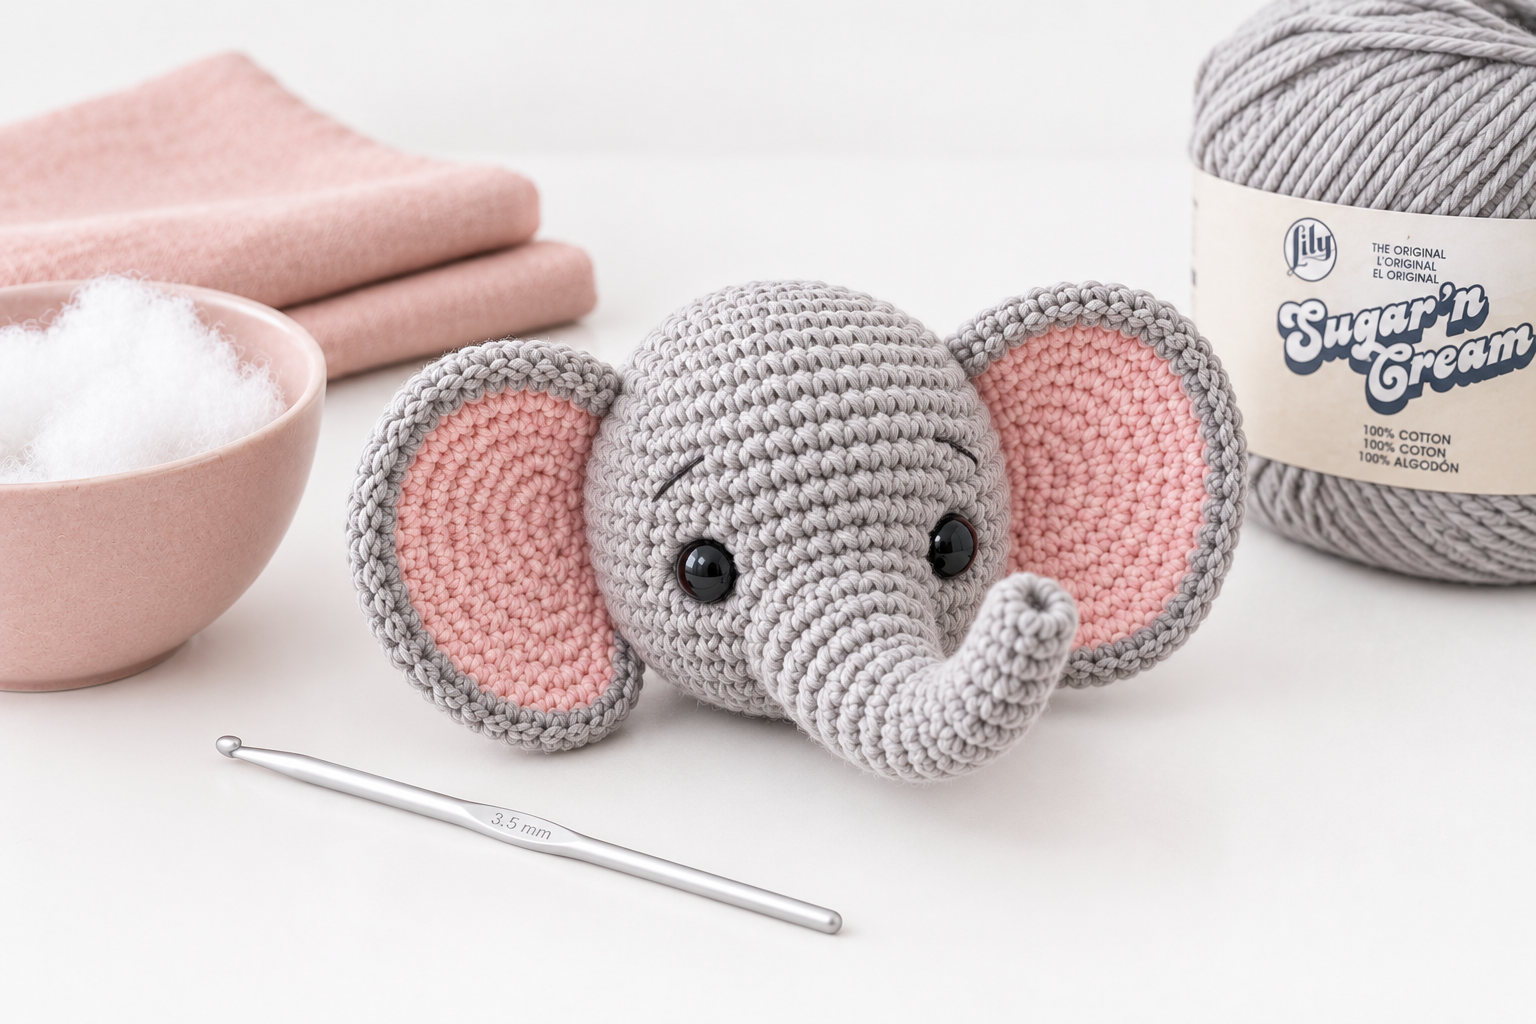
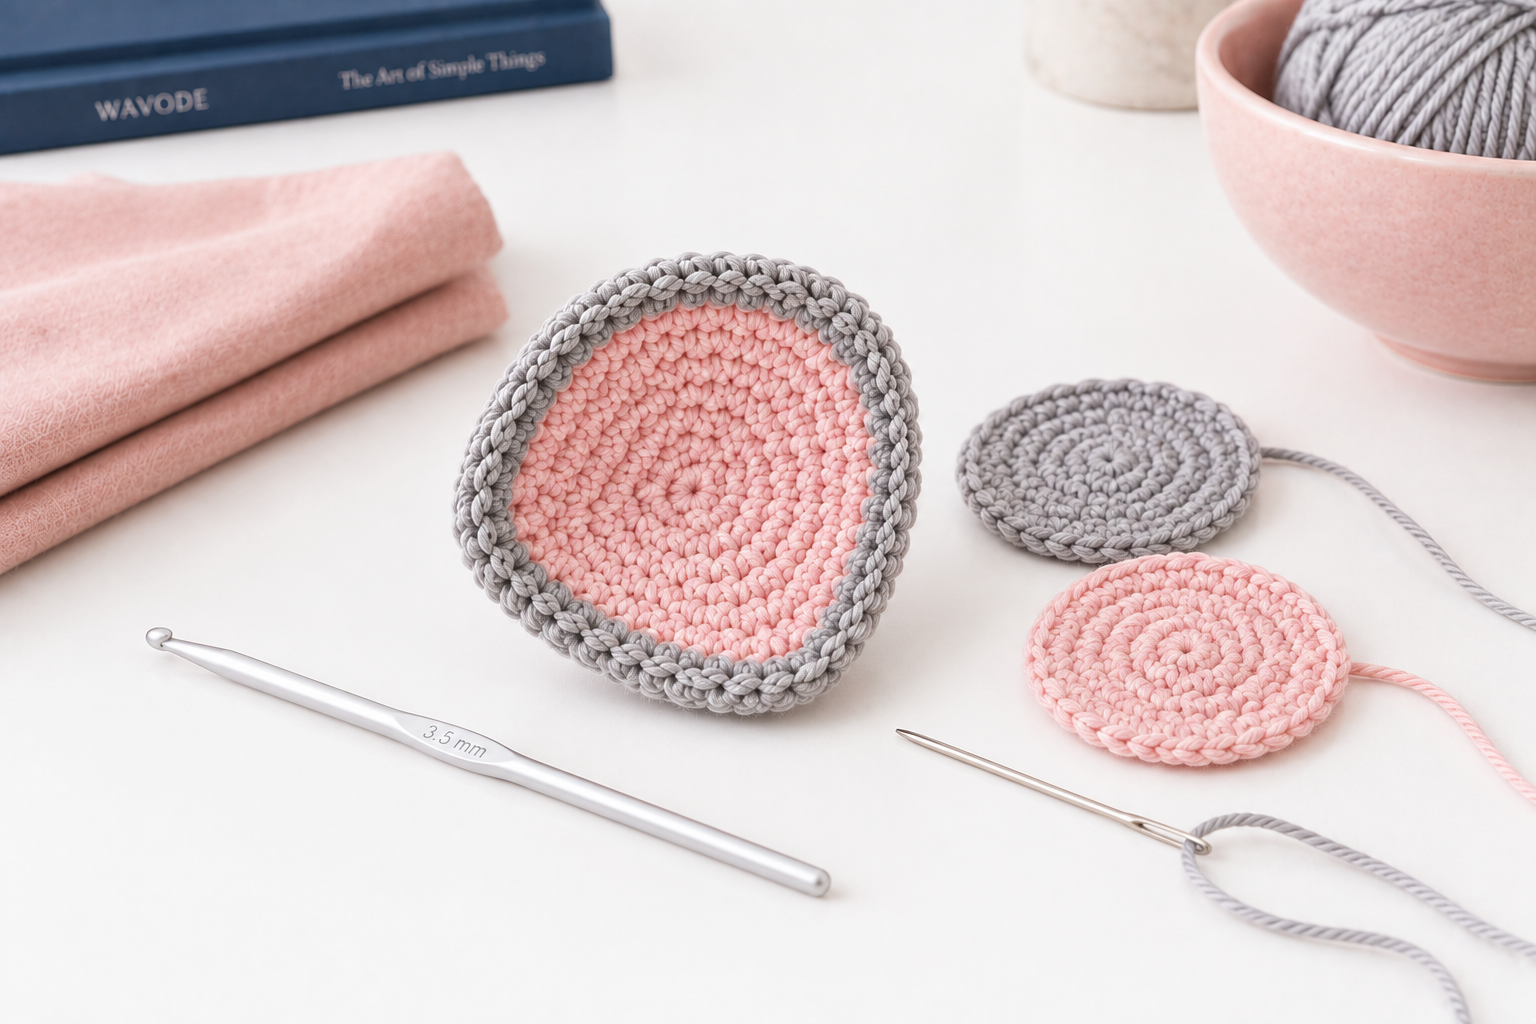
Each finished ear is one grey disc and one pink disc sewn back-to-back, then attached to the head. Big pink-lined ears are the whole personality of this elephant — do not skip the double layer.
Grey outer disc (make 2)
- R1: 6 sc in MR. (6)
- R2: inc × 6. (12)
- R3: (sc, inc) × 6. (18)
- R4: (2 sc, inc) × 6. (24)
- R5: (3 sc, inc) × 6. (30)
- R6: sc in each st. (30)
- R7: (4 sc, inc) × 6. (36)
- Sl st into next st. Fasten off leaving a 14-inch (35 cm) tail. Do not stuff. Flatten the disc.
Pink inner disc (make 2, in blush pink) — smaller than the grey
- R1: 6 sc in MR. (6)
- R2: inc × 6. (12)
- R3: (sc, inc) × 6. (18)
- R4: (2 sc, inc) × 6. (24)
- R5: (3 sc, inc) × 6. (30)
- R6: sc in each st. (30)
- Sl st into next st. Fasten off leaving a 4-inch (10 cm) tail.
Join each ear: center the smaller pink disc on top of the larger grey disc. Because the pink disc is one round smaller, an even grey border stays visible all the way around — that's the two-tone contour you see on the finished elephant. Using the 4-inch pink tail, whipstitch the pink disc onto the grey disc, catching only the grey stitches directly under the pink edge. Then, with the 14-inch grey tail, use it later to sew the assembled ear onto the head. Curve the finished ear gently into a broad oval before attaching — do not fold it sharply. The ear should extend outward and slightly downward from the head.
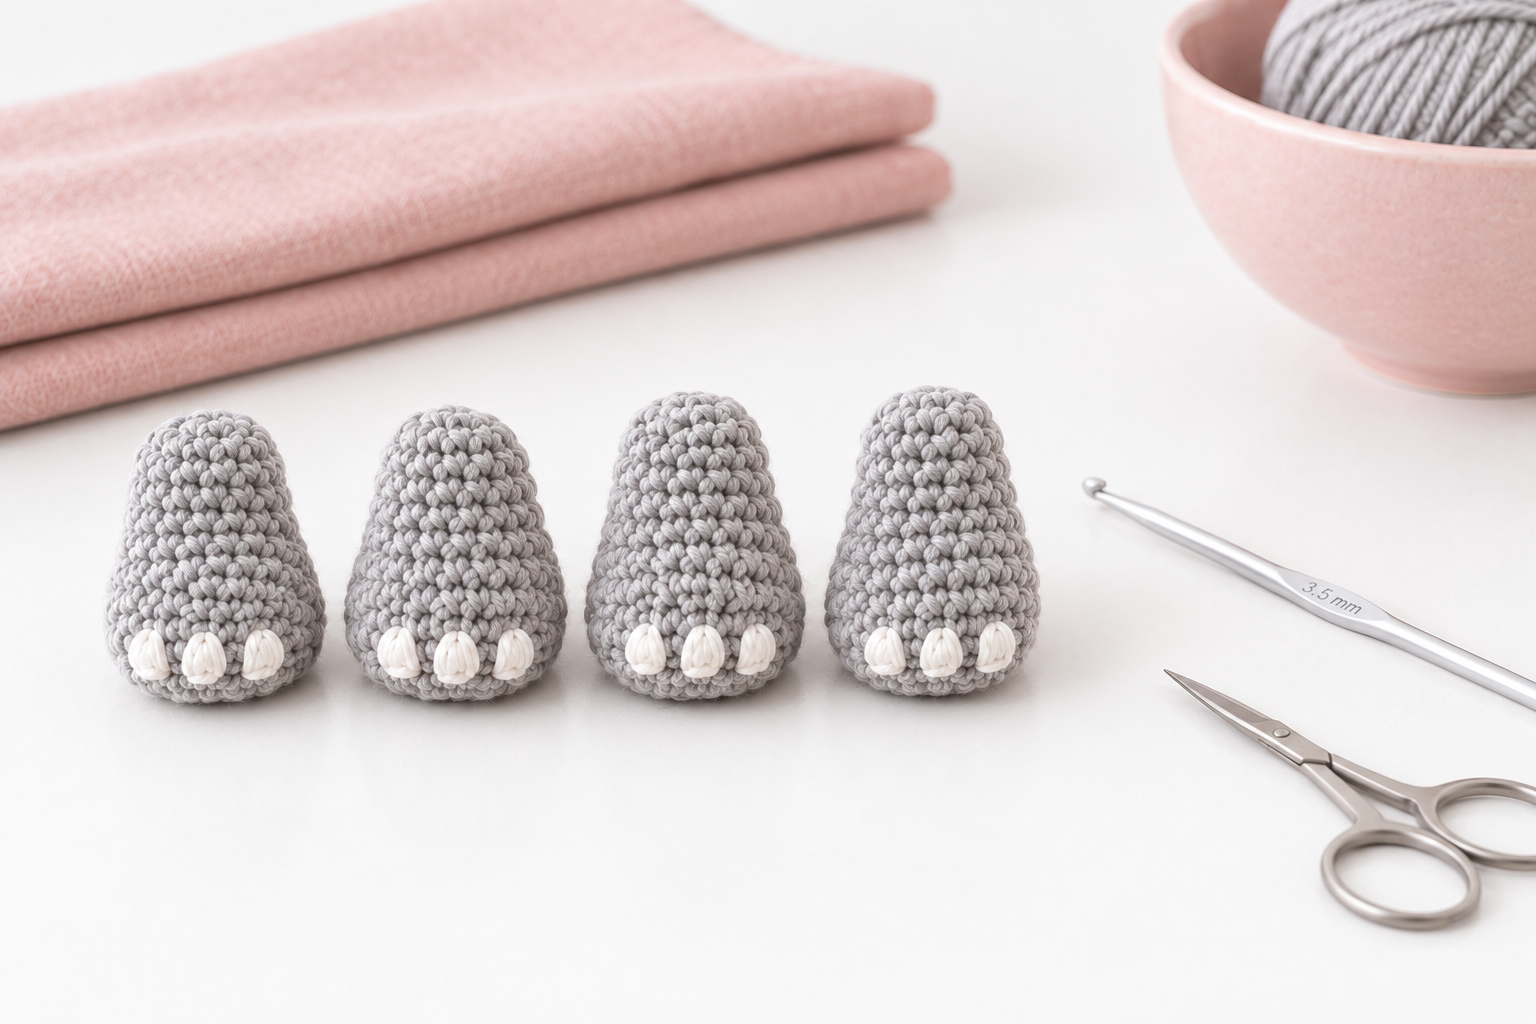
Legs (make 4, in grey — with white toenails)
Each leg starts at the foot pad (magic ring is the bottom of the foot, the surface it "sits" on) and ends at the hip (the closing round is what attaches to the body). Toenails are three small white bobbles worked onto the front-top of each foot before you stuff and close.
- R1: with grey, 6 sc in MR. (6)
- R2: inc × 6. (12)
- R3: (sc, inc) × 6. (18)
- R4–R5: sc in each st. (18, 2 rounds even)
- R6: 8 sc, inv dec × 4, 2 sc. (14). This dec cluster shapes the front-top of the foot where the toenails will sit.
- R7: sc in each st. (14)
- R8–R11: sc in each st. (14, 4 rounds even) — this is the leg proper.
- Toenails (make 3 bobbles on each foot, before closing): with white, join to the front-top of R6 (over the dec cluster). Work 3 white bobbles, spaced one stitch apart. Each bobble: insert hook, yarn over, pull up a loop, yarn over, pull through one, [yarn over, insert same stitch, pull up a loop, yarn over, pull through one] × 2, yarn over, pull through all loops. Fasten off each bobble on the inside with a 4-inch tail and weave in. Three bobbles form the little white toenails.
- Stuff the foot and the leg firmly.
- R12: (5 sc, inv dec) × 2. (12)
- R13: sc in each st. (12)
- Fasten off leaving a 12-inch (30 cm) tail. Do not close — the open R13 edge is what sews flat against the body.
Tail (make 1)
- With grey, ch 8.
- Sc in the second ch from the hook, sc across. (7 sc)
- Fasten off leaving a 6-inch (15 cm) tail.
- Cut a 3-inch length of grey yarn, fold in half, and use a lark's head knot to attach it to the end of the tail — trim to a small tuft.
Assembly (the part that makes or breaks an elephant)
Take your time here. Pin every piece before you sew — an elephant's face reads "wrong" if the trunk drifts a few millimeters off center.
- Head to body. Align the head's open 18-stitch neck with the body's open 18-stitch neck, so each stitch of the head sits directly above the matching stitch of the body. Use the head's 20-inch tail to whipstitch all the way around the seam, matching one head stitch to one body stitch. Go over the seam twice — the head is heavy and this is the joint that carries all its weight. This is a secure whipstitch seam, not an invisible finish.
- Trunk to face. Pin the open R10 edge of the trunk (15 sts) flat against the front of the head, centered between the safety eyes and slightly below them. The trunk should tilt upward — pin the top edge first, then curve the bottom edge to give it that classic little curl. Whipstitch all the way around with the trunk's 12-inch tail.
- Ears to head. Hold each ear flat against the side of the head, with the pink side facing forward. The ear's top edge should sit at about the round-6-to-round-8 level (just above the eyes). Pin the front half of each ear first so both sides look symmetrical, then whipstitch along the front seam only — the back half of the ear stays free and slightly cupped. Use the leftover grey tail from the whipstitch join.
- Legs to body. Sit the elephant on a flat surface. Pin the two back legs first, flush against the base of the body pointing straight forward, so the feet touch the surface. Then pin the two front legs, tucked under the front of the body and angled slightly outward so the elephant sits stable. Whipstitch each leg's open edge onto the body with its 12-inch tail. Sew each leg with 12+ stitches, going deep into the body — legs support the whole plush and a shallow seam will pop after a few days of play.
- Tail to back. Sew the tail onto the center-back of the body, just above the seat, with the 6-inch tail.
- Weave in every remaining end. Give the trunk a gentle roll upward between two fingers to set the curl.
Safety and care
- Age recommendation: the safety-eye version is suitable for children 3 and older. For babies under 3, embroider the eyes with a French knot in black cotton instead — safety eyes can detach with enough chewing and are a choking hazard for infants. This applies whether or not the washers feel tight.
- Washing: worsted cotton is washable. Hand wash cold, gently squeeze out water (do not wring), reshape while damp, and air dry flat. Machine washing is possible in a mesh bag on a delicate cycle, but the trunk shape and ear cup will need to be reshaped after each wash.
- Storage: flat on a shelf. Long-term compression in a box will flatten the ears.
Sizing variations
- Smaller keychain elephant (3 in tall): work every piece with a DK #3 cotton like Paintbox Cotton DK and a 2.5 mm hook, and stop the head after R11 (before decreases). The proportions still work, and a keyring loop can be sewn into the top of the head between R1 and R2.
- Bigger nursery-shelf elephant (14 in tall): switch to a chunky #5 or bulky #6 chenille yarn and a 5.5 mm hook. The stitch counts remain identical; only the finished size changes. Note: safety eyes should scale up too — 15 mm for a bulky version.
- Different-color elephant: the pattern works in any single color. A cream elephant with dusty-rose inner ears is a beautiful girl-nursery variant; a pale blue elephant with cream inner ears reads calm and coastal.
Why this pattern is a good "second amigurumi"
If you finished a beginner amigurumi like a bear or a bunny, an elephant is the natural next challenge — it introduces two new construction problems in one project without stepping outside single crochet.
The first is a hollow appendage sewn onto a curved surface (the trunk). Pinning it straight is fussy the first time, but the technique carries over to giraffe necks, dinosaur tails, and any snout that isn't just a stitched-on dot. The second is symmetric ear placement on a round head. Elephants read wrong faster than any other animal when their ears are uneven, which forces you to slow down and pin carefully — a habit that helps every animal you make afterward.
Frequently asked questions
How much yarn does a crochet elephant use?
A 9-inch sitting elephant in worsted #4 cotton uses about 220 yards of the main color, plus 20 yards for the inner-ear linings and about 5 yards for the toenails. One 220-yard skein of grey worsted cotton like Lily Sugar 'n Cream in Overcast is enough for the whole elephant, with a small amount of pink and white scrap yarn for the details.
Can I make this elephant without safety eyes?
Yes. Embroider both eyes as French knots in black cotton, wrapped 3 or 4 times, placed at the same position as R12–R13 of the head, 7 stitches apart. For anyone gifting to a baby under 3, this is the version I always recommend — the finished face is just as expressive and there is nothing that can detach.
What size hook do I use for a beginner elephant amigurumi?
Use one to two hook sizes smaller than the yarn's ball-band recommends. For worsted #4 cotton (which usually calls for a 5 mm hook), I use a 3.5 mm hook. That tighter tension is what stops the stuffing from showing through the fabric — the single most common beginner amigurumi problem.
How long does it take to crochet an elephant?
Around 8–10 hours of active work across three evenings for the 9-inch sitting elephant. Roughly 3 hours for the head, 2 for the body, 30 minutes for the trunk, 1 hour for the two ears (both layers), 2 hours for the four legs and toenails, and 30 minutes for tail plus assembly.
Is a cotton elephant washable?
Yes, hand-washing works well. Wash in cold water with mild soap, gently press out excess water without twisting, and dry flat. Shape the ears and re-curl the trunk while the elephant is still damp — cotton takes the reshaping and holds it once dry.
Where to make this pattern next
Pippa is one of a small family of sitting animals I hook when I need something calm to work on. If you enjoyed the construction, the sitting-teddy pattern uses the same head-to-body method with easier ear placement — a good confidence build after this one. A weekend of hooking, three evenings of sitting on the sofa with your favourite show, and you have a shelf keepsake or a very serious baby-shower gift.