Sunshine Amigurumi

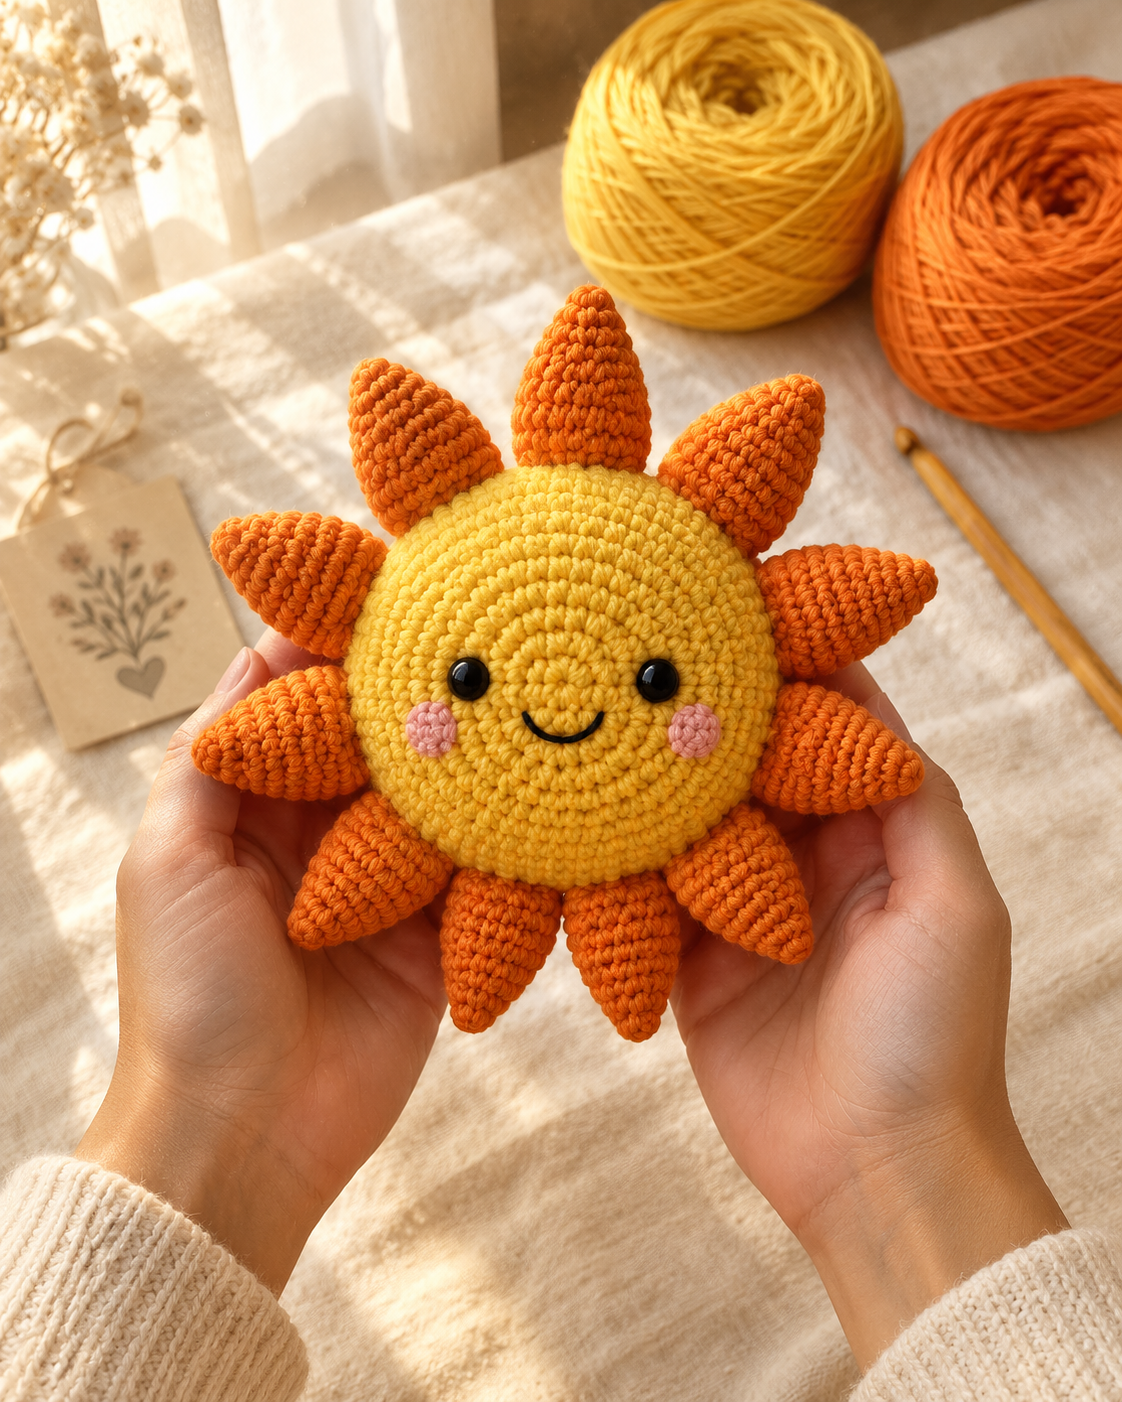
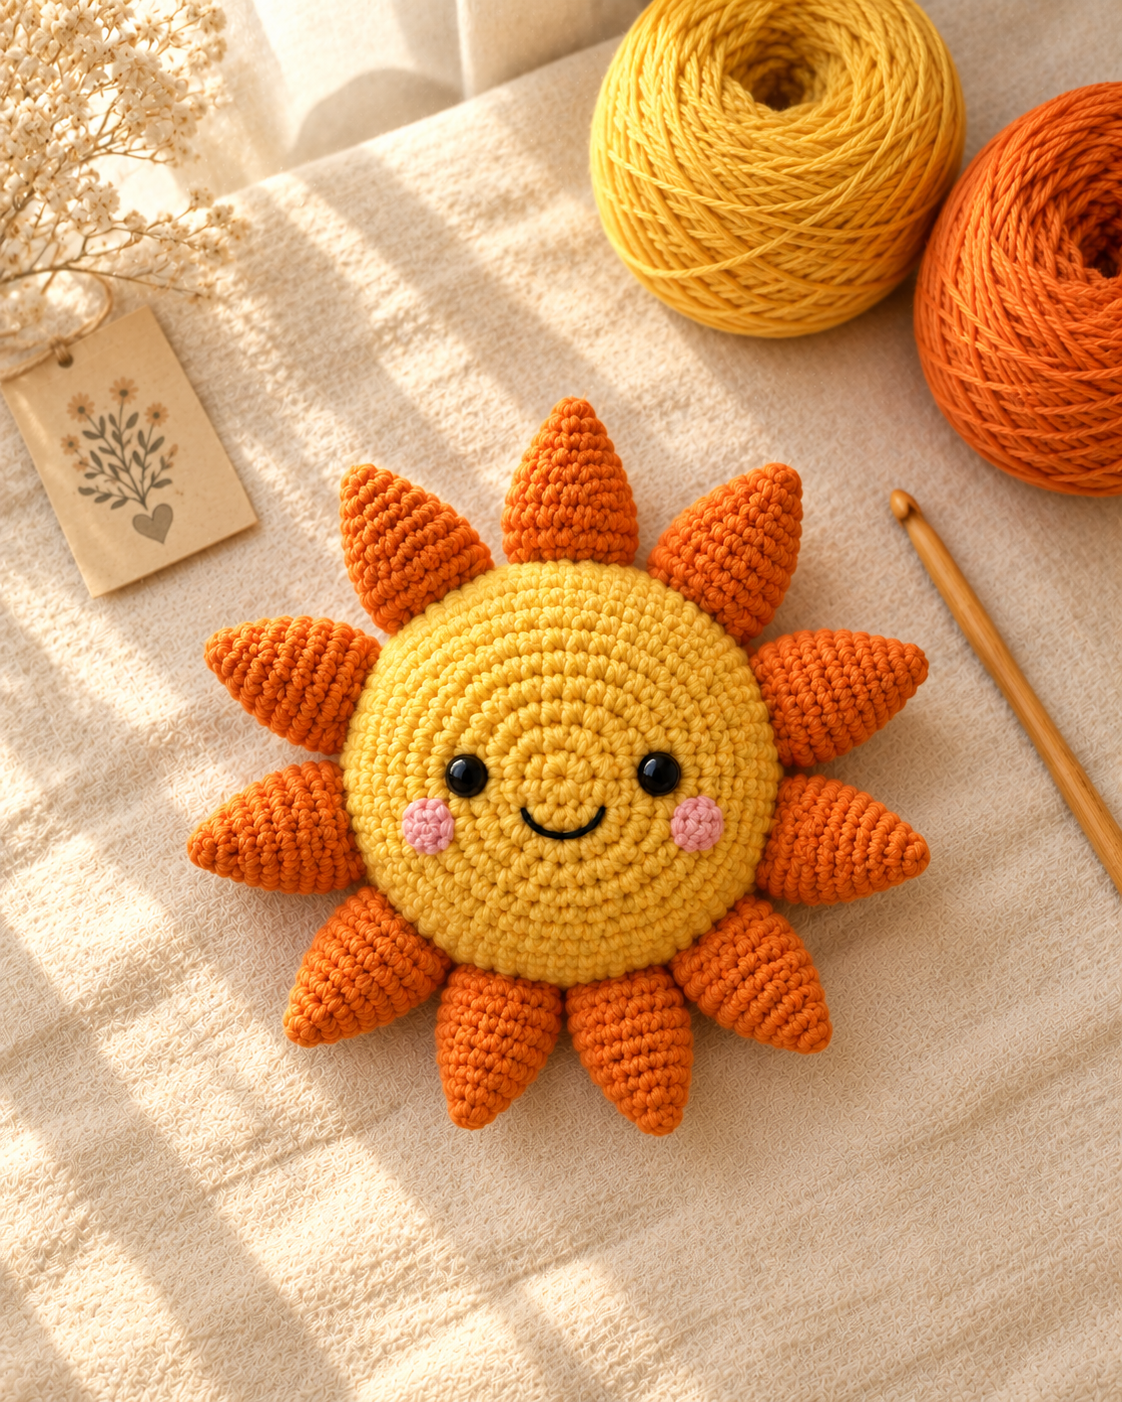
This free sunshine amigurumi uses worsted weight yarn in golden yellow and orange, a 4 mm hook, and two matching crocheted panels stuffed and seamed together to build a soft, huggable sun with a smiling face and a full ring of rays. You crochet the front panel with the face, a matching back panel, embroider the smile, join the two, and stuff as you close. About 150 yards total, 3 to 4 hours, one evening start to finish.
Pattern at a glance
A 7-inch sunshine plush (approximately, depending on tension): a golden-yellow face circle with eleven orange rays worked directly onto the edge, made twice to create matching front and back panels, then whipstitched together and stuffed. Safety eyes, an embroidered smile, and two blush cheeks finish the face.
The pattern uses single crochet, half double crochet, double crochet, and slip stitch. Beginner-friendly, one repeating ray motif.
Why this sunshine plush is such a satisfying quick make
There's something about a smiling sun that reads as pure comfort — no character to get "right," no tiny limbs to attach at an angle, just a round, cheerful face that photographs well in absolutely any light. I made my first one on a grey Tuesday afternoon and it's been propped on my windowsill ever since.
The construction is friendlier than it looks, too. Instead of separately crocheting and sewing on individual rays the way you would with the daisy crochet potholder, all 11 rays here are worked directly onto the face circle in one continuous round — no small pieces to lose, nothing that can work loose later. If you've made my crochet acorn keychain or mushroom keychain, the magic-ring start and safety-eye placement will feel familiar.
Skill level. Beginner. You need a magic ring, single crochet, half double crochet, double crochet, slip stitch, and a whipstitch seam. No amigurumi shaping beyond a basic flat-circle increase — this plush is worked flat, not in a sphere.
What you'll need
Yarn (worsted weight #4, ~150 yd / 135 m total)
- Color A (face): ~40 yd of golden yellow — Bernat Handicrafter Cotton in Sunshine or Paintbox Cotton Aran in Sunflower Yellow.
- Color B (rays): ~110 yd of orange — Bernat Handicrafter Cotton in Mango or Paintbox Cotton Aran in Burnt Orange.
- Soft acrylic or a cotton-acrylic blend both work well here — this plush isn't going anywhere near heat, so you don't need the cotton-only rule from my potholder patterns. Pick whatever feels nicest to hug.
Hook
- 4 mm (US G/6), single strand — normal amigurumi tension. Keep your stitches snug enough that the stuffing doesn't show through.
Notions
- 2 × 9 mm black safety eyes with washers (or embroidered French knots — see the safety note below).
- Polyester fiberfill stuffing (about 2 oz).
- Small scrap of pink yarn or two pink felt circles for the cheeks.
- Black or brown embroidery floss for the smile.
- Tapestry needle, stitch marker, scissors.
Abbreviations (US crochet terms)
- ch = chain
- sl st = slip stitch
- sc = single crochet
- hdc = half double crochet
- dc = double crochet
- MR = magic ring
- inc = 2 sc in same stitch
- st(s) = stitch(es)
A safety note before you start
Safety eyes are a choking hazard for children under 3. If this sunshine is going to a baby or toddler, skip the plastic safety eyes and embroider the eyes with black yarn instead — two small satin-stitch circles work well and can't come loose. For any recipient old enough for small parts, safety eyes are secure once the washer is snapped on and won't pull free with normal handling.
Finished size
- Diameter: approximately 6.5–7 in (16.5–18 cm), ray tip to ray tip, depending on tension.
- Face: approximately 3.5 in (9 cm) across, depending on tension.
- Ray length: approximately 1.75 in (4.5 cm) from the face edge to the tip.
The pattern — step by step
You crochet the front panel and back panel identically through the rays round, then only the front gets a face. Make two, add the features, then join.
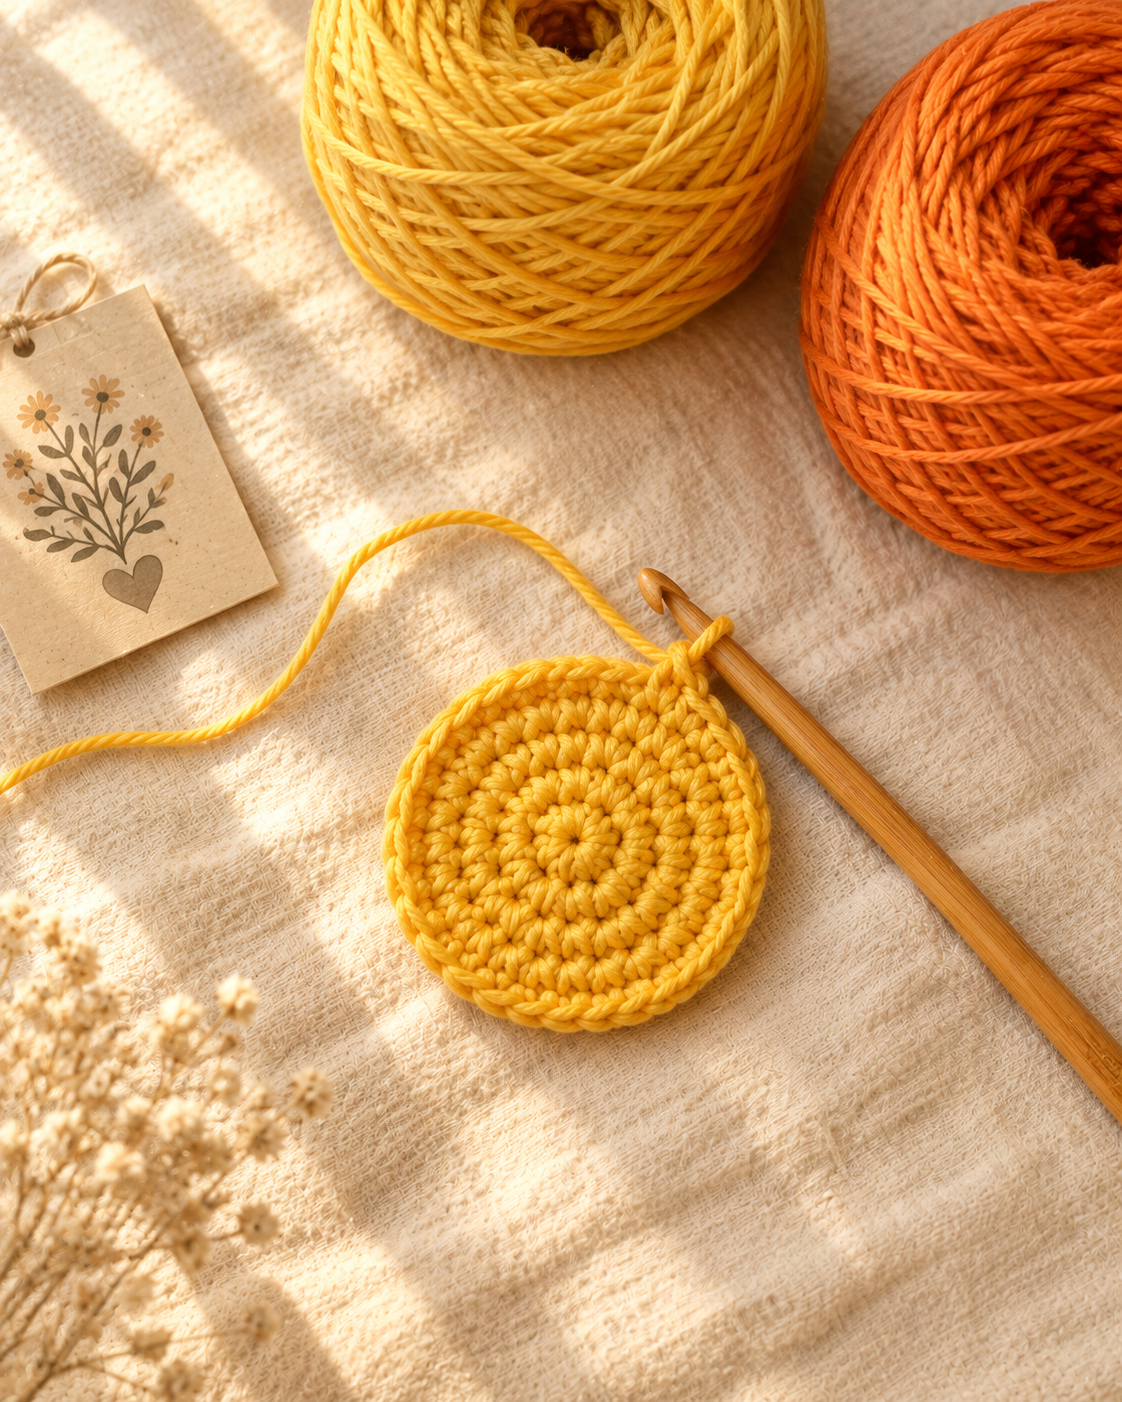
Part 1 — The face circle (make 2)
With Color A, 4 mm hook:
Rnd 1: Magic ring, 6 sc into ring. (6 sts) Rnd 2: Inc in each st around. (12 sts) Rnd 3: Sc 1, inc; repeat around. (18 sts) Rnd 4: Sc 4, inc; repeat twice, then sc 3, inc; repeat twice. (22 sts)
Do not fasten off. Move straight into the rays round.
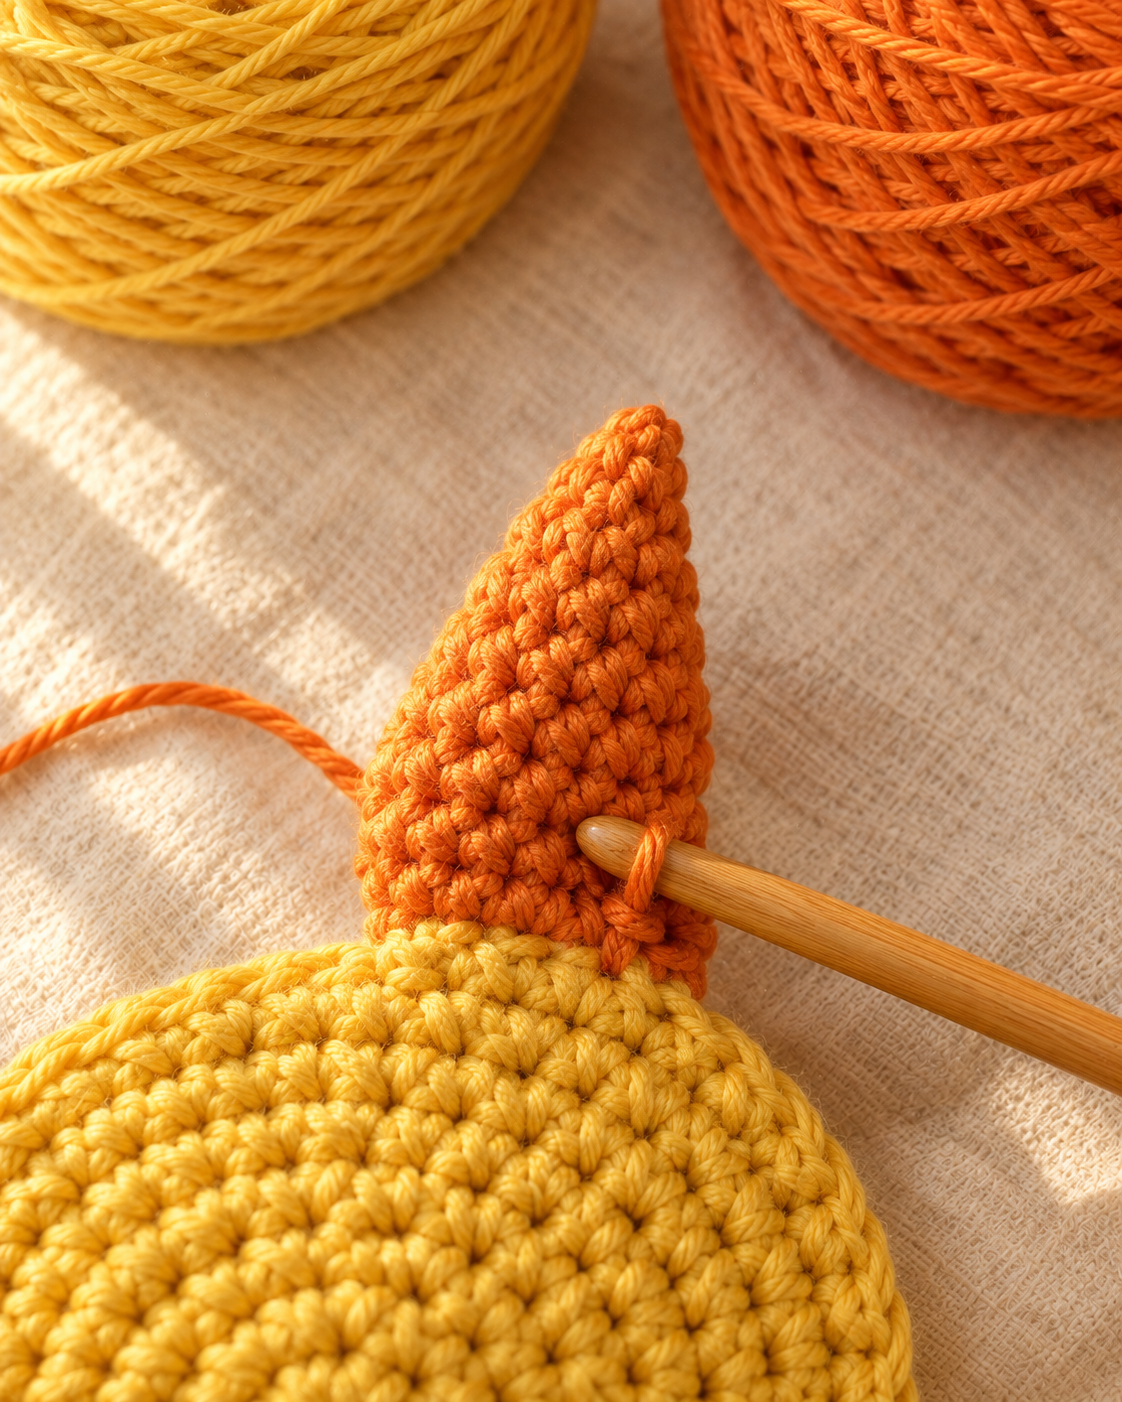
Part 2 — The rays (worked directly onto each circle)
Change to Color B (orange).
Sl st in the next st on the circle (this is your anchor point). Ch 7. Starting in the 2nd ch from hook: sc, hdc, 3 dc in the last ch (this makes the ray's pointed tip). Rotate to work down the other side of the same chain: hdc, sc, then sl st into the same stitch on the circle where you started the ray. Skip the next st on the circle, sl st into the following st — that's one ray complete and your anchor point moved for the next one.
Repeat the bracketed sequence 10 more times, for 11 rays total, ending back where you started. Fasten off, leaving a long tail (about 18 in) for seaming.
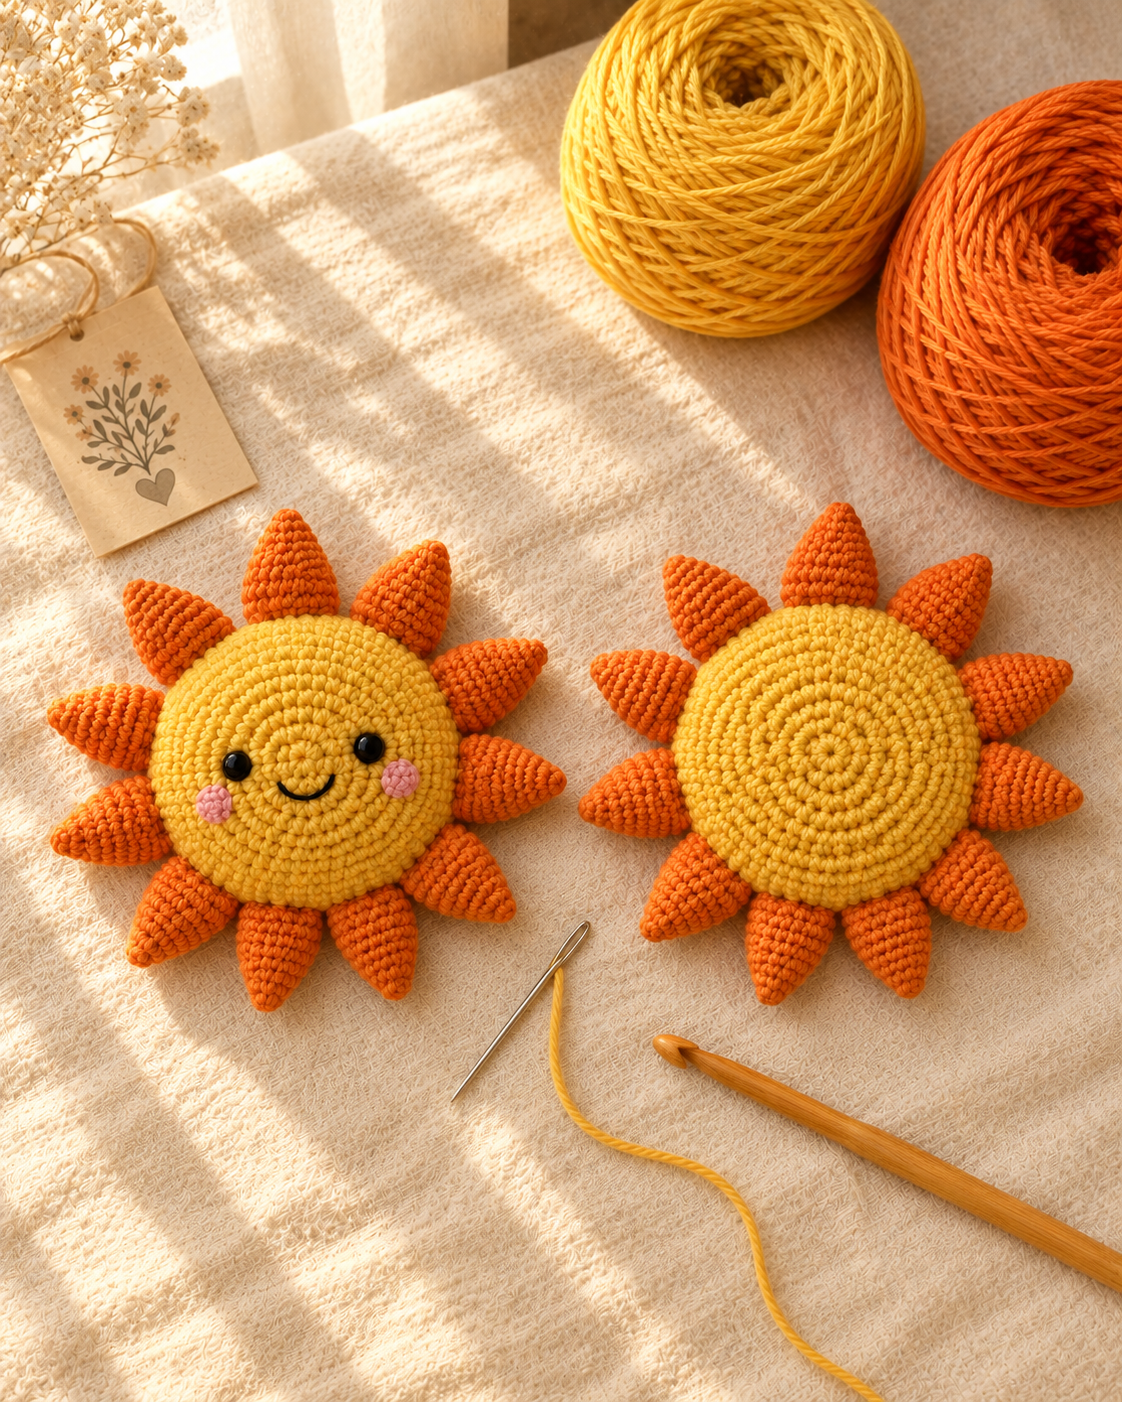
Repeat both parts to make your second panel — this becomes the back.
My finding: The first sun I made, I worked all 11 rays before checking that they were evenly spaced, and two rays ended up crowded together at the join point. Now I mark my starting stitch with a stitch marker and glance at the ray spacing every three or four rays as I go — much easier to catch a mistake early than to unpick a finished round.
Part 3 — The face
On one panel only (this becomes the front), add the features before joining:
- Insert the safety eyes (or embroider French knots) into the face circle, spaced about 5 stitches apart on Rnd 3, centered on the face, between the upper rays.
- Embroider the smile in black or brown floss below the eyes — a simple curved backstitch, about 1 in (2.5 cm) wide.
- Attach the cheeks — two small pink felt circles or satin-stitched pink yarn dots, one below each eye, just outside the smile.
Part 4 — Joining and stuffing
Hold the front and back panels with wrong sides together so both finished faces point outward once you're done. Line up the rays exactly — tip to tip, valley to valley.
Using the long tail and a tapestry needle, whipstitch around the entire outer edge, following the shape of every ray (up one side, around the tip, down the other side, into the valley, and on to the next ray). Stuff each ray as you close it — work a small, firm pinch of fiberfill in with the blunt end of your needle before the tip seams shut, enough that the ray domes very slightly rather than lying flat between the two layers.
Leave the last 2 in (5 cm) of the seam open, then stuff the face and body of the sun through the gap. Pack it fuller than feels natural — press a finger into the center as you go, and keep adding fiberfill until it barely gives. A softly stuffed center looks deflated once the yarn relaxes over the first week; an overstuffed one holds the round, domed shape you want. Close the remaining seam and weave in every tail.
My finding: The volume in the finished sun comes almost entirely from the center, not the rays. A firmly packed face pushes outward against the rays' base stitches, which is what makes them stand up and curve instead of lying flat against the table — stuff the center first and generously, then top up the rays.
Make it yours — quick variations
| Variation | Change from base pattern |
|---|---|
| Sunset sun | Deep orange face, dusty rose rays — warmer, moodier palette. |
| Pastel sun | Pale yellow face, soft peach rays, embroidered eyes instead of safety eyes for a nursery-safe version. |
| Moon and stars set | Swap Color A for silver-grey and add a crescent shape instead of rays — same face and joining technique. |
| Mini sun | Stop the face circle at Rnd 3 (18 sts) and use 9 rays instead of 11 for a 5-inch ornament-sized version. |
| Sun garland | Make three minis in graduating sizes and string them on jute cord for a nursery bunting. |
Troubleshooting the three things that go wrong
The rays look uneven or lopsided
You didn't check your spacing as you went. Unpick back to the last evenly-spaced ray and recount — with 22 stitches and 11 rays, you should have exactly 2 stitches (one anchor, one skip) between each ray's start.
The plush looks flat instead of plump
You under-stuffed the center face. Volume in this pattern comes from the center pushing outward against the rays, not from the rays alone — go back in through the small gap you left before fully closing the seam, pack the face firmly with the blunt end of your tapestry needle until it barely gives, then top up any ray that still lies flat.
The face looks off-center
The safety eyes went in before you'd checked the ray positions above them. Always lay the front panel flat with all 11 rays visible first, then place the eyes centered beneath the upper section of the ray ring, with the face aligned to the center of the sun — that's what keeps the face looking straight-on in photos.
Frequently asked questions
How long does the sunshine amigurumi take to make? About 3 to 4 hours for a confident beginner — 45 minutes per panel (two panels), 20 minutes for the face features, and 45 minutes to an hour to join and stuff.
What is the best yarn for this pattern? Worsted weight #4 in a soft acrylic or cotton-acrylic blend. Bernat Handicrafter Cotton and Paintbox Cotton Aran both hold the ray points well. Pure cotton also works if you want crisper stitch definition, though it's a touch less squishy than a blend.
Is this pattern safe for a baby? Only with embroidered eyes instead of plastic safety eyes — safety eyes are a choking hazard under age 3 even with the washer snapped on. For any recipient under 3, embroider French-knot eyes and skip the felt cheek circles in favor of embroidered ones too, since felt can also detach with heavy chewing.
Can I wash this plush? Hand-wash in cool water with mild soap, squeeze gently, and lay flat to dry. Machine washing on a delicate cycle inside a mesh bag also works if the yarn label allows it, but check the safety eyes for looseness after every wash.
Can I sell finished sunshine plushies made from this pattern? Yes — you're welcome to sell physical plushies made from this free pattern at craft fairs, Etsy, or as gifts. Please credit "Pattern by Wavode" on your listing and link back to this page. What you can't do is republish this write-up or my photos as your own pattern.
Related patterns on Wavode
- Daisy crochet potholder — the same radiating-shape idea, worked flat and unstuffed for the kitchen instead.
- Crochet acorn keychain — another quick magic-ring amigurumi if you want a smaller one-evening project.
- Crochet mushroom keychain — matching kawaii-face technique in a different shape.
Made this sunshine? Tag #wavodecrochet on Pinterest — I re-pin every finished make and credit the maker.
Pattern by Clara Hartwell for Wavode. Questions? Email me at support@wavode.com.