Crochet Acorn Keychain

The quick answer
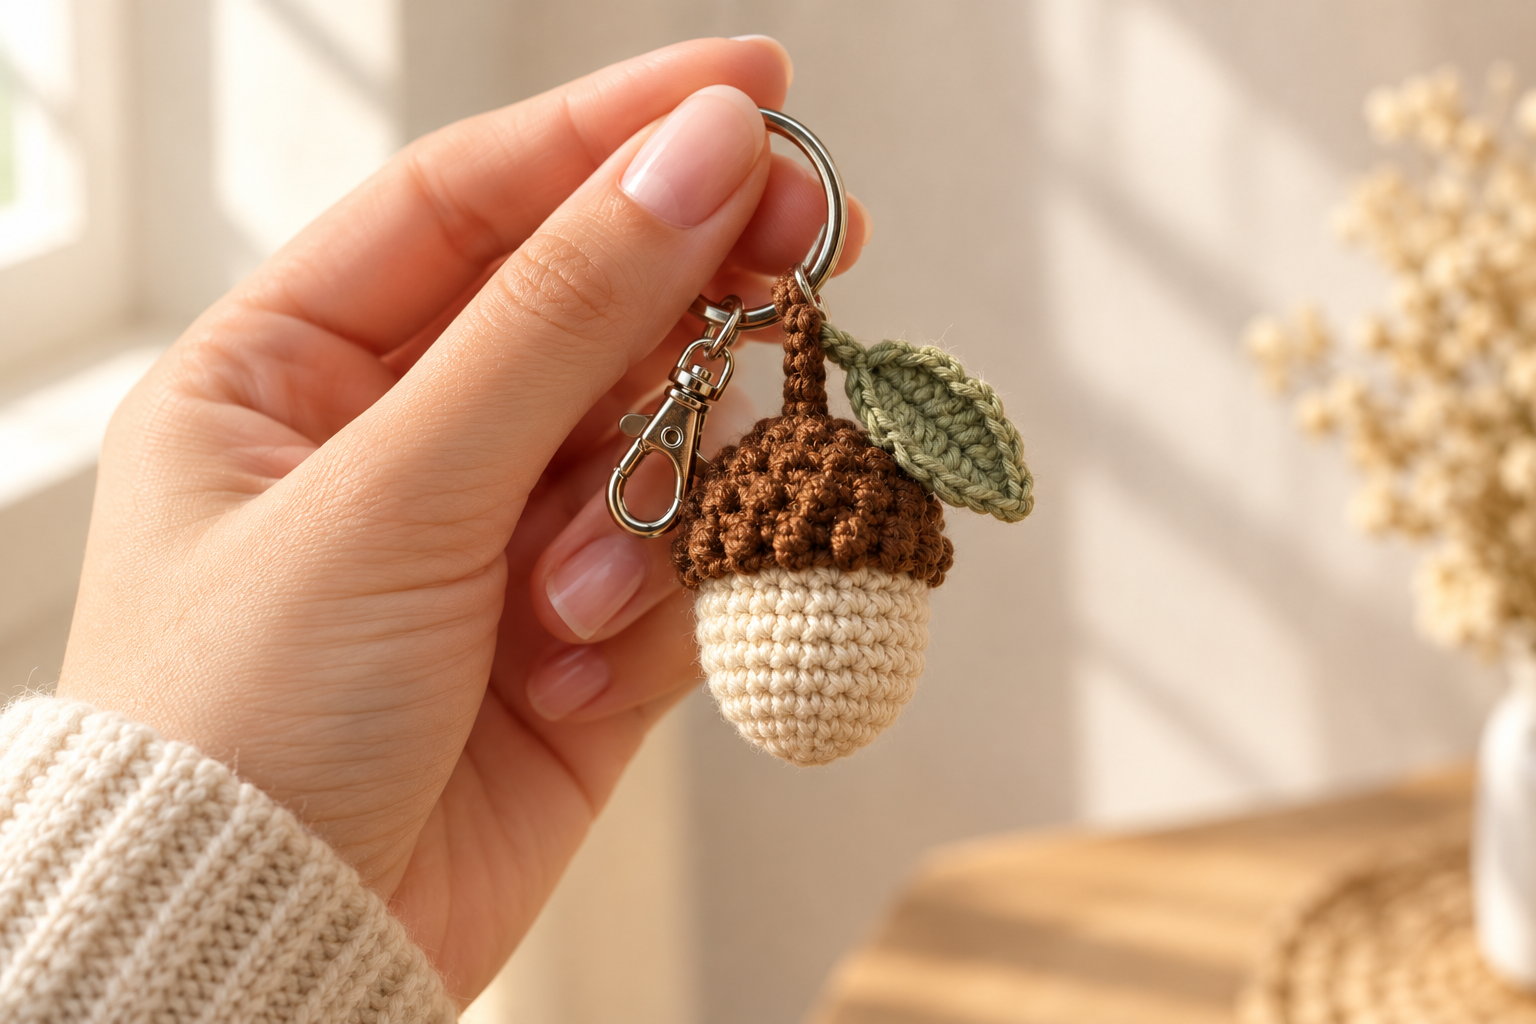
The mini crochet acorn keychain is a two-piece amigurumi (~5 cm tall): a smooth cream body, a textured brown cap worked in front-loop-only sc, a tiny brown stem, and one optional green leaf, mounted on a 25 mm silver split-ring. Cotton DK, 2.5 mm hook, ~60 minutes, ~8 g of yarn total.
Fits on keys, backpacks, bag zippers. The perfect no-sew fall market charm.
Why acorns quietly outsell every other fall keychain
Every October my market table becomes 40% acorns. Buyers pick them up because they read as seasonal without being spooky — you can sell them from September through Thanksgiving to people who will not touch a pumpkin or a witch hat. The Hookfully no-sew acorn proved that a one-piece build makes the pattern beginner-friendly enough for kids; the version I write below adds the little leaf that lifts the price point by 40%.
The other reason it works: the texture ratio. A smooth cream body under a bumpy brown cap gives you two crochet techniques in one 5-cm charm — that visible craft is what buyers pay for. If you have made the owl keychain before, you already know every stitch this pattern needs.
Skill level. Absolute beginner. You need magic ring, sc, inc, invisible dec, front-loop-only sc, and one whip-stitch attach. No color changes mid-round, no complicated shaping.
What you will need
- Yarn A (body): ~4 g of soft cream or light beige cotton DK (Paintbox Cotton DK in Vanilla Cream, Ricorumi in Ecru).
- Yarn B (cap + stem): ~3 g of warm chestnut brown cotton DK (Ricorumi in Chestnut, Paintbox in Coffee Bean).
- Yarn C (leaf, optional): ~0.5 g of sage or moss green cotton DK.
- Hook: 2.5 mm (US B/C). Denser fabric = sharper cap texture.
- Fiberfill: one small pinch of polyester stuffing.
- Keychain hardware: one 25 mm silver split-ring with attached small chain and lobster clasp.
- Notions: locking stitch marker, tapestry needle, sharp scissors.
Gauge: Not critical. If you can see stuffing through the fabric, drop to a 2.0 mm hook.
The pattern — Part 1: the cream acorn body
I write patterns in US terms. Work in continuous rounds — do not join or turn. Use a locking stitch marker in the first stitch of each round and move it up as you go. This is worked as one piece from base to top.
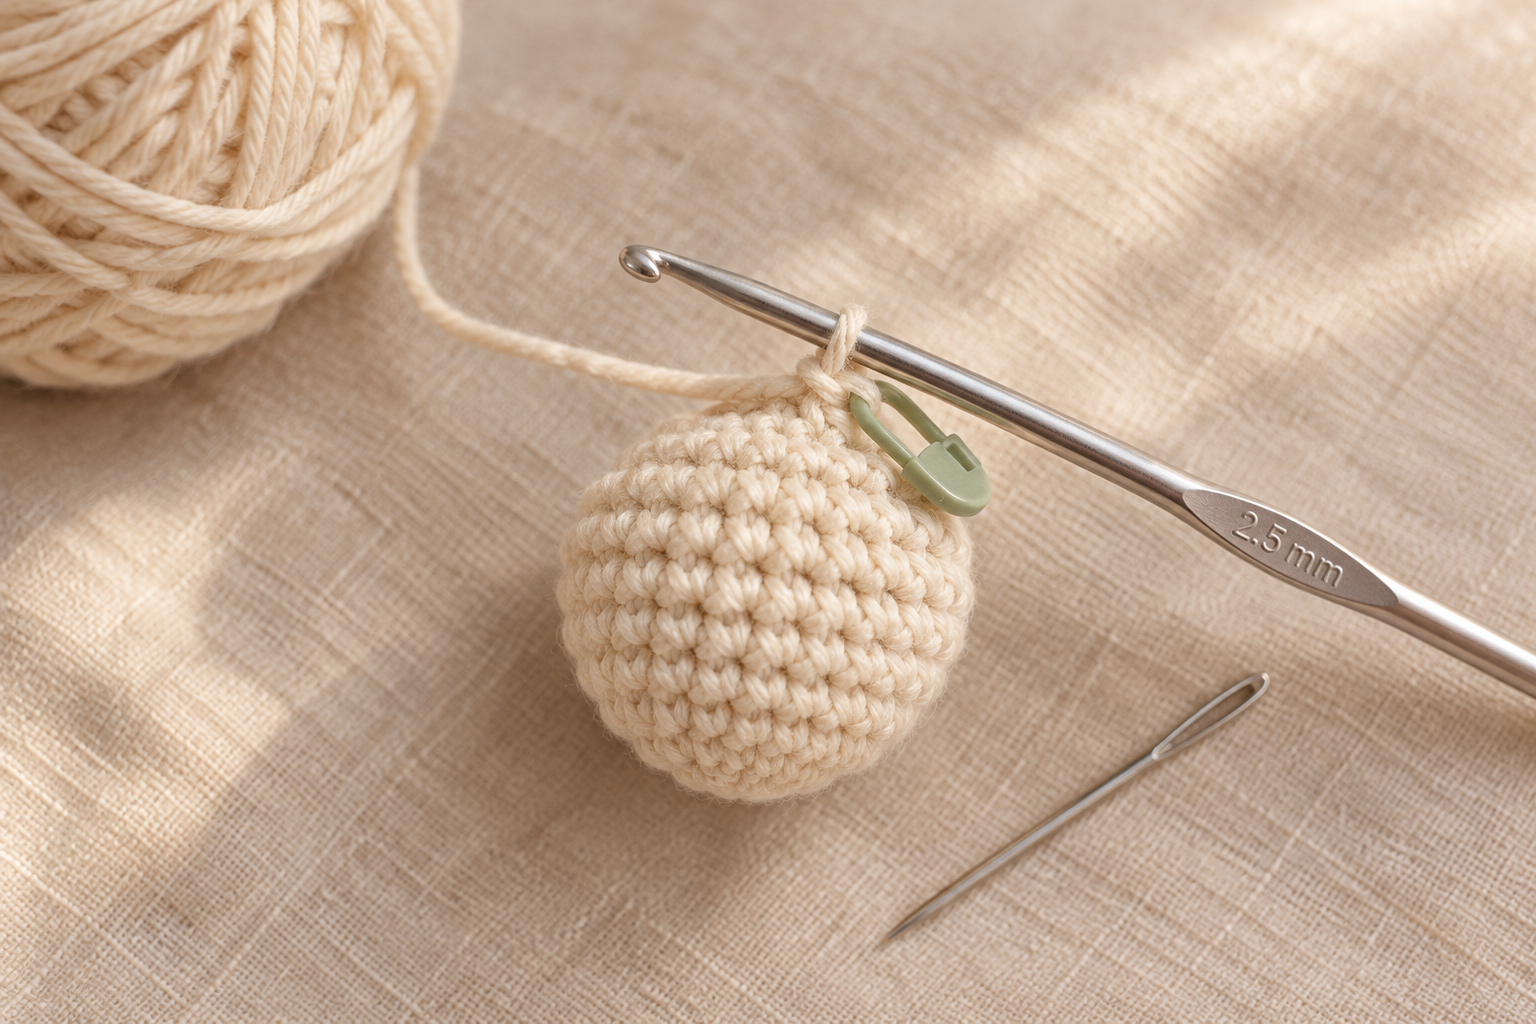
R1: With Yarn A, magic ring, 6 sc into ring. (6)
R2: Inc in each st. (12)
R3: sc, inc around. (18)
R4–R8: sc in each st around. (18 for 5 rounds)
Start stuffing firmly at round 6. Do not overstuff — the body should stay egg-shaped, not oval.
R9: sc, dec around. (12)
R10: dec around. (6)
Fasten off with a 4-inch tail. Thread through the last 6 stitches and pull tight to close the crown. Weave the tail into the body — you will not need it later.
The pattern — Part 2: the textured brown cap
This is the whole personality of the acorn. Front-loop-only sc creates the bumpy cap texture that makes it read as a real acorn instead of a beige blob.
R1: With Yarn B, magic ring, 6 sc into ring. (6)
R2: Inc in each st. (12)
R3: sc, inc around. (18)
R4: BLO (back loops only) — sc in each st around. (18)
R5–R6: FLO (front loops only) — sc in each st around. (18 for 2 rounds)
The BLO round creates the crisp ridge that separates the cap from the body. The two FLO rounds are where the bumpy texture forms.
R7: sc in each st (both loops), sl st to next st. Fasten off leaving a 10-inch tail. (18)
You now have a shallow bumpy brown bowl.
The pattern — Part 3: the tiny stem
Ch 4. Starting in the 2nd ch from hook, sl st into each of the 3 chains. Fasten off leaving a 4-inch tail.
You have a tiny brown stem about 1 cm long — perfect for the top of the acorn.
Final assembly — the acorn
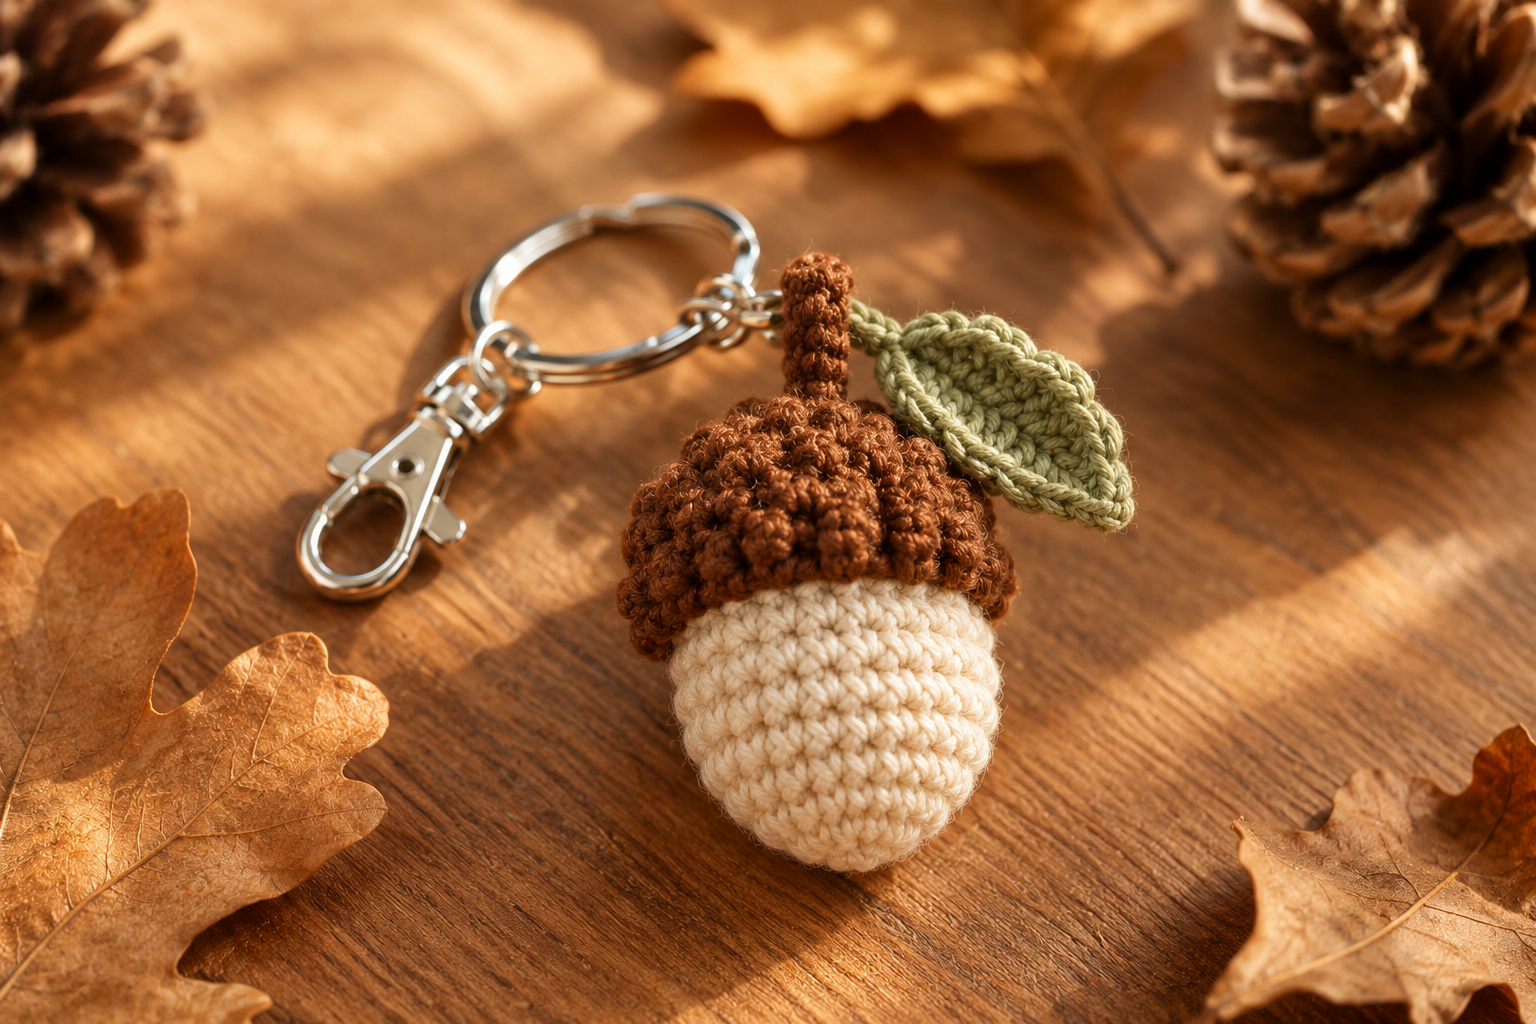
- Attach the cap. Place the brown cap over the top third of the cream body — it should cover the closed crown and the top 3 rounds. Whip-stitch the cap edge to the body all the way around using the long brown tail. Keep the stitches on the cap side so they hide in the texture.
- Attach the stem. Sew the tiny brown chain to the very top center of the cap. Two small stitches through the base, secure, tuck the tail in.
- Attach the leaf (optional). If you made the leaf (see below), whip-stitch it flat against the side of the cap, just under the stem. One stitch through the leaf base is enough.
- Attach the keychain ring. Thread a fresh 4-inch length of Yarn B through the base of the stem, loop through the keychain split-ring, and knot tight against the top of the cap. Weave the tails down into the body.
Adjust so the acorn hangs vertically with the stem pointing up. The finished keychain stands about 5 cm tall on a 25 mm ring.
The optional leaf (2 minutes)
Every acorn is cuter with a leaf, and it doubles the perceived value on a market table.
With Yarn C (green), ch 6. Starting in the 2nd ch from hook: sc, hdc, dc, hdc, sc into the last ch. Do not fasten off — turn and work the other side of the chain: sc, hdc, dc, hdc, sc. Sl st to close. Fasten off leaving a 4-inch tail.
You have a tiny pointed leaf about 2.5 cm long. That's it.
Watch me make one
If reading rounds makes your eyes cross, the same pattern in video form is 15 minutes. This 2025 tutorial matches the round counts above almost exactly — cotton DK, 2.5 mm hook, magic ring start.
▶ Watch: Crochet Tutorial — Easy Acorn Keychain (YouTube, 2025)
Styling and gift-wrapping
Slip the finished acorn onto a small cardstock backer card printed with "Handmade with love — [your maker name]." The card doubles the visual footprint on a peg display and turns a $6 charm into an $8 gift. This is the same tag trick I use for my owl keychain and the mini daisy vase keychain.
For a set, make three acorns in three shades — classic chestnut cap, a golden-brown "oak" cap, and a deep espresso cap — and sell as "the harvest trio" at market for 2.5× a single keychain price.
Make it yours — quick variations
| Variation | Change from base pattern |
|---|---|
| Oak acorn | Cap in warm golden-brown. Skip the leaf. Very classic. |
| Espresso acorn | Cap in deep espresso brown, cream body. Sophisticated, sells well to adult buyers. |
| Pastel acorn | Body in soft blush or sage, cap in matching darker tone. Kids' backpacks. |
| White oak | Body in warm cream, cap in soft grey-brown. Add TWO leaves. |
| Jumbo acorn (~10 cm) | Worsted yarn + 4 mm hook. Perfect as a bowl filler or ornament. |
Same 60-minute build time for every variation. Pair the acorn with my no-increase pumpkin for a full autumn set.
Troubleshooting the three things that go wrong
My cap won't sit on the body
You skipped the BLO round on R4 of the cap. That single round creates the ridge that grips the body edge. Frog back to R3 and redo — the fix takes 90 seconds.
The cap looks smooth, not textured
You worked R5–R6 in both loops instead of FLO. Front-loop-only is what pushes the back loops out and creates the bumpy texture. Recount and redo those two rounds.
The keychain pulls the stem loose
You knotted the yarn to the stem's tail only. The loop must catch actual cap stitches, not just an old tail. Re-attach by threading fresh yarn through the top center of the cap, then looping through the split-ring, and knotting inside the cap.
Frequently asked questions
How long does the crochet acorn keychain take to make?
About 60 minutes for a confident beginner — 25 minutes for the body, 20 minutes for the cap, 5 for the stem and leaf, 10 for final assembly and keychain attachment. First-time mini amigurumi is closer to 90 minutes if you re-count often.
What is the best yarn for a mini crochet acorn?
Cotton DK (CYC 3) at 2.5 mm hook. Cotton keeps stitch definition on the FLO cap texture and does not fuzz. Wool works but hides the bumpy detail. Skip anything bulkier than DK — the scale collapses and the acorn stops reading as an acorn.
Can I make the acorn without a keychain ring?
Yes — skip the split-ring and use the finished acorn as a bowl filler, tree ornament (loop a 6-inch length of jute through the stem), garland element, or brooch (glue a pin-back to the flat side of the cap).
Can I sell finished acorn keychains at markets?
Yes — you may sell physical keychains made from this free pattern. Please credit "Pattern by Wavode" on your listing and link back to this page. Reselling the pattern text (free or paid) is not permitted.
How do I stop the cap from lifting at the edge?
Whip-stitch every 2 stitches around the entire cap edge, not just at the top and bottom. A cap secured only at 4 points will lift; a fully stitched cap lies flat and lasts forever.
Made this acorn? Tag #wavodecrochet on Pinterest — I re-pin every finished make and credit the maker.
Pattern by Clara Hartwell for Wavode. Questions? Email me at support@wavode.com.