Classic Newborn Crochet Bonnet

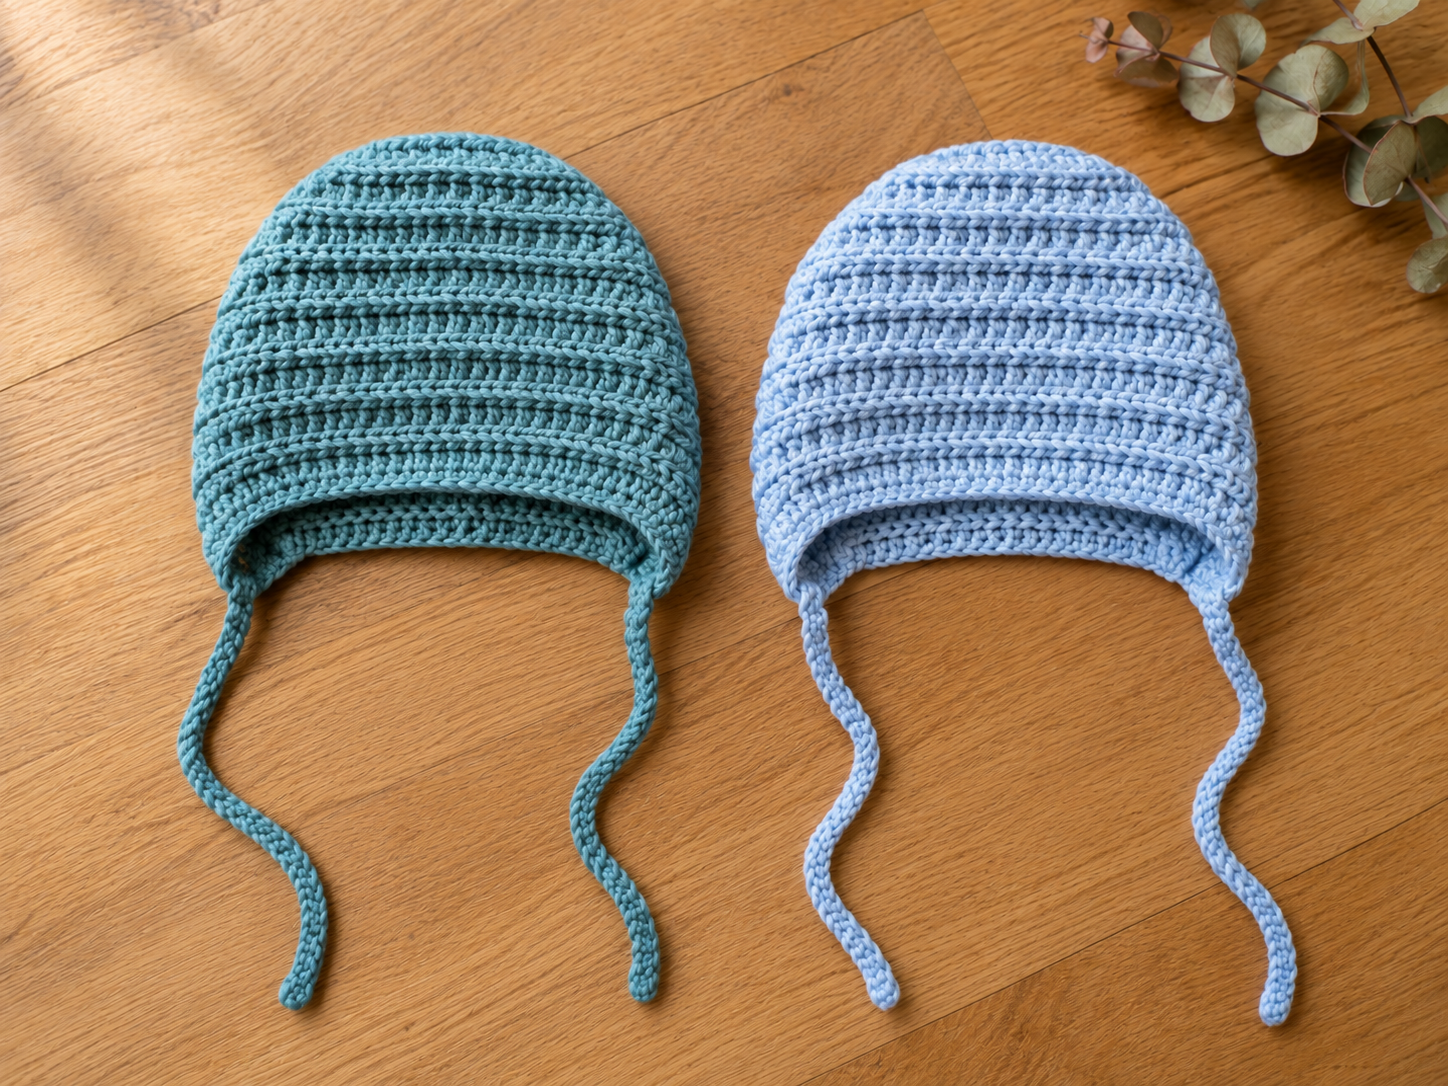
The simplest free crochet newborn bonnet pattern I've written all year — one small rectangle worked in the third loop of half double crochet, folded, seamed once at the back, and finished with two long chain ties. About 80 yards of DK cotton, a 4 mm hook, and a quiet afternoon. I made both of the blues in the photo in a single evening, and they fit a friend's 6-day-old the following Sunday.
Key Takeaways
- Rectangle bonnet worked flat in third-loop half double crochet (hdc3lp) for a soft horizontal-ribbed texture that hugs a newborn head.
- 80 yd DK #3 cotton (dusty teal or powder blue), 4 mm hook, sized to stretch over a newborn 13–14 in head circumference.
- One fold and one short whipstitch back seam — the fold on one side and the seam on the other close both ends of the crown naturally, so no top seam and no shaping rounds are needed.
- Chain ties worked directly off each brim corner and finished to length by measurement (about 6–6.5 in relaxed), no sewing after fastening off.
Pattern at a glance
- Stitch: third-loop half double crochet (hdc3lp) throughout. If you can hdc, you can do this.
- Yarn: DK #3 weight cotton, 80 yd total. Both bonnets in the photo use the same yardage.
- Hook: 4 mm (US G-6).
- Construction: flat rectangle → fold widthwise (row-end short edges meet) → whipstitch one short back seam → chain ties worked off the two brim corners. The fold on one side and the seam on the other close the crown between them, so no top seam is needed.
- Finished size: newborn. Folded piece measures roughly 5.4 in tall × 5.4 in front-to-back; the brim opening is ~10.75 in relaxed and stretches over a 13–14 in newborn head.
- Time to complete: 1.5–2 hours.
- Skill level: beginner. If your very first project was a granny square, this is your second.
Why a bonnet is the newborn gift that actually gets used
A newborn loses heat off the crown of the head faster than any other body zone — the American Academy of Pediatrics' 2025 newborn thermal-care guidance recommends a soft hat within the first hour of life to reduce cold stress, and covered heads for outdoor outings in cool weather. Hospitals hand out a stretchy jersey cap in the delivery room for exactly that reason. A soft hand-crocheted bonnet in cotton is a beautiful keepsake for the going-home photos and cool-weather stroller walks in the early weeks — worn while awake and supervised, and always removed for sleep per AAP safe-sleep guidance.
I keep two of these on hand for baby-shower gifts — one in the teal, one in the powder — because parents-to-be never know the baby's coloring in advance and both blues photograph beautifully against newborn skin.
What you'll need
Yarn (DK #3 weight cotton, ~80 yd / 73 m per bonnet)
- 80 yd DK cotton in one color: dusty teal or powder blue.
- The teal bonnet in the photo is Paintbox Cotton DK in Seafoam Blue; the powder is Scheepjes Catona in Powder Blue (held single strand). Any true DK cotton works.
Hook
- 4 mm (US G-6) — Clover Amour or your favorite bamboo.
Notions
- Tapestry needle, large-eye blunt.
- Stitch marker (1) for tracking the working row.
- Scissors, soft measuring tape.
Gauge
- 16 hdc3lp × 12 rows = 4 in (10 cm) on a 4 mm hook (so ~4 sts and ~3 rows per inch). Bonnets forgive a stitch of drift, but the finished dimensions below assume this gauge.
Sizing note
Written for newborn (13–14 in / 33–36 cm head circumference, per Craft Yarn Council baby-head sizing). Because ties and brim depth are given by measurement (not fixed stitch counts) you can also fit smaller preemies or slightly larger 1–2-month heads without a rewrite. For a 3–6 month version, measure the target baby's head, then chain enough starting stitches to hit half the head circumference plus 1 in, and work rows until the piece measures ~5.5 in from the foundation edge — that's about 47 sts × 17 rows at this gauge, but measure as you go.
Abbreviations
- ch — chain
- hdc — half double crochet
- hdc3lp — half double crochet in the third loop only (the horizontal bar behind the top V of the previous row)
- sl st — slip stitch
- st(s) — stitch(es)
- rep — repeat
What hdc3lp actually means
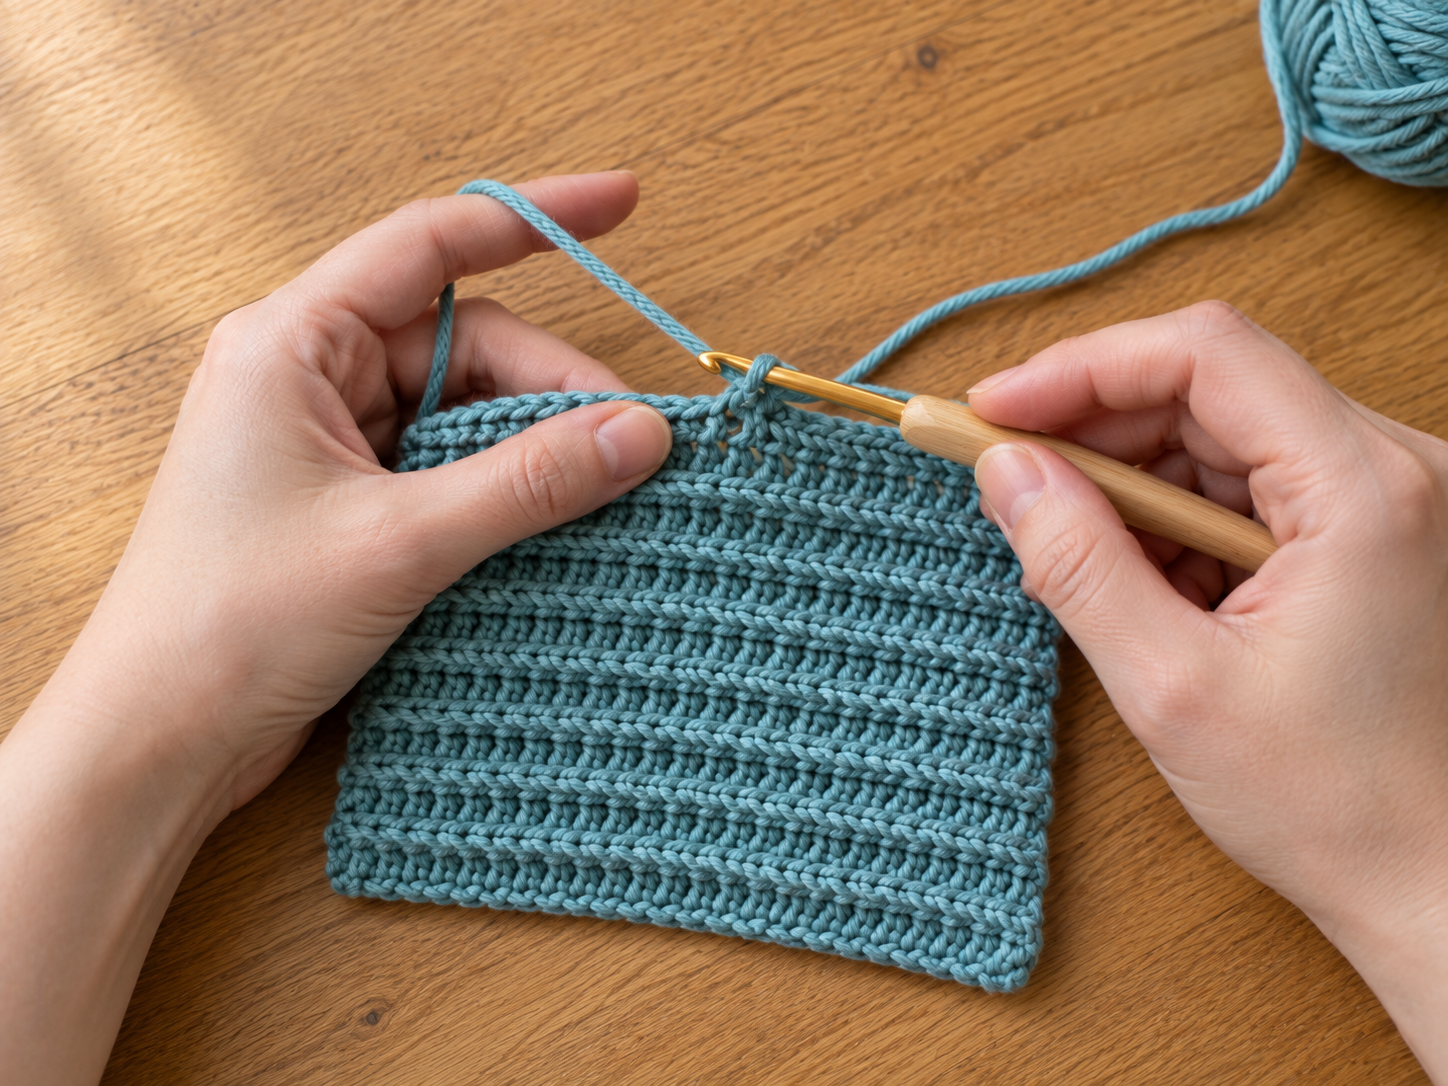
The third loop is the horizontal bar sitting behind the two top V-loops of a previous hdc row. Working into it instead of under the V pushes the V to the front and creates a subtle knit-style ribbing. It's the same stitch as regular hdc — only the insertion point changes.
If it's your first time, do a 4-row swatch before the bonnet. Row 1 is regular hdc into the chain; from Row 2 on, tilt the work toward you and hook into that third bar. Two rows in, you'll see the ribbing form.
Making the bonnet body
Worked flat as one rectangle. Turn at the end of every row.
Foundation: Ch 44.
Row 1: Hdc in the 3rd ch from hook (the skipped 2 chs count as the first st) and in every ch across. Turn. (43 hdc)
Rows 2–16: Ch 2 (does not count as a st here — I know, we're breaking a rule, but it keeps the edge tidy). Hdc3lp in each st across. Turn. (43 sts every row)
At the end of Row 16 the piece measures roughly 10.75 in wide × 5.4 in tall at gauge. Measure before you fasten off: if it's short of 5.3 in, work one more row; if it's over 5.5 in, frog the last row. Fasten off leaving a 12-inch tail — that tail will sew the single back seam.
Folding and seaming the bonnet
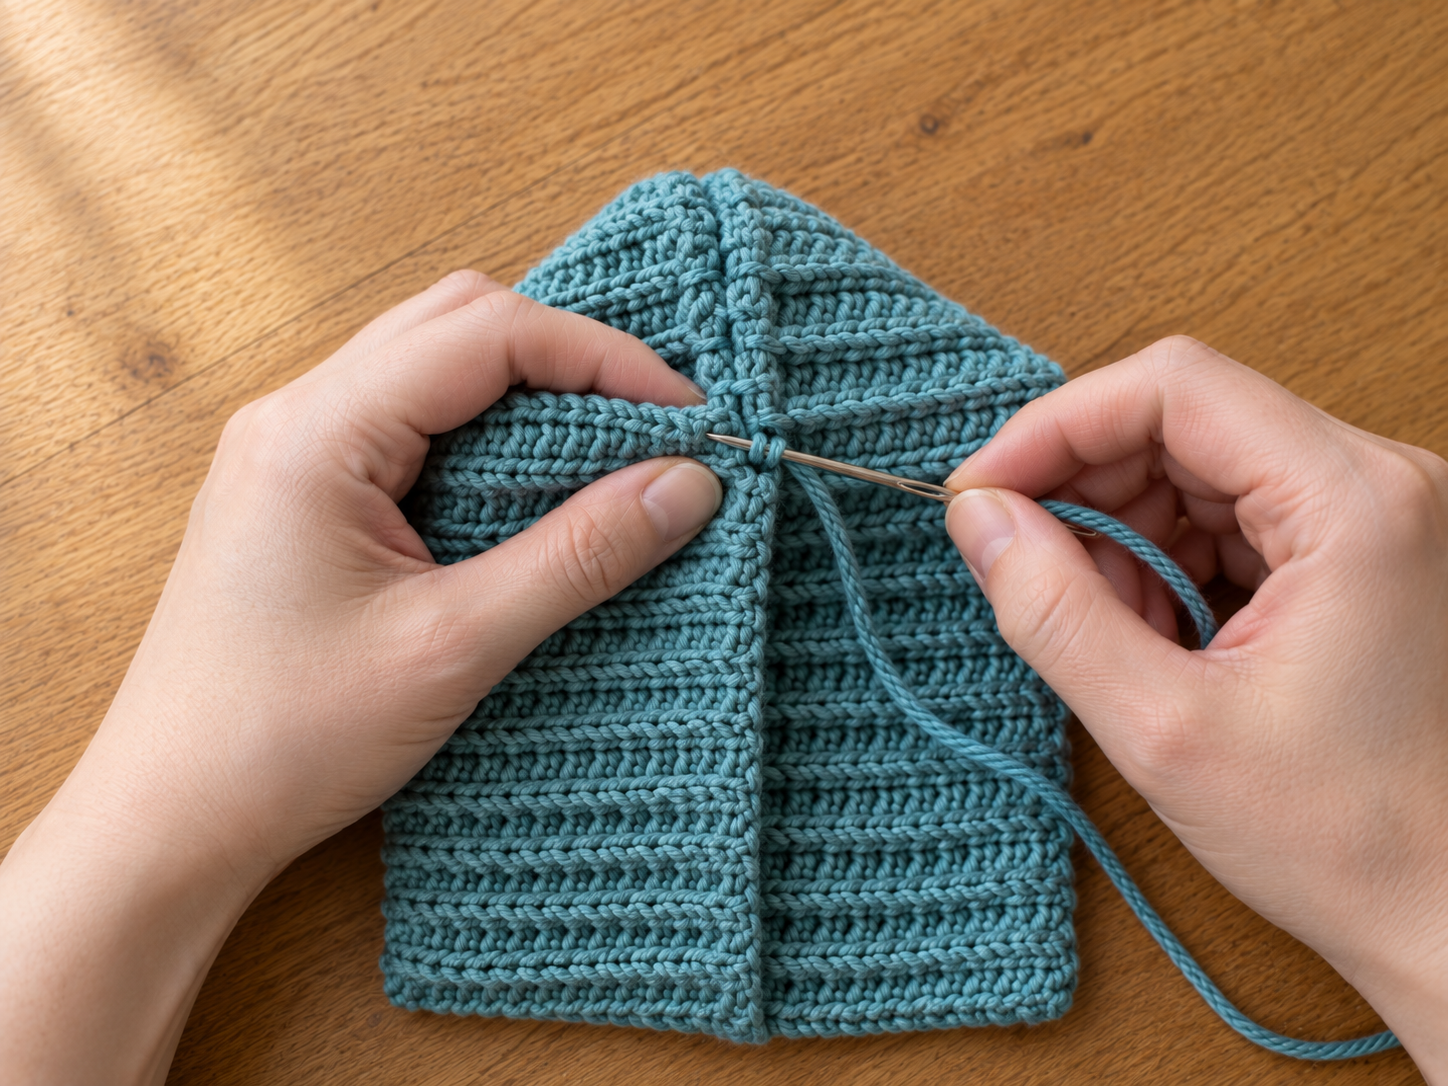
The rectangle becomes a bonnet with one fold and one short whipstitch back seam. No shaping round, no gathering, no separate top-of-head seam — the fold and the seam close the crown between them.
Read this first so you know which edge is which. In the rectangle you just finished:
- The foundation-chain edge (Row 1) is one long side, ~10.75 in.
- The last-row edge (Row 16) is the opposite long side, ~10.75 in.
- The two row-end edges on the left and right are the short sides, ~5.4 in each.
Now the fold and seam:
- Lay the rectangle in front of you with the ribbing running horizontally.
- Fold widthwise — bring the left short row-end edge across to meet the right short row-end edge, so the two short edges stack together on one side. The fold runs vertically down what used to be the center of the rectangle, on the opposite side of the folded piece. Your folded piece measures roughly 5.4 in × 5.4 in, nearly square.
- Orient the folded piece so the fold is on one side (this becomes the front of the bonnet, framing the face) and the stacked short row-end edges are on the opposite side (this becomes the back of the head, where the seam goes).
- Sew the back seam. Thread the long tail through the tapestry needle. Starting at the top corner where the stacked short edges begin (this is the crown), whipstitch the two stacked short row-end edges together, going through the outer V loops only. About 15 firm stitches carries you the full ~5.4 in down to the bottom corner (the nape). Knot on the inside, weave the tail through 6 stitches in two directions, snip.
That's the only seam. Here is why nothing else needs sewing: the fold on one side already holds one end of the crown closed, and the back seam you just sewed closes the other end. The doubled fabric across the top of the folded piece stays flat naturally between those two closed ends — it becomes a soft, gently domed crown ridge, exactly as you can see on the two finished bonnets in the hero photo.
The bottom edge — the two halves of the Row-1 foundation edge, joined by the fold on one side and by the back seam on the other — opens up into a soft face-framing brim of about 10.75 in relaxed circumference, which stretches to fit a 13–14 in newborn head. Turn the bonnet right-side out (the ribbed side is the outer side).
Making the chain ties
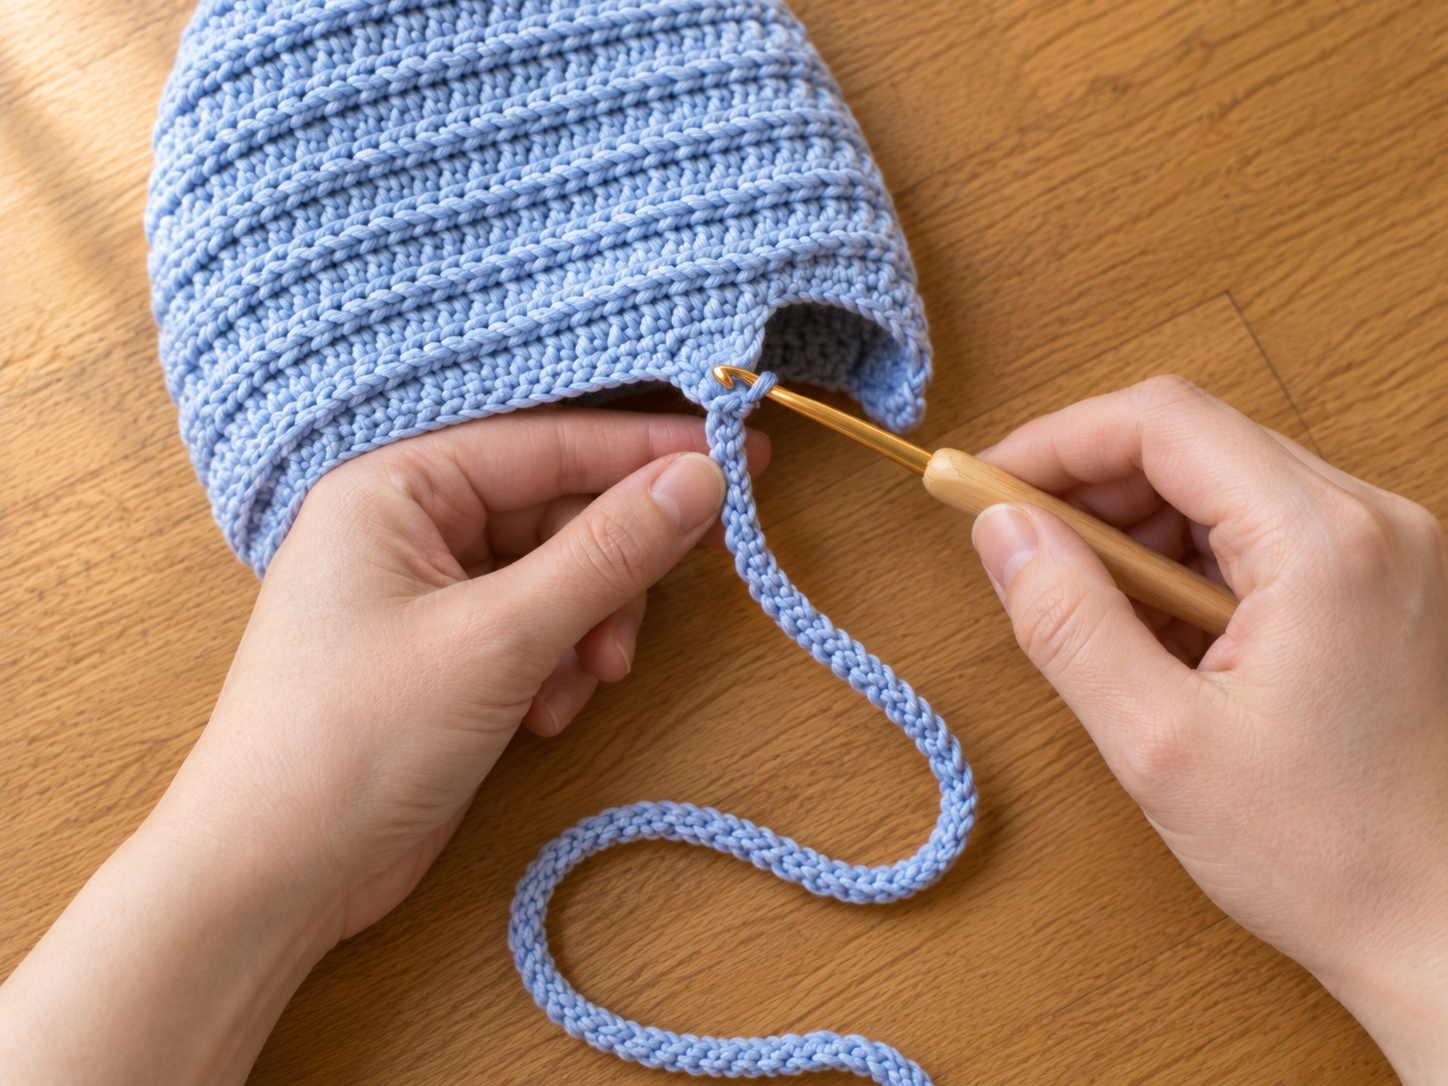
The ties are worked directly off the two brim corners of the finished bonnet — no separate strap to sew. When worn, the two ties come out beside the baby's cheeks and tie in a loose bow to one side of the neck.
- Turn the bonnet right-side out with the open brim edge facing you.
- Rejoin yarn with a sl st into the corner stitch of the brim at the fold-side corner (where the front fold meets the brim edge).
- Chain until the tie measures about 6–6.5 in relaxed — usually around 35–42 chains depending on your chain tension, so measure as you go rather than counting. Fasten off. Pull the tail through the last chain and weave the short tail back through the chain for 5 stitches to secure and hide the end. Snip.
- Rejoin at the seam-side corner (where the back seam meets the brim edge) and repeat: sl st, chain to 6–6.5 in, fasten off, weave in.
Both ties should end up the same length — measure the first one flat before you start the second.
Finishing touches
- Steam gently. A quick hover with a warm iron over a damp cloth relaxes the cotton and sets the fold-crown so it stays soft against the head.
- Weave every end through at least 6 stitches in two directions. Newborns have startlingly strong grip reflexes and will find any loose tail.
- Do not attach beads, buttons, or bows. For a newborn, the brim needs to stay smooth against the temple. Any hard embellishment is a pressure point during a nap.
Care instructions
Hand-wash in cool water with a fragrance-free baby-safe soap. Do not wring — squeeze in a rolled bath towel. Reshape the fold-crown and lay flat to dry. Cotton DK holds its shape through 30+ washes if you never put it in the dryer.
Troubleshooting the bonnet
The ribbing isn't showing up. You're catching a top V loop as well as the third loop. Tilt the work more sharply toward you before inserting the hook and you'll see the horizontal bar sitting alone at the back.
The bonnet feels tight around the brim. Your gauge is running small. Go up half a hook size (4.5 mm) and remake — brim tightness is the one measurement that matters for a newborn.
The chain ties curl into a spiral. Your chain tension is tighter than your row tension. Loosen the yarn hand for the ties specifically, or hook one size up for the ties only.
The back seam shows on the outside. You're going through both V loops instead of the outer V. Undo, restart the seam catching only the outermost loop of each edge — the seam becomes almost invisible from the back.
My folded piece is much closer to a rectangle than a square. You worked too many rows or too few. Measure Row-1 to last-row height before you fold — you want ~5.4 in, no more. If you're already fastened off, add or frog rows to hit the number.
Frequently asked questions
Is this bonnet safe for a newborn?
The pattern itself uses only soft cotton yarn and worked stitches — no buttons, beads, wire, safety eyes, or hard embellishments — but no crocheted bonnet with ties should be marketed as "safe from birth" without caveats, so here are the honest ones. Only use the bonnet while the baby is awake and supervised — the American Academy of Pediatrics safe-sleep guidance is clear that hats and headwear should be removed for sleep and for car-seat use because of overheating and airway risks. Tie the strings in a loose bow to the side of the neck, not under the chin, and never tight enough to leave a mark. Check ties often for wear and re-secure the weave-in ends. I recommend it for going-home photos, stroller walks in cool weather, and short awake moments only.
How long should I make the ties?
Aim for a relaxed length of 6–6.5 in on each side, which is enough for a soft bow with a short tail. In DK cotton at my chain tension that lands around 35–42 chains, but chain tension varies enormously between hookers — measure the first tie flat before you count on a number. For a preemie, 5 in relaxed is plenty; for a larger 3-month head, 7 in works.
Can I use worsted #4 yarn instead of DK #3?
You can, but the fabric gets denser and the bonnet runs larger. If you only have worsted, drop the starting chain to 38 and work 13 rows instead of 16 — that lands you close to the newborn size. Any Lily Sugar 'n Cream color works with those adjustments.
Why hdc3lp instead of a regular hdc row?
Regular hdc gives a horizontal bumpy texture. Third-loop hdc gives a subtle knit-style rib that looks like a store-bought newborn cap and stretches more forgivingly around the head. It's the same amount of yarn and takes the same time — the payoff is just the finish.
Can I add a pom-pom to the crown?
I don't recommend it for a newborn. A pom-pom on the fold-crown puts a lump right where the baby's head rests against a car-seat headrest or a parent's shoulder. For a 6–12 month version of the pattern, absolutely — babies that age tolerate the crown decoration and it photographs beautifully.
Related patterns from my hook
- The meadow baby crocs round out the newborn photo-shoot set with matching sage cotton feet.
- The easy crochet baby blanket in cream is the swaddle I photograph these bonnets on for gift bundles.
- The barnaby teddy bear lovey is the third piece in the "new parent" gift trio I made this spring.
Ready to hook one?
Save this pattern to your Pinterest board, pick your favorite blue (or a soft rose, or a butter yellow — same numbers, any DK cotton), and start Row 1 tonight. If you finish a bonnet, tag me on Pinterest — I love seeing which colors you land on and whose tiny head it went home to.