Easy Crochet Pumpkin Coaster Pattern

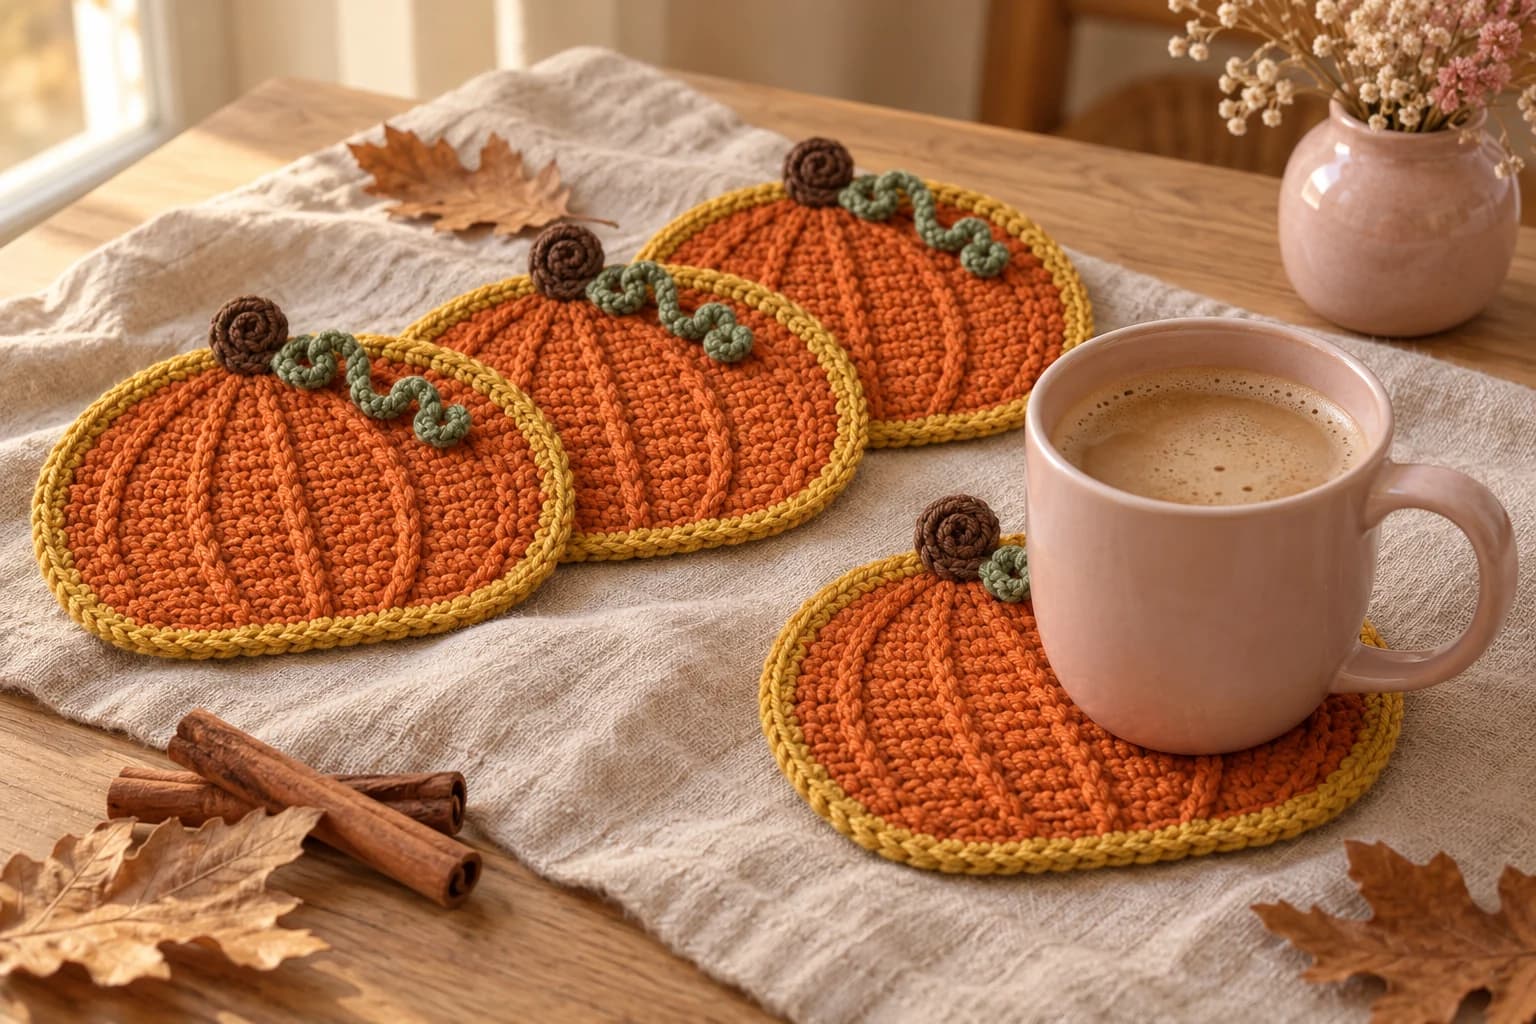
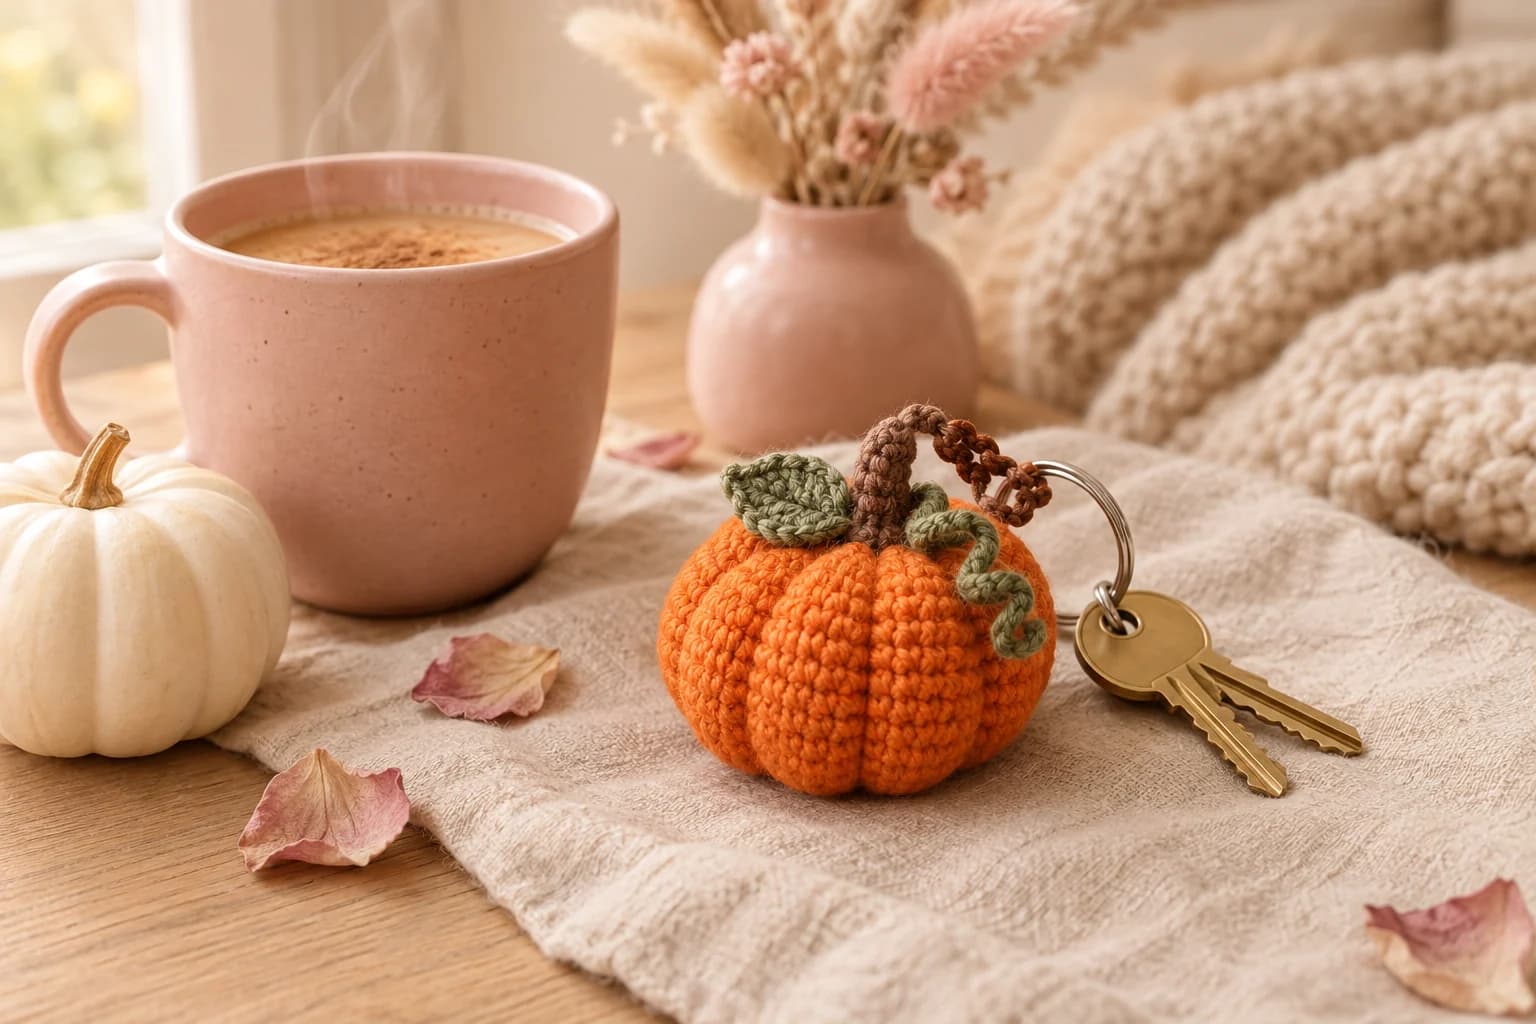
This easy crochet pumpkin coaster pattern makes a flat orange pumpkin about 4¾ inches wide, with seven raised ribs, a braided mustard border, a little rolled stem and two curly green vines. The body is a single crochet oval worked in a spiral around a short chain, so it comes out a little wider than tall, like a real squat pumpkin. You'll need about 140 yards of worsted cotton for a set of four, a 4 mm hook and roughly 1¼ hours per coaster.
Every October my coffee table collects rings from warm mugs and cider glasses. A flat coaster fixes that, and a pumpkin-shaped one earns a spot on the table for the whole season, not only on Thanksgiving.
Key Takeaways
- One flat piece: a 46-stitch orange oval, then a 2-round mustard border and a slip stitch edge.
- The ribs are added on top with surface slip stitch, so you can place them exactly where you want.
- Stem and vines are small extras sewn to the top edge, away from where the mug sits.
- Budget ~140 yd (128 m) of worsted #4 cotton for 4 coasters, mostly orange.
| At a glance | |
|---|---|
| Finished size | about 4¾ in wide × 4¼ in tall (12 × 11 cm), plus about ½ in of stem |
| Yarn | worsted #4 cotton in orange, mustard, brown and green |
| Hook | 4 mm (US G-6) |
| Skill level | easy: sc, hdc, sl st and surface slip stitch |
| Time | about 1¼ hours per coaster |
Why this pumpkin is an oval with ribs added on top
A round coaster looks like an orange, not a pumpkin. Real pumpkins are squat, so I start from a short 5-chain foundation and work around both sides of it. That chain stretches the circle sideways by about half an inch. It's just enough to read as "pumpkin" once the ribs and stem go on.
I tried working the ribs into the fabric first, with front post stitches on the straight sides. They lined up fine near the middle, then drifted sideways on the curved ends, because the rounds bend there. Surface slip stitch doesn't care about rounds at all. You draw the line where you want it, and it follows. That's why the ribs come after the body, as their own step.
The border is two rounds of mustard single crochet, finished with a round of slip stitches. That last round lays a neat braided line along the edge and firms it up, so the coaster doesn't stretch when you lift a mug.
Materials for a set of four pumpkin coasters
Yarn: worsted #4 cotton, such as Lily Sugar 'n Cream or Paintbox Cotton Aran. Cotton soaks up drips and takes a warm mug without softening. I don't use acrylic for coasters, since a hot mug can make it shiny and flat.
| Color | Used for | For 4 coasters |
|---|---|---|
| Pumpkin orange | bodies and ribs | about 75–95 yd (1 ball of 120 yd) |
| Mustard yellow | borders | about 35–45 yd (1 ball) |
| Chocolate brown | stems | about 6 yd (scraps) |
| Sage green | vines | about 18–22 yd (scraps or 1 small ball) |
I worked those amounts out from the stitch counts, sewing tails included, so treat them as estimates. One coaster takes roughly 20 yd of orange, 9 yd of mustard, 1½ yd of brown and 5 yd of green.
Hook and notions
- 4 mm (US G-6) hook. It's a little smaller than most worsted cotton labels suggest, which keeps the coaster dense.
- 3 stitch markers, plus about 20 straight pins to plan the ribs.
- Tapestry needle and scissors.
Tension: about 4 sc and 4½ rounds to the inch (2.5 cm). At that tension the coaster comes out about 4¾ in wide and 4¼ in tall, so measure your first one and adjust the hook if you want it bigger or smaller. Flatness matters more than the exact size. If the oval cups, go up half a hook size. If it ruffles, go down.
Stitches (US terms): ch (chain), sl st (slip stitch), sc (single crochet), hdc (half double crochet), inc (2 sc in the same stitch), st(s) (stitch/es). Rounds 1–9 are worked in a continuous spiral: don't join, and move a marker up into the last stitch of each round. The stitch count is in parentheses at the end of each round.
The pattern, round by round
Part 1 — The orange oval (Rounds 1–7)
With orange and the 4 mm hook. The side facing you is the right side.
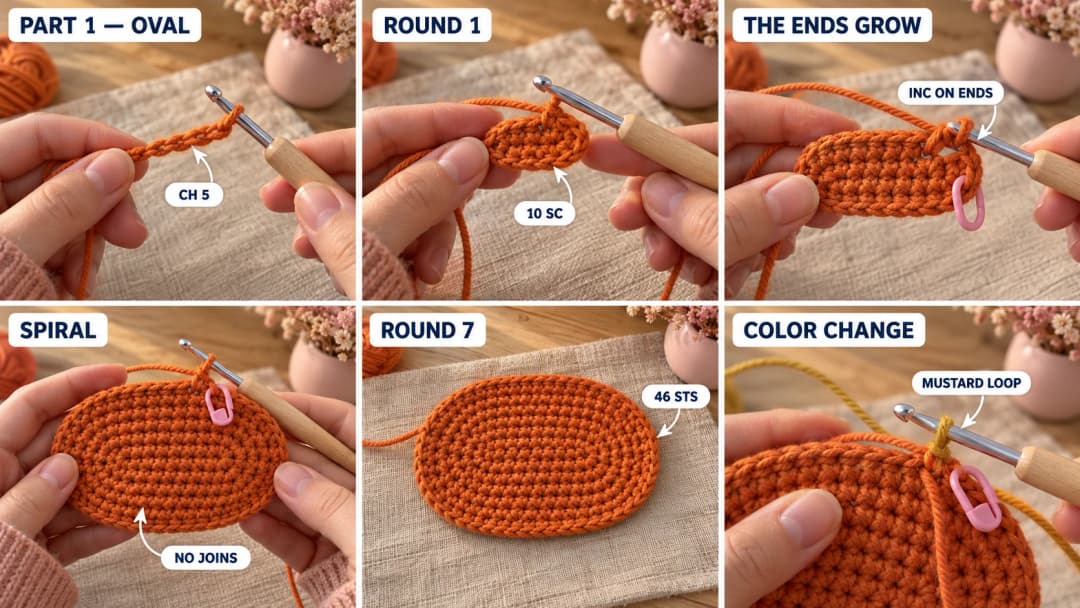
- Foundation: Ch 5.
- Rnd 1: 3 sc in the 2nd ch from the hook, sc in each of the next 2 ch, 3 sc in the last ch. Rotate the piece so you can work along the other side of the chain, then sc in each of the next 2 ch. (10 sc) Don't join. Put a marker in the last st.
- Rnd 2: [Inc in each of the next 3 sts, sc in each of the next 2 sts] 2 times in total. (16 sc)
- Rnd 3: [(Sc in the next st, inc) 3 times, sc in each of the next 2 sts] 2 times in total. (22 sc)
- Rnd 4: [Sc in the next st, inc, (sc in each of the next 2 sts, inc) 2 times, sc in each of the next 3 sts] 2 times in total. (28 sc)
- Rnd 5: [(Sc in each of the next 3 sts, inc) 3 times, sc in each of the next 2 sts] 2 times in total. (34 sc)
- Rnd 6: [Sc in each of the next 2 sts, inc, (sc in each of the next 4 sts, inc) 2 times, sc in each of the next 4 sts] 2 times in total. (40 sc)
- Rnd 7: [(Sc in each of the next 5 sts, inc) 3 times, sc in each of the next 2 sts] 2 times in total. (46 sc)
Each half of a round is one curved end plus the two plain stitches of a straight side. The increases sit only on the ends, and on Rounds 4 and 6 they shift by half a group, so the ends stay round instead of turning into corners.
Tip: check it flat now. Before the last stitch of Round 7, lay the oval on the table. It should be about 3¾ in (9.5 cm) wide and 3 in (7.5 cm) tall, and perfectly flat. A bowl shape means too few stitches for your tension: redo it with a 4.5 mm hook. Don't wait until the border to find out.
Change to mustard on the last stitch of Round 7: work its last yarn over with mustard and pull it through. Cut the orange with a 6 in tail. Pull the mustard loop long and put a marker in it so it can't unravel. It waits there while you work the ribs.
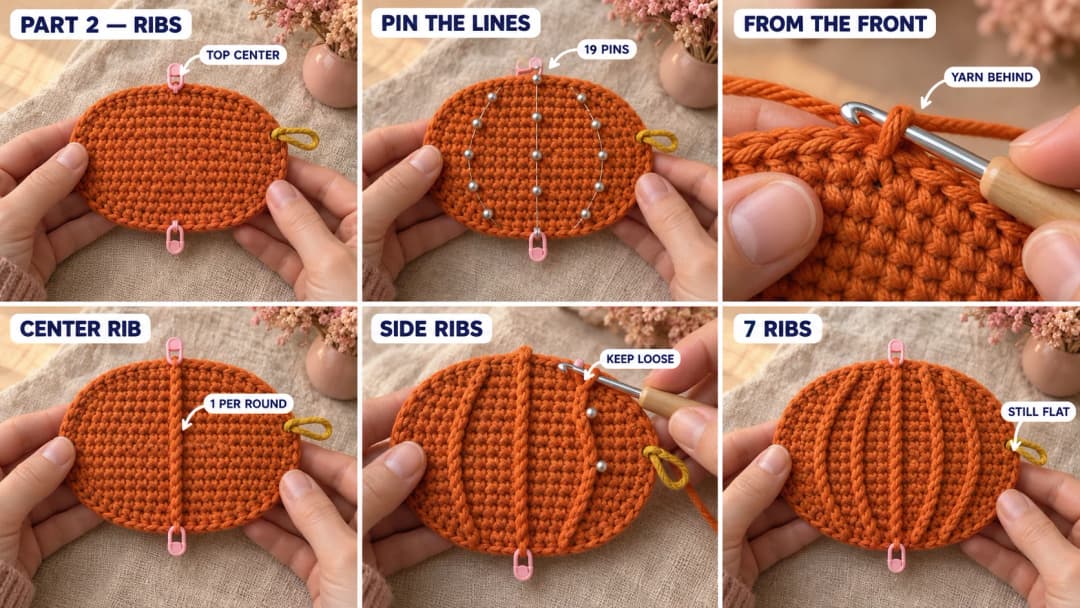
Part 2 — Seven raised pumpkin ribs (surface slip stitch)
This is the step that turns an orange oval into a pumpkin. Cut about 7 yd (6.5 m) of orange for it. You'll work seven lines of slip stitches on the right side, from the top edge to the bottom edge, all inside Round 7. That leaves the top loops of Round 7 free for the border.
Mark the top and bottom first. Lay the oval right side up, the long way across. Choose one straight side as the top. Put a marker between its 2 plain side stitches of Round 7: that's the top center. Do the same on the opposite side: that's the bottom center. They should line up with the middle of the foundation chain.
Mark the middle line. Each curved end has 21 stitches in Round 7. Put a marker in the 11th one, its middle stitch, on both ends. The imaginary line from one of these markers, through the foundation chain, to the other is the middle line. Along it, the rounds of each end are stacked side by side like the layers of an onion: Round 1 against the chain, Round 7 at the edge.
Pin the seven lines. Count along Round 7 from each center marker:
| Rib | Starts in Rnd 7 (top) | Crosses the middle line | Ends in Rnd 7 (bottom) |
|---|---|---|---|
| Center | at the top center | between the 2nd and 3rd foundation ch (it crosses the chain) | at the bottom center |
| Inner pair | 2 sts left / right of the top center | in the gap between Rounds 2 and 3 of that end, on the middle line | 2 sts left / right of the bottom center |
| Middle pair | 4 sts left / right of the top center | in the gap between Rounds 4 and 5 of that end, on the middle line | 4 sts left / right of the bottom center |
| Outer pair | 6 sts left / right of the top center | in the gap between Rounds 6 and 7 of that end, on the middle line | 6 sts left / right of the bottom center |
Count the rounds from the chain outward, along the middle line. Put a pin at each start, middle and end point: 19 pins plus your 2 center markers. An easy way to remember the table: the rib that starts N stitches from the center crosses the middle line between Rounds N and N+1. The side ribs bow outward through the middle, then curve back in, like the lines on a real pumpkin. On the middle line, each side rib runs along the gap between two rounds instead of across them, so it sits neatly there.
Before you start, look at the pins from arm's length. The left and right ribs should mirror each other, and the gaps between neighboring ribs should look about even. Move a middle pin by one round if a curve looks too flat or too round.
How to work surface slip stitch:
- Make a slip knot in orange and hold it behind the coaster.
- Insert the hook from the front, between two stitches at the top pin, catch the slip knot and pull the loop through to the front.
- Move the hook down about one round (¼ in) along your line. Insert it from the front to the back, catch the yarn behind, and pull a loop through the fabric and through the loop on the hook. That's one surface slip stitch.
- Repeat, one stitch per round, steering toward the next pin. The center rib takes about 15 slip stitches, the side ribs 15 to 18.
- At the bottom pin, cut the yarn with a 6 in tail, pull it through to the front, then take it back down through the same hole with the needle. Weave both tails in on the back.
Tip: keep them loose. Tight slip stitches pucker the coaster. Go up to a 4.5 mm hook for the ribs if yours pull in, and gently stretch each rib lengthwise when it's done. The coaster should still lie flat afterward.
Work the center rib first, then the inner pair, the middle pair and the outer pair, so you can check the spacing by eye as you go. With seven ribs the sections between them are only about ½ in wide, which is what gives the coaster its pumpkin look.
Part 3 — The mustard border (Rounds 8–10)
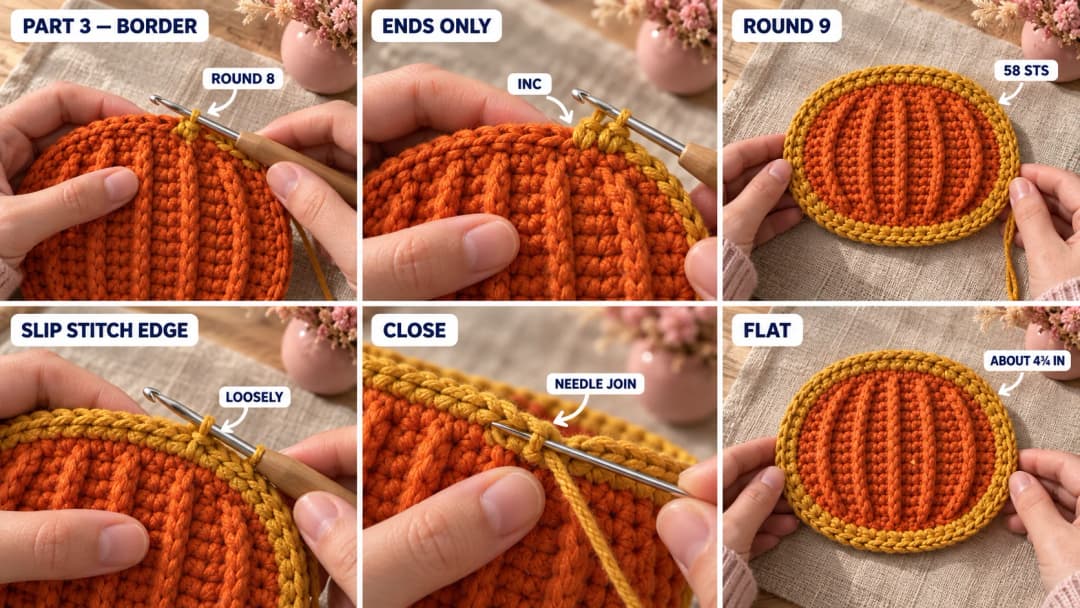
Put the live mustard loop back on the hook. Keep working in the spiral.
- Rnd 8: [Sc in each of the next 3 sts, inc, (sc in each of the next 6 sts, inc) 2 times, sc in each of the next 5 sts] 2 times in total. (52 sc)
- Rnd 9: [(Sc in each of the next 7 sts, inc) 3 times, sc in each of the next 2 sts] 2 times in total. (58 sc)
- Rnd 10: Sl st loosely in each st around. (58 sl st)
Cut the yarn with a 6 in tail and pull it through the last loop. Thread it on the needle, pass it under both loops of the first sl st of Round 10, then back down into the last one. That closes the slip stitch braid without a bump. Weave in all the tails on the back.
The slip stitch round is what gives the braided look along the edge. If it pulls the coaster into a bowl, rip it back and redo it with a 4.5 mm hook.
The rolled stem and the curly vines
Both pieces are tiny and quick. Make them with the same 4 mm hook, and leave long tails: they're your sewing thread.
Part 4 — The rolled stem (make 1 per coaster)
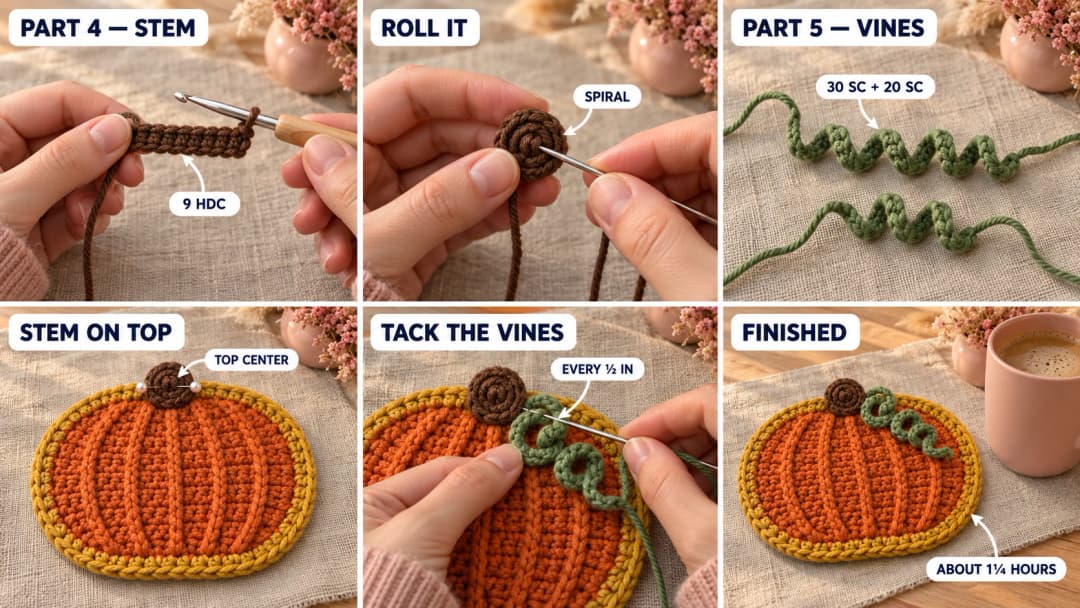
With brown:
- Foundation: Leave an 8 in (20 cm) starting tail. Ch 11.
- Row 1: Hdc in the 3rd ch from the hook and in each ch across. (9 hdc) Fasten off and weave in this end.
Roll the strip up tightly from the fastened-off end, so the starting tail ends up on the outside. Thread the tail on the needle and stitch straight through all the layers 3 or 4 times, near one edge of the roll. You now have a little spiral knob, about ¾ in (2 cm) across.
Part 5 — Two curly vines (make 2 per coaster)
With green:
- Long vine: Leave an 8 in (20 cm) starting tail. Ch 16. 2 sc in the 2nd ch from the hook and in each ch across. (30 sc) Fasten off, leaving another 8 in tail.
- Short vine: Leave an 8 in starting tail. Ch 11. 2 sc in the 2nd ch from the hook and in each ch across. (20 sc) Fasten off, leaving another 8 in tail.
Working 2 sc into every chain makes the outer edge twice as long as the chain in the middle, so each vine twists into a corkscrew on its own as you go. Don't fight it. If yours twists only loosely, give it a few extra turns between your fingers. The curl gets fixed for good when you sew it down, so it doesn't have to hold by itself. The two tails, one at each end, let you tack it from both sides.
Sewing the stem and vines so a mug still sits flat
Everything goes on the top 1½ inches of the coaster. The middle stays clear, so a mug or glass sits flat on the ribs.
- Stem. Set the stem roll on the top center, spiral side facing you, so its lower half overlaps the mustard border and the upper half stands above the edge. The center rib should run straight up into it. Sew its lower half to the border and to Round 7 with the brown tail, 6 to 8 small stitches. Go through to the back each time, then weave the tail in there.
- Long vine. Start right at the base of the stem, on its right side. Press the corkscrew flat onto the coaster, letting it coil into 2 round loops that run down and to the right. Pin the center of each loop.
- Short vine. Start it at the same point as the long one. Press it flat into 1 or 2 smaller loops just below or beside the first vine, so the two tips point in different directions.
- Tack them down. With the green tails, take a small stitch over the inner edge of each loop every ½ in or so, going through to the back. Tacking the inner edge holds the loop round while the outer edge stays free and curly. Keep the stitches loose, or the coaster puckers under them. Weave the tails in on the back.
Want the vines on the left instead? Mirror the layout. For a mixed set, I like two coasters with the vines on the right and two on the left, so they look different when they're fanned out on the table.
Keeping pumpkin coasters flat through the season
Cotton coasters relax and spread a little after their first wash. I block mine before I use them: wet the coaster, press it flat on a towel, nudge the ribs straight, and let it dry overnight. The stem and vines dry in the shape you give them.
To wash, use a gentle cold machine cycle in a mesh bag, or hand-wash with a drop of dish soap. Lay them flat to dry. A tumble dryer can make cotton shrink and the vines frizz. Coffee and tea stains come out more easily if you rinse them the same day, so don't leave a damp coaster under a mug overnight.
Between seasons, store them flat in a stack, with the stems all on the same side. That way, the rolled stems don't get squashed into the next coaster.
A matching pumpkin set: four coasters, two looks
A set of four in plain orange looks like the pumpkin patch in my photo. If you'd like a mix, these swaps keep the same counts:
- White pumpkins: cream body and ribs, sage border, brown stem. They look lovely next to the orange ones.
- Sage pumpkins: soft sage body, cream border and green-brown stem, for a quieter table.
- No vines: for a quicker set, or for coasters that get stacked a lot, skip Part 5. The stem alone still says pumpkin.
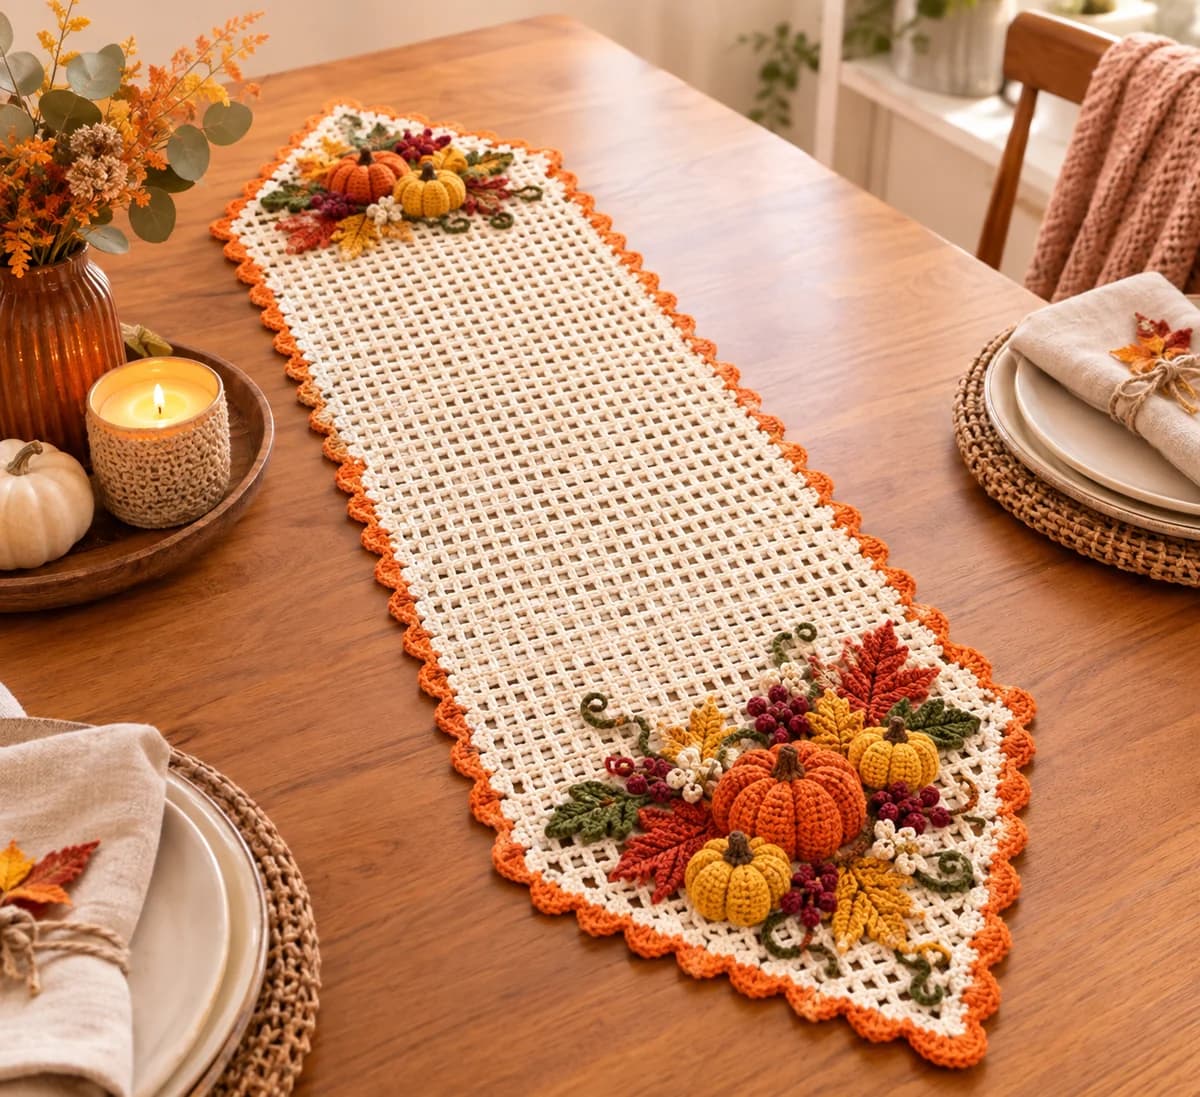
Tie a stack of four with twine and tuck in a few cinnamon sticks, and you have a hostess gift for a fall dinner, made in about five or six hours. If you want something to put in the middle of that table, my pumpkin table runner crochet pattern uses the same orange, mustard, brown and green palette.