Pumpkin Cat Crochet Pattern

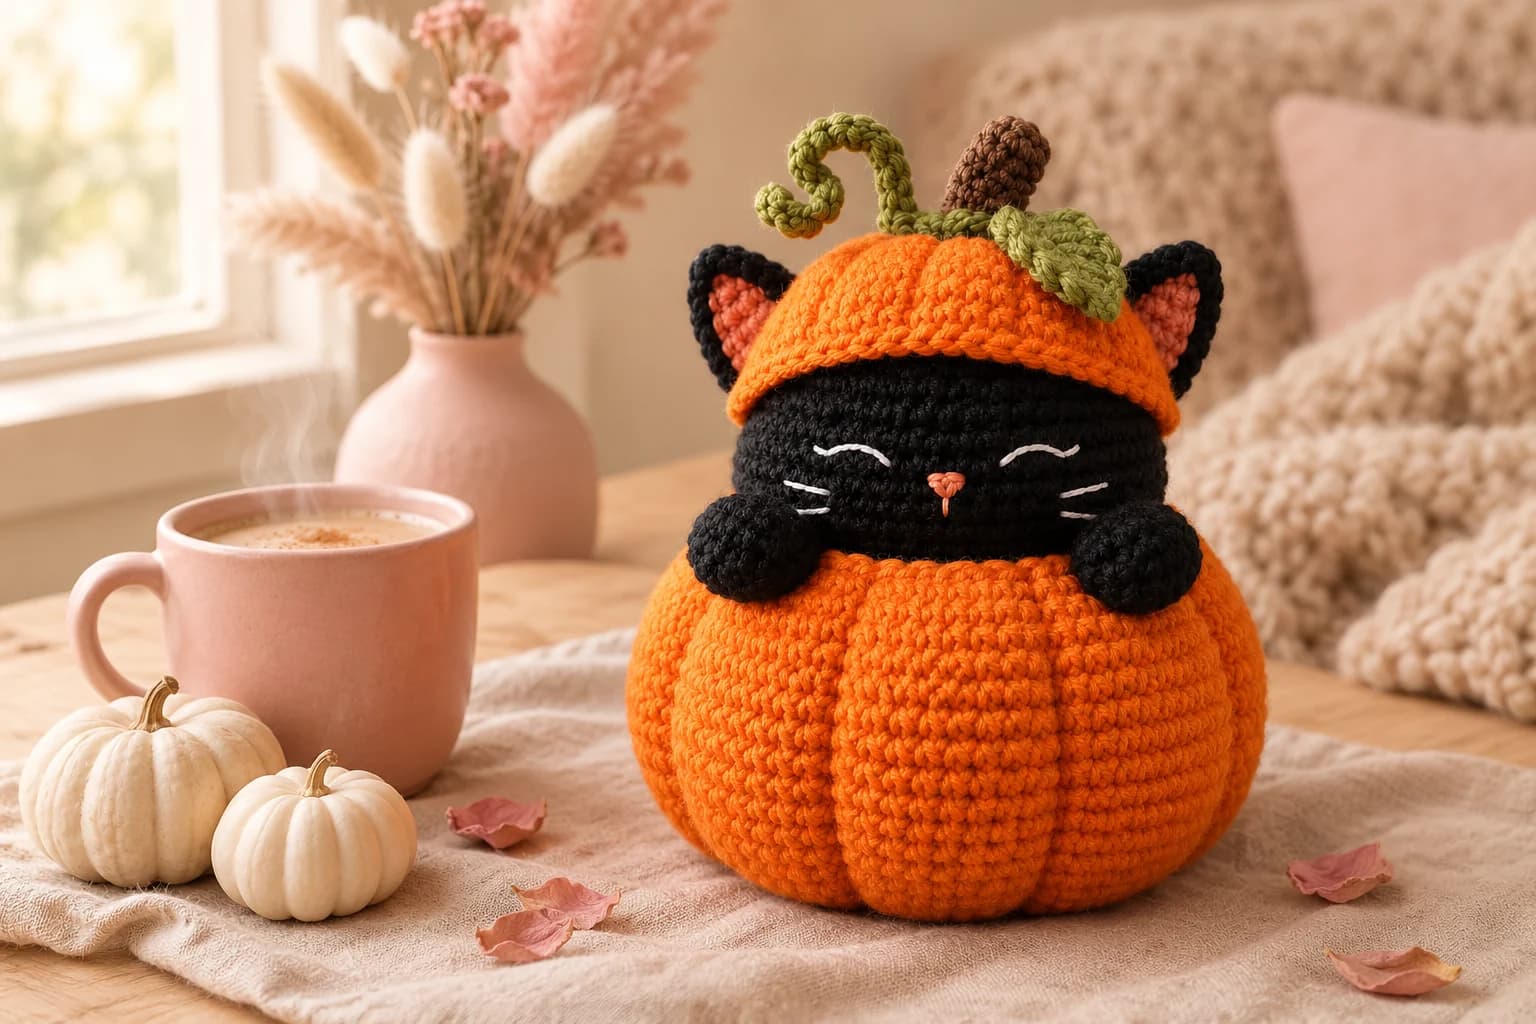
This free pumpkin cat crochet pattern makes a sleepy black cat peeking out of a plump orange pumpkin, wearing a little pumpkin hat of its own. The finished piece is about 5.5 inches wide and 7.5 inches tall to the tip of the stem. It's worked in worsted yarn on a 3.5 mm hook, in simple single crochet rounds. The face is embroidered, so there are no safety eyes to buy. Plan on about 245 yards in total and a relaxed weekend of crocheting.
Key Takeaways
- Ten small pieces, mostly sc rounds: pumpkin, head, hat, stem, leaf, vine, 2 ears and 2 paws, plus 2 tiny inner ears.
- The head sinks into the pumpkin. The pumpkin's 54-stitch opening is sewn to the head's 54-stitch middle, stitch for stitch.
- The ribs are pulled in with yarn, not crocheted: 8 lines on the stuffed pumpkin, 6 on the hat.
- Budget ~245 yd (225 m) of worsted #4: about 150 yd orange and 80 yd black.
Why I love this little pumpkin cat
I've made plain crochet pumpkins every October for years. This one has a black cat living in it, and it's the piece everyone picks up first. It sits on a shelf like a pumpkin, but it reads as a character the second you see those closed, happy eyes.
The construction is friendlier than it looks. Everything is single crochet in the round. The pumpkin is a big stuffed ball with an opening at the top, and the cat's round head simply drops into that opening. The hat, ears and paws are small pieces you sew on at the end.
The ribs are my favorite trick. You don't crochet them. You stuff the pumpkin, then pull a strand of orange yarn from the base to the rim eight times. Each pull makes a dent, and suddenly you have a real pumpkin.
Is it Halloween decor or fall decor? Both. The black cat says Halloween, but the warm orange and green fit on a fall mantel from September to Thanksgiving.
Skill level. Easy to intermediate. You need a magic ring, sc, inc and dec in the round, plus basic sewing and embroidery. Nothing is hard. There are just more pieces to put together than in a one-piece pattern.
What you'll need
Yarn: worsted #4 acrylic, such as Red Heart Super Saver or Lion Brand Basic Stitch. Acrylic keeps its shape, holds a firm stuffing well and won't fade on a sunny shelf.
| Color | Used for | Amount |
|---|---|---|
| Orange | Pumpkin, hat, rib lines | about 150 yd (140–170 yd) |
| Black | Head, ears, paws | about 80 yd (70–90 yd) |
| Olive green | Leaf, vine | about 8 yd |
| Brown | Stem | about 5 yd |
| Coral pink | Inner ears, nose | about 4 yd |
| White | Eyes, whiskers | about 2 yd |
I worked those amounts out from the stitch counts, at about 2.2 inches of worsted yarn per single crochet, plus sewing tails. A 364-yd skein of orange covers the whole pumpkin and hat with plenty to spare.
Hook and notions
- 3.5 mm (US E-4) hook. It's smaller than the yarn label suggests, so the fabric is tight and the stuffing doesn't show through.
- About 4 oz (115 g) of polyester fiberfill.
- A stitch marker for the start of each round, plus 8 more for the pumpkin ribs.
- A tapestry needle with a large eye, a long doll needle (about 5 in) for the ribs, pins and scissors.
Gauge and finished size
Gauge isn't critical, but tension is. Your stitches should be tight enough that the stuffing doesn't peek through. As a check, Rnd 9 of the head (54 sc) should measure about 3.5 in (9 cm) across lying flat. If it's bigger, go down to a 3.25 mm hook.
Finished pumpkin cat: about 5.5 in (14 cm) wide and about 7.5 in (19 cm) tall to the tip of the stem. The pumpkin alone is about 4 in tall once the ribs are pulled in.
Abbreviations (US crochet terms)
- ch = chain
- sl st = slip stitch
- sc = single crochet
- hdc = half double crochet
- dc = double crochet
- inc = 2 sc in the same stitch
- dec = single crochet two together (I use the invisible decrease through the front loops)
- MR = magic ring
- st(s) = stitch(es)
- rnd(s) = round(s)
UK crocheters: this pattern uses US terms. US single crochet = UK double crochet, US half double = UK half treble, US double crochet = UK treble.
Work every piece in continuous spiral rounds, unless the pattern says to join. Don't join at the end of each round. Move your marker up to the first stitch of every new round.
The pieces at a glance
| Piece | Color | Make | Size |
|---|---|---|---|
| Pumpkin | orange | 1 | 84 sts at the widest, open at the top |
| Head | black | 1 | 54 sts at the widest |
| Hat | orange | 1 | 60-st brim |
| Ear | black | 2 | about 1.2 in tall |
| Inner ear | coral pink | 2 | about 0.8 in tall |
| Paw | black | 2 | about 1.4 in long |
| Stem | brown | 1 | about 1.8 in tall |
| Leaf | olive green | 1 | about 1.5 in long |
| Vine | olive green | 1 | a 30-st corkscrew |
The pattern — step by step
Part 1 — The pumpkin
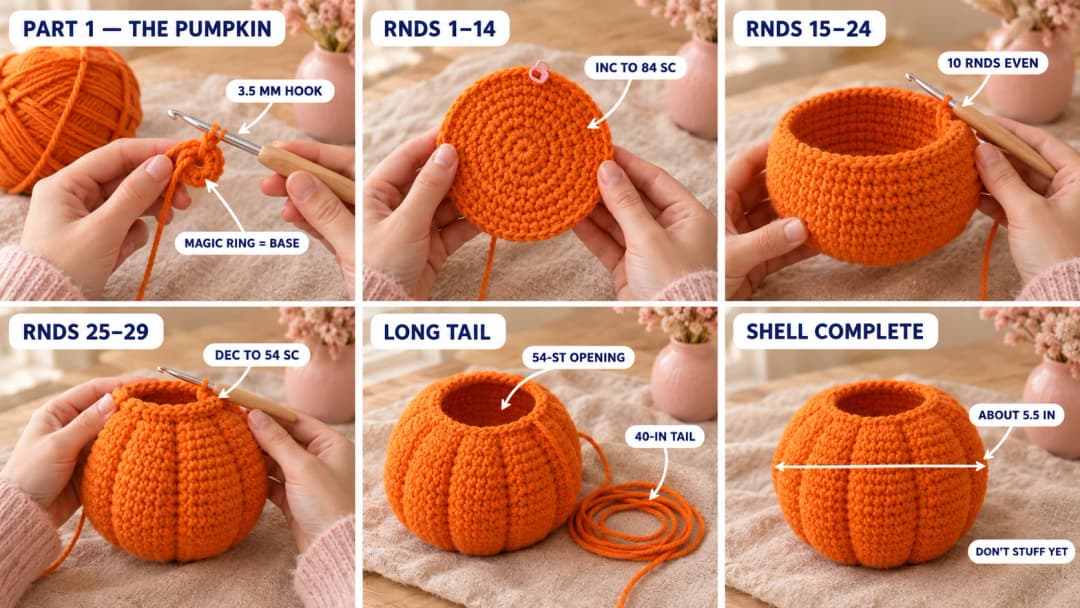
With orange. The magic ring is the base of the pumpkin, the part it sits on. The last round is the top opening, where the cat's head goes.
- Rnd 1: MR, 6 sc in the ring. Pull it closed tight. (6)
- Rnd 2: Inc in each st around. (12)
- Rnd 3: (Sc, inc) × 6. (18)
- Rnd 4: (2 sc, inc) × 6. (24)
- Rnd 5: (3 sc, inc) × 6. (30)
- Rnd 6: (4 sc, inc) × 6. (36)
- Rnd 7: (5 sc, inc) × 6. (42)
- Rnd 8: (6 sc, inc) × 6. (48)
- Rnd 9: (7 sc, inc) × 6. (54)
- Rnd 10: (8 sc, inc) × 6. (60)
- Rnd 11: (9 sc, inc) × 6. (66)
- Rnd 12: (10 sc, inc) × 6. (72)
- Rnd 13: (11 sc, inc) × 6. (78)
- Rnd 14: (12 sc, inc) × 6. (84)
- Rnds 15–24: Sc in each st around, 10 rounds. (84)
- Rnd 25: (12 sc, dec) × 6. (78)
- Rnd 26: (11 sc, dec) × 6. (72)
- Rnd 27: (10 sc, dec) × 6. (66)
- Rnd 28: (9 sc, dec) × 6. (60)
- Rnd 29: (8 sc, dec) × 6. (54)
Sl st in the next st and fasten off, leaving a 40-in (1 m) tail at the top opening. You'll use it to sew the pumpkin to the head. Don't stuff the pumpkin yet.
Tip: With a big ball like this, I stagger the increases. On every other round, I work half the plain stitches before the first increase, for example (1 sc, inc, 1 sc) instead of (2 sc, inc). The stitch count stays the same, and the pumpkin comes out round instead of hexagonal.
Part 2 — The head and face
With black. The magic ring is the crown of the head, which the hat will cover. The last round is the bottom of the head, which ends up hidden inside the pumpkin.
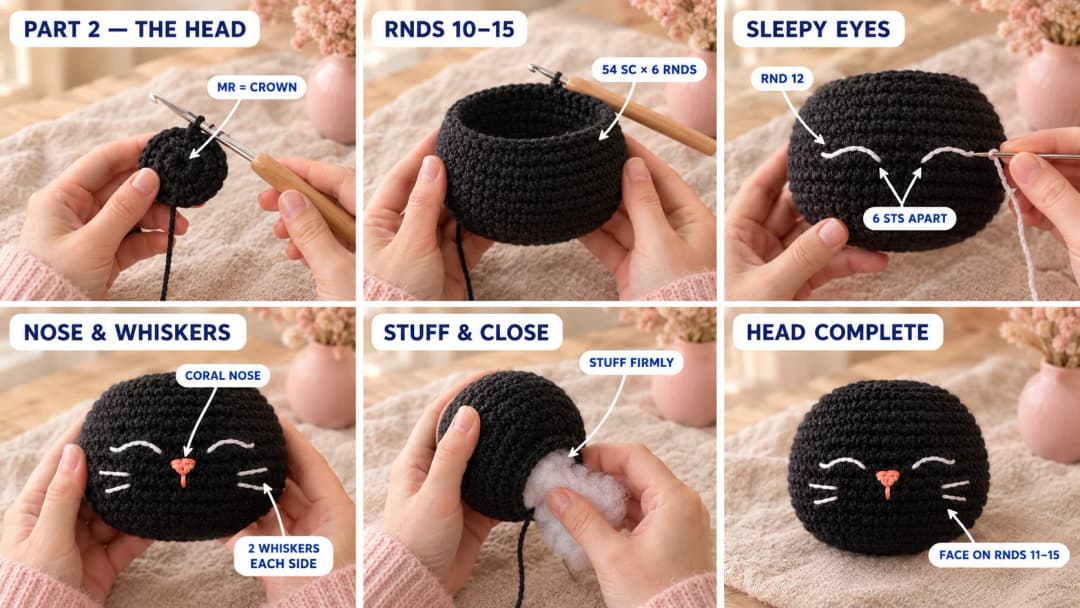
- Rnds 1–9: Work as for Rnds 1–9 of the pumpkin. (54)
- Rnds 10–15: Sc in each st around, 6 rounds. (54)
- Rnd 16: (7 sc, dec) × 6. (48)
- Rnd 17: (6 sc, dec) × 6. (42)
- Rnd 18: (5 sc, dec) × 6. (36)
Embroider the face now, while the head is still open and you can reach inside. Find the front of the head, opposite the start of your rounds so the jog is at the back.
- Eyes (white): On Rnd 12, stitch each eye as a gentle arc about 3 sts wide, like a closed, happy eye. Leave 6 sts between the two eyes. I use two backstitches per eye, then a couching stitch in the middle to curve the line.
- Nose (coral pink): Centered between the eyes, on Rnds 13–14. Make a small triangle with 3 or 4 straight stitches across 2 sts, then one short straight stitch down from its point.
- Whiskers (white): Two on each side, on Rnds 13–14. Start each one about 2 sts out from the nose and stitch it about 3 sts long, angling slightly out.
Knot all the ends inside the head. Then stuff firmly and keep going:
- Rnd 19: (4 sc, dec) × 6. (30)
- Rnd 20: (3 sc, dec) × 6. (24)
- Rnd 21: (2 sc, dec) × 6. (18)
- Rnd 22: (Sc, dec) × 6. (12)
- Rnd 23: Dec × 6. (6)
Top up the stuffing, then fasten off. Thread the tail through the front loops of the last 6 sts, pull the hole closed and weave the tail in.
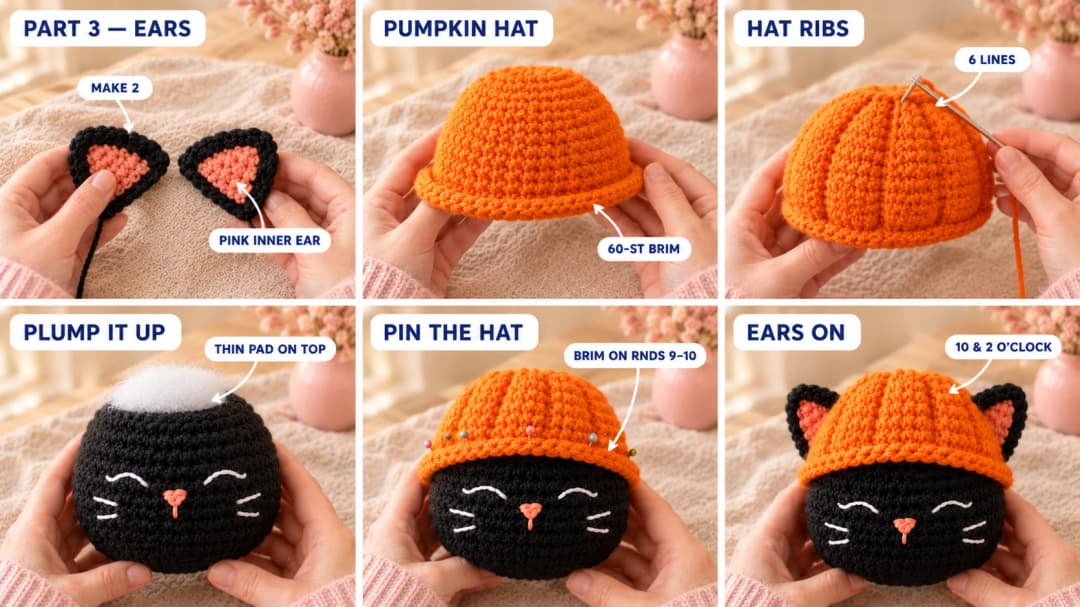
Part 3 — The ears and the pumpkin hat
Ears (make 2, black). The magic ring is the tip of the ear. The last round is its base, which you sew on.
- Rnd 1: MR, 4 sc in the ring. (4)
- Rnd 2: (Sc, inc) × 2. (6)
- Rnd 3: (Sc, inc) × 3. (9)
- Rnd 4: (2 sc, inc) × 3. (12)
- Rnd 5: (3 sc, inc) × 3. (15)
- Rnd 6: Sc in each st around. (15)
Fasten off, leaving a 12-in tail. Don't stuff. Flatten the ear into a triangle.
Inner ears (make 2, coral pink).
- Rnd 1: MR, 4 sc in the ring. (4)
- Rnd 2: (Sc, inc) × 2. (6)
- Rnd 3: (Sc, inc) × 3. (9)
Fasten off, leaving an 8-in tail. Flatten it, and sew it to the front of a black ear with a few small whipstitches. Keep its tip about one round below the tip of the black ear, so a thin black border shows all around.
Pumpkin hat (orange). The magic ring is the top of the hat, under the stem. The last round is the brim.
- Rnds 1–8: Work as for Rnds 1–8 of the pumpkin. (48)
- Rnd 9: (7 sc, inc) × 6. (54)
- Rnd 10: Sc in each st around. (54)
- Rnd 11: (8 sc, inc) × 6. (60)
- Rnd 12: Sc in each st around. (60)
Sl st in the next st and fasten off, leaving a 30-in tail. The last two rounds flare out a little, which gives the hat its rolled brim.
Pull in the hat ribs. Do this before the hat goes on, while you can still reach inside it. Thread a long orange strand on a tapestry needle and knot it inside the top center of the hat. Bring the needle out at the top center, take the yarn down the outside of the hat and push it through the brim to the inside. Then run it back up inside to the top center. Pull gently until the cap gathers into a soft dent. Repeat for 6 lines, about 10 sts apart around the brim, and knot the strand inside the top.
Put the hat on. Your head is a closed, stuffed ball. Lay a thin, flat pad of stuffing on top of its crown, like a small cushion. This makes the hat look plump, like a little pumpkin. Set the hat over it, slightly tipped forward, with the brim around Rnds 9–10 of the head. That leaves the face (Rnds 11–15) showing. Pin it, then sew the brim to the head all the way around with the 30-in tail.
Sew on the ears. Place each ear at the side of the head, its base right under the brim, at about 10 and 2 o'clock. Tilt the tips outward. Sew the base down with the black tail, going around it twice. Tack the inner corner to the edge of the brim so the ear pokes out from under the hat.
Part 4 — The stem, leaf, vine and paws
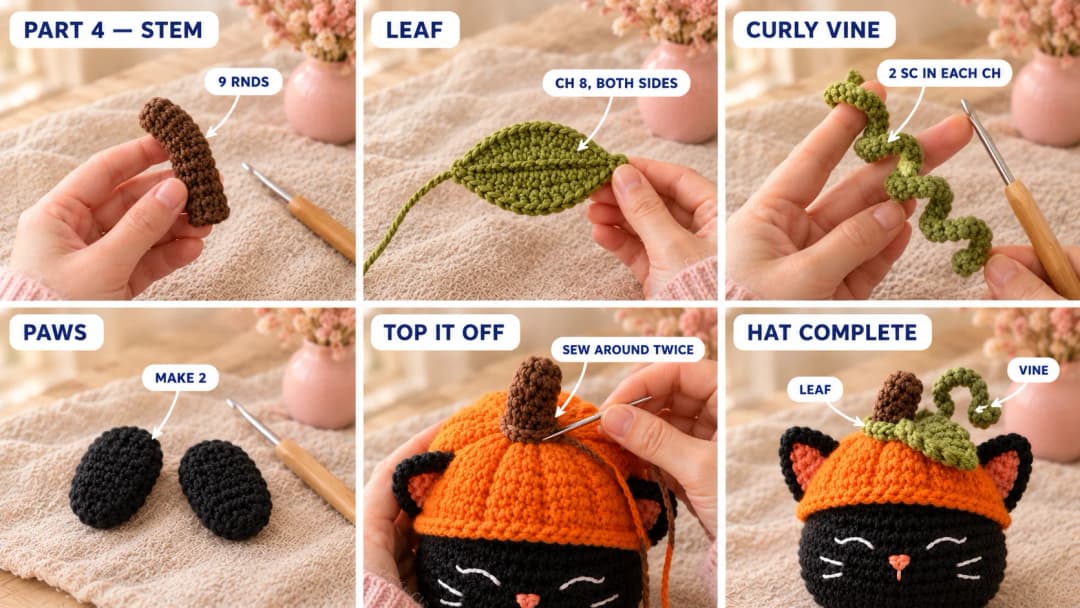
Stem (brown). The magic ring is the tip of the stem. The last round is its base.
- Rnd 1: MR, 6 sc in the ring. (6)
- Rnd 2: (Sc, inc) × 3. (9)
- Rnds 3–7: Sc in each st around, 5 rounds. (9)
- Rnd 8: (2 sc, inc) × 3. (12)
- Rnd 9: Sc in each st around. (12)
Fasten off, leaving a 12-in tail. Stuff lightly. Bend the tip slightly to one side.
Leaf (olive green). Ch 8. Starting in the 2nd ch from the hook: sl st, sc, hdc, dc, dc, hdc. Work 3 sc in the last ch. Now work along the other side of the chain: hdc, dc, dc, hdc, sc, sl st. (15 sts) Fasten off, leaving a 10-in tail.
Vine (olive green). Ch 16. Work 2 sc in the 2nd ch from the hook and in each ch across. (30 sc) Fasten off, leaving a 10-in tail. The extra stitches make the strip twist into a corkscrew. Roll it around your finger to set the curl.
Optional: for a vine that holds its curl, work the sc over a green pipe cleaner, and tuck its cut ends inside the stitches. This makes the piece decor only, not a toy for children under 3.
Paws (make 2, black). The magic ring is the rounded front of the paw. The last round is the end you sew to the pumpkin rim.
- Rnd 1: MR, 6 sc in the ring. (6)
- Rnd 2: Inc in each st around. (12)
- Rnd 3: (Sc, inc) × 6. (18)
- Rnds 4–7: Sc in each st around, 4 rounds. (18)
- Rnd 8: (Sc, dec) × 6. (12)
Stuff lightly, so the paw stays soft and oval. Flatten the opening and sew it closed with the tail, leaving the tail long for sewing it on.
Finish the hat. Sew the stem to the top center of the hat with its tail, going around its base twice. Sew the leaf next to the stem, tilted toward the front. Sew one end of the vine at the base of the stem, on the other side, and let its curl stand up.
Part 5 — Put it together
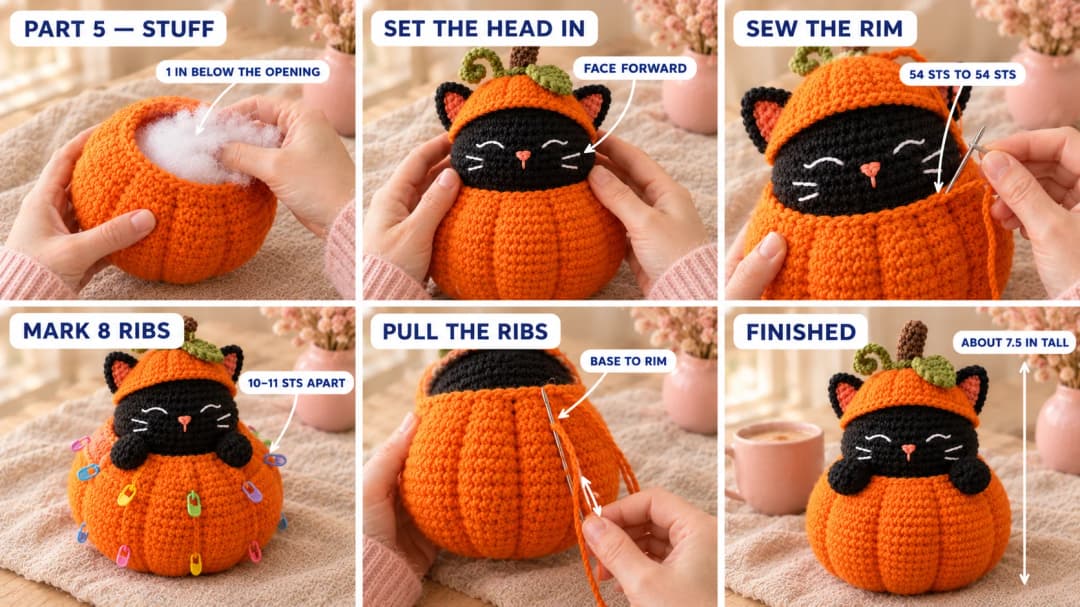
- Stuff the pumpkin. Fill it firmly, up to about 1 in (2.5 cm) below the opening. Shape it as you go, so it's round and wide, not tall.
- Set the head in. Push the bottom of the head into the opening, until Rnd 15 of the head (the last 54-st round) lines up with the edge of the pumpkin. The face should look straight ahead.
- Sew the pumpkin to the head. With the 40-in orange tail, sew the 54 sts of the opening to the 54 sts of head Rnd 15, one stitch to one stitch. Before you close the last third, add stuffing around the head through the gap, so the pumpkin stays plump.
- Sew on the paws. Place them on the front of the pumpkin rim, on either side of the face, a little below the chin. The sewn end goes over the rim, and the rounded front hangs down onto the pumpkin. Sew each one with its tail along the top and the sides, going deep into both the pumpkin and the head.
- Mark the pumpkin ribs. Place 8 markers around Rnd 20 of the pumpkin, about 10–11 sts apart. Put one directly under the face and one at the back.
- Pull in the ribs. Thread a long orange strand on the doll needle. Bring it out at the base center (the magic ring). Push the needle up through the stuffing and out at the rim, just under the seam, in line with marker 1. Take the yarn down the outside, past the marker, and back into the base center. Pull until a clear dent forms. Do the same for all 8 markers, pulling each line with the same tension. Knot the strand at the base and bury the end.
Press the bottom of the pumpkin on the table a few times so it sits flat. That's it: your cat is home.
Care and safety. The face is embroidered, so there are no hard parts unless you add the pipe cleaner to the vine. Still, this is a decorative piece with many small sewn-on parts. It isn't designed as a toy for babies. To clean it, spot wash with a damp cloth and mild soap, and let it air dry.
Make it yours — quick variations
| Variation | Change from base pattern |
|---|---|
| Ginger cat | Make the head, ears and paws in orange-brown, and the pumpkin in cream for a white-pumpkin look. |
| Open eyes | Use 9 mm safety eyes on Rnd 12, 6 sts apart, fitted before stuffing. Not for children under 3. |
| Tuxedo cat | Add a small white oval on the chin, crocheted as Rnds 1–3 of the paw and sewn flat. |
| Mini pumpkin cat | Use DK yarn and a 2.5 mm hook. Same rounds, about 4 in wide. |
| Fall bundle | Make a few crochet acorns to sit around it on the mantel. |
Troubleshooting the three things that go wrong
The head won't stay straight in the pumpkin
The pumpkin isn't stuffed firmly enough, so the head sinks and tips. Pull out the last few seam stitches, add stuffing under the head through the gap, and sew it closed again. Pinning the head at the front, back and sides before you sew also helps.
The ribs look weak
Pull each line harder, and use the same tension on all 8. If a dent still won't hold, take the yarn through the base center and back up twice on the same line. A firmly stuffed pumpkin gives deeper ribs than a soft one.
The hat covers the eyes
The brim is sitting too low. Before you sew, check that the brim is at Rnds 9–10 of the head, and that you can see all of Rnd 11 above the eyes. Add a little more stuffing under the crown of the hat to lift it.
Frequently asked questions
How long does the pumpkin cat take? About 8 to 10 hours in total. The pumpkin takes about 3 hours, the head about 2, and the hat, ears, paws and small parts about 2 more. Plan another 1 to 2 hours for the face, sewing and pulling in the ribs.
How much yarn do I need? About 245 yd (225 m) of worsted #4 yarn: about 150 yd of orange, 80 yd of black and small amounts of green, brown, coral pink and white. One skein of orange and one of black are plenty, with yarn left over.
Can I make it with safety eyes instead? Yes. Use 9 mm safety eyes on Rnd 12 of the head, 6 sts apart, and fit them before you stuff. I like the embroidered sleepy eyes because they match the cozy look, and they're one less thing to buy.
Is this pattern good for beginners? It's a good second amigurumi. Every piece is single crochet in the round, but there are several pieces to sew. If it's your first one, start with my easy crochet pumpkin, then come back to this cat.
Can I sell pumpkin cats made from this pattern? Yes, you're welcome to sell finished pumpkin cats made from this free pattern at markets, on Etsy or as gifts. Please credit "Pattern by Wavode" in your listing and link back to this page. What you can't do is republish this write-up or my photos as your own pattern.
Related patterns on Wavode
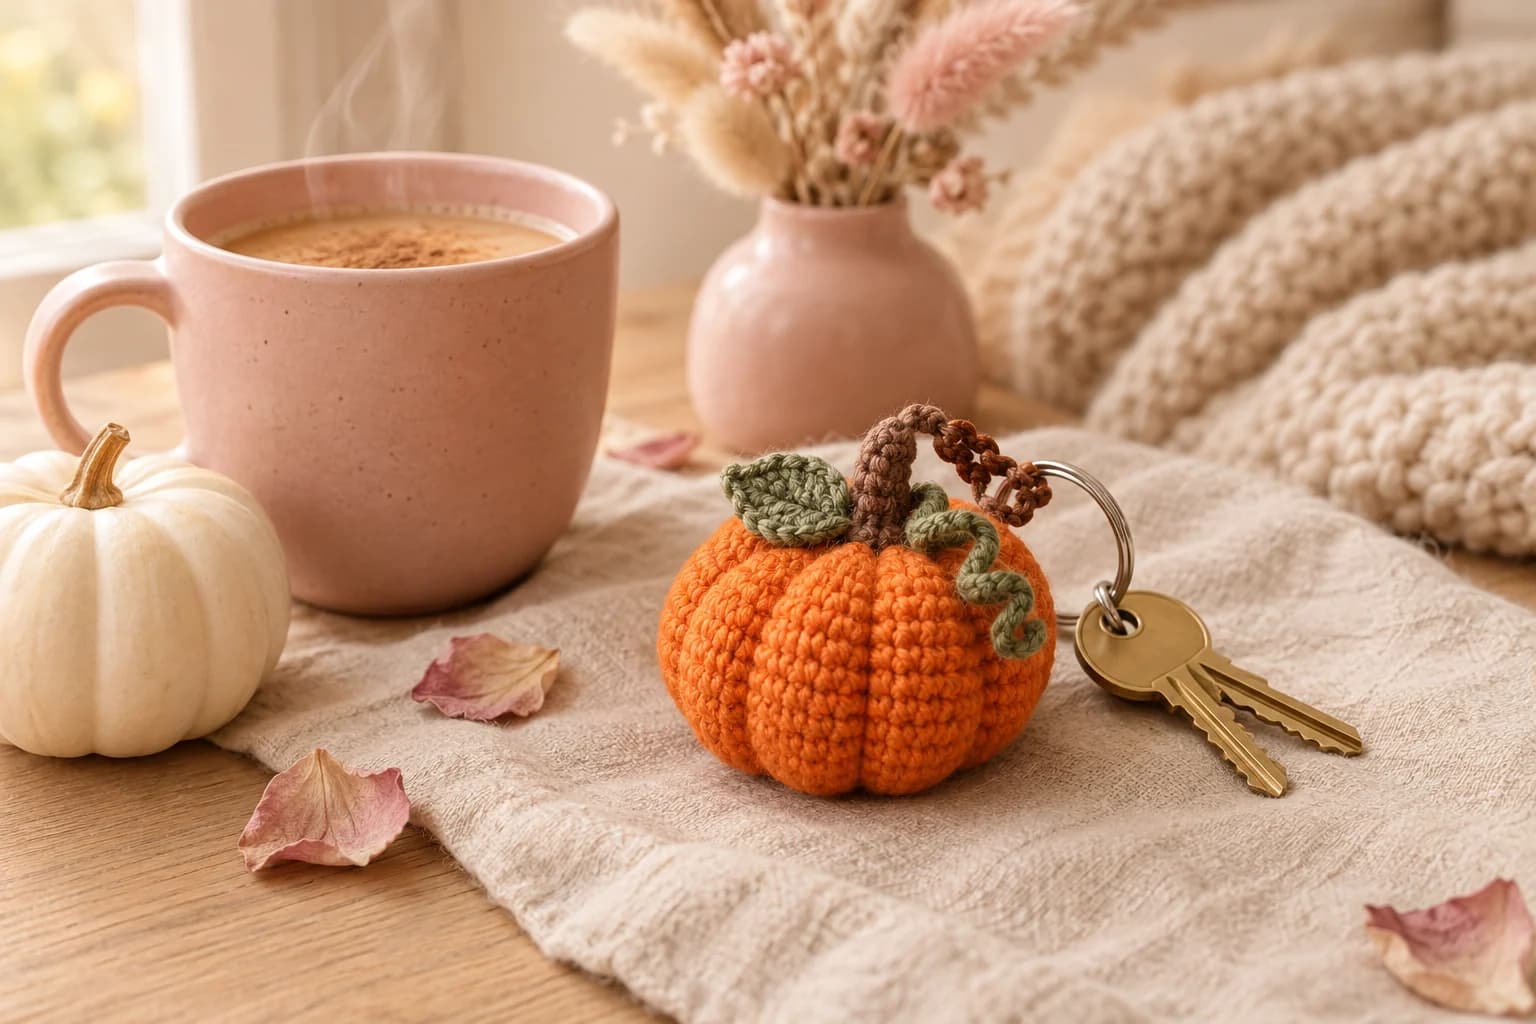
- How to crochet a pumpkin: a simple ribbed pumpkin from a folded rectangle.
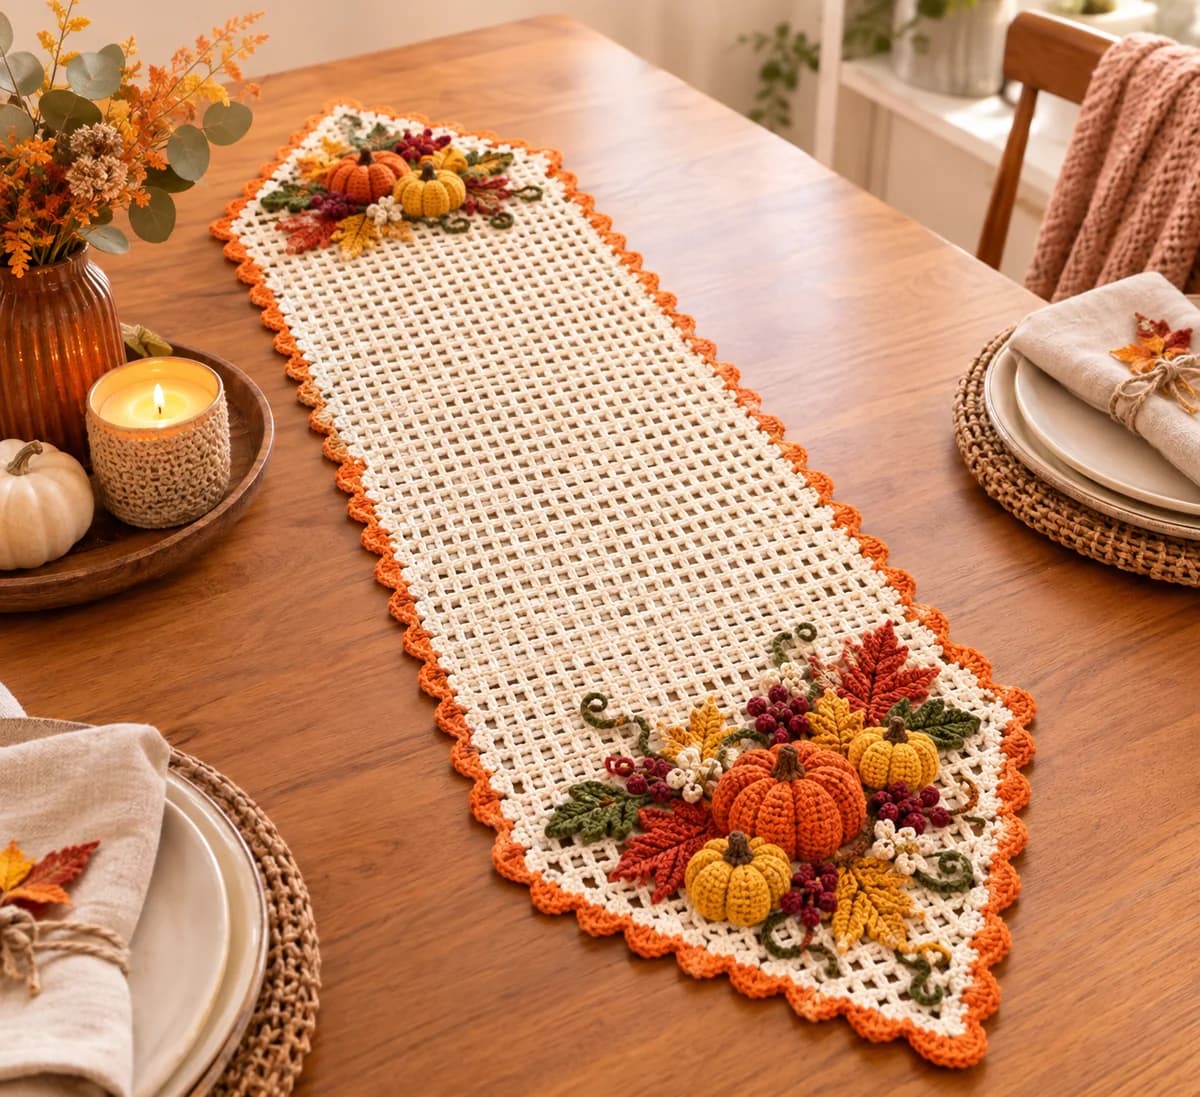
- Pumpkin table runner: a cream filet runner with pumpkins and maple leaves.
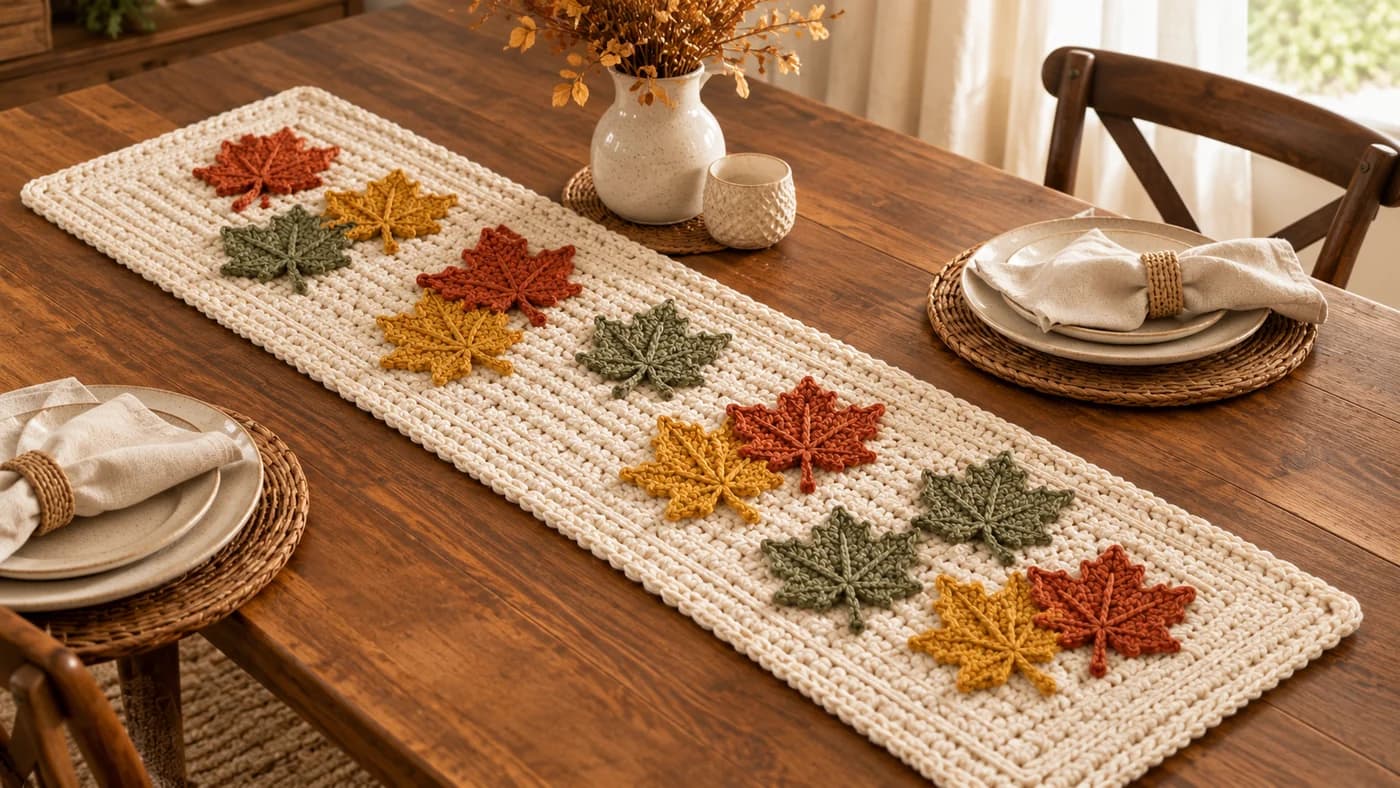
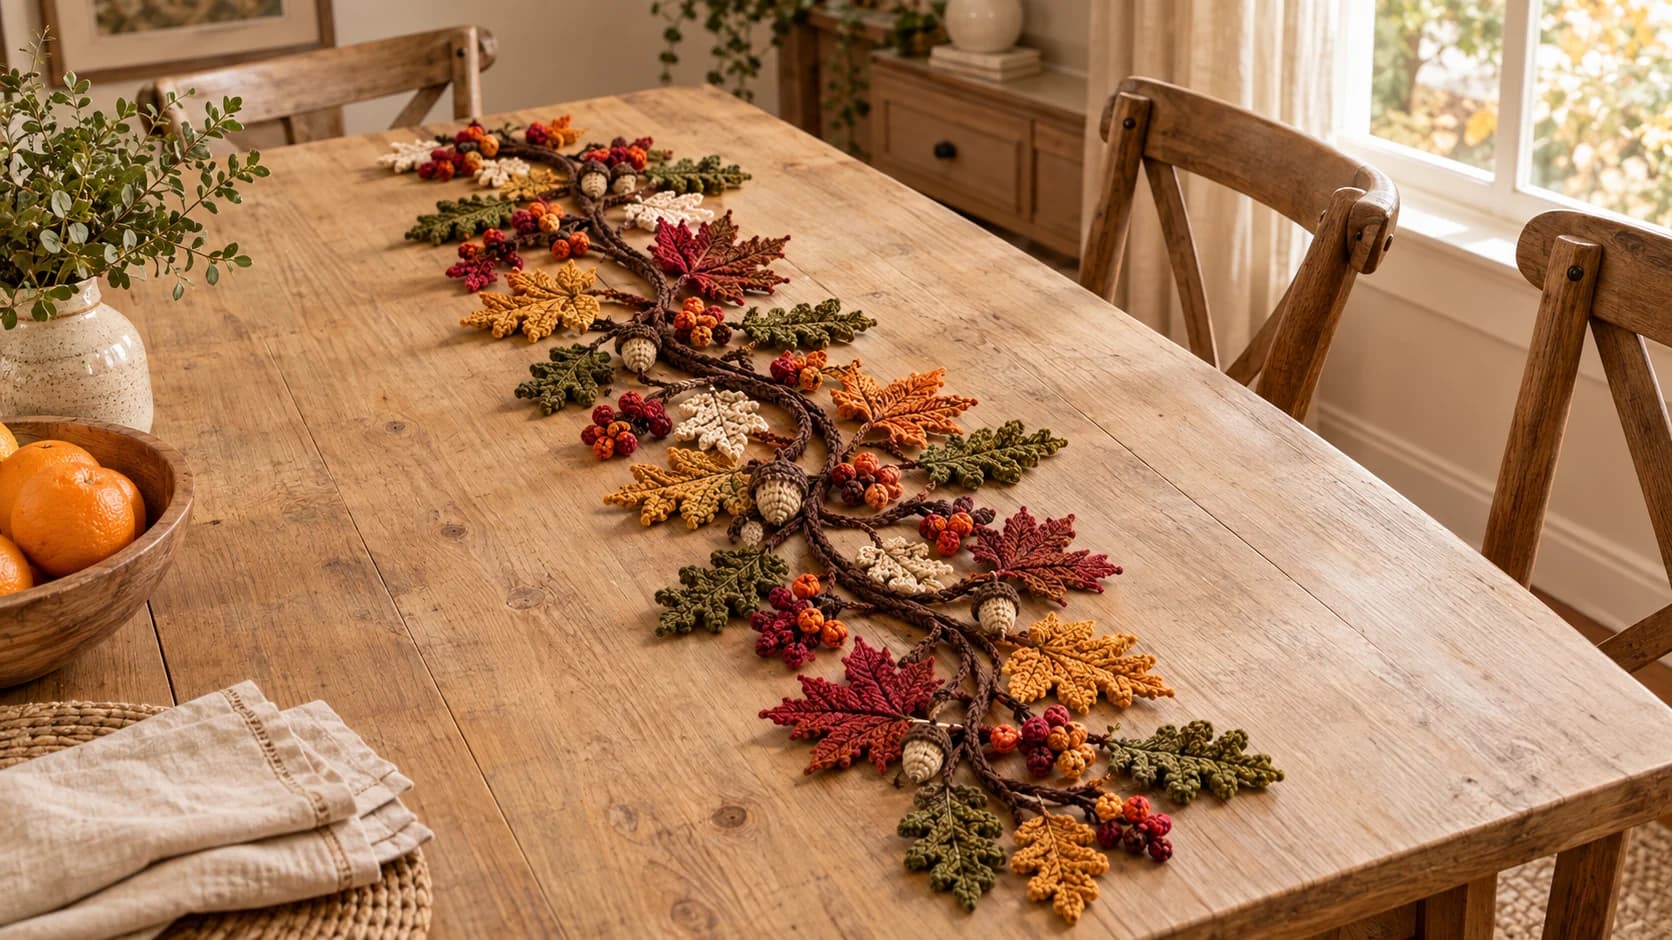
- Autumn leaves table runner: a garland of fall leaves for the table.
- Crochet amigurumi acorns: tiny acorns to scatter around your pumpkin cat.
- Fox mini amigurumi: another small fall animal to keep it company.
Made a pumpkin cat? Tag #wavodecrochet on Pinterest. I re-pin every finished make and credit the maker.
Pattern by Clara Hartwell for Wavode. Questions? Email me at support@wavode.com.