Easy Crochet Christmas Tree Ornament


This easy crochet Christmas tree ornament is one long strip of single crochet that you swirl around a paper cone. A craft wire hidden in the last row holds the swirl, so the tree keeps its shape on the branch. A little tan star sits on top, and a gold bead hangs from the center. You need about 60 yards of worsted cotton in two colors, a 4 mm hook, some craft wire and 2.5 to 3 hours.
Key Takeaways
- Only single crochet: four rows along a long chain make the whole tree.
- The wire goes in the last row. You crochet right over it, so it's hidden inside the stitches.
- A paper cone shapes the swirl. Wrap the strip around it, then slide the cone out.
- About 60 yd (55 m) of worsted #4 cotton: about 50 yd cream for the tree and 10 yd tan for the star and loop.
Why I love this swirl tree
I like ornaments that look fancy but are really simple to make. This tree is just four rows of single crochet. The swirl comes from the shaping, not from the stitches. In cream with a tan star, it looks calm and cozy on a green tree, and it catches the light beautifully between the coils.
The wire is what makes it work. On its own, a crochet strip would hang down like a ribbon. With the wire hidden in the top edge, every coil stays where you put it. You can also bend it back into shape if it gets squashed in the ornament box.
It's a good one to make in batches for gifts. Make the strips on the sofa, then shape a few trees at once on the same paper cone. Doesn't a little row of cream trees sound like the perfect Christmas gift?
Skill level. Easy. You need a chain, single crochet, a magic ring, hdc and dc for the star, and a little sewing.
What you'll need
Yarn: worsted #4 cotton, such as Lily Sugar 'n Cream or Paintbox Yarns Cotton Aran. Cotton has a crisp stitch and holds the swirl better than soft acrylic.
| Color | Used for | Amount |
|---|---|---|
| Cream (or off-white) | Tree strip | about 45–50 yd |
| Tan (or camel) | Star and hanging loop | about 8–10 yd |
I worked those amounts out from the stitch counts, plus the tails for sewing.
Hook and notions
- 4 mm (US G-6) hook.
- 16-gauge (1.3 mm) aluminum craft wire, about 40 in (1 m). It bends by hand but holds its shape.
- Small pliers to fold the wire ends. Round-nose or flat-nose pliers both work.
- One sheet of cardstock and some tape, for the cone.
- One 10–12 mm gold bead (or a small gold jingle bell) and about 12 in of strong beige thread or clear nylon thread.
- Sewing pins or mini clothespins, a tapestry needle and scissors.
- Optional: spray starch, for an extra crisp swirl. Skip it if you don't have any.
Gauge and finished size
Gauge: about 18 sc = 4 in (10 cm). Gauge isn't critical here, but tight, firm stitches give the best swirl. Four rows of sc make a strip about 0.9 in (2.3 cm) wide.
Finished size: about 9.5 in (24 cm) tall from the bottom coil to the top of the star, and about 3.5 in (9 cm) across the bottom. You set the final height yourself when you space the coils, so measure your first one.
Abbreviations (US crochet terms)
- ch = chain
- sl st = slip stitch
- sc = single crochet
- hdc = half double crochet
- dc = double crochet
- MR = magic ring
- st(s) = stitch(es)
- rnd(s) = round(s)
UK crocheters: this pattern uses US terms. US single crochet = UK double crochet, US hdc = UK half treble, and US dc = UK treble.
The pieces at a glance
| Piece | Color | Make |
|---|---|---|
| Tree strip with wire | Cream | 1 |
| Star | Tan | 2 |
| Hanging loop | Tan | 1 |
| Center bead | Gold bead on thread | 1 |
The pattern — step by step
Part 1 — The tree strip
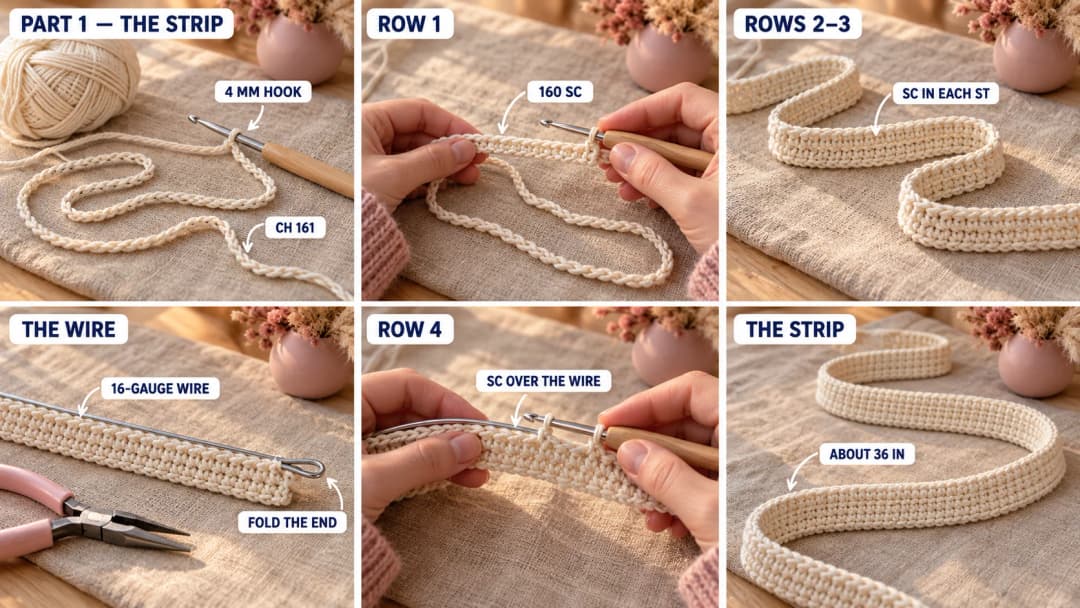
The strip has two ends. The end where you start the chain (with the starting tail) is the top of the tree. The other end is the bottom.
With cream, leave an 8-in starting tail.
- Ch 161.
- Row 1: Sc in the 2nd ch from the hook and in each ch across. (160 sc)
- Rows 2–3: Ch 1, turn. Sc in each st across. (160 sc)
You're now back at the top end, next to the starting tail. Don't fasten off.
Get the wire ready. Cut 40 in (1 m) of craft wire. With the pliers, fold the first ½ in back on itself and pinch it flat, so the end is blunt and can't poke out.
- Row 4 (over the wire): Ch 1, turn. Lay the wire along the top edge of Row 3, with the folded end at the first st. Work 1 sc in each st across, inserting the hook under the wire each time, so every stitch wraps around it. (160 sc)
Push the stitches together along the wire as you go, so they sit snug. When you reach the end, trim the wire ½ in past the last st, fold that ½ in back with the pliers and pinch it flat. Tuck the fold into the last few stitches.
Fasten off, leaving an 8-in tail. Use it to sew a few stitches over the folded wire end at the bottom, then weave it in. Do the same at the top with the starting tail, but don't cut it: you'll use it in Part 3.
Your strip is about 36 in (91 cm) long, with the wire hidden along one edge.
Part 2 — Swirl it around a paper cone
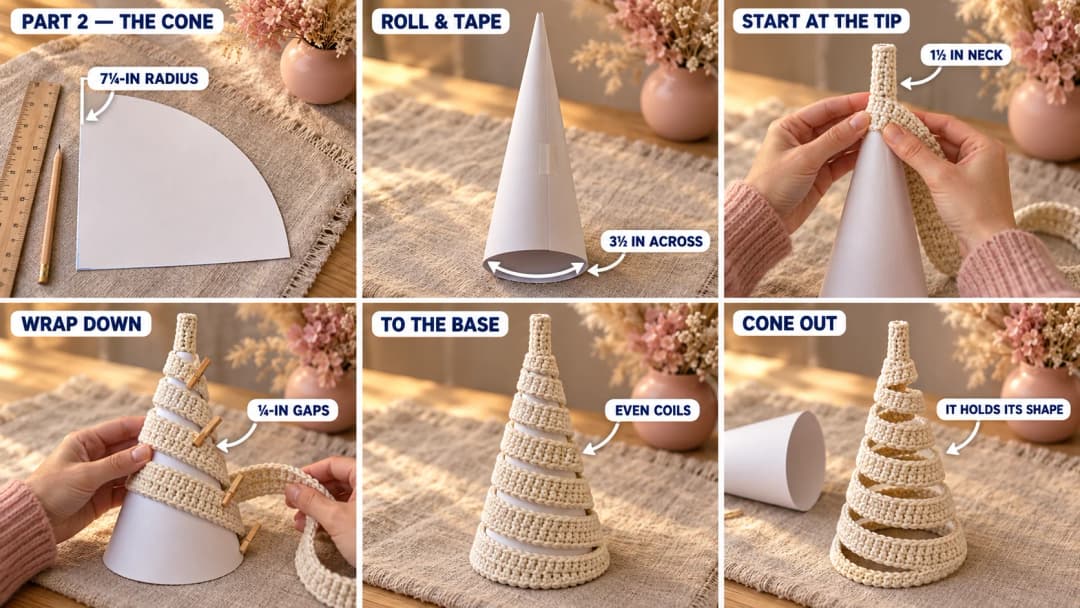
Make the cone. On the cardstock, draw a quarter circle with a 7¼-in (18.5 cm) radius: put a ruler at one corner and mark 7¼ in all along the curve. Cut it out and roll it into a cone, with the open end about 3½ in (9 cm) across. Tape the seam.
Wrap the strip. Keep the wire edge at the top of every coil, so the strip hangs from it.
- Hold the top end of the strip against the cone, about ¾ in below the tip. Let 1½ in of strip stand straight up above the tip. That's the neck under the star.
- Wrap the strip around the cone, going down, so it forms a swirl.
- Leave a gap of about ¼ in (6 mm) between the coils. Keep the gaps even.
- Pin or clip each coil to the cone as you go.
- Adjust the gaps so the bottom end of the strip finishes right at the base of the cone. Wider gaps make a taller tree; smaller gaps make a shorter one.
Set the shape. Press each coil gently against the cone with your fingers, so the wire takes the curve. Optional: mist the strip with spray starch and let it dry on the cone.
Slide the cone out. Take out the pins. Hold the tree by the neck and push the cone out from the tip, through the bottom. Then adjust any coil that moved with your fingers.
Part 3 — The star, loop, bead and finishing
Star (tan, make 2).
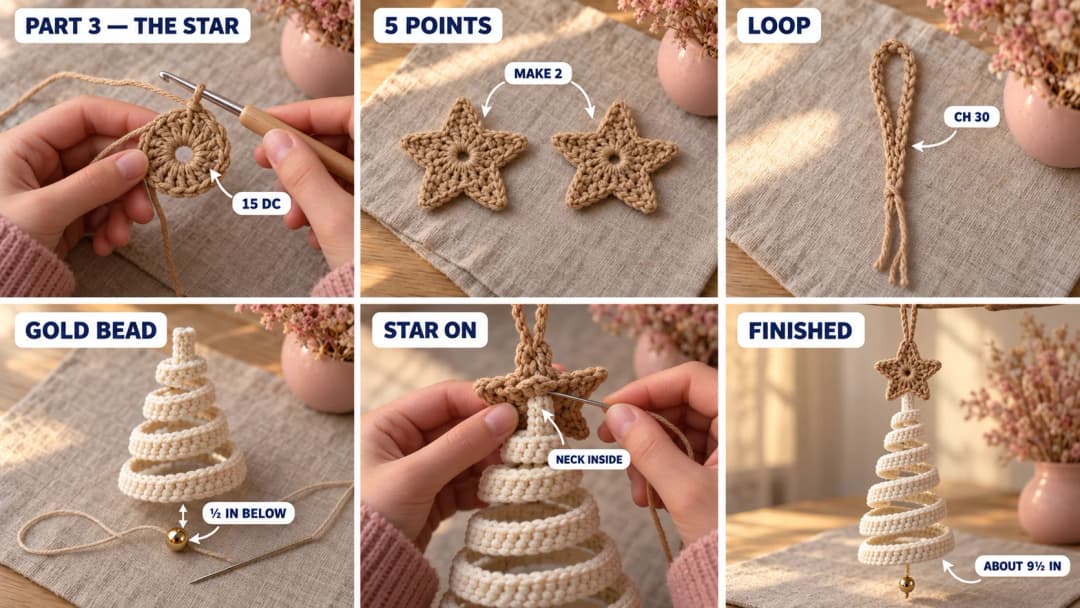
- Rnd 1: MR, ch 3 (counts as a dc), 14 dc in the ring. Pull the ring closed and join with a sl st to the top of the ch 3. (15 dc)
- Rnd 2 (points): Ch 4, sc in the 2nd ch from the hook, hdc in the next ch, dc in the next ch, skip the next 2 sts of Rnd 1, sl st in the next st. Repeat from * to * 4 more times. (5 points) The last sl st lands in the join.
Fasten off the first star and weave in the ends. Fasten off the second star leaving a 12-in tail. Each star is about 2 in (5 cm) across.
Hanging loop (tan). Leave a 6-in starting tail, ch 30, and fasten off leaving a second 6-in tail. Fold the chain in half: you get a loop about 2.5 in long, with both tails at the bottom.
Center bead. Thread the gold bead onto the beige thread and tie it on with a double knot at one end. Thread the other end onto a needle. Push the needle up through the middle of the tree, from the bottom to the neck. Sew the thread to the inside of the neck with a few small stitches, so the bead hangs about ½ in below the bottom coil. Knot and trim.
Put the star on.
- Lay the two stars on top of each other, wrong sides facing, with their points lined up.
- Slide the top ¾ in of the neck between them, from the bottom, so it sits behind the center ring. Then slide the two loop tails between them, at the top point.
- Use the 12-in tail to whipstitch all around the edges of the stars, through both layers.
- Sew a few stitches through the center of the star, going through the neck and the loop tails, so they can't slide out.
- Tie off inside the star. Weave in the cream starting tail along the neck, and trim all the ends.
Check the hang. Hold the tree by its loop. If it leans, gently bend the coils on the heavy side up a little, or move the bead thread closer to the center of the neck.
Safety and care. This is a decoration, not a toy. The wire ends and the small bead make it unsafe for children under 3 and for pets. If it gets dusty, spot-clean it with a damp cloth. Don't put it in the washing machine, because the wire can bend or poke out.
Make it yours — quick variations
| Variation | Change from base pattern |
|---|---|
| Green tree | Make the strip in forest green and the star in mustard yellow, for a classic look. |
| Gold edge | Work Row 4 (over the wire) in a gold or tan yarn. The edge of every coil gets a thin gold line. |
| Mini tree (about 5 in) | Ch 73 for 72 sc and work only 3 rows, with the wire in Row 3. Use a cone with a 4¼-in radius. |
| Star topper only | Skip the bead and tie the tree to a gift with its loop as a package topper. |
| Tree garland | Make 5 or 6 mini trees and tie them along a length of jute, about 6 in apart. |
Troubleshooting the three things that go wrong
The strip twists before you add the wire
The foundation chain is tighter than your single crochet, so the strip curls. Make the chain with a 5 mm hook, then switch to the 4 mm hook for Row 1. The wire straightens out any small twist in Row 4.
The coils sag after the cone comes out
The coils weren't pressed onto the cone, or the wire is too soft. Put the tree back on the cone and press each coil firmly. Spray starch also helps. If it still sags, use a slightly thicker wire, such as 14-gauge, for your next tree.
The tree hangs crooked
The coils aren't even, so one side is heavier. Check the gaps and bend the low side up a little. Also check that the bead thread is sewn in the middle of the neck, not on one side.
Frequently asked questions
How long does this tree take? About 2.5 to 3 hours. The strip takes most of that, because it's 4 rows of 160 sc. The cone, the star and the finishing take about 30 minutes more.
How much yarn do I need? About 60 yd (55 m) of worsted #4 cotton per tree: about 45–50 yd of cream for the strip and 8–10 yd of tan for the two stars and the loop.
Can I make it without wire? Yes, with a fabric stiffener instead. Soak the strip, wrap it on the cone and let it dry for a full day. It holds well at first, but it can soften in a humid room. The wire keeps the swirl for years and lets you reshape it.
Is this ornament safe for kids? Not for children under 3 or for pets, because of the wire ends and the small bead. For a home with a toddler, hang it high on the tree. Always fold the wire ends and sew over them, as in Part 1.
Can I sell trees made from this pattern? Yes, you're welcome to sell finished trees made from this free pattern at markets, on Etsy or as gifts. Please credit "Pattern by Wavode" in your listing and link back to this page. What you can't do is republish this write-up or my photos as your own pattern.
Related patterns on Wavode
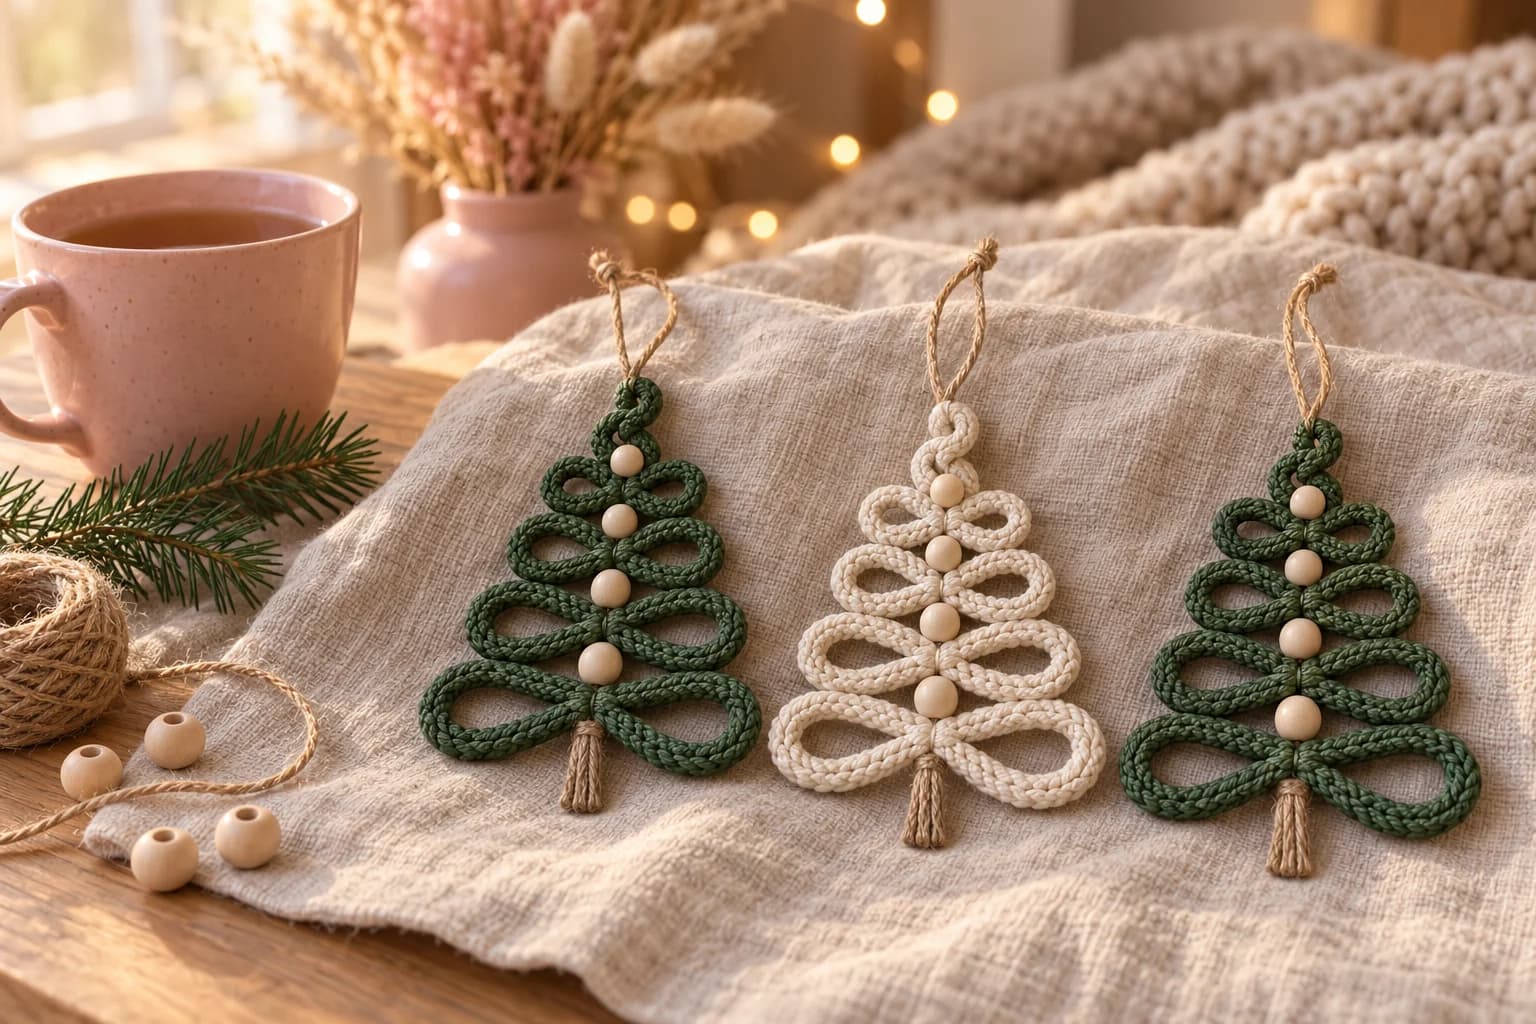
- Crochet spiral Christmas tree: a looped cord ornament with wooden beads.
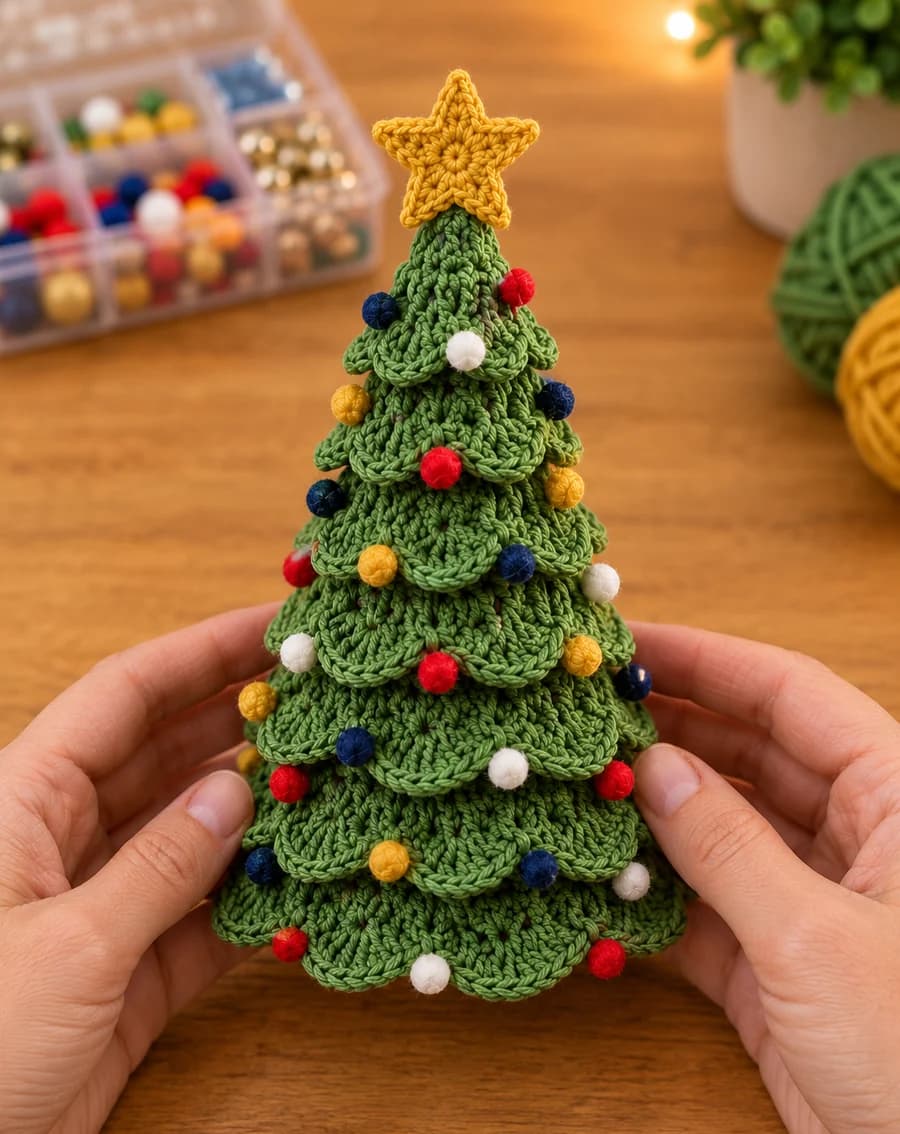
- Crochet Christmas tree decorations: a scalloped tabletop tree on a paper cone.
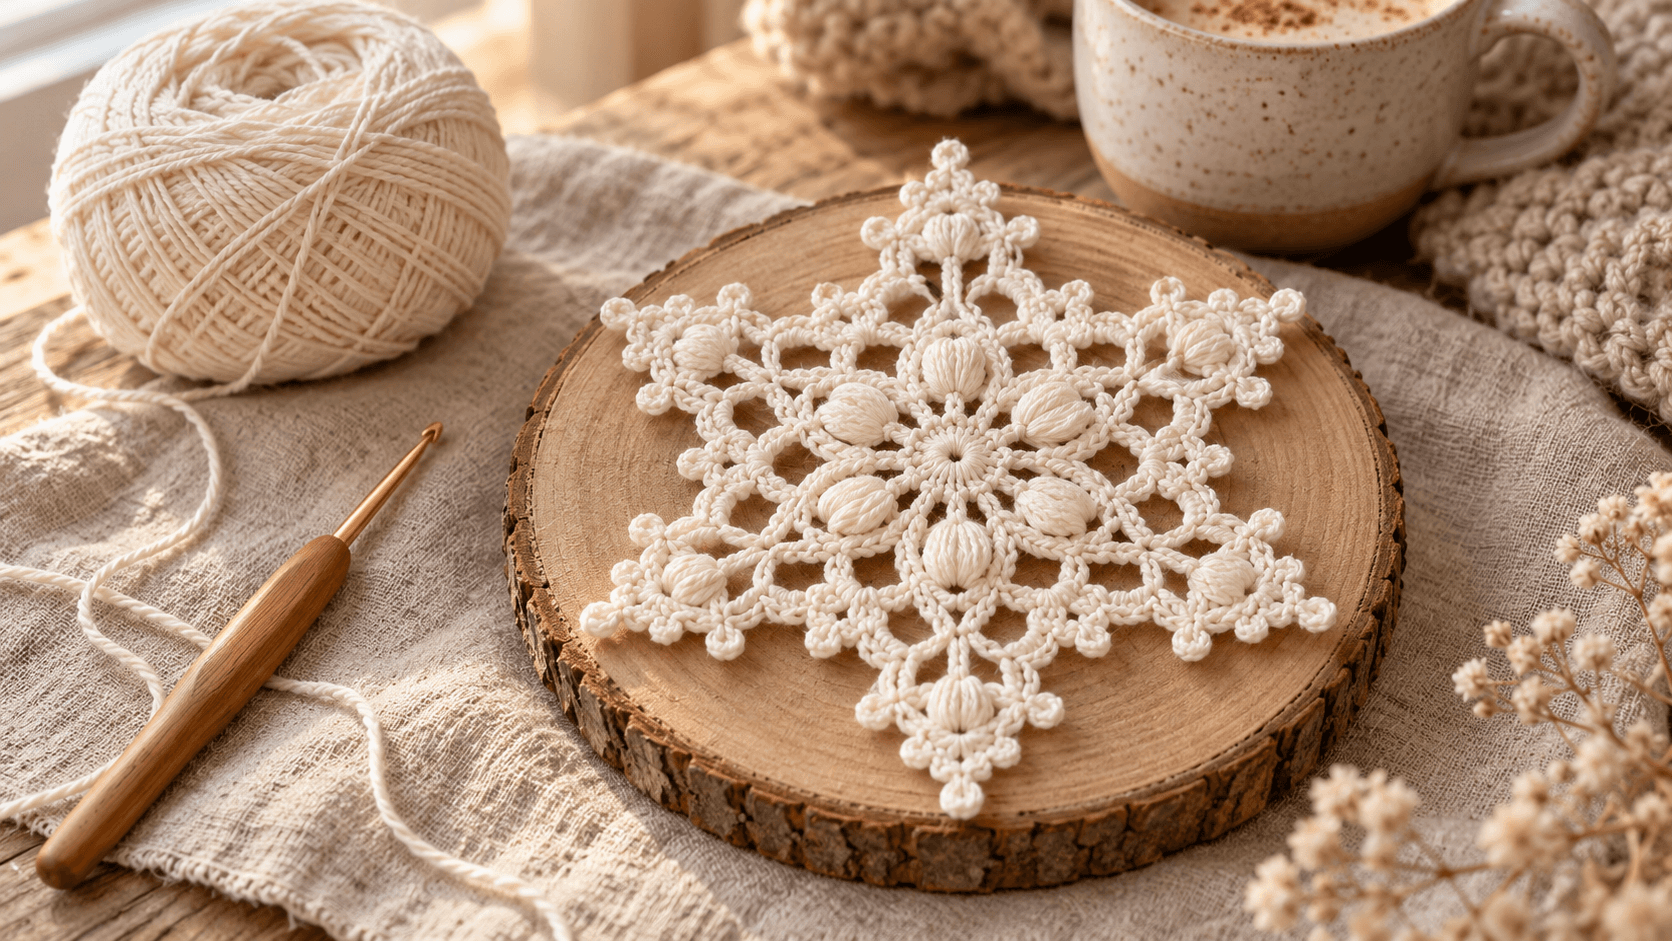
- Snowflake crochet pattern: a puff stitch snowflake ornament.
- Snowman keychain: a mini snowman with a top hat and scarf.
- Crochet Christmas gnome: a cozy gnome with a long hat and a fluffy beard.
Made a swirl tree? Tag #wavodecrochet on Pinterest. I re-pin every finished make and credit the maker.
Pattern by Clara Hartwell for Wavode. Questions? Email me at support@wavode.com.