Cute Crochet Top

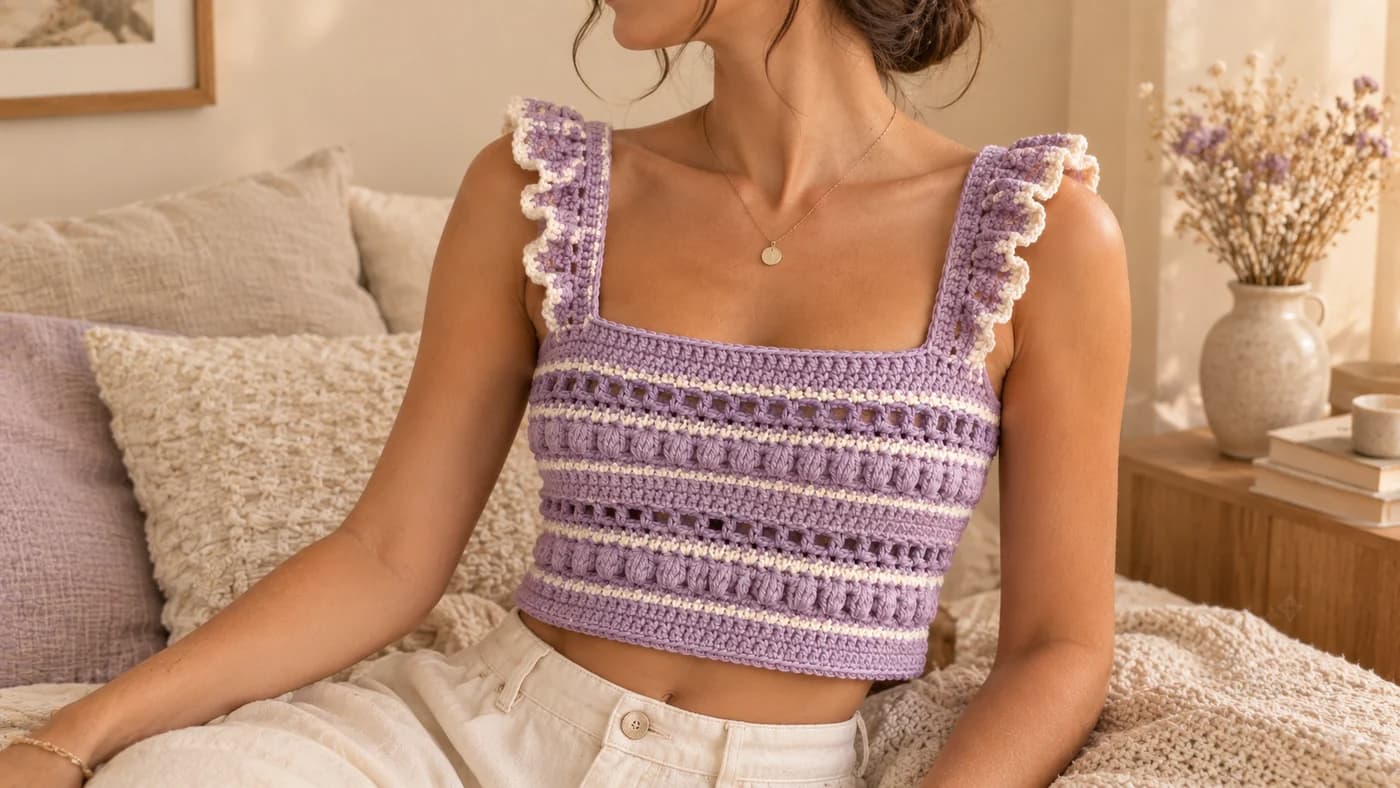
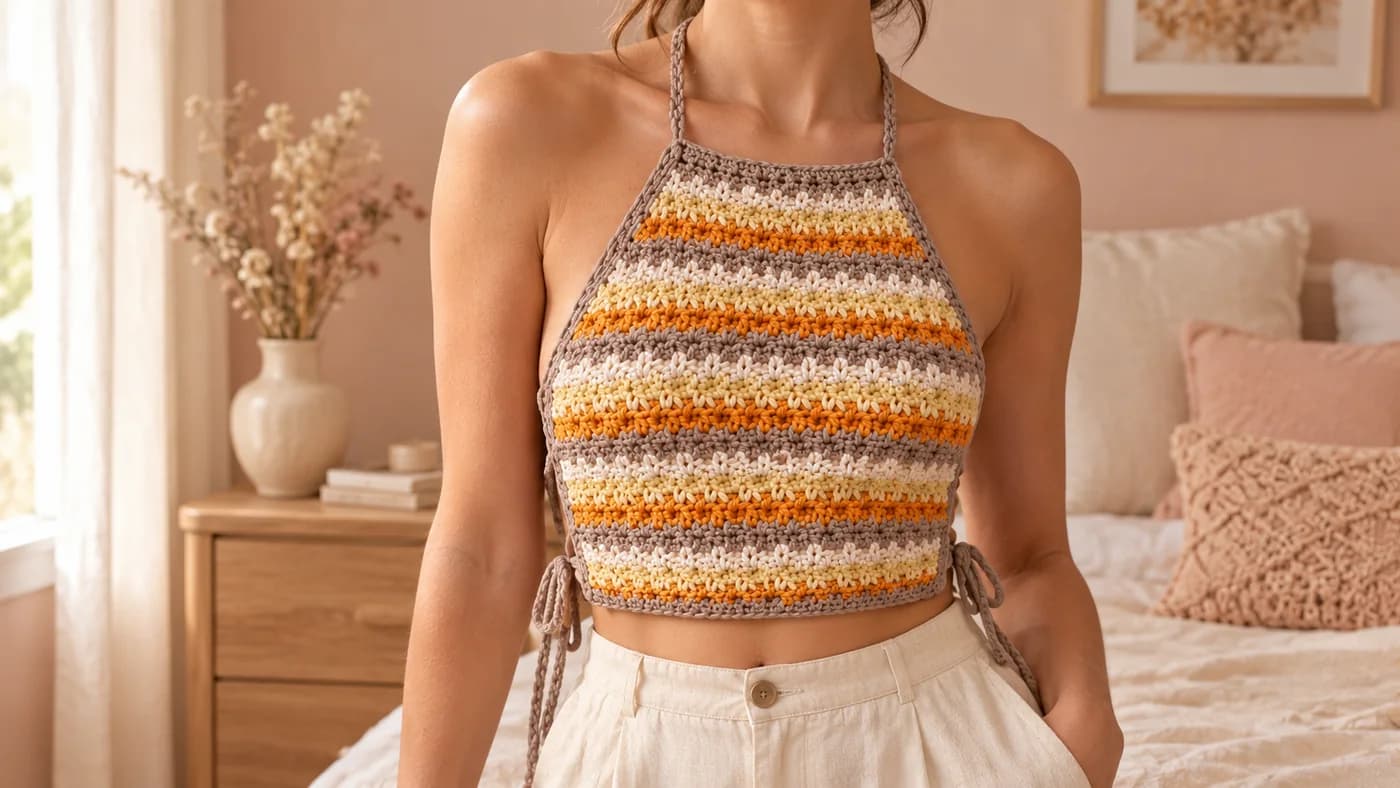
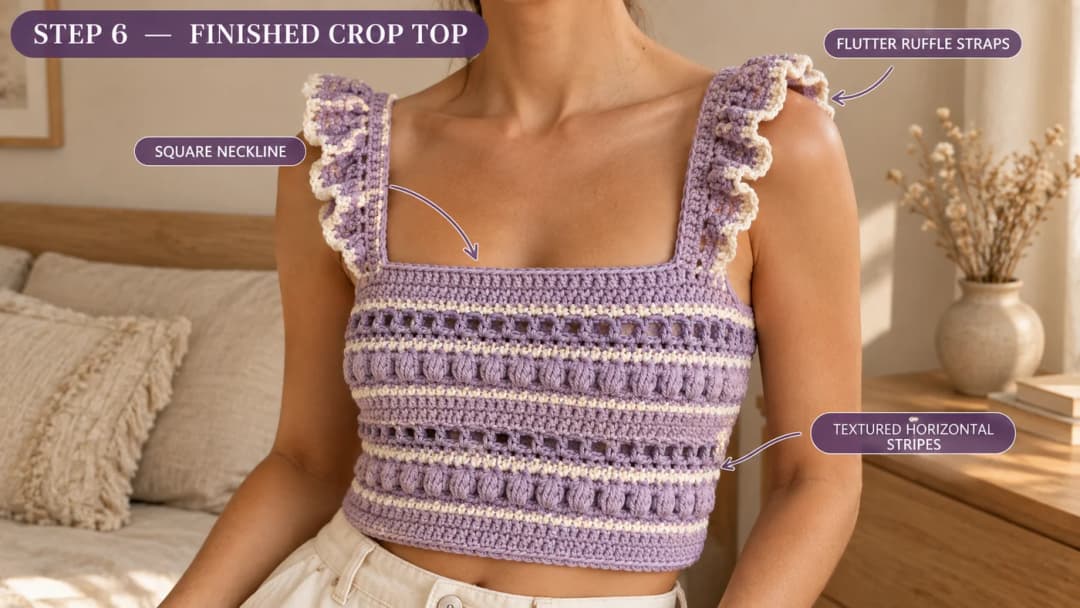
This free cute crochet top pattern makes a striped crop top with a square neckline and two ruffled straps that flutter over the shoulders. The body is one tube worked in the round, so there are no side seams. A 6-round stripe repeats up the body: a row of puff stitches and a row of little mesh eyelets, framed by thin cream lines and solid double crochet. The straps grow straight up from the top edge. You'll need DK #3 cotton in 2 colors, a 4 mm hook and about 520 yards for size S. It comes in 5 sizes, XS to XL.
Key Takeaways
- One piece: a seamless tube with two straps worked straight up from its top edge.
- A 6-round stripe repeat that adds about 2 in (5 cm) of length each time.
- Budget 475–735 yd (435–670 m) of DK #3 cotton in total, in 2 colors.
- The square neckline is free: the top edge is straight, and the straps make the shape.
Why I love this cute crochet top
I wanted a top that feels like summer even on a grey day. Stripes do that, and so do ruffles. Put the two together and you get something that looks sweet with denim shorts and just as nice with linen trousers.
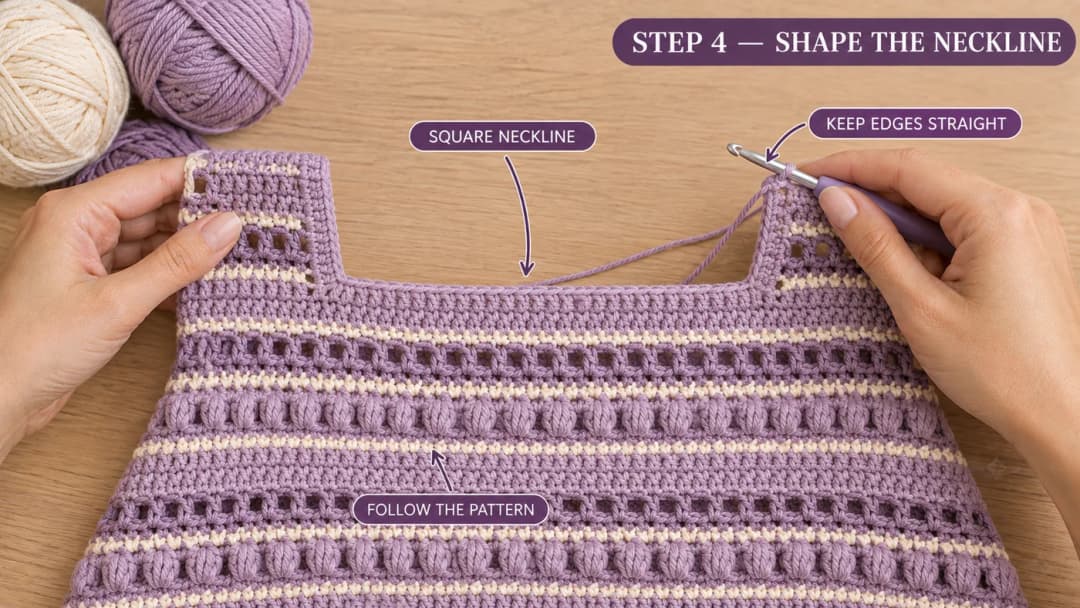
The construction is the easy part. You chain a ring, work around and around, and stop when the tube reaches your chest. The top edge stays straight. Then you crochet two narrow straps straight up from the front edge, add a ruffle along the outside of each and sew the ends to the back. The straight edge between the straps turns into a square neckline. No neck shaping needed.
The texture keeps it interesting. Each stripe mixes four kinds of rounds, so you never work more than two similar rounds in a row. The mesh rounds also let a bit of air through, which you'll be glad of in July.
Skill level. Advanced beginner. You need chain, slip stitch, single crochet, double crochet, the puff stitch, joined rounds and color changes. If puff stitches are new to you, the swatch below lets you practise them first.
What you'll need
Yarn (DK weight #3 cotton, about 475 (520, 560, 685, 735) yd / 435 (475, 510, 625, 670) m in total)
- Color A (main color, lilac in my photos): 370 (405, 435, 530, 570) yd.
- Color B (stripe lines and ruffle edge, cream): 105 (115, 125, 155, 165) yd.
- In Paintbox Yarns Cotton DK (137 yd / 125 m per 50 g), that's 3 (3, 4, 4, 5) balls of A and 1 (1, 1, 2, 2) ball(s) of B. Rico Essentials Cotton DK works too.
- I worked these totals out from the stitch count. They already include a margin of about 10% for the swatch, the joins and the seams.
Hook
- 4 mm (US G/6).
Notions
- Tapestry needle.
- 8 locking stitch markers.
- Measuring tape and scissors.
Gauge
- Double crochet on a 4 mm hook: 20 sts × 10 rows = 4 in (10 cm).
- One full 6-round stripe repeat measures about 2 in (5 cm) tall.
Check the gauge before you start. This is a fitted top, so one stitch per 4 in changes the bust by 1½ in or more. If you have too many stitches, go up a hook size. If you have too few, go down one.
Abbreviations (US crochet terms)
- ch: chain
- sl st: slip stitch
- sc: single crochet
- dc: double crochet
- puff: puff stitch. (Yarn over, insert the hook in the stitch, pull up a loop) 3 times, yarn over and pull through all 7 loops on the hook.
- sk: skip
- sp: space
- st(s): stitch(es)
- rnd(s): round(s)
The stripe pattern
The stitch count is always even. Every round starts at the same spot and ends with a sl st into the first stitch. That spot will be the left side of the top.
Rnd 1 (B): Ch 1. Sc in each st around. Join with a sl st to the first sc.
Rnd 2 (A), puffs: Ch 2 (doesn't count). Puff in the next st, ch 1, sk the next st. Repeat from * around. Join with a sl st to the top of the first puff.
Rnd 3 (B): Ch 1. Sc in each puff and in each ch-1 sp around. Join.
Rnd 4 (A), mesh: Ch 4 (counts as a dc and a ch-1). Sk the next st. Dc in the next st, ch 1, sk the next st. Repeat from * around. Join with a sl st to the 3rd ch of the ch-4.
Rnd 5 (A): Ch 3 (counts as a dc). Dc in the next ch-1 sp. Dc in the next dc, dc in the next ch-1 sp. Repeat from * around. Join with a sl st to the top of the ch-3.
Rnd 6 (A): Ch 3 (counts as a dc). Dc in each st around. Join.
That's one stripe repeat. The stitch count goes back to the starting number after Rnds 3 and 5, so you can check it twice per stripe.
Changing colors. Change color on the joining sl st: insert the hook, drop the old color and pull the new color through. Carry both colors loosely up the inside at the join, so you don't have to cut and weave in ends every round.
Swatch. Make a small tube like the body: with A, ch 48 and join into a ring without twisting. Work 3 rnds of sc, then 2 repeats of Rnds 1–6. Lay it flat and measure. The 48 sts go around in about 9½ in, so the flat tube should be about 4¾ in wide. The 2 repeats should be about 4 in tall.
Size chart
| Size | To fit bust | Finished bust | Body length | Strap length | Yarn (A / B) |
|---|---|---|---|---|---|
| XS | 30 in / 76 cm | 30 in / 76 cm | 12 in / 30 cm | 13¼ in | 370 / 105 yd |
| S | 33 in / 84 cm | 33¼ in / 84 cm | 12 in / 30 cm | 13½ in | 405 / 115 yd |
| M | 36 in / 91 cm | 36 in / 91 cm | 12 in / 30 cm | 14 in | 435 / 125 yd |
| L | 39 in / 99 cm | 39¼ in / 100 cm | 14 in / 36 cm | 14½ in | 530 / 155 yd |
| XL | 42 in / 107 cm | 42 in / 107 cm | 14 in / 36 cm | 15¼ in | 570 / 165 yd |
The top is meant to fit close, with about 0 in of ease. The mesh and puff rounds give it a little stretch. Choose the size that matches your bust. If you're between two, take the larger one.
Instructions are written XS (S, M, L, XL). When only one number is given, it applies to every size.
The pattern, step by step
Part 1: The body
The body is worked from the hem up, in joined rounds.
With A, ch 150 (166, 180, 196, 210). Check that the chain isn't twisted, then join with a sl st to the first ch to make a ring.
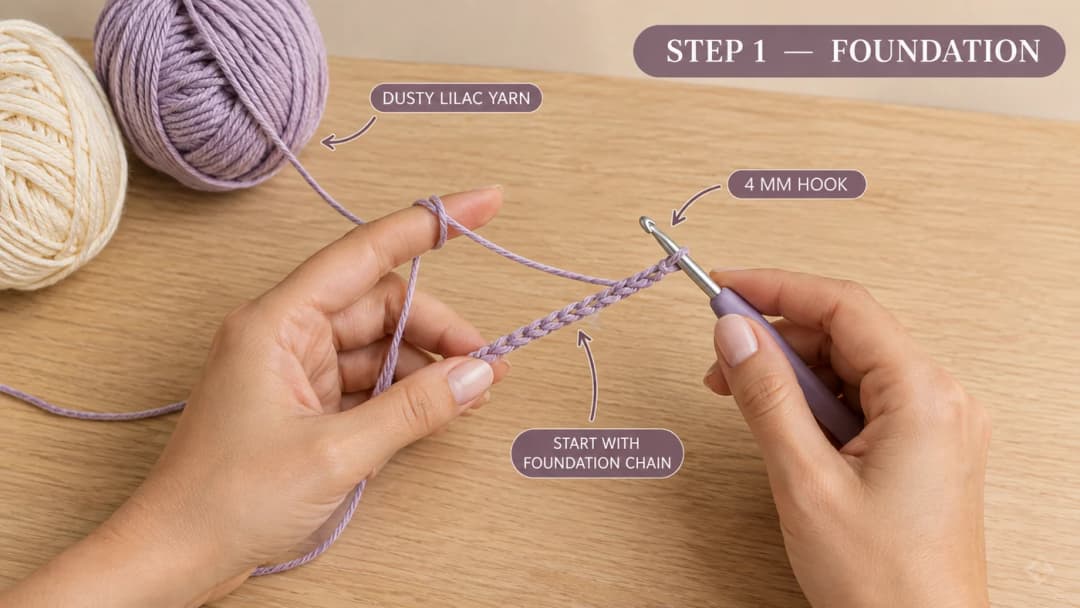
Rnd 1 (A): Ch 1. Sc in each ch around. Join with a sl st to the first sc. (150 (166, 180, 196, 210) sc)
Rnds 2–3 (A): Ch 1. Sc in each st around. Join.
Place a marker in the joining st. It marks the left side of the top. These 3 rounds are the hem band.
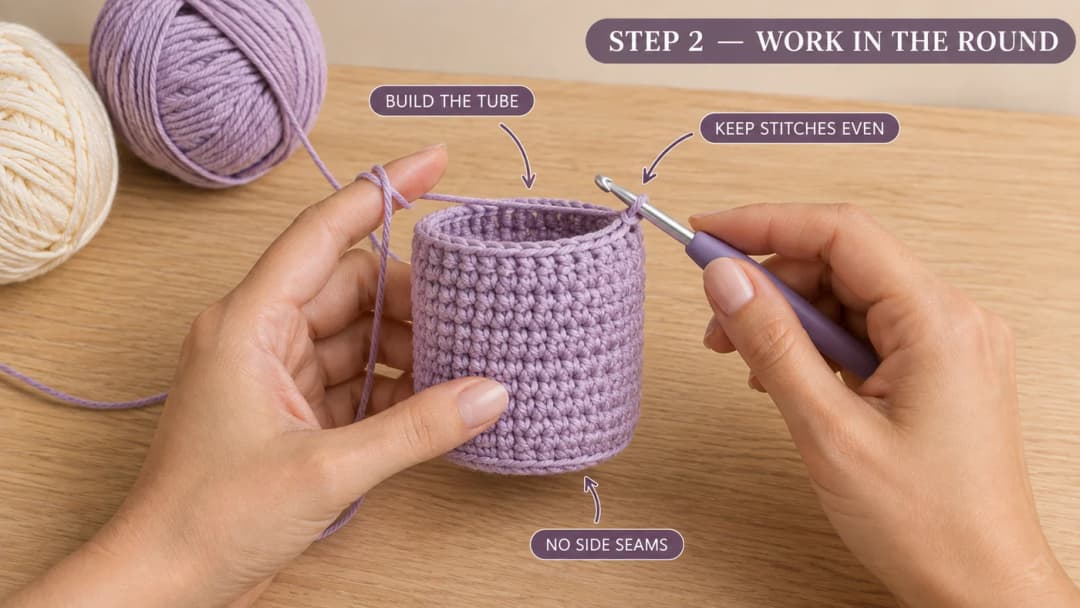
Stripes. Work Rnds 1–6 of the stripe pattern 5 (5, 5, 6, 6) times.
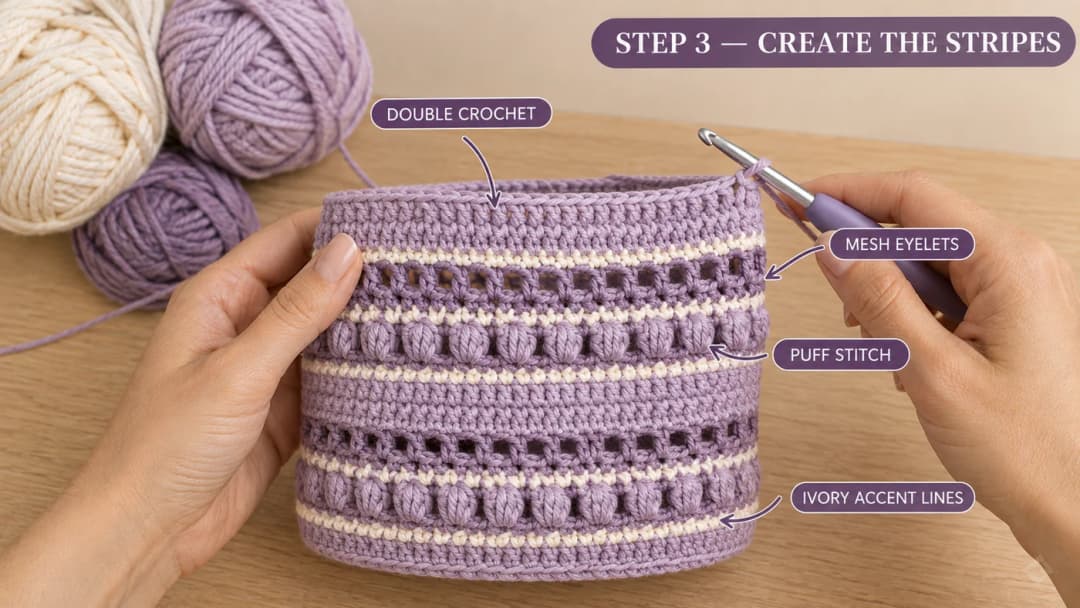
Top band. Work one more Rnd 1 in B (sc). Change to A and work 1 rnd of dc (ch 3 at the start, counts as a dc), then 2 rnds of sc. Don't fasten off yet if you're happy to start a strap right away. Otherwise fasten off and weave in the tail.
The tube measures about 12 (12, 12, 14, 14) in tall. Each stripe repeat you add or leave out changes that by about 2 in.
My finding: The solid lilac top band is what holds the straps up. If you stop on a mesh or puff round, the neckline is too soft and it rolls forward. Those last dc and sc rounds act like a little facing, and they give the straps something firm to grow out of.
Part 2: The straps (make 2)
Both straps are worked straight up from the top edge of the front, then sewn to the back.
Mark the strap positions.
- Lay the body flat with the marker on the left fold. The layer on top is the front.
- Put a marker at the center of the front top edge. Measure 4 (4, 4¼, 4½, 4¾) in to each side and place a marker. These are the inner edges of the straps. The space between them is the neckline, about 8 (8, 8½, 9, 9½) in wide.
- From each of these markers, count 9 sts outward, toward the side, and mark the 9th st. Each strap is worked over these 9 sts.
- Do the same on the back top edge, without counting the 9 sts. The back markers show where the strap ends will be sewn.
Strap Row 1 (B): With the front facing you, join B in the right-hand marked st of one pair. Ch 1, sc in the same st and in each of the next 8 sts. Change to A in the last sc. Turn. (9 sc)
Strap Row 2 (A), mesh: Ch 4 (counts as a dc and a ch-1). Sk the next st. Dc in the next st, ch 1, sk the next st. Repeat from * to the last st, dc in the last st. Turn. (5 dc, 4 ch-1 sps)
Strap Row 3 (A): Ch 3 (counts as a dc). Dc in each dc and in each ch-1 sp across. Turn. (9 dc)
Strap Row 4 onward (A): Ch 3 (counts as a dc). Dc in each st across, ending in the top of the turning ch. Turn.
Repeat Row 4 until the strap measures 13¼ (13½, 14, 14½, 15¼) in from the top edge of the body. That's about 34 (34, 35, 37, 39) rows in total. Try the top on before you fasten off: the strap should reach the back top edge without pulling. Add or remove a row if needed. Fasten off, leaving a 12-inch tail.
Make the second strap the same way over the other 9 marked sts.
Part 3: The ruffles
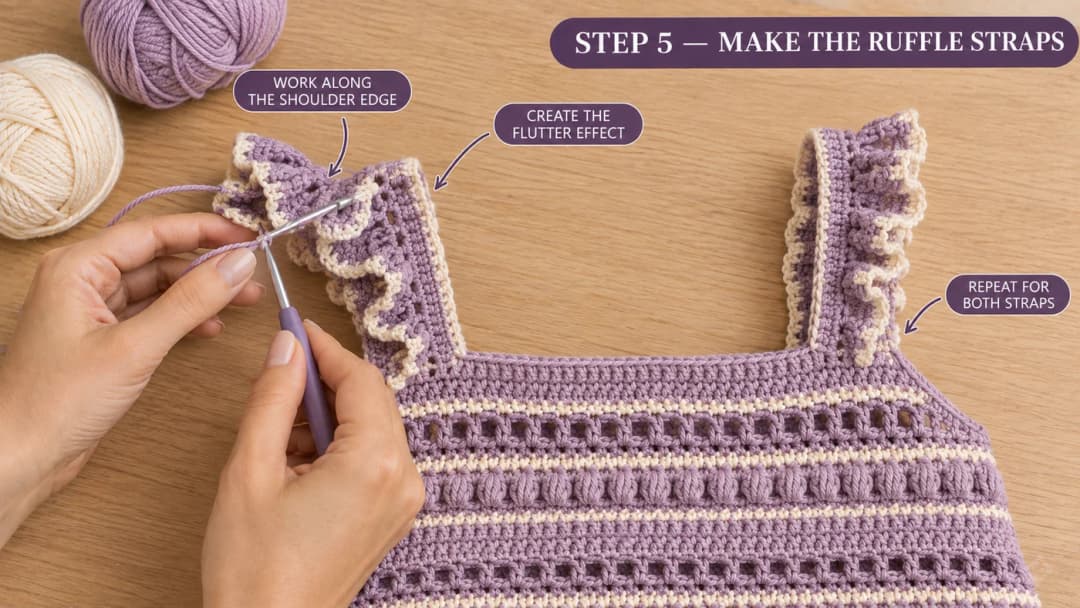
The ruffle runs along the outer edge of each strap, the long edge on the armhole side, away from the neck.
Ruffle Row 1 (A): With the front facing you, join A in the end of Strap Row 1, where the outer edge meets the body. Ch 3 (counts as a dc), dc in the same row end. Then work 4 dc in each row end up the outer edge, to the top of the strap. Turn.
Ruffle Row 2 (B): Ch 1. Sc in each dc across. Fasten off.
Four dc in the height of one dc row is twice as many stitches as the edge needs. That's what makes the ruffle wave and flutter. Repeat on the second strap.
Sew the straps to the back. Bring each strap over the shoulder without twisting it, with the ruffle still on the outside. Tuck ½ in of the strap end inside the back top edge, with its inner edge at the back marker, and pin it. Try the top on one last time. Then use the 12-inch tail to whipstitch the strap end to the inside of the top edge, all the way around the tucked part. Weave in the ends.
Finishing and blocking
- Weave in every tail through at least 6 sts, then back the other way. Hide the carried strands inside the join line on the left side.
- Wet block the top. Soak it in cool water, roll it in a towel and lay it flat. Pat the stripes straight and open up the mesh eyelets with your fingers. Let it dry fully.
- Fluff the ruffles. While they're damp, pinch the ruffle waves into even folds. They dry in that shape.
Care
Hand wash in cool water, or use a cold delicate cycle inside a laundry bag. Lay flat to dry. Don't tumble dry: cotton shrinks in heat, and the ruffles lose their shape. Store the top folded, with the straps tucked in.
Frequently asked questions
How much yarn do I need for this cute crochet top? About 475 (520, 560, 685, 735) yd of DK #3 cotton for sizes XS to XL. In Paintbox Cotton DK that's 3 (3, 4, 4, 5) balls of the main color and 1 (1, 1, 2, 2) ball(s) of cream. Buy each color from one dye lot.
Can I make it longer, or not cropped? Yes. Each extra stripe repeat adds about 2 in. Add them before the top band. Allow roughly 65 (70, 75, 85, 90) yd more per repeat, most of it in color A.
Can I make it in one color? Yes. The puffs and eyelets still show. You'll need the same total yardage, so around 4 (4, 5, 5, 6) balls of Paintbox Cotton DK. Skip the color changes, and you won't have any carried strands to hide.
Can I make the straps without ruffles? Yes. Just skip Part 3 and sew the straps on. You'll save about 35–45 yd. For a neater plain edge, work 1 sc in each row end along both long edges of the strap.
Can I sell tops made from this pattern? Yes, you can sell finished tops you've made yourself. Please credit "Pattern by Wavode" and link back to this page. Please don't republish the written pattern or my photos.
Related patterns on Wavode
- Crochet crop top pattern with a square neck: a sleeveless top made from two flat panels, with crossed-stitch eyelets.
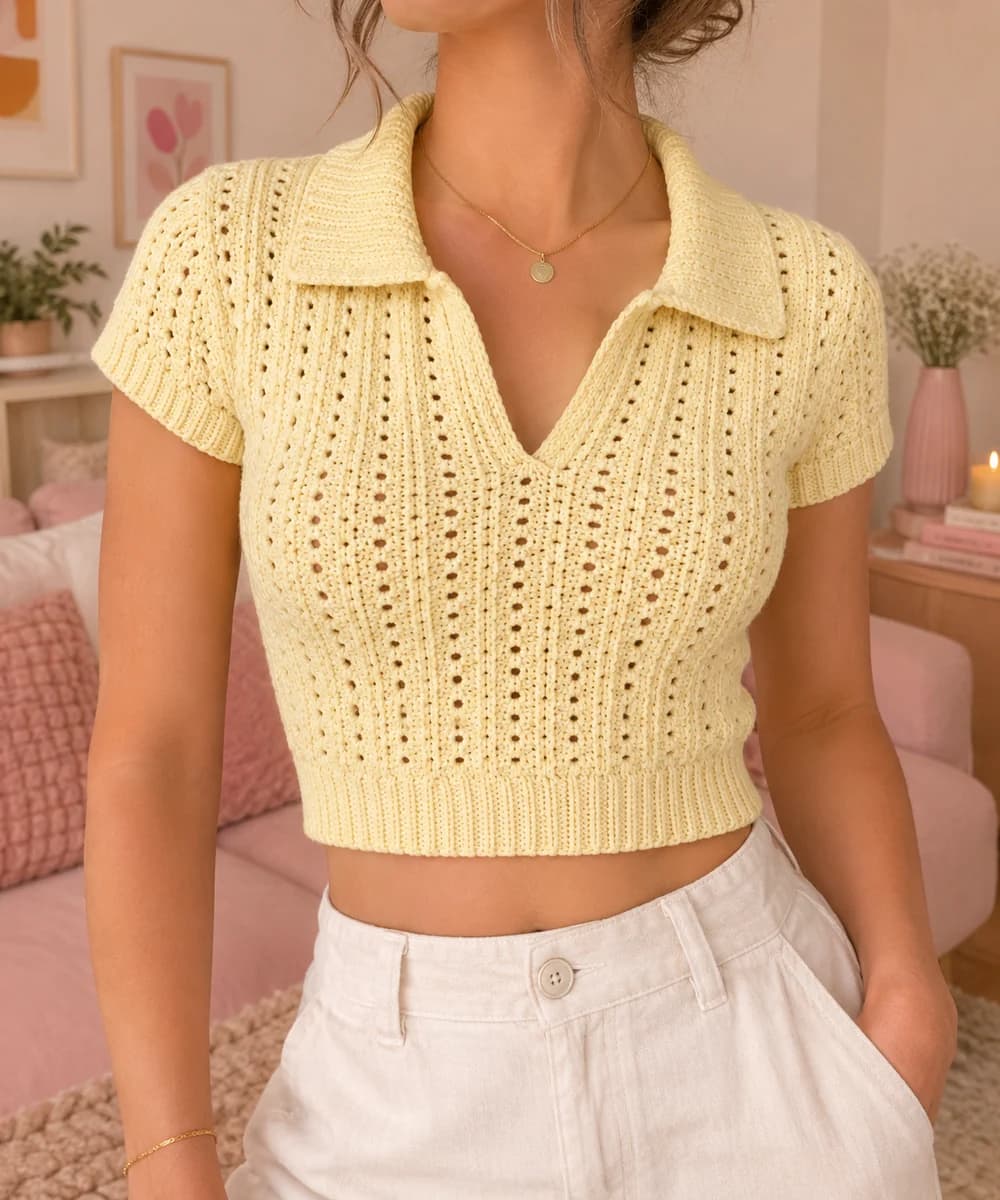
- Crochet ribbed collar top: a cropped polo with short sleeves, for cooler summer days.
- Sage flare crochet skirt: a tennis-style skirt that goes with this top.
- Breezy drawstring crochet shorts: an easy high-waisted bottom for a summer set.
Made this top? Tag #wavodecrochet on Pinterest. I re-pin every finished make and credit the maker.
Pattern by Clara Hartwell for Wavode. Questions? Email me at support@wavode.com.